Users have been experiencing an issue while trying to install a printer on Windows machines. Upon trying to connect to a printer in their local network, users stumble upon the “ Windows cannot connect to the printer ” error message with the 0x00000520 error code. As it turns out, issues like these have been known to be caused by Windows updates, however, that may not always be the case either. There is a fix available for this from Microsoft which you can install on your computer to resolve the issue in case it was being triggered by an update. In this article, we will be taking you through the process and showing you how to connect to your printer without any issues.
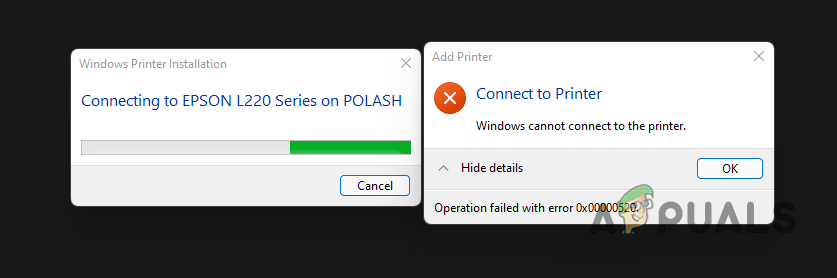
Network Printer Error 0x00000520
As it turns out, Windows updates had recently caused an error with network printers in addition to security vulnerabilities that surrounded the area. While Microsoft released an update to resolve the issue, it didn’t actually do much and the problem remained. However, there is an update that has happened to fix the issue. In addition to this, there are also cases where the problem may not be caused due to the Windows update but rather another problem on your end. Do not fret as we have additional workarounds here as well that can help you resolve the problem in case the problem wasn’t really caused by installing a Windows update in the first place. With that said, let us get started and show you the different methods that you can implement to fix the error in question.
Check Domain Authentication
The first thing that you should try when you encounter the 0x00000520 error code while connecting to a printer is to check the authentication of the domain that you are trying to connect to. As it turns out, the error code in specific refers to the fact that the specified login session was not found, or it was terminated.
Therefore, if this case is applicable to you, the first thing that you should do is to check your domain authentication and make sure that everything is fine there. In case the issue is not being generated by an issue with domain authentication, simply move on to the next method down below.
Check Network Settings
As it turns out, another possible thing that can cause the problem in question is your network settings. The problem can arise when your public and private network settings are not updated in which case you will have to double-check them and see if that could be causing the issue. Make sure that your computer is allowed to be discoverable by other devices on your network.
In order to check your network settings, follow the instructions that are given down below:
- First of all, open up the Windows Settings app by pressing Windows key + I on your keyboard. Windows Settings
- Once the Settings window is up, on the left-hand side, click on Network and Internet if you are on Windows 11. In case you are using Windows 10, simply click the Network and Internet option provided. Network Settings
- After you are in network settings, make your way to Ethernet settings and there check your Public and Private network settings. Ethernet Settings
- Once you have done that, see if the problem still appears.
Install Windows Update
Finally, if none of the above-mentioned methods have helped you in solving the 0x00000520 error code, then it is very likely that the problem is being caused by an installed Windows update. Now, some people might think of going ahead and uninstalling the Windows update but that is not the best case scenario. The reason being that Microsoft has already released an update that will fix the network printer issues for you and all you need to do is simply download and install it on your computer.
The update that we are talking about is referred to as KB5006674. Thanks to Microsoft Update Catalog, you can simply search up the update via the provided ID and it should be available to download. We would recommend simply checking for any updates available on your Windows machine and then installing them. This will automatically install the required updates for you and as a result, the problem should be gone. However, while we recommend the aforementioned strategy, you can also choose to download and install only the update that fixes the problem. To do this, follow the instructions that are given down below:
- First of all, in your browser, open up the Microsoft Update Catalog website by clicking here .
- Once you are there, search for the KB5006674 update via the search field provided. Searching for KB5006674 Update
- In case you are using Windows 10 , you should search for KB5007253 instead.
- Download the update for your respective from the results shown by clicking the Download button provided. Update KB5006674 Results
- Once the update has been downloaded, go ahead and install it on your computer.
- Then, perform a system restart for the changes to take effect.
- After your PC boots up, see if the problem is still there.
How to Fix “Printer is in an error state” Issue?
A lot of Windows are reporting that they’re no longer able to connect to their network printer after installing the KB5006746 update on Windows 11. Upon trying to print something, affected users see an error prompt with the error message ‘ Windows couldn’t connect to the printer ‘.

Network Printing Error After KB5006746 Update on Windows 11
The irony of this ongoing issue is that the KB5006746 update was supposed to fix a whole slew of printer connectivity issues that we’re preventing Windows 11 users from connecting to their network printers.
And while this update was successful for the most part, a small segment of the user base ended up with an entirely new issue where their network printer became entirely unusable.
Fortunately for those of you affected by this issue, there are actually a number of potential fixes that you can deploy in order to make your network printer usable once again. Here’s a list of fixes that other affected users have successfully used to fix the functionality of their network printer after installing the KB5006746 update:
- Install the hotfix for the KB5006746 update – As it turns out, Microsoft has recently announced that they have started deploying the hotfix aimed at resolving the new issues introduced along with the KB5006746 update. If you have started dealing with a network printing issue immediately after installing KB5006746, check back on WU and install any new update that is available.
- Run the Printer Troubleshooter – In case the issue is brought about by a general inconsistency and the issue has nothing to do with the new update (KB5006746), you should start this troubleshooting attempt by running the Printer Troubleshooter and applying the recommended fix.
- Re-Enable the Print to PDF feature – According to some affected users, the reason why you can no longer connect to your network printer can also be an inconsistency brought about by the Print-to-PDF feature. If the Print-to-PDF feature is currently stuck in a limbo state, you can most likely resolve the issue by re-enabling it from the Windows Features menu.
- Uninstall the KB5006746 update – If you started to experience this issue immediately after installing the KB5006746 update and the fix to the fix has not yet arrived for you, the quickest way to resolve the issue is to simply uninstall the problematic update and wait until Microsoft offers the ‘revised’ update inside the WU screen
- Enforce the fix manually – If the ‘revised’ update did not appear yet for you and you don’t want to revert back the KB5006746 update, one additional route you can take is to enforce the fix manually by using the Registry Editor to create and configure the RpcAuthnLevelPrivacyEnabled value.
Now that you are aware of every potential fix that is capable of allowing you to finally connect your network printer to the internet, move down to the first potential fix below.
Install ‘the Fix’ of the Fix
Microsoft was quick to announce a fix to the fix (the KB5006746 update) that introduced this new slew of issues for people that are using a network-connected printer.
If you had no issues connecting to your network printer and you’re suddenly no longer able to after you installed the KB5006746 update, the first thing you should do is check Windows Update to see if a new update is available.
Microsoft has already announced that they have started deploying a hotfix for the KB5006746 update in order to resolve the unexpected consequences.
If you are affected, follow the instructions below to install the hotfix for the KB5006746 update and resolve your issue with the network connected printer:
Note: Because Microsoft releases these hotfixes on segments, it’s possible that you haven’t yet received the hotfix while others have. If no new update is available yet, check back regularly or move down to the next potential fix below.
- Press Windows key + R to open up a Run dialog box. Next, type ‘ms-settings:windowsupdate’ inside the text box and press Enter to open up the Windows Update tab of the Settings menu on Windows 11. Open up the Windows Update tab on Windows 11
- Once you’re inside the Windows Update screen, move down to the right-hand section and click on Check for Updates to check if the hotfix is ready to be installed. Check for new Windows Updates inside Windows Update
- If a new update is waiting to be installed, click on Install Now and wait patiently until the new hotfix gets installed locally. Installing the new hotfix via WU
- Once the update is installed, reboot your PC and attempt to connect your network printer once again after your computer boots back up.
In case this issue didn’t resolve the problem in your case or no new update is available inside WU, move down to the next potential fix below.
Run the Printer Troubleshooter
In case the problem is not actually related to the KB5006746 update, chances are you’re dealing with this problem due to a general inconsistency that is in no way related to this bad update that has gotten everybody riled up.
If your particular problem has nothing to do with the KB5006746 update, the best thing you can do is run the Printer Troubleshooter and apply the recommended fix.
Note: Upon running the Printer Troubleshooter utility, the tool will start scanning your current printing components for any inconsistencies it can find. If a recognizable problem is identified, the tool will then suggest the appropriate automated fix that you can typically enforce in just one click.
Follow the instructions below for step-by-step instructions on running the Printer Troubleshooter and applying the recommended fix:
- Open up a Run dialog box by pressing Windows key + R . Next, type ‘ ms-settings:troubleshoot ‘ inside the text box and press Enter to open up the Troubleshoot tab of the Settings app. Opening up the Troubleshooting tab
- Once you’re inside the Troubleshoot tab, click on Other Troubleshooters from the menu on the right-hand side. Accessing the Other Troubleshooting tab
- Once you’re inside the Other Troubleshooters menu, click on the Run button associated with the Printer. Accessing the Printer Troubleshooter
- At the initial screen, wait until the scan is complete. If a viable issue is identified, you will be presented with a screen when you can apply the recommended fix.
- If a viable recommended fix is pushed forward by the troubleshooter, click on Apply this fix to enforce it. Applying the recommended fix Note: Depending on the fix that gets recommended, you might be required to do some manual steps – just follow the on-screen instructions.
- Reboot your PC and see if you are now able to connect to your network printer.
In case no viable printer fix was recommended or you already enforced it and you saw no improvement to the printer network connectivity, move down to the next potential fix below.
Re-Enable the Print to PDF feature
As it turns out, you can also expect to see this particular issue occurring due to a complementary feature (Print-to-PDF) that was unexpectedly affected by the latest update that you installed.
According to some affected users, your inability to connect to a network printer might be related to the Print to PDF feature that ended up being disabled after the installation of the update.
if this scenario is applicable, follow the instructions below to re-enable the Print to PDF feature from the Windows Features screen:
- Press Windows key + R to open up a Run dialog box. Next, type ‘appwiz.cpl’ inside the text box and press Enter to open up the Programs and Features menu. Open up the Programs and Features menu
- Once you’re inside the Programs and Features menu, use the menu on the left to click on Turn Windows features on or off. Open up the Windows Features screen
- When you’re prompted by the User Account Control (UAC) , click Yes to grant admin access.
- Once you’re inside the Windows Features screen, scroll down to the Microsoft Print to PDF and enable the checkbox associated with it before clicking on Ok to save the changes. Enable the Microsoft Print to PDF functionality
- At the confirmation prompt, accept the change and wait until the Microsoft Print to PFF component is enabled.
- Reboot your PC and see if you are still not able to connect your network printer.
In case the same kind of issue is still occurring, move down to the next potential fix below.
Uninstall the KB5006746 update
If none of the methods above have proven to be effective in your case, one way to be certain that you eliminate the effects brought about by the bad Windows 11 update is to simply uninstall the problematic KB5006746 update via the Update History Tab .
However, doing this is likely not enough since the Windows Update component will likely end up re-installing the problematic update once again. Because of this, you’ll also need to use the Microsoft Show or Hide troubleshooter to hide the update that is causing this issue for you.
Note: Keep in mind that if the KB5006746 update was installed weeks ago, you will likely not be able to uninstall it at this point. In this case, the only thing we can do
Follow the instructions below to uninstall and hide the KB5006746 update in order to fix the issue related to your network printer:
- Press Windows key + R to open a Run dialog box. Next, type ‘appwiz.cpl’ inside the text box and press Enter to open up the Programs and Features screen. Open up the Programs and Features menu
- Once you’re inside the Programs and Features menu, use the vertical menu on the left to click on View installed updates. Accessing the View Installed Updates
- Once you’re inside the Installed Update screen, right-click on the KB5006746 update and choose Uninstall from the context menu. Uninstalling the problematic update
- At the confirmation prompt, click Yes, then wait until the uninstallation is complete.
- Once the KB5006746 update is uninstalled, don’t restart your computer. Instead, visit the official download page of the Microsoft Show or Hide troubleshooter . Note: The download should start automatically.
- After the download is complete, open the .diagcab file and click on the Advanced button at the first prompt. Next, check the box associated with Apply Repairs Automatically before clicking on Next. Applying the repairs automatically
- Wait until the utility scans your system to figure out which pending updates are not installed. Once the next screen appears, click on Hide Updates from the list of available options. Hiding Updates on Windows 11
- From the next screen, check the box associated with the KB5006746 update, then click on Next to hide it – this will prevent the Windows Update from attempting to install the update once again.
- Reboot your PC one final time and see if you are now able to connect your network printer without receiving the same ‘Windows couldn’t connect to the printer’.
If the same kind of issue is still occurring or this method was not applicable, move down to the final potential fix below.
Enforce the Fix Manually via Registry Editor
In case you were not able to follow the method above due to the fact that the installation of the problematic KB5006746 update was older than 2 weeks, you will no longer be able to uninstall it.
However, what you can still do is enforce the same kind of fix that the hotfix for the bad update already does.
This can be done by opening an elevated Registry Editor prompt and creating a new DWORD 32-bit key named RpcAuthnLevelPrivacyEnabled and setting it to 0 .
Follow the instructions below for step by step instructions on how to do this:
- Press Windows key + R to open up a Run dialog box. Next, type ‘regedit’ inside the text box and press Ctrl + Shift + Enter to open up the Registry Editor with admin access. Opening up the Regedit Utility on Windows 11
- When you’re prompted by the User Account Control, click Yes to grant admin access.
- Once you’re inside the Registry Editor tool, use the vertical menu on the left to navigate to the following location: HKEY_LOCAL_MACHINE\System\CurrentControlSet\Control\Print Note: You can either navigate there manually or you can paste the full path above directly into the navigation bar at the top and press Enter to get there instantly.
- Next, move over to the right-hand section – once you’re there right-click on an empty space and choose New > Dword (32-bit) Value . Creating a new Dword value
- Finally, name the newly created DWORD value to RpcAuthnLevelPrivacyEnabled, then double-click on it and set the Base to Hex a decimal and the Value data to 0 before clicking on Ok to save the changes. Configuring the RpcAuthnLevelPrivacyEnabled value
- Close the elevated Registry Editor utility and restart your computer in order to allow the changes to take effect.
- Once your PC boots back up, attempt to connect your network printer once again and see if the issue is now fixed.
