Time-lapse photography has to be one of the greatest photography technique to ever be invented. Imagine being able to watch a sunset or a flower bloom in a matter of seconds. All of these are beautiful aspects of nature but would normally require a certain level of patience to truly experience them.
In case you are out of the loop, time lapse is a technique where a series of photos are played at a significantly higher frame rate than that which was used to capture them. Confusing, I know, so I will give you a practical example with the flower blooming instance. If the camera has been set to take one shot per second which are then played back at the rate of 30 shots per second. The sequence of photos then become some sort of a video that seems to be in fast forward mode. This is what we call a Time-lapse video.
But there is also another way you can create a time lapse video. Record a video at normal speed then speed it up. It is the simpler method but has its set of limitations. For instance, when recording for long periods, the video size becomes too large which will pose a problem in post editing since most editors cannot handle very large files. The video quality will also be compromised. It is incomparable with the standard method of shooting a series of images then merging them.
So in this post, we will be looking at the best software you can use to create a time lapse video. These software allow you to merge frames captured from any device including your computer’s webcam. Let’s begin.
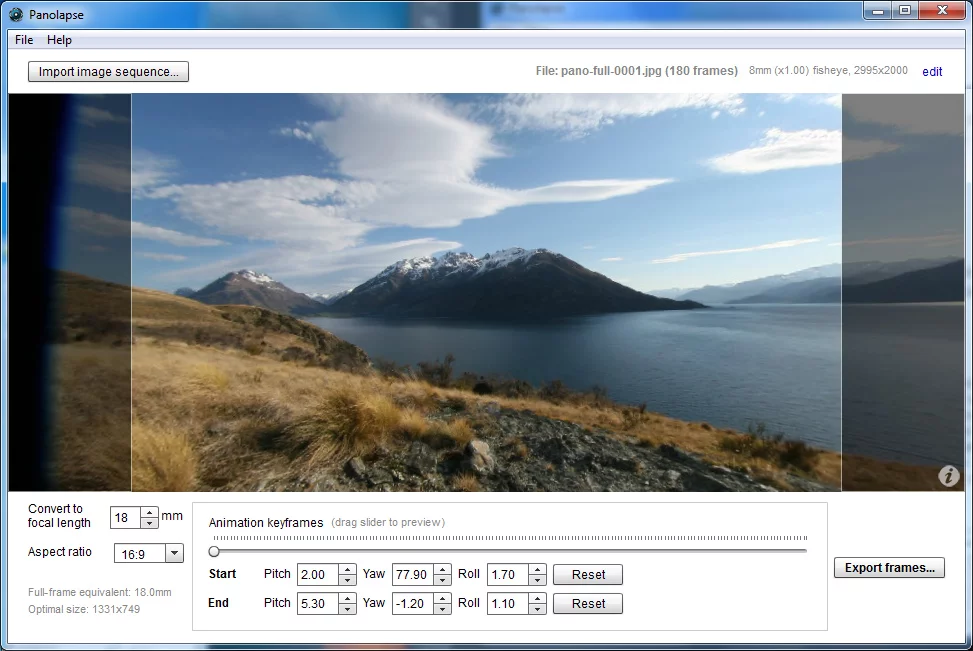
1. Panolapse
For a free software, I have to say that Panolapse has quite a portfolio. It’s, therefore, unsurprising that I recommend it as my first pick.
PanoLapse
One of the first things you will love about this software is the ability to add rotational panning to your time-lapse video. Conventionally, to introduce this kind of motion you would have to use a motorized track to move your camera around which is limiting in a way since they are not very flexible. Panolapse will now act as your motorized head and uses 3D perspective correction so that the rotational pan looks natural.
RawBlend is another great feature that allows you to compile multiple frames flawlessly. It achieves this by balancing out the exposure, colour, contrast and other image attributes for all the frames. Also related to RawBlend is the Deflicker feature that adjusts the brightness level for each frame to eliminate the flickering that can sometimes be observed when switching between two frames.
Panolapse also has an auto exposure feature that will be especially useful when shooting in areas where the light is changing rapidly. Additionally, Panolapse will be great in creating panoramas. The final video can be saved in various formats such as JPG Frames, .Mov and .Mp4.
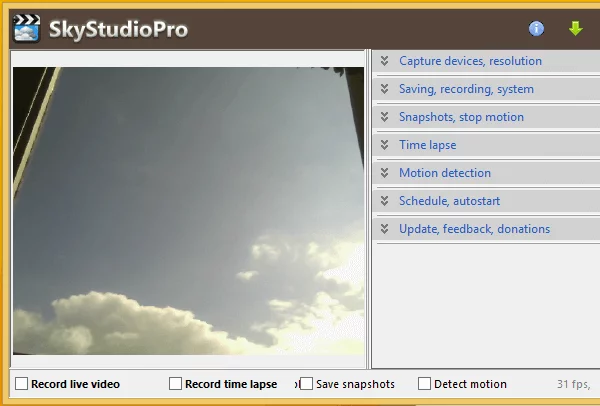
2. SkyStudioPro
SkyStudio is an excellent timelapse software for windows that can work with your webcam or any other capture device. And you don’t have to pay anything to use it.
SkyStudioPro
One of the highlight features of this software is the motion detection that allows the camera to begin recording immediately it detects movement. And the good thing is that it will immediately slow down the time lapse so that you can discern what the moving object is.
The software can also be used to make stop motion videos thanks to its new SkyStudio Video Compiler. This is achievable through taking a series of snapshots manually then compressing them into a video using the compiler.
Sky studio includes a night vision feature and it will lower the frame rate when shooting at night to enhance the quality of images and videos being captured. This software can take videos at any size and frame rate and is also able to support two video devices simultaneously.
3. Chronolapse
Chronolpase can be used to take still photos using your Windows machine then combine them to create a time lapse video.

ChronoLapse
Some of the post-processing editings you can do using Chronolapse include cropping the picture, scaling, and creating picture in picture effects. It even includes the option to add an audio file to the compiled video.
Chronolapse also has dual monitor support and includes tools that you can use to annotate your video. This software is not limited to the pictures taken using your Webcam. It allows you to add pictures from other sources like your phone, a different PC or professional camera then join them into a time-lapse video.
This software is completely free to use.
4. PhotoLapse
Photolapse is yet another free tool that is used to compile JPG images into an AVI format time lapse videos. It is compatible with all versions of Windows and its small footprint means that it does not take up much of your system resources.

PhotoLapse
Photolapse is a software whose strength lies in its ease of use. Creating a time-lapse is as easy as selecting a folder containing the images. In fact, the hardest thing you have to do is probably selecting whether to use all the images in the folder to create your time-lapse video or add them in a particular sequence.
5. MakeAVI

MakeAVI is a very basic time lapse software that has been created to do just one thing. Help you make time-lapse videos as easily as possible. It offers support for various image file formats such as JPG, PNG, and BMP but can only save the time-lapse video in AVI format.

MakeAVI
This may not be the best software if you are into serious photography but if it’s something of a hobby then it will be excellent. It is lightweight meaning it does not affect the performance of your computer and it is the easiest software you will use.
How to Fix “Printer is in an error state” Issue?
The error “ WinRAR Error: Next Volume Is Required ” usually appears when you’re extracting a multi-part RAR archive and WinRAR can’t find (or can’t correctly identify) the next file in the sequence . This often happens when a volume is missing , stored in a different folder , or renamed in a way that breaks the archive’s expected order .

In this guide, we’ll go over the most reliable fixes confirmed by affected users, along with what each method is doing behind the scenes so you can choose the right one for your situation.
Important: To extract multi-volume archives, you should always start extraction from the first file in the set. This is usually file.part1.rar , or (in older sets) the main .rar file that comes before .r01 , .r02 , and so on.
1. Download and Place the Missing RAR File
WinRAR needs all parts of a multi-volume archive to complete extraction. This error usually appears when one of the volumes in a set like .part2.rar , .r01 , .r02 , .001 , and similar naming formats is missing . Downloading the missing volume and placing it in the same folder as the other parts allows WinRAR to continue extracting normally .
- Look at the error message or review the list of archive parts in the folder.
- Identify which volume is missing (for example, part2.rar , .r02 , .001 , etc.).
- Go back to the website or source where you downloaded the archive.
- Locate and download the exact missing file using the same naming format as the others.
- Make sure the new file name matches the pattern of the rest. Example: If you have file.part1.rar and file.part3.rar , the missing one must be file.part2.rar .
- Move the downloaded missing volume into the same folder as the other archive parts.
- Confirm that all parts are in a single folder before extracting.
- Right-click the first file in the series (usually part1 or the main .rar file) and select Extract Here or Extract to Folder .
- WinRAR should now detect all volumes and continue extraction normally .
2. Manually Browse & Select the Next Volume
Use this method only if the next volume already exists , but WinRAR is failing to detect it automatically. This can happen due to incorrect naming , the file being in a different location , or a temporary file access issue. Manually browsing helps WinRAR locate the correct volume and resume extraction without interruption .
- Right-click the first file in the series (usually .rar or part1.rar ) and select Extract Here or Extract to Folder .
- When WinRAR cannot find the next volume, it will show the “ Next Volume Is Required ” message.
- A small window will appear, allowing you to manually select the next volume .
- Use the file explorer window to locate the folder where the other archive parts are saved.
- Select the next part based on the naming order (example: select file.part2.rar after file.part1.rar ).
- Make sure the selected file matches the naming format of the archive (no extra characters like (1) and no mismatched numbering).
- WinRAR will resume extraction using the selected volume .
- If additional volumes are missing or stored separately, WinRAR may prompt you again. Repeat the same process until extraction completes.
3. Rename the RAR files in Order
WinRAR relies on a proper naming sequence (such as file.part1.rar , file.part2.rar , file.part3.rar ) to extract multi-volume archives. If a file is named incorrectly, contains extra characters, or is out of order, WinRAR may fail to locate the next volume and show this error. Renaming the files correctly helps WinRAR follow the sequence and extract the archive without interruptions .
Note: Renaming only changes the file name , not the file contents. The goal is to restore the correct sequence so WinRAR can detect the next volume.
- Go to the folder where all the RAR files are saved.
- Make sure all parts of the archive are present and stored in the same folder .
- Check how the parts are currently named . Common patterns include:
file.part1.rar, file.part2.rar, file.part3.rar
file.rar, file.r01, file.r02, file.r03
- Look for files that don’t match the expected numbering pattern (for example, file.part01.rar , file.part1(1).rar , or unrelated names).
- Rename each file so it follows the same order without extra characters or mismatched numbering. Example:
Incorrect: file.part1.rar, file.part3.rar, file.part2(1).rar
Correct: file.part1.rar, file.part2.rar, file.part3.rar
- Make sure the text before the number is exactly the same for all files.
- Only the last part number should change.
- Right-click the first file in the series (usually part1.rar or the main .rar file) and select Extract Here .
- WinRAR should now recognize the sequence and continue extraction normally .
If you still get the same prompt: the archive set is likely incomplete (a part was never downloaded or was removed), or one of the volumes is corrupt and must be re-downloaded from the original source.
