Nothing is more terrifying than when a printer stops doing what it’s supposed to do, printing. And it gets worse if you have just installed a new cartridge. The time when you expect a shining print, all you get is a blank page. This issue can also occur in a printer that is using an old cartridge.
Mostly it is a hardware issue responsible for this. But hardware is only as good as the drivers or software you are using on your computer, so the issue can be caused by that end too.
Follow the guidelines stated below to troubleshoot the issue.
Inspect Cartridge
Incorrect installation of the cartridge can stop it from printing hence blank pages will be printed. In case this issue has started appearing after installing a new cartridge, a common mistake that you could have made is failing to remove the protective sheet or cover on the cartridge before inserting it into the printer. It is used to protect the sensitive part of the cartridge drum getting damaged or dirty. You have to remove it before you can use the cartridge.
Firstly, take your cartridge out . Based on your cartridge type, the protective tape (usually orange/yellow in color) can be of different types and in a different location.
In some printers, there is a colored tab on the new cartridge. Pull it and the protective sheet will be removed. In some, it a plastic little sheet placed on the contacts and ink nozzle. You just have to pull it off to remove it.

You will have to consult the manual for your exact printer’s model to know the location of the protective sheet. A user can easily miss this, so make sure you double-check it. Once done, firmly insert the cartridge(s) back into the printer.
Check Ink Levels
Make sure the ink cartridges are not completely empty. You can easily check that by printing out a report by using the menu buttons on your printer.
It will be mentioned as “ Ink Levels ” or “ Print Quality ” as it differs by your printer’s model. Or you can consult your printer’s manual to see the exact way to check Ink levels.
If there is no ink in the black cartridge, then, of course, you will be unable to print.
In the case of some color printers (Epson’s, for example), completely empty color cartridges can also cause your printer to print blank pages even if you are printing a black and white document. The reason behind this is that a little amount of colored ink is required to keep the heads of the printer clean.
Unclog Print Heads
If you have not used your printer for a long time, a heavy amount of ink can dry up and clog at the print heads on the cartridge. To unclog them, in most printers there is an option to clear print heads or print nozzles in the menu of the printer or in the software that came with the printer installed on your computer.
To manually unclog and clean the printer head , turn the printer on. Remove the cartridge from the printer.
The location of the print head varies by printer brand and location. It’s usually the place where the protective sheet is placed in a new cartridge. Once again you will have to consult its manual to know the exact location. Once you find it, clean it with a lint-free cloth and cotton swabs .
To stop this problem from happening in the future, make sure you print a page at least once every 3 days .
Use Another Software
Try different software to print your file. For example, if you are using Microsoft Word to print a document, then save it as a PDF and use Adobe Reader instead to open and print it.
Update Printers Drivers
An outdated driver can be messing up your print command. To install updates , visit your printer’s manufacturer’s website .
- Once there, type in your exact printer’s model and search for the Download or Support section of your model.
- In there, download the drivers that are specifically made for your operating system (e.g. Windows 7 x86, Windows 10 x64, Mac OS, etc.)
- Install them and check. If there are no drivers available for Windows 10, you can try Windows 8/8.1 drivers instead.
How to Fix “Printer is in an error state” Issue?
Seiko Epson Corporation (Epson) is a Japanese based electronic company which is one of the largest distributors of Printing, and other imaging-related equipment. Print Head nozzles are located inside the printer below the cartridges and they are actually responsible for the spraying of the ink on the paper. These nozzles can, however, become clogged over time and it can degrade the quality of the printing process or in some cases, stop it altogether.
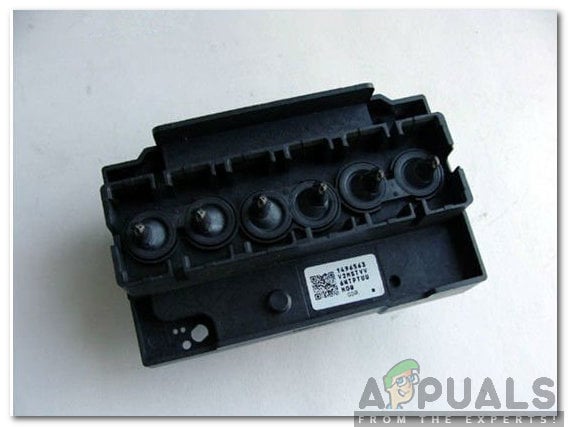
Clogged printer heads
Therefore, in this article, we will be describing the process to thoroughly clean your printer’s Head nozzles in the safest way possible. Make sure to follow the steps and the guidelines accurately to avoid any loss of equipment.
Required Equipment:
Before we start cleaning, you will need the following equipment to move ahead with the process:
- Syringe: To inject the solution.
- Bloating Paper: To absorb the spillage.
- Scissors: To Cut the bloating paper
- Cleaning Solution: To breakdown the clogged particles.
- Injecting Pipe: To inject the solution.
You can get all of this equipment from this site.
How to Clean Epson Printer Head Nozzles Which are Clogged?
After you have gathered the required equipment, we will move on towards the actual process. Be aware that if done incorrectly, you might end up permanently damaging your printer.
- Try to print something in the printer.
- Unplug the printer while it is printing, this will make it easier to remove the cartridges and access the print head. Unplugging the printer
- Remove the top of the printer, slide the carriage holding the ink cartridges and remove all the cartridges one by one.
- Wrap the cartridges in some paper, to avoid them from drying out.
- Remove the cap of the printing solution and put the bottle in warm water as shown below. Removing the cap and placing in warm water
- Cut 2 pieces of blotting paper that fit the rail under the print head.
- Slide the pieces of paper below the print head carriage and make sure that one head comes out of the other end of the carriage. Sliding the pieces of paper below the cartridge carriage
- Attach the injecting pipe with the syringe and make sure that it is tightly wound around the syringe.
- Inject about 2ml of the cleaning solution inside the syringe.
- Firmly put the pipe around the print head make sure that there isn’t any room for spillage .
- After waiting for about 5 minutes, inject the solution inside the print head slowly. Note: Make sure you don’t put too much force if there is too much resistance, stop the process and get the printer checked out for damages.
- Leave the pipe attached for about 5 minutes
- After removing the pipe, remove the bloated paper from under the print head carriage that we inserted previously.
- Put the cartridges back in and close the head. Putting the cartridges back in
- Run the printer’s self-clean function at least 2 or 3 times.
- The Printer head has now been cleaned and should be unclogged.
