The SKP file format is a proprietary 3D modeling file format used by the SketchUp design software. The SKP file type can include many features such as textures, shading, wireframes, geometry, materials, lighting, and other model attributes. This file type is commonly used among architects, interior designers, film directors, video game designers, and engineers. You can spot an SKP file by simply looking for documents with the .SKP extension.
SKP file format
The SketchUp software and SKP images have evolved over time, with several versions of the software available, based on the designer’s level of skill. For beginners, there is a free, web-only version available. Additionally, there is a premium Pro version for desktop, but it is not free.
What is the correct way to open SKP files?
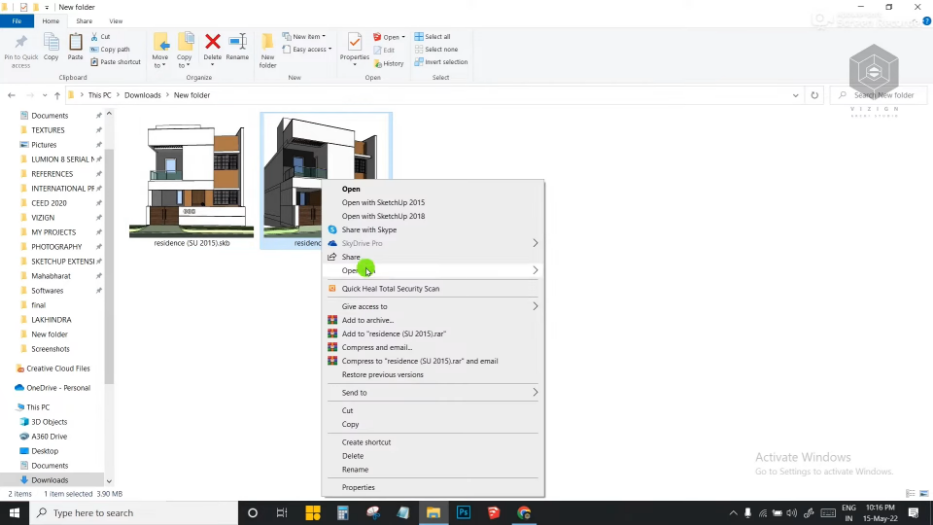
Opening an SKP file requires having SketchUp or another software application that supports the SKP file format installed on your computer. If you already have SketchUp installed, you can simply open this file type by right-clicking , selecting ‘ Open with ,’ and choosing the SketchUp application .
Which applications support the SKP file format?
If you don’t have SketchUp installed, you can open this file type using various other programs that support it, including Blender , 3D Studio Max , and Maya . However, it’s important to know that these programs may not fully support all the features and components of the SKP file format, resulting in the model appearing differently than it would in SketchUp.
Can you 3D-print SKP files?
Yes, it is possible to 3D print SKP files. However, to 3D print, you must first prepare the file by using a slicing program that will convert the SKP file into a format that a 3D printer can read.
There is built-in support for directly importing SKP files in several 3D printing applications, including Simplify3D. The SKP file can also be converted to a more widely used 3D file format, such as STL or OBJ, which can then be loaded into a slicing program.
After preparing the SKP file for 3D printing, you can then use a 3D printer to create a physical object from the file. Keep in mind that the final print quality of the object will be affected by the printer’s resolution and the materials used.
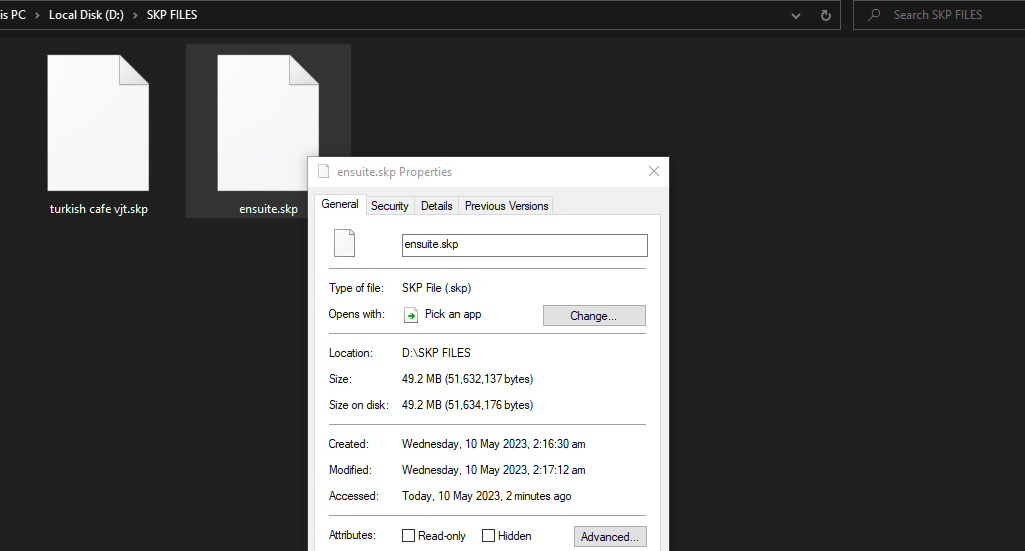
How do I export an SKP file to an image?
To export an SKP file to an image, follow these steps:
- Open the “ SKP file” in SketchUp
- Go to the “ file ” menu and select “ Export “>” 2D Grahpic “
- In the “ Export dialog box ,” select the format to which you want to export the image, such as PNG, JPEG, or BMP.
- Choose the options for the export format , such as ‘ resolution ‘ and ‘ image size .’ select “resolution” and “image size”
- Now choose the “ location” of where you want to “ export” the file on your computer choose the “location” to export
- Click “ Export ” to save the image file. click export as png
The 3D model in the SKP file will now be represented in 2D in the exported image. This image can then be used for presentations, documentation, or web publishing, among other things. Always remember that the resolution and size parameters you select throughout the export process will determine the quality of the exported image.
How to Fix “Printer is in an error state” Issue?
Embarking on the journey of 3D printing is both exciting and, at times, a bit daunting. Thankfully, this innovative technology has become considerably accessible, allowing users to convert digital designs into real-world objects. For 2024, a wide selection of 3D printers is designed specifically for beginners.

This guide offers genuine recommendations whether you are an educator, an entrepreneur working on prototypes, or a hobbyist pushing creative boundaries, to help establish a solid base for your 3D printing endeavors. But before we dive into these top picks, let’s explore what makes a 3D printer truly outstanding. Here’s a breakdown of the key considerations based on specific needs and applications.
Print Quality: Focus on obtaining high-quality prints first and foremost. Opt for a printer that generates detailed, clean, and precise prints, as these are crucial for any printing project. Elements such as resolution, measured in microns, play a role; a lower micron count results in a higher resolution. Furthermore, the layer height is pivotal, with thinner layers yielding finer details. While faster speeds can reduce print time, they might affect print quality, hence balancing speed and quality is key.
Build Volume: The build volume dictates the maximum size of objects you can print. Choose a printer with a build volume that aligns with your intended print sizes.
Reliability and Durability: A dependable 3D printer should consistently produce quality prints and remain durable over time. Prioritize printers with robust construction and reliable components.
Ease of Use: For beginners and those desiring easy printing, prioritize features that enhance usability. Look for elements like a user-friendly interface, perhaps via touchscreens or intuitive software. Automatic bed leveling diminishes the necessity for manual calibration, streamlining the process. Additionally, filament sensors are handy for notifying users about low filament levels or if issues arise during printing.
Material Compatibility: Projects may require diverse materials. Top 3D printers support multiple filaments like PLA, ABS, PETG, and specialized filaments such as flexible or composite variants.
Connectivity: Depending on your setup, connection options for your printer may include USB , SD card, Wi-Fi , or Ethernet. Some models even offer remote monitoring and control via apps.
Software: The software included with the printer, or compatible options, should smoothly translate designs into printable files. Look for slicer software balancing user-friendliness with advanced features.
Safety Features: Safety is paramount, particularly in educational settings or around children. Consider printers with enclosed areas for temperature regulation and burn prevention. Furthermore, HEPA filters reduce potentially harmful particle emissions, enhancing operational safety.
Support and Community: Having a strong user community and excellent customer support is invaluable, especially for troubleshooting and learning how to use your printer.
Price: Lastly, consider the cost. The best printer for you balances these factors with your budget.
Here, we have intricately curated a list of the best 3D printers for beginners. So, let’s get started.
1. Creality Ender 3 V2 Neo
Best Value
Pros
- Auto-Leveling
- Improved Extruder System
- Removable Build Plate
- Print Resume Feature
Cons
- No Touchscreen
- Print Speed Limitations
- No Double Z-Axis
- Bare-Bones Appearance
No products found.
No products found.
The Creality Ender 3 V2 Neo combines accessibility with precision, designed to make 3D printing approachable without sacrificing quality. This model exemplifies Creality ‘s dedication to innovation, incorporating a CR Touch auto-leveling system for perfect layering. The printer features a PC steel printing platform, delivering strong adhesion and a smooth foundation for creations.
Its all-metal Bowden extruder ensures durability and stable performance, suitable for both beginners and experienced users. This upgraded version of the well-known Ender 3 V2 model is crafted with user-friendliness and print quality in focus. It comes 95% pre-installed, facilitating an easy setup.

Creality Ender 3 V2 Neo
The addition of the CR Touch auto-leveling kit significantly improves leveling accuracy, while the PC steel platform and all-metal Bowden extruder support its dependability and longevity.
↪Pros
- Auto-Leveling: The CR Touch auto-leveling feature performs excellently, simplifying the process for beginners by negating manual leveling challenges.
- Improved Extruder System: Enhanced with metal construction, the extruder system boosts the printer’s performance and durability.
- Removable Build Plate: The removable build plate eases print removal, preventing damage caused by overly adhered prints.
- Print Resume Feature: The print resume feature saves progress during power outages, allowing for a smooth continuation once power is restored.
↪Cons
- No Touchscreen: Despite its improvements, the Ender 3 V2 Neo lacks a touchscreen interface, which could enhance user experience.
- Print Speed Limitations: Higher speeds (around 120mm/s) may result in reduced print quality, indicating an optimization for moderate speeds.
- No Double Z-Axis: Missing a double Z-axis, the printer might not offer the maximum stability and precision that some users seek.
- Bare-Bones Appearance: Some might find the Ender 3 V2 Neo’s design quite basic, lacking the aesthetic appeal found in other models.
This printer is part of Creality’s initiative to make 3D printing more accessible and user-friendly while incorporating features catering to advanced users. It strikes a balance between usability and performance, making it a suitable choice for many 3D printing enthusiasts.
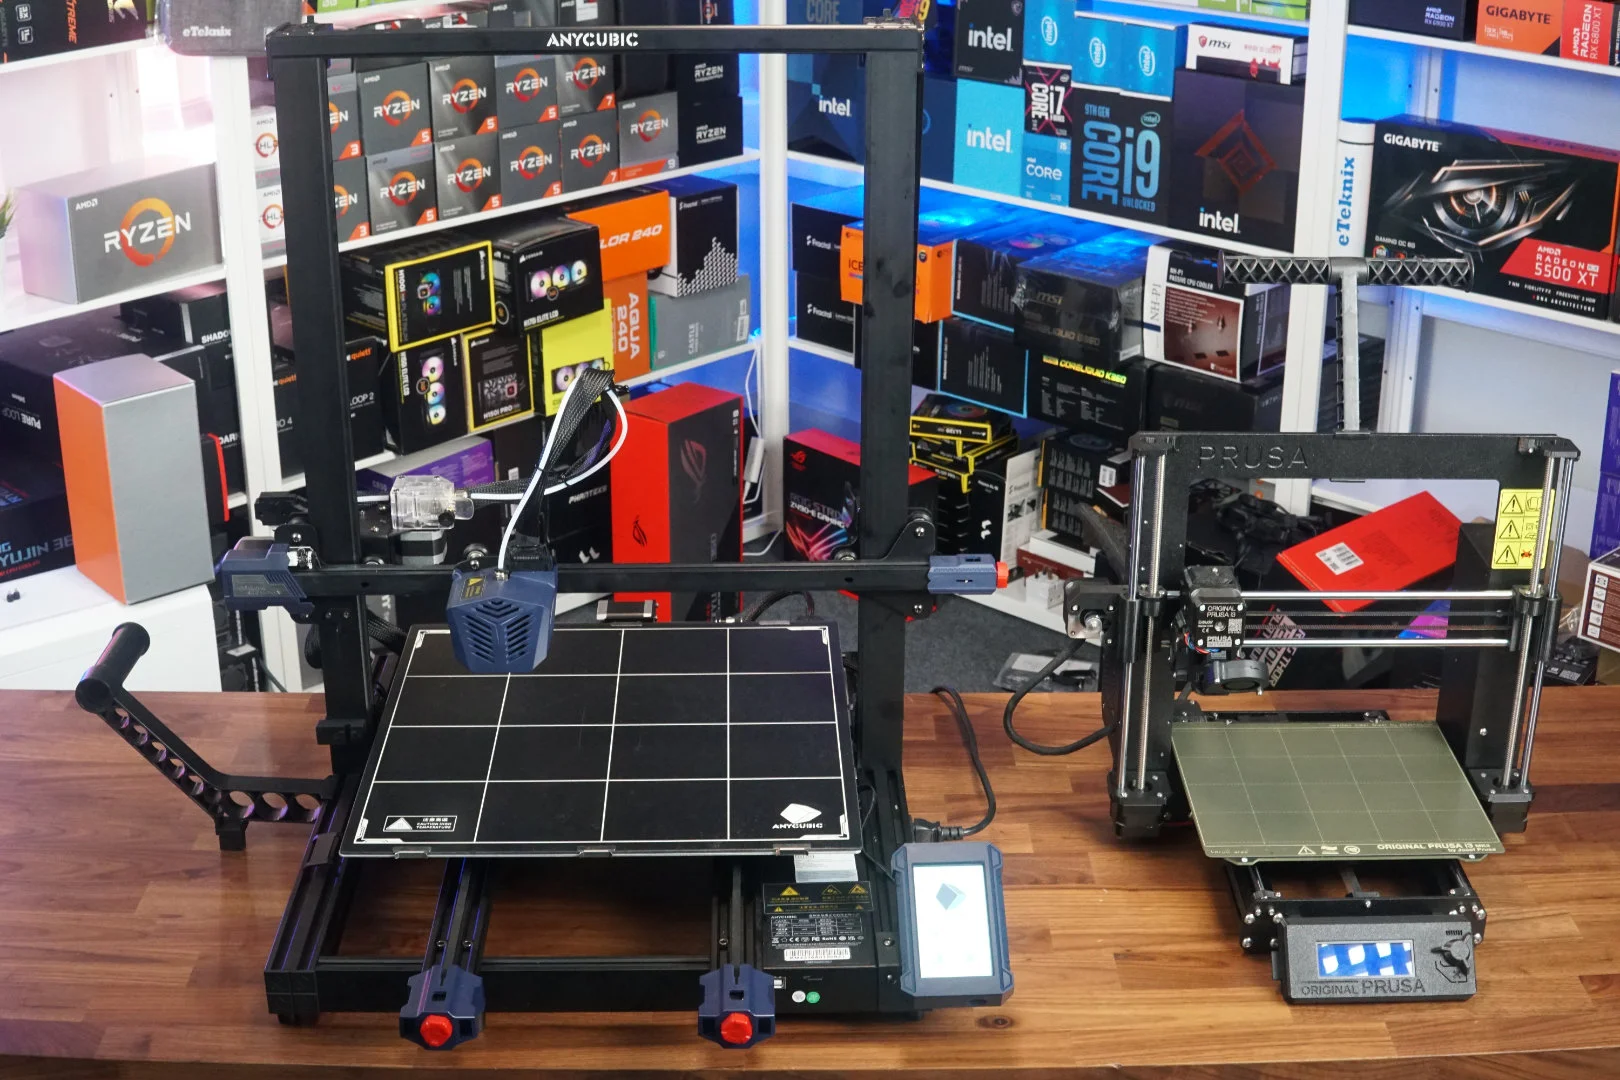
2. Original Prusa i3 MK3S+
Best Overall
Pros
- High-Quality Prints
- User-Friendly Software
- Good Support Resources
- Included PLA Spool
Cons
Build Volume
No Built-In 3D Scanner
Dated Interface
Price
The Original Prusa i3 MK3S+ symbolizes continuous innovation, reflecting years of meticulous enhancement to provide superior print quality and reliability in 3D printing. A key feature is the SuperPINDA probe, which ensures meticulous first-layer calibration, paving the way for flawless prints. Its advanced extruder is engineered to handle filament smoothly and adapt seamlessly to various types, ensuring hassle-free printing.
More than a tool, this printer opens a world of precision and limitless possibilities, built upon Prusa’s lasting dedication to quality. As an evolution from the MK3S , the MK3S+ introduces enhancements while preserving the reputable Prusa i3 series’ legacy.
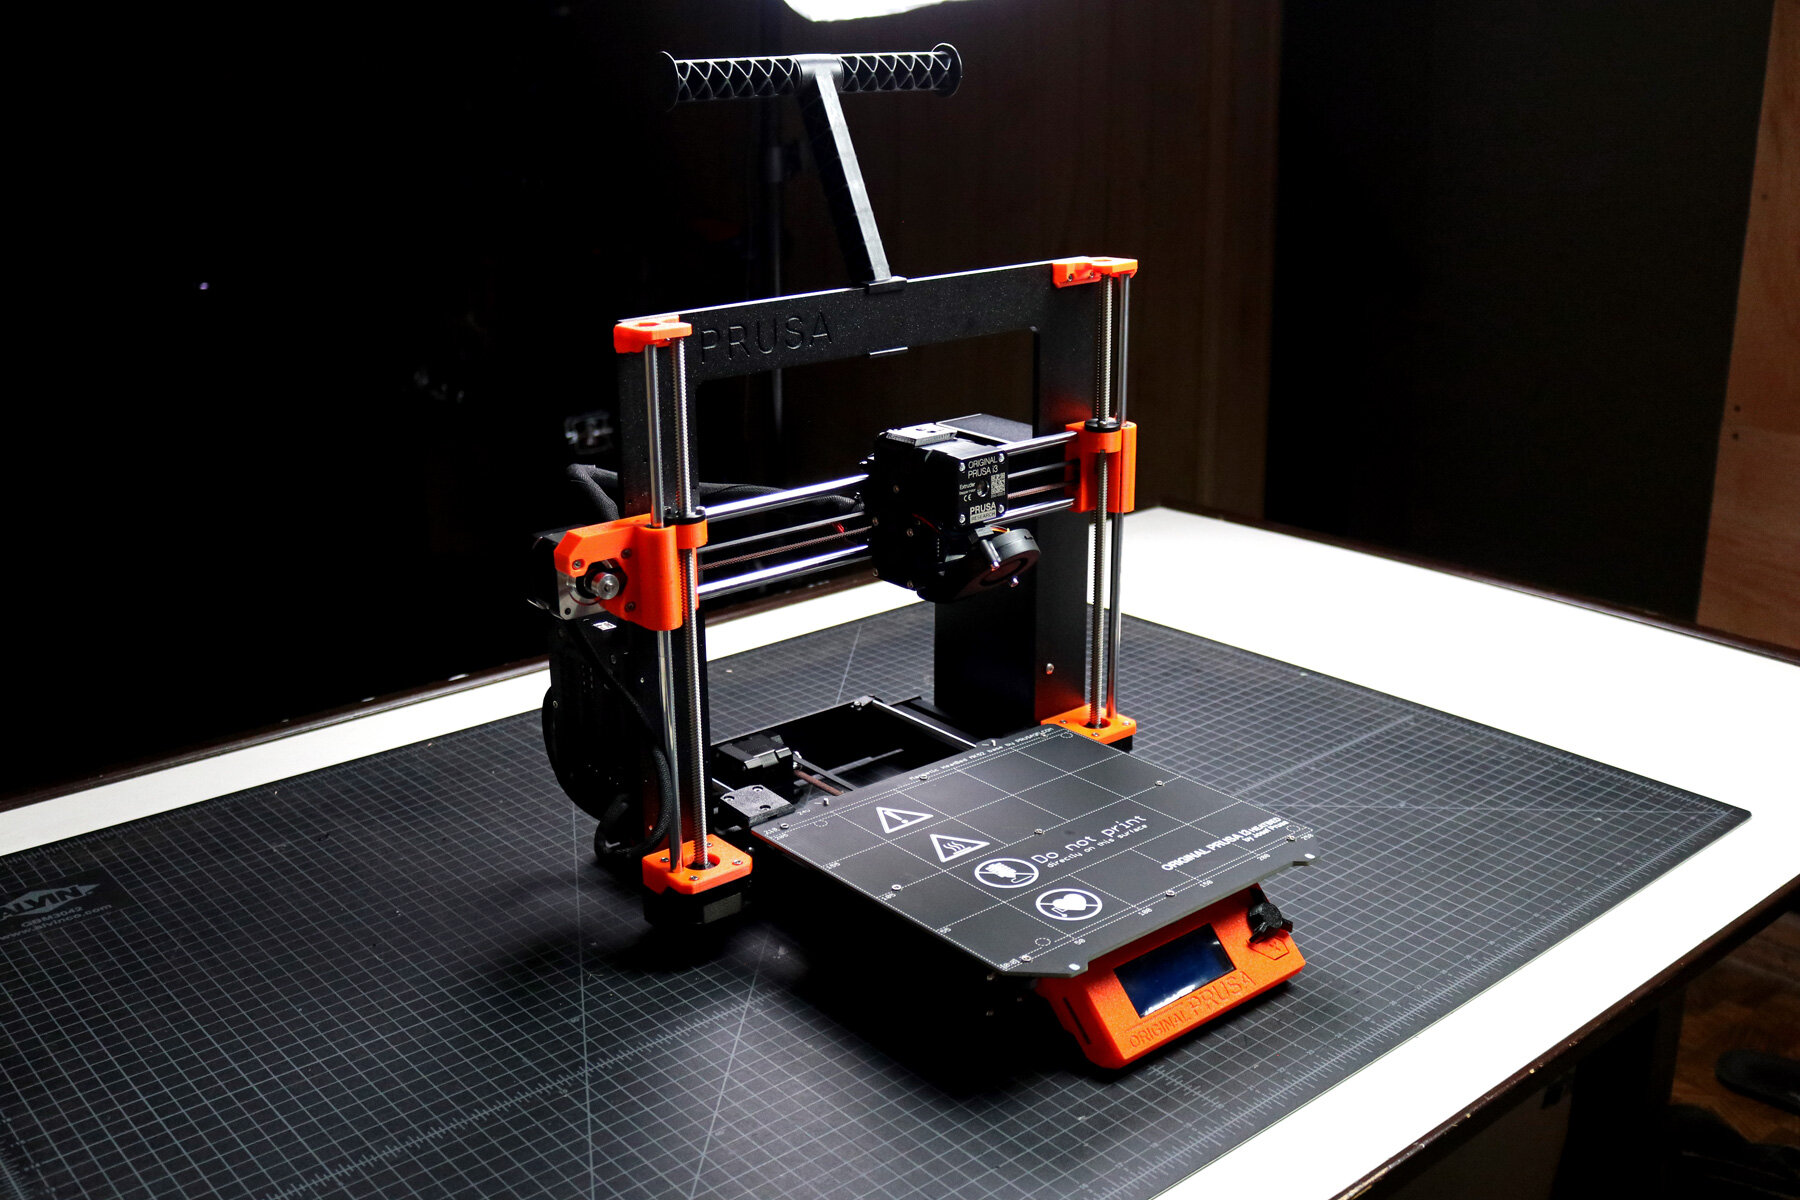
Original Prusa i3 MK3S+
Additionally, the integrated filament sensor detects any filament type or color, enhancing its functionality. Retaining its direct drive system, the MK3S+ remains notably advantageous for printing flexible materials, lending versatility to a broad spectrum of printing requirements.
↪Pros
- High-Quality Prints: The MK3S+ consistently delivers high-quality prints without errors, demonstrating its dependability.
- User-Friendly Software: The printer is accompanied by easy-to-use yet powerful software that supports multiple filament types.
- Good Support Resources: Prusa offers a professionally printed user guide and excellent support materials for the MK3S+.
- Included PLA Spool: A 1-kilogram PLA spool is included with the MK3S+, a beneficial bonus for beginners.
↪Cons
- Build Volume: The build volume might be slightly small for the price, which could limit larger projects.
- No Built-In 3D Scanner: The MK3S+ lacks a built-in 3D scanner, unlike some other models.
- Dated Interface: The LCD screen and interface are somewhat outdated compared to more current 3D printers.
- Price: Although the MK3S+ is a robust printer, some users may feel it doesn’t justify the cost considering market alternatives.
The Original Prusa i3 MK3S+ remains popular in the 3D printing community for its consistent performance and Prusa’s commitment to open-source development. It strikes a balance between ease of use and advanced capabilities for both enthusiasts and professionals.
3. Bambu Lab P1P
Best Speed
Pros
- Blazing Speed
- Simple Auto Bed Leveling
- DIY Custom Side Panels
- Optional Multicolor Capabilities
Cons
Appearance
Noise Level
Proprietary Parts
Filament Wastage
The Bambu Lab P1P excels in speed, characterized by a robust CoreXY framework engineered for rapid printing results. Ready for action from the start, this printer features a direct drive extruder and an all-metal hot end, accommodating various filament types.
Its automatic bed leveling sensor ensures a perfect first layer is effortlessly achieved, enabling prints that are both swift and visually appealing. Bambu Lab’s creation emphasizes not just speed but also reliability and versatility. The P1P offers a spacious build volume of 256 x 256 x 256 mm , coupled with impressive speeds reaching 500 mm/s and an acceleration of 20,000 mm/s .
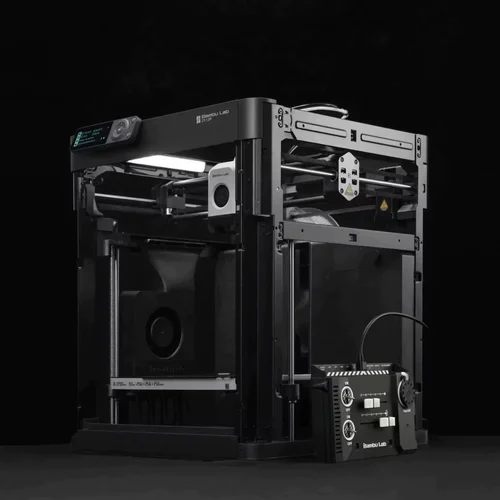
Its direct drive extruder and high-temperature hot end facilitate printing with various filaments, including PLA, PETG , and TPU .
Additionally, the P1P is designed with future enhancements in mind, being compatible with Bambu Lab’s Automatic Material System (AMS) for multicolor printing, and can be further customized with printable mod plates, adding layers of flexibility to meet changing needs.
↪Pros
- Blazing Speed: A key highlight is the P1P’s speed, which facilitates rapid printing without compromising quality.
- Simple Auto Bed Leveling: The auto bed leveling streamlines the printing process, particularly advantageous for beginners.
- DIY Custom Side Panels: Customizable side panels add a degree of personalization.
- Optional Multicolor Capabilities: Utilizing the AMS unit, the P1P supports multicolor prints, enhancing creative opportunities.
↪Cons
- Appearance: The P1P’s “naked” design may not appeal to everyone as it lacks side panels.
- Noise Level: The printer can be loud in operation, which may be a concern for certain settings.
- Proprietary Parts: Using proprietary parts can increase maintenance and upgrade costs.
- Filament Wastage: The AMS unit can lead to filament wastage, affecting cost-efficiency.
The Bambu Lab P1P is appealing to those seeking speed, reliability, and customization with the flexibility to adapt to various needs.
4. Anycubic Kobra Max
Best for Large Prints
Pros
- Enormous Build Size
- Accurate Auto Bed Leveling
- Convenient Build Plate
- Comprehensive Kit
Cons
Large Footprint
Bed Slinger Design
No Larger Nozzle Included
Slow Printing
The Anycubic Kobra Max is a powerhouse in 3D printing, offering an impressive build volume that allows creators to manifest large-scale concepts. With its responsive touchscreen and remarkable printing speed, the Kobra Max distinguishes itself in FDM printing.
Its robust frame and automatic bed leveling offer stability and precision, making it a preferred choice for tackling substantial projects. Designed for hobbyists, enthusiasts, and professionals, the Anycubic Kobra Max boasts a large build volume of 400 x 400 x 450 mm , perfect for ambitious prints. The 4.3-inch LCD touchscreen simplifies navigation and operation.
Anycubic Kobra Max
With a maximum printing speed of 180mm/s , faster than many rivals, it ensures swift progress without sacrificing quality, supported by its solid aluminum frame for continuous stability and precision.
↪Pros
- Enormous Build Size: Ideal for large prints like props and costumes, accomplishing projects in a single run.
- Accurate Auto Bed Leveling: The auto leveling yields precise results, simplifying usage.
- Convenient Build Plate: The coated glass bed facilitates easy print releases as they cool.
- Comprehensive Kit: It comes with essential tools and a PLA sample to start off immediately.
↪Cons
- Large Footprint: The significant size requires ample space to operate effectively.
- Bed Slinger Design: The design might be a drawback for some users.
- No Larger Nozzle Included: Lacking a larger nozzle, which can expedite larger prints.
- Slow Printing: Despite a high maximum speed, actual printing can be slow.
The Anycubic Kobra Max offers a budget-friendly solution for those requiring significant build volume, prized for automatic bed leveling and touchscreen interface. However, consider the large size and slower operation pace.
5. Toybox 3D Printer
Best for Newbies/Children
Pros
- Ease of Use
- Creative Freedom
- Kid-Friendly Design
- Educational Value
Cons
Small Build Area
Internet Dependency
Unheated Bed
Proprietary Filament
The Toybox 3D Printer introduces a delightful touch of innovation, sparking creativity for both kids and adults. Its compact, intuitive design reshapes play by allowing users to easily design and print toys. With a simple, user-friendly interface, the Toybox invites everyone into the realm of 3D printing, serving as an ideal gateway for young enthusiasts.
Featuring a modest build volume of 7 x 8 x 9 cm , perfect for small hands and big imaginations, the Toybox operates at a pace of 60 mm/s with a resolution of 200 microns , ensuring precise toy reproduction. The 4mm Smooth-Flow Extruder Head and Easy-Peel bed simplify the printing experience, eliminating complexities.
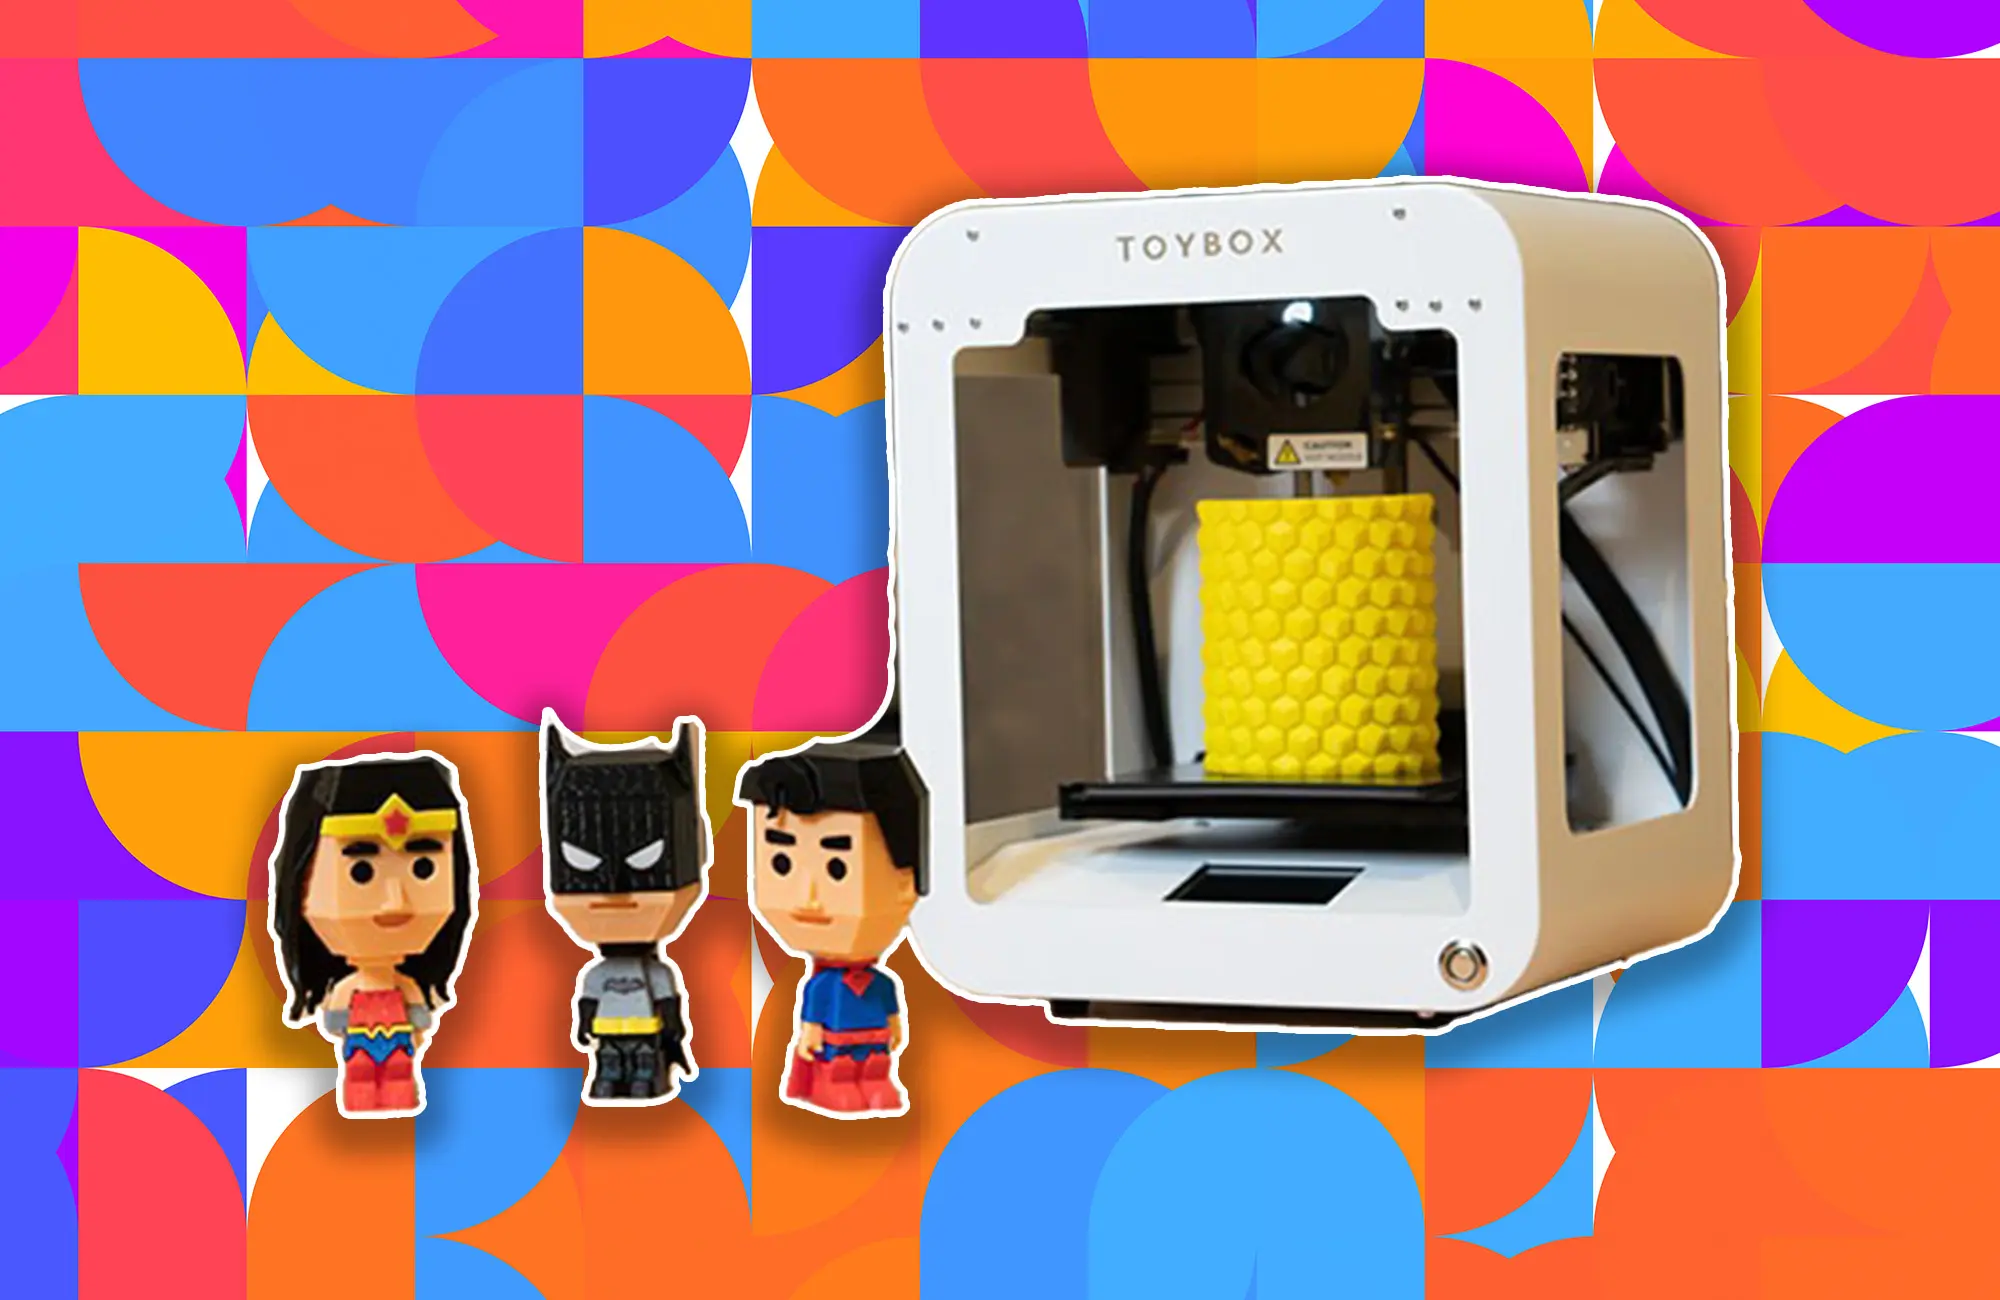
Toybox 3D Printer
Compatible with STL, OBJ , and gCode formats, and offering easy connectivity via 2.4GHz Wi-Fi , sending designs from your smartphone or tablet is seamless. The Toybox puts the magic of creation at your fingertips.
↪Pros
- Ease of Use: Known for reliable, misprint-free performance and one-touch operation, ideal for kids and beginners.
- Creative Freedom: Access to more than 2,000 printable toys and crafting your own designs expands imaginative possibilities.
- Kid-Friendly Design: The robust all-metal frame features rounded edges, safe and easy enough for children to operate with minimal supervision.
- Educational Value: Introduces children to 3D printing and design basics, fostering creativity and problem-solving skills.
↪Cons
- Small Build Area: The build area may limit the size of toys that can be printed.
- Internet Dependency: Requires an internet connection to access its design library, which could be a constraint.
- Unheated Bed: An unheated bed may affect print adhesion compared to other printers.
- Proprietary Filament: Limited to its brand of filament, which may restrict material variety and increase long-term costs.
The Toybox 3D Printer is a doorway into 3D printing, offering a joyful and educational experience that encourages creative thinking and idea realization.
Look for printers with an easy setup, intuitive controls, good customer support, and a robust online community.
Entry-level 3D printers can range from $200 to $500, depending on features and quality.
You can print a wide variety of objects, but always check the printer’s material compatibility and build volume limits.
Yes, if you follow the manufacturer’s safety guidelines, such as proper ventilation and not touching hot surfaces.
Regular maintenance includes cleaning the build plate, lubricating moving parts, and updating firmware.
Check for common issues like bed leveling, filament quality, and slicer settings. Online communities can also offer support.
