Some Windows 10 users are reporting that their Photoshop installation is crashing every time they attempt to print something directly from the application (via File > Print ). Affected users are reporting that the issue occurs with any type of file that they’ve tried.

Photoshop crashes when printing content
If you’re looking for a quick workaround around this crash, try flattering the .PSD file in Photoshop by transforming it into a .JPG or .PNG and printing it using Windows Photos. But this is not a fix, just a quick workaround.
How to Fix Photoshop Crashes when Printing on Windows 10
If you have the time to troubleshoot the issue properly, start by running a simple scan with the Printer Troubleshooter and see if the utility manages to identify and fix the issue automatically. If you want to do it manually, start by restarting the Spooler service in order to eliminate the possibility of a glitch that’s stopping it from acting as a bridge between Photoshop and the printer.
It’s also possible that you are dealing with a port/driver issue. If this scenario is applicable, use Device Manager to uninstall every Printer-related port in order to force your OS to reinstall the generic equivalents.
However, this problem might be entirely caused by Photoshop. On PhtoshopCC 2015 or older, this problem is often occurring due to badly cached data by the Preference (Settings folder). In this save, you can fix the issue by resetting the Preference / Settings folder.
In some rare circumstances, system file corruption can also be responsible for these printing crashes in Photoshop . In this case, running DISM and SFC scans should allow you to fix the issue entirely.
Flattering the .PSD (Workaround)
If you’re fine with just a quick workaround rather than a proper fix, you have the option to simply flatten the .PSD file to a .JPG or .PNG and then print it via Windows Photo Viewer . But keep in mind that this will not resolve the underlying issue that’s causing this problem – it’s just a reliable workaround that will allow you to print Photoshop files if you are in a hurry.
This workaround has been confirmed to be effective by dozens of affected users on Photoshop CC2015 and older on Windows.
In the event that you’re looking for a quick fix, follow the instructions below to flatten the .PSD file and print it using Windows Photo Viewer :
- Open Photoshop and load up the .PSD file that you’re having issues with.
- Next, click on File (from the ribbon bar at the top) and click on Save as from the newly appeared context menu. Using the Save As function in Photoshop
- Inside the Save As window, select a suitable location where you can save the flattened file, name it whatever you want but ensure that you change the Save as type to .JPEG or .PNG . Accessing the Flattened File
- Once the file has been successfully saved, you can close your Photoshop application and navigate to the location where you saved the flattened file. Next, right-click on it and choose Open with > Photos from the newly appeared context menu. Opening the flattened images with the Photos app
- Once the flattened image is opened with the Photos app, click the print icon in the top-right section to initiate the printing action. Initiating the printing action
Once you initiate the printing action, see if the print job completes successfully. In case you still get a printing error or you want to deploy a fix that actually fixes the root cause of the PhotoShop crash, move down to the next fix below.
Running the Printer Troubleshooter
Before you try any other fix, you should begin by testing the waters and seeing if your Windows 10 installation is able to fix the issue automatically. Windows 10 is equipped with a robust troubleshooter for printing problems, and there are a lot of reports with users managing to fix their printing issues simply by running it and applying the recommended steps.
The Printer Troubleshooter on Windows 10 will begin by scanning your computer for any inconsistencies. If any problems are discovered and the utility holds a viable repair strategy, you will be prompted to apply it automatically.
If you want to pursue this potential fix, follow the instructions below to run the Printer Troubleshooter on your computer:
- Press Windows key + R to open up a Run dialog box. Next, inside the text box, type ” ms-settings:troubleshoot” and press Enter to open up the Troubleshooting tab of the settings app. Accessing the Troubleshooting tab
- Once you’re inside the Troubleshooting tab, move over to the right-hand section and then scroll all the way down to the Get Up and running section. When you get there, click on Printer, then click on Run the troubleshooter to open up the utility. Running the Printer Troubleshooter
- Once the utility is started, it will automatically begin scanning all your printer components in a logical order to determine the problem that’s causing your printing issues. In case a problem is discovered and the utility has a viable repair strategy for it, you will be presented with a fix. If this happens, apply it by clicking on Apply this fix , then wait for the operation to complete. Apply this fix
- After the recommended repair strategy is applied, reboot your machine and see if the problem is resolved once the next startup is complete by attempting to initiate a printing task directly from Photoshop once again.
In the event that you still end up experiencing the same kind of crash, move down to the next potential fix below.
Restarting the Spooler Service
As it’s been confirmed by multiple affected users, this problem can also be facilitated by a glitch with the Print Spooler Service. In most cases, you will end up experiencing the crashes because the Print Spooler service will become stuck in a limbo state and will no longer act as a bridge.
If this scenario is applicable, you should be able to fix the issue by restarting the Print Spooler service. This operation was confirmed to be effective by a lot of affected users.
In case you’re unsure on how to restart your Print Spooler Service , follow the instructions below:
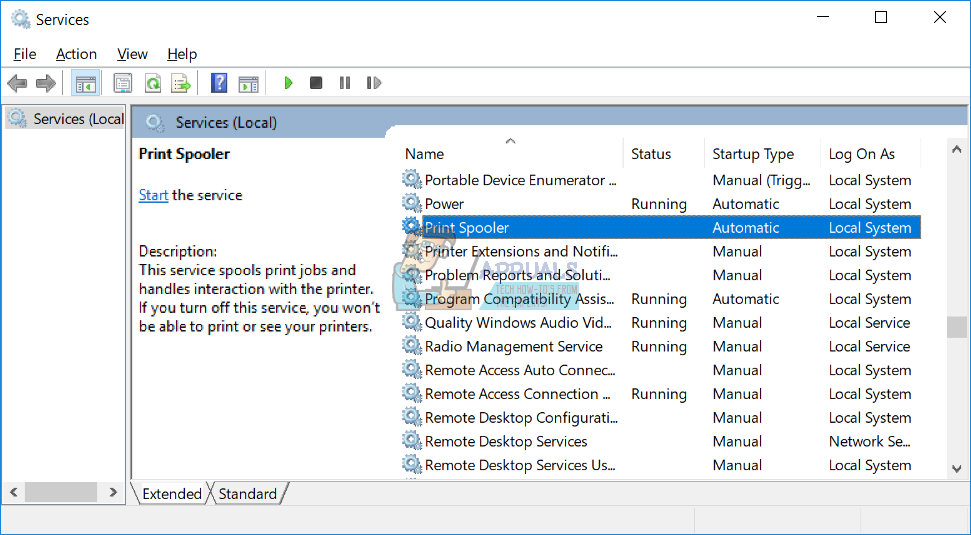
- Press Windows key + R to open up a Run window. At the Run prompt, type “services.msc’” and press Enter to open up the Services screen. Running Services Manager Note: If you’re prompted by the UAC (User Account Control) , click Yes to grant administrative privileges.
- Once you’re inside the Services screen, move over to the right-hand side section, then scroll down through the list of services until you locate the Print Spooler Service .
- When you manage to locate the Print Spooler service , right-click on it and then click on Properties from the newly appeared context menu. Accessing the Properties screen of the Printer Spooler service
- Once you’re inside the Properties menu of the Print Spooler service, select the General tab from the vertical menu at the top. Next, once you are in the correct menu, change the Startup type of this service to Automatic, then click on Stop (under Service Status ). Restarting the Print Spooler service
- Once you successfully stop the service, wait a little while before clicking the Start button in order to restart the Print Spooler service.
- After you restart this service, open Photoshop once again and trigger a printing action to see if the problem is now fixed.
In case the same problem is still occurring even after you restarted the Print Spooler Service , move down to the next potential fix below.
Resetting the Photoshop Preference folder
According to some affected users, this Photoshop printing issue can also occur due to a corrupted Preferences file. As it turns out, this file might end up catching corrupted data which might contribute to the sudden crash you’re experiencing when you try to print something directly from Photoshop’s menus.
Fortunately, you should be able to fix this issue swiftly by deleting and resetting the Photoshop Preference folder to the default. This operation is confirmed to be successful on both Windows and macOS.
Important: Keep in mind that resetting Photoshop’s Preference file will reset more than just the custom preference you previously established. It will also clear any custom settings related to color settings, keyboard settings, and workspaces you’ve previously created.
If you understand the consequences and you want to go ahead with resetting your Photoshop Preference folder, follow the instructions below:
Note: The instructions below are applicable to both Windows and macOS.
- First things first, ensure that Photoshop is completely closed (and no background process belonging to it is running in the background). This step is done to clean any temp data that your Photoshop app might currently be holding on to.
- Next, relaunch the app press and hold Shift + Ctrl + Alt (on Windows) or Shift + Command + Option (on macOS). This is done in order to force the Preference (Settings) prompt to appear.
- Once you see the Settings (Preference) popup, click Yes in order to clear it. Deleting the Photoshop Settings file Note: If you are using Photoshop CC, you also have the option to reset the Preference file directly from the application. to do this, go to Preferences > General and click on Reset Preferences on Quit. Resetting Preferences on Quit
Reinstalling all Printer ports
Another viable scenario that might cause Photoshop to crash when it has to handle a printing job is an inconsistency with the Printer ports involved in this operation. Some users that were previously facing the same problem have confirmed that they managed to get the issue resolved by reinstalling every printer driver (generic or dedicated)
If you want to pursue this potential fix, follow the instructions below:
- Press Windows key + R to open up a Run dialog box. Next, type ‘devmgmt.msc’ inside the text box and press Enter to open up Device Manager . Once you are prompted by the UAC (User Account Control) , click Yes to grant administrative privileges. Running Device Manager
- Once you manage to find yourself inside Device Manager, scroll down through the list of device types, and expand the drop-down menu associated with Print Queues .
- Next, go ahead and right-click on each printer driver that you find under Print Queues and click on Uninstall from the newly appeared context menu. Uninstalling the Printer Driver
- Ensure that every printer driver under Print Queues is successfully uninstalled, then move over to the Universal Serial Bus controllers and uninstall everything printer related entry also. Uninstalling Print ports
- As soon as you manage to uninstall every relevant printer driver, restart your computer in order to allow your OS to reinstall the generic set of printer drivers that are missing. Note: After the next startup is complete, you can install the dedicated drivers once again.
- Open Photoshop and attempt to complete a printing job from within the app to see if the issue is now resolved.
In case you still end up seeing the same application crash, move down to the next method below.
Running SFC and DISM scans
If none of the instructions below have worked for you, there’s a high chance that the problem is actually caused by some type of system file corruption that’s either interfering with the Printer service or it ends up affecting some dependencies that the Adobe application uses – this is very likely if you get a different error while attempting to print conventionally (from outside Photoshop).
If this scenario is applicable you should be able to fix the issue by running a couple of utilities capable of dealing with this type of system file corruption – DISM (Deployment Image Servicing and Management) and SFC (System File Checker)
System File Checker is an entirely local tool that uses a default archive to replace corrupted instances with healthy copies. Initiate an SFC scan , wait patiently until the operation is complete, then restart your computer.

SFC Scan Command
Note: Once you start this process, it’s highly recommended that you don’t interrupt it. Doing so might cause logical errors that might end up to additional problems down the line.
Once the SFC scan is complete, reboot your computer and prepare for the DISM scan. This is different from the first SFC scan, mainly because DISM uses a sub-component of Windows update to replace corrupted files and it’s way more efficient at repairing broken OS-components (rather than drive inconsistencies).
With this in mind, ensure that your Internet connection is stable, then initiate a DISM scan and restart your computer at the end of this procedure.

Scanning System Files
Once the second scan is finished, restart your computer once again and see if the issue is fixed at the next startup.
How to Fix “Printer is in an error state” Issue?
Print spooler is service which spools print jobs and handles interaction with the printer. If you turn off this service, you won’t be able to use your printer. That means print spooler services should be running, so you can print properly. You can start Print Spooler service through Services tool and fix the problem. But sometimes, when you start Printer Spooler services, it automatically stopped.
So, why this problem occurs? There are different reasons including file or document corruption, driver corruption, not compatible drivers, malware infection, the problem with spoolsv.exe ownership and others.
We created 15 methods which will help you to solve this issue.
Method 1: Delete content from Spool folder
In this method, we will delete content from two folders, including folder PRINTERS and folder drivers . We will show you how to do it using Windows 10 1703 version. Also, this method is compatible with another operating system, from Windows XP to Windows 8.1. These two folders are located within Windows\System32\spool.
- Hold Windows logo and press E to open Windows Explorer or File Explorer
- On the left side click on This PC or My Computer
- Navigate to following location C:\Windows\System32\spool
- Open folder drivers and delete all files and folders
- Delete content from folder Printers and restart Print Spooler service using tool available on this LINK
- Restart your Windows machine
- Enjoy printing on your machine
Method 2: Reinstall printer driver
Sometimes the bad driver can make problems with your printer. In this method, you will need to download and install the latest driver for your printer. In most cases, vendors are providing two types of drivers, basic driver, and full package driver. What is the difference between them? As the name says, the basic driver includes the only driver for the printer, and the full package includes driver and additional software for managing printer. Few users solved their problem, by reinstalling the current driver and installing the only basic driver. You will need to download the driver from official vendor’s website. For example, if you are using printer HP LaserJet 1320 you will need to open this LINK and download the basic driver. After you finish reinstalling printer driver, you will need to restart your Windows machine and restart Print Spooler service, by downloading and running tool from the link in step 5 of method 1.
Method 3: Remove duplicated drivers
In this method, you will need to remove all duplicated drivers from your Windows machine. Please follow the procedure described (Method 4) . After you finish deleting duplicated drivers, you will need to restart your Windows machine and restart Print Spooler service .
Method 4: Set Driver Isolation
In this method, we will show you how to set your printer driver to isolation. Why should we do this? The main reason is to avoid conflict between drivers. This procedure is compatible with the operating system from Windows 7 and Window 10. Driver Isolation is not a part of previous operating systems. If you are not using Windows 7, Windows 8 or Windows 10, please check method 5.
- Hold Windows logo and press R
- Type printmanagement.msc and press Enter to open Print Management
- Choose All drivers
- Select your printer driver
- Right click and choose Set Isolation , and then choose Isolated instead of System Default (Shared)
- Close Print Management
- Restart your Windows machine
- Restart Print Spooler service
- Enjoy printing on your machine
Method 5: Take ownership of spoolsv.exe
In this method, you will need to take ownership of spoolsv.exe application which is responsible work Print Spooler service. We will show you how to do it using Windows 10. The same procedure is compatible with another operating system.
- Hold Windows logo and press E to open Windows Explorer or File Explorer
- On the left side click on This PC or My Computer
- Navigate to following location C:\Windows\System32
- Select file spoolsv.exe
- Right click on spoolsv.exe and choose Properties
- Select Security tab
- Under Group and user names choose Users and then click Advanced
- Under Owner click Change and type your user account. In our example, it is user account named Jasmin Kahriman
- Click Check Names and then click OK
- Click Apply and then OK
- Click Apply and then OK , again
- Restart Print Spooler service
- Restart your Windows machine
- Enjoy printing on your machine
Method 6: Reset Internet Explorer settings
If you tried to print some files from Internet Explorer and you are not able to do that because of issue with Print Spooler service, we are recommending you to reset settings on your Internet Explorer. For resetting Internet Explorer please follow method 1. After you finish restarting Internet Explorer to default settings, you will need to restart your Windows machine and restart Print Spooler service.
If you are not printing from Internet Explorer, please check next method.
Method 7: Delete unnecessary key from Registry
End users do not like to do some changes in Registry Editor because wrong changes can damage your Windows, drivers or applications. Do not worry, we will show you how to do it step by step. In this method, we will delete unnecessary keys from Registry database on following location Computer\HKEY_LOCAL_MACHINE\SYSTEM\CurrentControlSet\Control\Print\Providers. Before you do any registry configuration, we are recommending you to backup registry database. Why do you need to do registry backup? In the case of some misconfiguration, you can revert registry database to the previous state when everything worked without any problems. For this method, you will need to use a user account with Administrator privilege, because Standard user account is not allowed to do any system changes.
- Hold Windows logo and press R
- Type regedit and press Enter to open Registry Editor
- Click Yes to confirm running Registry Editor with Administrator privilege
- Click File , and then Export to save current registry configuration
- Choose Desktop as location where you will export registry configuration
- Under File name type Backup06092017 and choose All under Export range
- Click Save
- Navigate to the following location: Computer\HKEY_LOCAL_MACHINE\SYSTEM\CurrentControlSet\Control\Print\Providers . You will need to delete all keys, but LanMan Print Services and Internet Print Provider which are the default and which should not be deleted. In case you find the additional key, you should delete that key. In our example, there is an additional key named Printing Services .
- Delete key Printing Services
- Close Registry Editor
- Restart Print Spooler service
- Restart your Windows machine
- Enjoy printing on your machine
Method 8: Scan your hard disk for malware
In this method, you will need to scan your hard disk for malware using Malwarebytes. Please follow instructions to download and run a scan on this internet explorer has stopped working , method 10. Also, you can scan your hard disk for malware using Avira Antivir or Microsoft Defender. You will find more information on this LINK , method 5. After you finished removing malware from your machine, you will need to restart your Windows machine and restart Print Spooler service
Method 9: Use CCleaner
CCleaner is a powerful tool for deleting unnecessary files from your Windows machine. In this method, we will download and install CCleaner and delete unnecessary files stored on hard disk. We will show you how to do it on Windows 10.
- Open Internet browser (Google Chrome, Mozilla Firefox, Edge or other)
- Download CCleaner from this LINK
- Install and run CCleaner on your machine
- Under Windows, tab select all actions and click Run Cleaner
- Follow the same procedure under Application tab
- Wait until CCleaner is finished procedure
- Close CCleaner
- Restart your Windows machine
- Restart Print Spooler service
- Enjoy printing on your machine
Method 10: Uninstall Oracle SealedMedia or IRM
Sometimes some applications can block Print Spooler service and you will need to uninstall that application, to continue printing without any problems. In this method, we will uninstall Oracle IRM from Windows machine. If this method did not solve your problem, then you can install Oracle IRM again.
- Hold Windows logo and press R
- Type appwiz.cp l and press Enter to open Program and Features
- Navigate to Oracle IRM
- Right click on Oracle IRM and choose Uninstall
- Wait until Windows is finished procedure
- Restart your Windows machine
- Restart Print Spooler service
- Enjoy printing on your machine
Method 11: Run CHKDSK /R
In case you have a problem with system file corruption or you can not write or read data from hard disk, you should do CHKDSK /R. Check disk is a utility which will help you to find bad sectors, and fix them in case there are fixable. The procedure is the same for all operating system from Windows XP to Windows 10. Please check instructions here (Method 10)
Method 12: SFC /SCANNOW
System File Checker (SFC) is a command line utility integrated into Windows that checks for system file corruption. In case SFC found some issues with system file corruption, SFC will try to fix them. SFC includes additional commands as SCANNOW. SCANNOW scans integrity of all protected system files and repairs files with problems when possible. How to run SFC /SCANNOW? Please follow instructions on this msvcr71.dll missing , method 4
Method 13: System Restore
System Restore is recovery mechanism integrated into Windows operating systems. It is not enabled by default, and it should be enabled by the end user or IT Administrator. If System Restore is not enabled on your Windows, please follow instructions for enabling System Restore on this system restore . If System Restore is already enabled on your Windows machine, you will need to do System Restore by reading method 13 on this remote procedure call failed .
Method 14: Replace your old printer
If you do not want to downgrade your operating system and you have planned budget for a new printer, then you can purchase a new printer. Before you change printer, you will need to uninstall all drivers and software related to old printer. Which brand should you purchase? There are different vendors including HP, Lexmark, Canon, Samsung, Kyocera, and others. Today, almost all new printers are compatible with the operating system from Windows 7 to Windows 10.
- Even in our digital age, physical materials like paper still play a vital role, especially in printing, where the type of paper can greatly affect the final product.
- Different printers are best suited to specific paper types, such as glossy for photos or cardstock for invitations, highlighting the importance of choosing the right paper for your project.
- The variety of paper options, with different textures, weights, and finishes, allows for creativity and precision in achieving the desired look and feel for each print job.
Choosing the right paper for your print job is not an easy task. You need to understand factors like paper weight , finish , and brightness . The combination of these qualities results in numerous paper types, each suited to a specific use case.

Types of Paper for Printing
You wouldn’t want to print your cherished pictures on cardstock paper, and you certainly wouldn’t want to print your business card on standard printer paper. Knowing the different options available can help you make the most of your printer for a broader range of projects.
- Types of Printer Papers 1. Inkjet Paper 2. Laser Paper 3. Copy Paper 4. Matte Paper 5. Glossy Paper 6. Photo Paper 7. Card Stock Paper 8. Bond & Label Paper
- Which Paper is Best for Your Print Job?
Types of Printer Papers
1. Inkjet Paper

Inkjet Paper
As the name suggests, inkjet paper is specifically designed for inkjet printers to create clear text and sharp images . It can be further classified into various types, such as glossy , matte , and card , to suit different needs. However, this doesn’t mean that other paper types won’t work with these printers. The specification is simply to achieve the best results, as inkjet paper tends to absorb ink and is thus made slightly thicker .
2. Laser Paper

Laser Paper
Similarly, laser paper is specifically designed for laser printers to produce high-quality results. This type of paper is usually best for office use, such as memos , invoices , and high-volume documents . The finish is typically matte to avoid delaying drying time.
Since the toner stays on the surface of the paper in laser printing, it is not designed for maximum absorption, unlike inkjet paper, which can withstand more moisture comparatively.
3. Copy Paper

Copy Paper
While some may use copy paper and laser paper interchangeably, there’s a distinct difference between the two. Copy paper is the kind you usually find next to your office printer in a large box. It is thinner and less expensive than laser paper and, well , gets the job done. However, color accuracy and print quality may sometimes be compromised .
4. Matte Paper

Plain Matte Paper
Matte paper, or more commonly known as printer paper, features a non-reflective, smooth , and non-textured finish that provides a clean and professional appearance. For this reason, it is ideal for printing reports and resumes , although the latter is less common these days.
But what’s even better, you ask ? You can produce double-sided printouts without having silhouettes show on the other side. Talk about a great balance of cost-effectiveness and resource efficiency in the long run!
5. Glossy Paper

Glossy Paper
Looking for a touch of pizzazz ? Then a glossy finish is the way to go. It not only enhances contrast and color saturation , but when combined with durable inks and color-depth cartridges, it produces brilliant and crisp photographs and marketing materials . Text documents are not the best use of this paper, unless , of course, you’re aiming for an extra element of sophistication.
6. Photo Paper

Photo Paper
Photo paper is specifically designed for printing photographs and is available in several finish options, such as matte , glossy , and satin . In fact, it often has a different finish on each side and is thicker than most papers.
The purpose of this paper, as clear as the results it produces, is to deliver exceptional sharpness and color reproduction . After all , what good is a photograph if it’s not preserved in its best quality for many years to come? However, you should check your printer’s manual or the manufacturer’s website to see if it can handle photo paper and its thickness.
7. Card Stock Paper

Card Stock Paper
You might still be wondering what to use for printing business cards , wedding invitations , flyers , or other formal materials for your brand. Using regular printer paper or glossy paper for these purposes may not be very convincing. For this, you need the durability and sturdiness offered by card stock paper.
The premium feel and longevity of this material can withstand harsh handling and minimize damage. However, keep in mind that not all printers are designed to handle card stock. So, if you use an incompatible printer , be prepared for paper jams or other similar issues.
8. Bond & Label Paper

Bond & Label Paper
Ever noticed how receipts and labels paper feel different from your everyday paper? That’s because it’s a special material called thermal roll or bond roll , which features a texture similar to fabric.
The “ thermal ” in its name refers to the printing process that uses heat to imprint the image onto the paper. This method not only reduces ink costs but also prevents smudging and smearing . However, receipts and labels aren’t its only applications. Thermal paper is used in various fields, from art to business and beyond . But mostly where ink permanence is the top priority.
Which Paper is Best for Your Print Job?
Since everyday tasks typically require standard matte paper and most office printers use laser paper for document reproduction, you don’t need extraordinary printers or thicker paper for these tasks.
But if you wish to print cards , invitations , and brochures , you’ll definitely need to stock up on card stock and glossy paper. And if you’re a photographer with a studio, you wouldn’t need to purchase anything other than photo paper —until you decide to leave the profession, that is.

A and C-Series Paper Sizes
But it doesn’t end there. Each paper type is available in various sizes , ranging from A1 to A10 . While standard printers typically support A4 and/or A3 sizes, specialized printers can accommodate a wider range of sizes, along with different coatings and weights, providing maximum flexibility for your printing needs.
The error “ WinRAR Error: Next Volume Is Required ” usually appears when you’re extracting a multi-part RAR archive and WinRAR can’t find (or can’t correctly identify) the next file in the sequence . This often happens when a volume is missing , stored in a different folder , or renamed in a way that breaks the archive’s expected order .

In this guide, we’ll go over the most reliable fixes confirmed by affected users, along with what each method is doing behind the scenes so you can choose the right one for your situation.
Important: To extract multi-volume archives, you should always start extraction from the first file in the set. This is usually file.part1.rar , or (in older sets) the main .rar file that comes before .r01 , .r02 , and so on.
1. Download and Place the Missing RAR File
WinRAR needs all parts of a multi-volume archive to complete extraction. This error usually appears when one of the volumes in a set like .part2.rar , .r01 , .r02 , .001 , and similar naming formats is missing . Downloading the missing volume and placing it in the same folder as the other parts allows WinRAR to continue extracting normally .
- Look at the error message or review the list of archive parts in the folder.
- Identify which volume is missing (for example, part2.rar , .r02 , .001 , etc.).
- Go back to the website or source where you downloaded the archive.
- Locate and download the exact missing file using the same naming format as the others.
- Make sure the new file name matches the pattern of the rest. Example: If you have file.part1.rar and file.part3.rar , the missing one must be file.part2.rar .
- Move the downloaded missing volume into the same folder as the other archive parts.
- Confirm that all parts are in a single folder before extracting.
- Right-click the first file in the series (usually part1 or the main .rar file) and select Extract Here or Extract to Folder .
- WinRAR should now detect all volumes and continue extraction normally .
2. Manually Browse & Select the Next Volume
Use this method only if the next volume already exists , but WinRAR is failing to detect it automatically. This can happen due to incorrect naming , the file being in a different location , or a temporary file access issue. Manually browsing helps WinRAR locate the correct volume and resume extraction without interruption .
- Right-click the first file in the series (usually .rar or part1.rar ) and select Extract Here or Extract to Folder .
- When WinRAR cannot find the next volume, it will show the “ Next Volume Is Required ” message.
- A small window will appear, allowing you to manually select the next volume .
- Use the file explorer window to locate the folder where the other archive parts are saved.
- Select the next part based on the naming order (example: select file.part2.rar after file.part1.rar ).
- Make sure the selected file matches the naming format of the archive (no extra characters like (1) and no mismatched numbering).
- WinRAR will resume extraction using the selected volume .
- If additional volumes are missing or stored separately, WinRAR may prompt you again. Repeat the same process until extraction completes.
3. Rename the RAR files in Order
WinRAR relies on a proper naming sequence (such as file.part1.rar , file.part2.rar , file.part3.rar ) to extract multi-volume archives. If a file is named incorrectly, contains extra characters, or is out of order, WinRAR may fail to locate the next volume and show this error. Renaming the files correctly helps WinRAR follow the sequence and extract the archive without interruptions .
Note: Renaming only changes the file name , not the file contents. The goal is to restore the correct sequence so WinRAR can detect the next volume.
- Go to the folder where all the RAR files are saved.
- Make sure all parts of the archive are present and stored in the same folder .
- Check how the parts are currently named . Common patterns include:
file.part1.rar, file.part2.rar, file.part3.rar
file.rar, file.r01, file.r02, file.r03
- Look for files that don’t match the expected numbering pattern (for example, file.part01.rar , file.part1(1).rar , or unrelated names).
- Rename each file so it follows the same order without extra characters or mismatched numbering. Example:
Incorrect: file.part1.rar, file.part3.rar, file.part2(1).rar
Correct: file.part1.rar, file.part2.rar, file.part3.rar
- Make sure the text before the number is exactly the same for all files.
- Only the last part number should change.
- Right-click the first file in the series (usually part1.rar or the main .rar file) and select Extract Here .
- WinRAR should now recognize the sequence and continue extraction normally .
If you still get the same prompt: the archive set is likely incomplete (a part was never downloaded or was removed), or one of the volumes is corrupt and must be re-downloaded from the original source.
