Some Windows users have been encountering the Office Couldn’t Install 30088-1021 (0) error whenever they attempt to install or update Microsoft Office on their computer. This issue is mostly reported to occur on Windows 10.
How to Fix Office Error Code 30088-1021
After investigating this particular issue thoroughly, it turns out that there are several underlying causes that might trigger this error code when installing the latest version of Microsoft Office:
- Corrupted Microsoft Office installation – As it turns out, one of the most common causes of this particular error is some type of file corruption that is affecting the Office installation. In this case, you can fix the issue by running the Office Repair tool and applying the recommended fix.
- Corrupted / Missing Registry keys – In case the problem is occurring due to some kind of registry inconsistency, running the Office Fix It Tool should allow you to effectively uninstall any remnants of the current Office installation before reinstalling from scratch.
- Installation inhibiting malware – Keep in mind that you might also end up seeing the 3088-1021 error due to some kind of malware or spyware that is preventing 3rd party programs from making registry changes when installing a newer version. If this scenario is applicable, you should deploy a deep security scan with Malwarebytes before retrying the installation.
Now that you are familiar with every potential cause of this particular issue, here’s a shortlist of verified fixes that other users finding themselves in a similar situation have used to get to the bottom of this issue:
1. Run the repair tool to resolve Couldn’t Install Office Error
If you get this error while attempting to update your current version of Microsoft office, chances are you are dealing with some kind of file corruption or missing registry keys that are preventing the updating process to take place.
According to some affected users, you should be able to fix the issue in this case by repairing the Office installation via the built-in tool.
This will serve the purpose of repairing any corrupted or quarantined files that might be responsible for the issue.
Follow the instructions below to resolve the Office Couldn’t Install 30088-1021 (0) error:
- Start by opening up a Run dialog box by pressing Windows key + R . Next, type ‘appwiz.cpl’ and press Enter to open up the Programs and Features window. Opening up the Programs and features screen
- Inside the Programs and Features menu, scroll down through the list of installed applications and locate your Office installation.
- Next, go ahead and right-click on the listing associated with Office and click on Change from the context menu. Change the installation of Microsoft Office
- Wait until the initial scan is completed, then choose Online Repair (if available) and wait until the operation is complete. Initiating an Online Repair
Note: It’s important to ensure that you’re connected to a reliable network before initiating this procedure.
Once the repair procedure is complete, restart your computer and see if the 30088-1021 error is fixed at the next computer startup.
2. Use “Office Fix It Tool” to Repair theInstall30088-1021 (0) Error
If the first fix did not work in your case and the problem occurs due to some kind of registry issue, you should know that Microsoft developed an automated tool equipped to resolve instances where the auto-updating function goes bust.
Several affected users have reported that they managed to resolve the issue by running a Microsoft Office Fix It tool .
This utility will resolve various problems that end up blocking Office programs from being launched, installed, updated, or removed.
Note: You can use it on Windows 10, Windows 7, and Windows 8.1.
If the issue is caused by corrupted registry keys or by files from uninstalled or existing programs, this tool might end up resolving the issue by uninstalling the current Office suite, allowing you to clean install the latest version without the apparition of the same 30088-1021 error.
Here’s a quick guide on downloading and using the Fix It Microsoft Office tool to resolve this particular issue:
- Start by visiting the official download page of the Microsoft Office Fix-It tool and downloading the .diagcab file. Once you get to the correct page, click on the Download button.
- After the tool has been successfully downloaded, double-click on the .diagcab file to open it.
- When you get to the first prompt, click on Advanced and make sure that the box associated with Apply repair automatically is checked. Then, click the Next button to proceed.
- After the initial detection phase is complete, click on Installing or Uninstalling – depending on when you get this error.
- At the next screen, select the program that you’re encountering issues with (most likely Microsoft Office) and click Next once again before finally clicking on Yes, try uninstall .
- Wait until the operation is finally complete, then restart your computer and re-install the Microsoft Office suite via the Official channels to see if the same error is still occurring.
Resolving the issue via the Fix It Tool
If you’re still encountering the error even after using the Fix-it tool, jump down to the next method below.
3. Malware from your Computer then Install Office (if applicable)
According to some affected users, you can also expect to see the installation error Office Couldn’t Install 30088-1021 (0) if your computer is currently hosting spyware or malware that is preventing 3rd party programs from making registry changes.
This, of course, renders you unable to install, uninstall or update any of the applications that have to go through the Windows installer.
If you are encountering this problem, you should encounter similar errors when trying to install or uninstall different applications, not just Microsoft office.
In case this scenario looks like it could be applicable, you should start by using a powerful anti-malware cleaner to get rid of the security threat first – We recommend performing a deep scan with Malwarebytes .
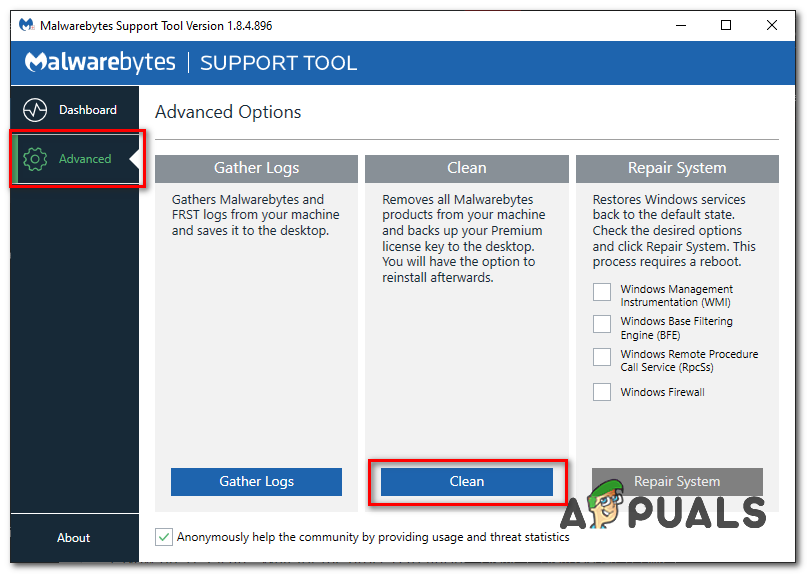
Initiating a scan with Malwarebytes
After the scan is complete and the security threat is eliminated, the next thing you should do is get rid of your current Office installation before reinstalling the newest version from scratch.
Here’s a quick step by step guide on how to do this:
- Press Windows key + R to open up a Run dialog box. Next, type ‘appwiz.cpl’ and press Enter to open up the Programs and Features menu. If you are prompted by the UAC (User Account Control), click Yes to grant admin access. Opening up the Programs and Features menu
- Inside the Programs and Features screen, scroll down through the list of installed programs and locate your Microsoft Office installation.
- Once you locate the Office suite that’s giving you trouble, right-click on it and choose Uninstall from the context menu that just appeared. Uninstall Microsoft Office
- Inside the uninstallation screen, follow the on-screen instructions to complete the process, then restart your computer and re-download the latest version of Microsoft Office from the official channels.
How to Fix “Printer is in an error state” Issue?
The error “ WinRAR Error: Next Volume Is Required ” usually appears when you’re extracting a multi-part RAR archive and WinRAR can’t find (or can’t correctly identify) the next file in the sequence . This often happens when a volume is missing , stored in a different folder , or renamed in a way that breaks the archive’s expected order .

In this guide, we’ll go over the most reliable fixes confirmed by affected users, along with what each method is doing behind the scenes so you can choose the right one for your situation.
Important: To extract multi-volume archives, you should always start extraction from the first file in the set. This is usually file.part1.rar , or (in older sets) the main .rar file that comes before .r01 , .r02 , and so on.
1. Download and Place the Missing RAR File
WinRAR needs all parts of a multi-volume archive to complete extraction. This error usually appears when one of the volumes in a set like .part2.rar , .r01 , .r02 , .001 , and similar naming formats is missing . Downloading the missing volume and placing it in the same folder as the other parts allows WinRAR to continue extracting normally .
- Look at the error message or review the list of archive parts in the folder.
- Identify which volume is missing (for example, part2.rar , .r02 , .001 , etc.).
- Go back to the website or source where you downloaded the archive.
- Locate and download the exact missing file using the same naming format as the others.
- Make sure the new file name matches the pattern of the rest. Example: If you have file.part1.rar and file.part3.rar , the missing one must be file.part2.rar .
- Move the downloaded missing volume into the same folder as the other archive parts.
- Confirm that all parts are in a single folder before extracting.
- Right-click the first file in the series (usually part1 or the main .rar file) and select Extract Here or Extract to Folder .
- WinRAR should now detect all volumes and continue extraction normally .
2. Manually Browse & Select the Next Volume
Use this method only if the next volume already exists , but WinRAR is failing to detect it automatically. This can happen due to incorrect naming , the file being in a different location , or a temporary file access issue. Manually browsing helps WinRAR locate the correct volume and resume extraction without interruption .
- Right-click the first file in the series (usually .rar or part1.rar ) and select Extract Here or Extract to Folder .
- When WinRAR cannot find the next volume, it will show the “ Next Volume Is Required ” message.
- A small window will appear, allowing you to manually select the next volume .
- Use the file explorer window to locate the folder where the other archive parts are saved.
- Select the next part based on the naming order (example: select file.part2.rar after file.part1.rar ).
- Make sure the selected file matches the naming format of the archive (no extra characters like (1) and no mismatched numbering).
- WinRAR will resume extraction using the selected volume .
- If additional volumes are missing or stored separately, WinRAR may prompt you again. Repeat the same process until extraction completes.
3. Rename the RAR files in Order
WinRAR relies on a proper naming sequence (such as file.part1.rar , file.part2.rar , file.part3.rar ) to extract multi-volume archives. If a file is named incorrectly, contains extra characters, or is out of order, WinRAR may fail to locate the next volume and show this error. Renaming the files correctly helps WinRAR follow the sequence and extract the archive without interruptions .
Note: Renaming only changes the file name , not the file contents. The goal is to restore the correct sequence so WinRAR can detect the next volume.
- Go to the folder where all the RAR files are saved.
- Make sure all parts of the archive are present and stored in the same folder .
- Check how the parts are currently named . Common patterns include:
file.part1.rar, file.part2.rar, file.part3.rar
file.rar, file.r01, file.r02, file.r03
- Look for files that don’t match the expected numbering pattern (for example, file.part01.rar , file.part1(1).rar , or unrelated names).
- Rename each file so it follows the same order without extra characters or mismatched numbering. Example:
Incorrect: file.part1.rar, file.part3.rar, file.part2(1).rar
Correct: file.part1.rar, file.part2.rar, file.part3.rar
- Make sure the text before the number is exactly the same for all files.
- Only the last part number should change.
- Right-click the first file in the series (usually part1.rar or the main .rar file) and select Extract Here .
- WinRAR should now recognize the sequence and continue extraction normally .
If you still get the same prompt: the archive set is likely incomplete (a part was never downloaded or was removed), or one of the volumes is corrupt and must be re-downloaded from the original source.
