For most office jobs, grammar skills are very important because they make the content you’re easy to read and understandable. But making sure that your grammar is top of the line with every report or material that you make takes time and will actually hurt your productivity. In this case, a tool like Grammarly can be just what you need to help you find grammar errors.

Using Grammarly to check for grammar errors
Sure, it’s not as good a human editor, but it comes pretty darn close. It’s capable of checking for spelling errors, verb agreement, subject agreement, sentence formation, punctuation mistakes and a lot more if you go beyond the free version.
If you work with words a lot, chances are you are already using Grammarly since it’s already the most popular online and offline checking tool. But did you know that Grammarly also offers a free extension that will allow you to use it with Microsoft Word and other Microsoft Office tools?
Most users make use of the free Grammarly extensions or add-ons for Firefox and Chrome to correct emails, blog posts, and social media post. You can also use it their own editor to store and paste documents for automatic proofread.
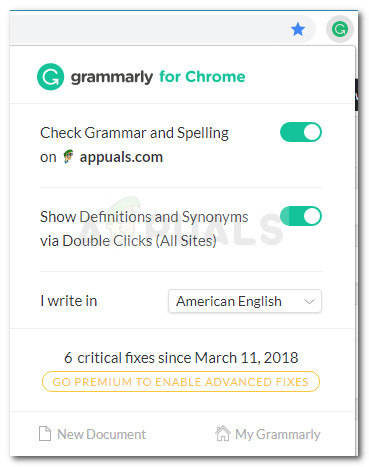
Grammarly Chrome extension
How to use Grammarly with Microsoft Word
I’ve been using Grammarly for a while now, but I only recently discovered that you can also use it with the Word Editor as a Microsoft Office extension. This is great because we all know that the default proofreading feature of Word is certainly not reliable.
The steps of installing Grammarly as a Microsoft Office extension are a little more tedious than just enabling the extension in your browser, but we’ll guide you through the whole thing.
Follow the steps below to install Grammarly on Microsoft Office and use it with Microsoft Word:
- Visit this link ( here ) and click the Free Download button to download the Office extension version of the software. Downloading Grammarly Office extension
- Double-click on the GrammarlyAddInSetup.exe (the installation executable that you’ve just downloaded)
- Click Get Started at the first installation prompt.
- Select the Office products that you want to use the Grammarly extension on. Then, click the Install button to begin the installation process. Selecting the products that you’ll use Grammarly in Note: Make sure that any instance of Word or Outlook is not running before you hit the Install button.
- Once the installation is complete, create a Grammarly account or log-in with your existing one. Log-in with your Grammarly credentials Note: Keep in mind that Grammarly will not function with Microsoft Word if you hit the Skip button and don’t log in with your user credentials.
- Once the setup is complete, open an existing or create a new Word document. Then, go to the ribbon bar at the tab an click on the Grammarly tab. From there, simply click on Open Grammarly and the proofreading tool will automatically kick into action. Open Grammarly from Microsoft Word
- Now that you have configured the Grammarly extension, it will become available with every document that you open on Word. The only downside of using Grammarly with Word is that you will not have the ability Undo ability (Ctrl + Z) while the extension is active. Checking grammar errors with Grammarly in Microsoft Word
Installing Grammarly as a desktop app on Windows
If you’d like to have he error correcting capabilities of Grammarly with all your desktop applications, not just Word, you can install the Grammarly desktop app instead.
- Visit this link ( here ) and download the desktop version of Grammarly by clicking the Download Grammarly for Windows button. Downloading Grammarly for Windows
- Open the GrammarlySetup executable and see how the application works by clicking the Next button several times. Going through Grammarly’s training screens
- Press the Get started button to complete the installation setup. Completing Grammarly’s desktop installation setup
- Login with your Grammarly credentials or create a new free account if you don’t have one. Log in with your Grammarly account
- Shortly after you insert your login credentials, you’ll see the dashboard menu. You can use it to create a new document, import a local one or search for past projects. Grammarly desktop’s dashboard
How to Fix “Printer is in an error state” Issue?
The error “ WinRAR Error: Next Volume Is Required ” usually appears when you’re extracting a multi-part RAR archive and WinRAR can’t find (or can’t correctly identify) the next file in the sequence . This often happens when a volume is missing , stored in a different folder , or renamed in a way that breaks the archive’s expected order .

In this guide, we’ll go over the most reliable fixes confirmed by affected users, along with what each method is doing behind the scenes so you can choose the right one for your situation.
Important: To extract multi-volume archives, you should always start extraction from the first file in the set. This is usually file.part1.rar , or (in older sets) the main .rar file that comes before .r01 , .r02 , and so on.
1. Download and Place the Missing RAR File
WinRAR needs all parts of a multi-volume archive to complete extraction. This error usually appears when one of the volumes in a set like .part2.rar , .r01 , .r02 , .001 , and similar naming formats is missing . Downloading the missing volume and placing it in the same folder as the other parts allows WinRAR to continue extracting normally .
- Look at the error message or review the list of archive parts in the folder.
- Identify which volume is missing (for example, part2.rar , .r02 , .001 , etc.).
- Go back to the website or source where you downloaded the archive.
- Locate and download the exact missing file using the same naming format as the others.
- Make sure the new file name matches the pattern of the rest. Example: If you have file.part1.rar and file.part3.rar , the missing one must be file.part2.rar .
- Move the downloaded missing volume into the same folder as the other archive parts.
- Confirm that all parts are in a single folder before extracting.
- Right-click the first file in the series (usually part1 or the main .rar file) and select Extract Here or Extract to Folder .
- WinRAR should now detect all volumes and continue extraction normally .
2. Manually Browse & Select the Next Volume
Use this method only if the next volume already exists , but WinRAR is failing to detect it automatically. This can happen due to incorrect naming , the file being in a different location , or a temporary file access issue. Manually browsing helps WinRAR locate the correct volume and resume extraction without interruption .
- Right-click the first file in the series (usually .rar or part1.rar ) and select Extract Here or Extract to Folder .
- When WinRAR cannot find the next volume, it will show the “ Next Volume Is Required ” message.
- A small window will appear, allowing you to manually select the next volume .
- Use the file explorer window to locate the folder where the other archive parts are saved.
- Select the next part based on the naming order (example: select file.part2.rar after file.part1.rar ).
- Make sure the selected file matches the naming format of the archive (no extra characters like (1) and no mismatched numbering).
- WinRAR will resume extraction using the selected volume .
- If additional volumes are missing or stored separately, WinRAR may prompt you again. Repeat the same process until extraction completes.
3. Rename the RAR files in Order
WinRAR relies on a proper naming sequence (such as file.part1.rar , file.part2.rar , file.part3.rar ) to extract multi-volume archives. If a file is named incorrectly, contains extra characters, or is out of order, WinRAR may fail to locate the next volume and show this error. Renaming the files correctly helps WinRAR follow the sequence and extract the archive without interruptions .
Note: Renaming only changes the file name , not the file contents. The goal is to restore the correct sequence so WinRAR can detect the next volume.
- Go to the folder where all the RAR files are saved.
- Make sure all parts of the archive are present and stored in the same folder .
- Check how the parts are currently named . Common patterns include:
file.part1.rar, file.part2.rar, file.part3.rar
file.rar, file.r01, file.r02, file.r03
- Look for files that don’t match the expected numbering pattern (for example, file.part01.rar , file.part1(1).rar , or unrelated names).
- Rename each file so it follows the same order without extra characters or mismatched numbering. Example:
Incorrect: file.part1.rar, file.part3.rar, file.part2(1).rar
Correct: file.part1.rar, file.part2.rar, file.part3.rar
- Make sure the text before the number is exactly the same for all files.
- Only the last part number should change.
- Right-click the first file in the series (usually part1.rar or the main .rar file) and select Extract Here .
- WinRAR should now recognize the sequence and continue extraction normally .
If you still get the same prompt: the archive set is likely incomplete (a part was never downloaded or was removed), or one of the volumes is corrupt and must be re-downloaded from the original source.
