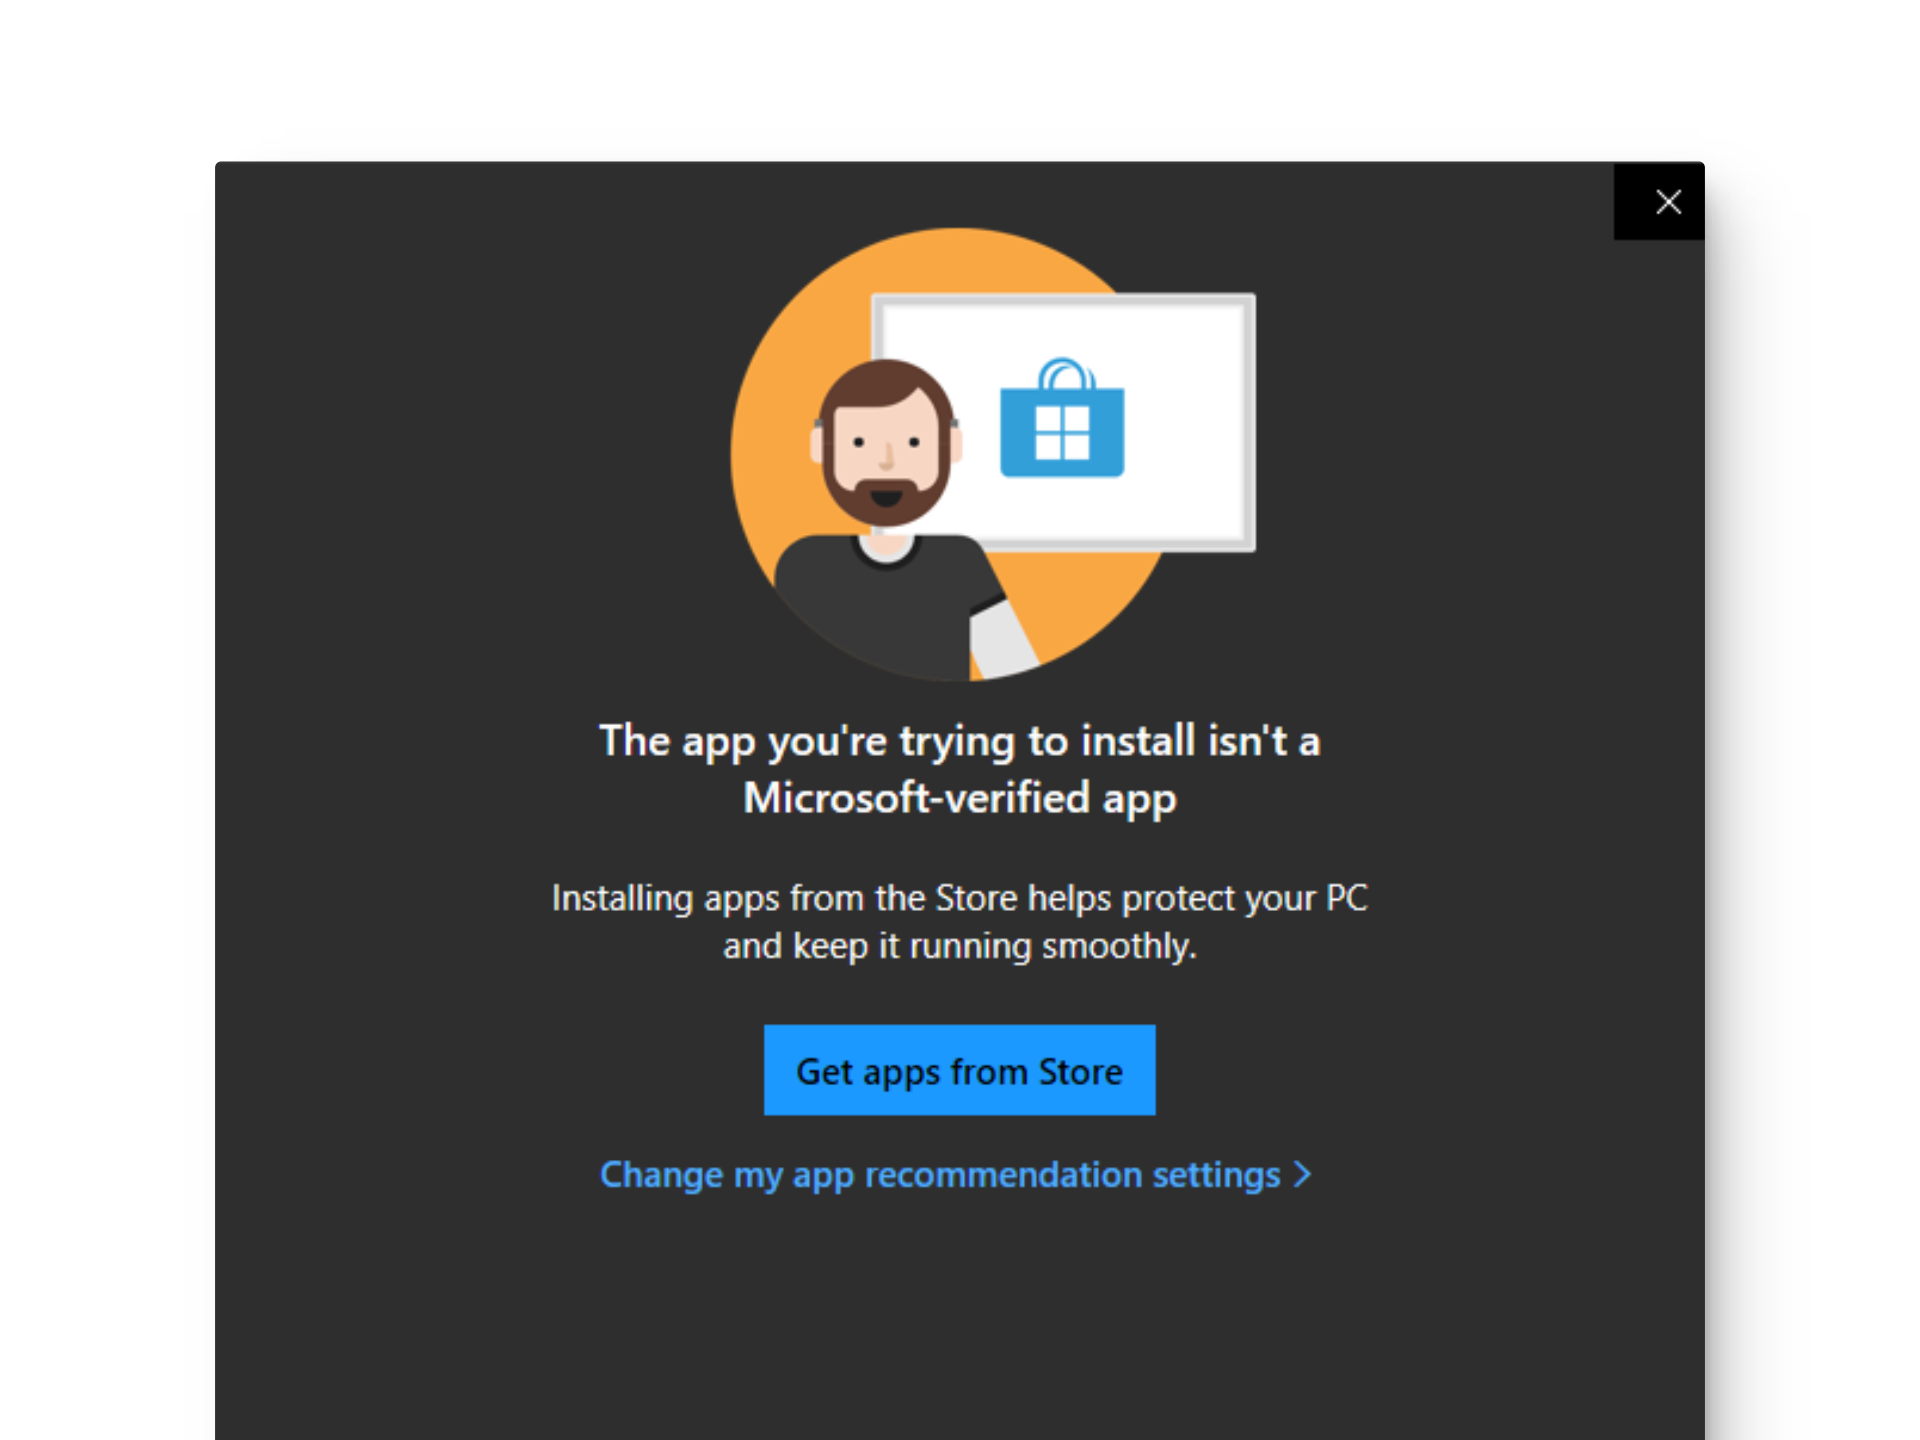
Windows is set up to display an error message, “ The app you are trying to install isn’t a Microsoft-verified app, ” when you attempt to install apps not verified by Microsoft. This feature aims to prevent potential threats from viruses or malware, as Microsoft-verified apps are typically those available in the Microsoft Store and have met certain safety standards.
Third-party developers can enhance their apps’ credibility by digitally signing them through Microsoft Authenticode Technology, although not all developers choose to do this. As a result, you may encounter warning pop-ups when attempting to install unverified, third-party apps.
The absence of Microsoft verification doesn’t mean an app is unsafe, but it does place the responsibility for ensuring its safety on you. While the Microsoft Store offers a wide range of secure apps, you might still need unverified apps for their unique features, customization, or to explore different software. Disabling the verification feature provides the freedom to install such apps, bypassing default restrictions.
However, it’s essential to be careful and follow these safety measures when installing unverified apps:
- Download software from trusted and official sites only.
- Avoid installing cracked versions of paid programs.
- Refrain from visiting suspicious websites.
- Refer to reviews published in forums and reputable tech sites.
- Always enable Windows Defender or an antivirus program.
- Use online tools to scan download links and check for link security.
- Create a backup point in case the app turns out to be malicious, and you need to restore your data.
You can disable Microsoft-verified apps using several methods, and your choice depends on your comfort level and the Windows edition you are using.
1. Via Windows Settings
The easiest way to disable verification is through Windows Settings, which enables you to control the operating system and its app permissions from a single place.
- Open the Settings app by pressing Windows key + I on your keyboard.
- Click on Apps on the left sidebar and go to Advanced App Settings .
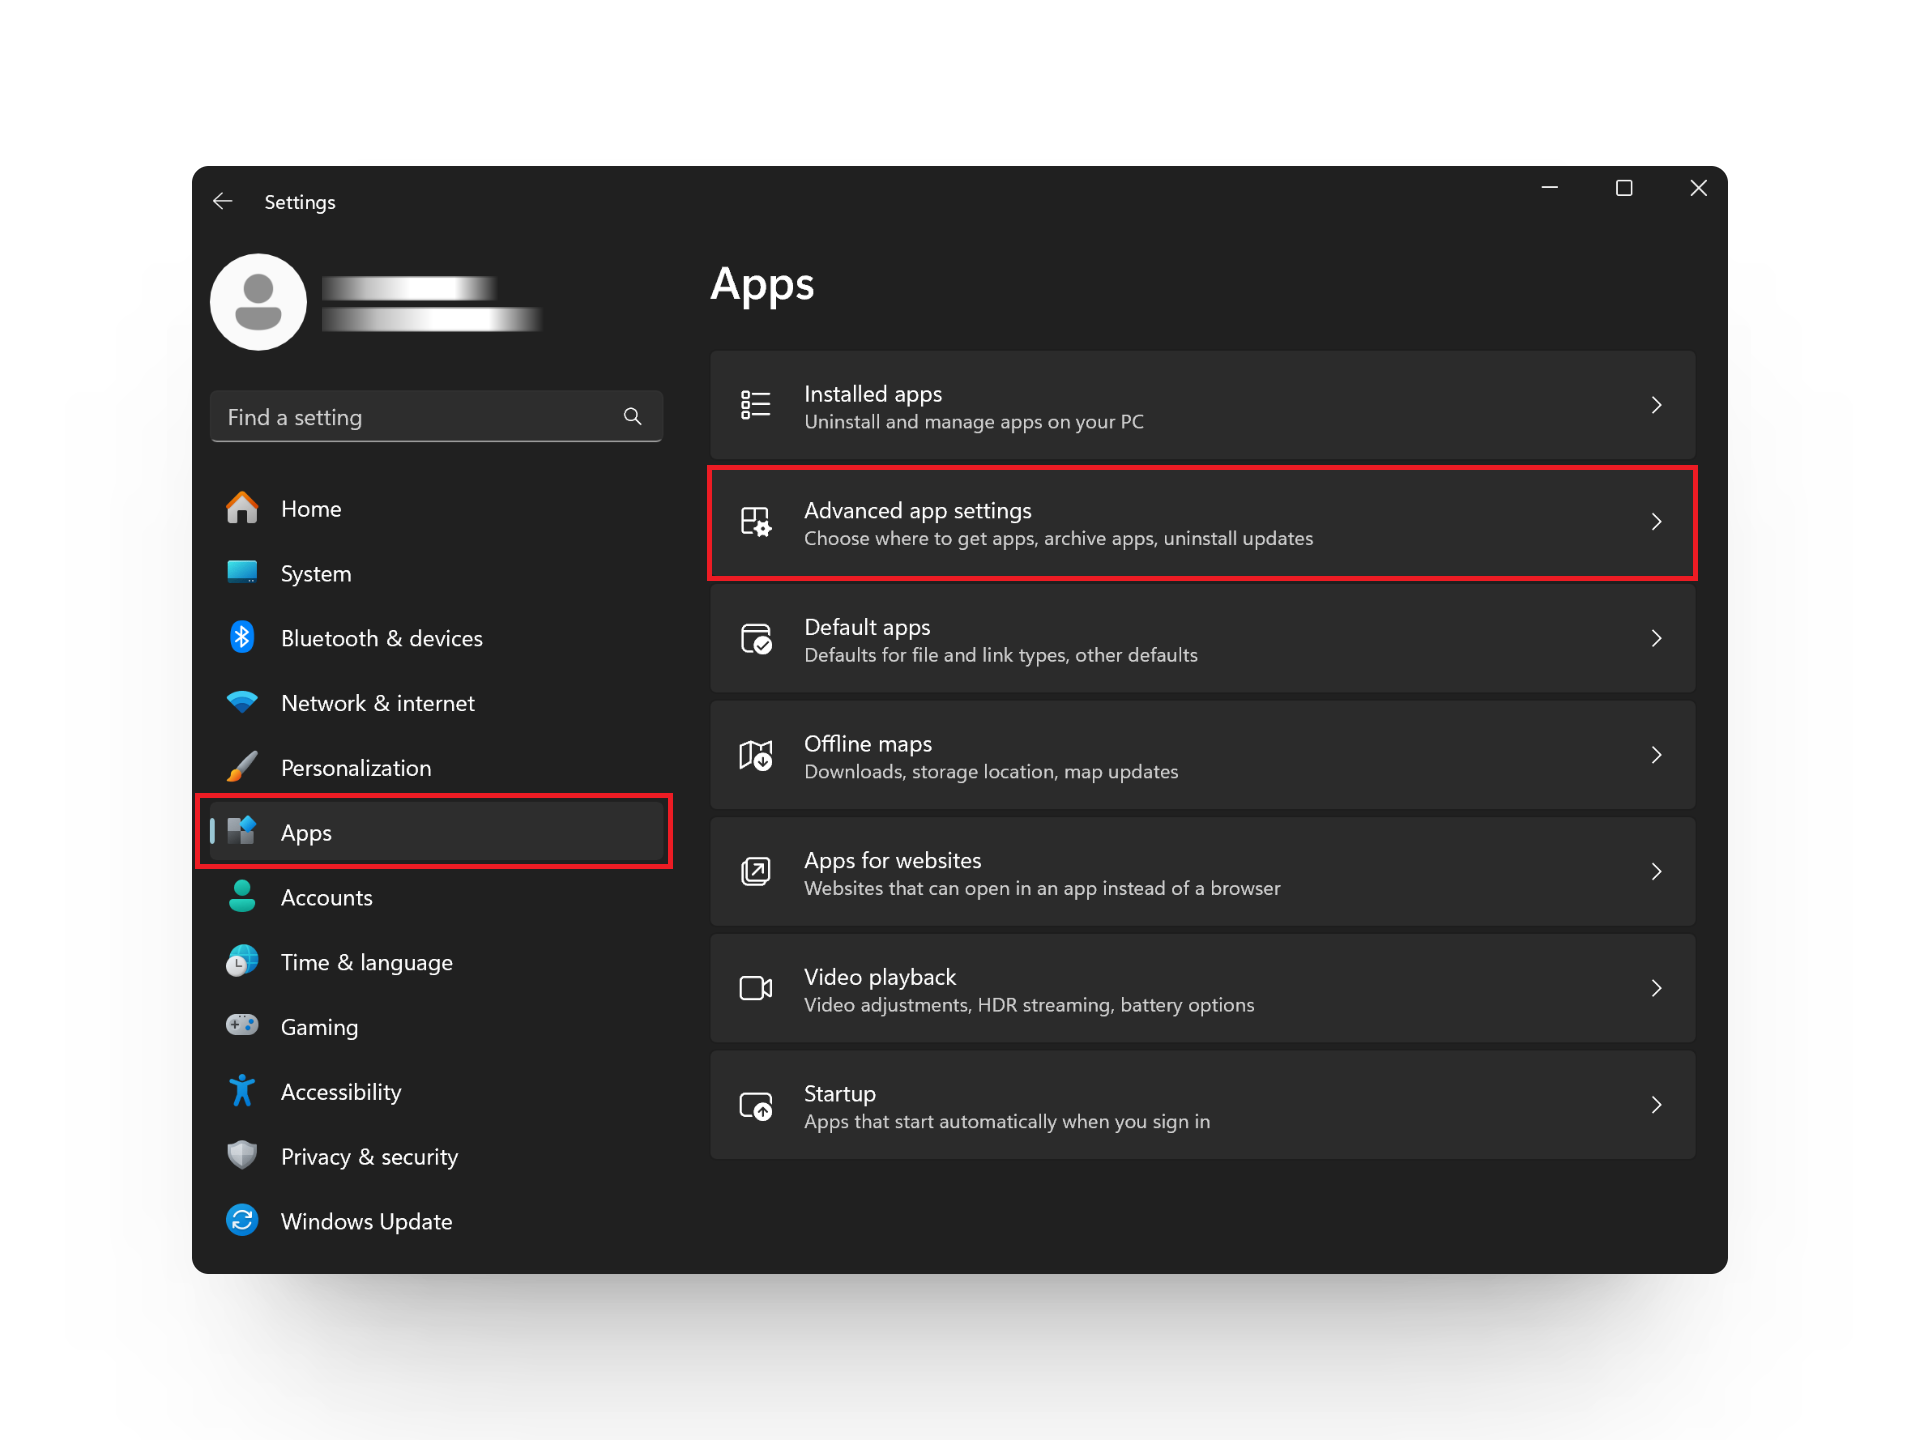
Click on Advanced App Settings
- Click to open the drop-down menu for Choose where to get apps and select Anywhere .
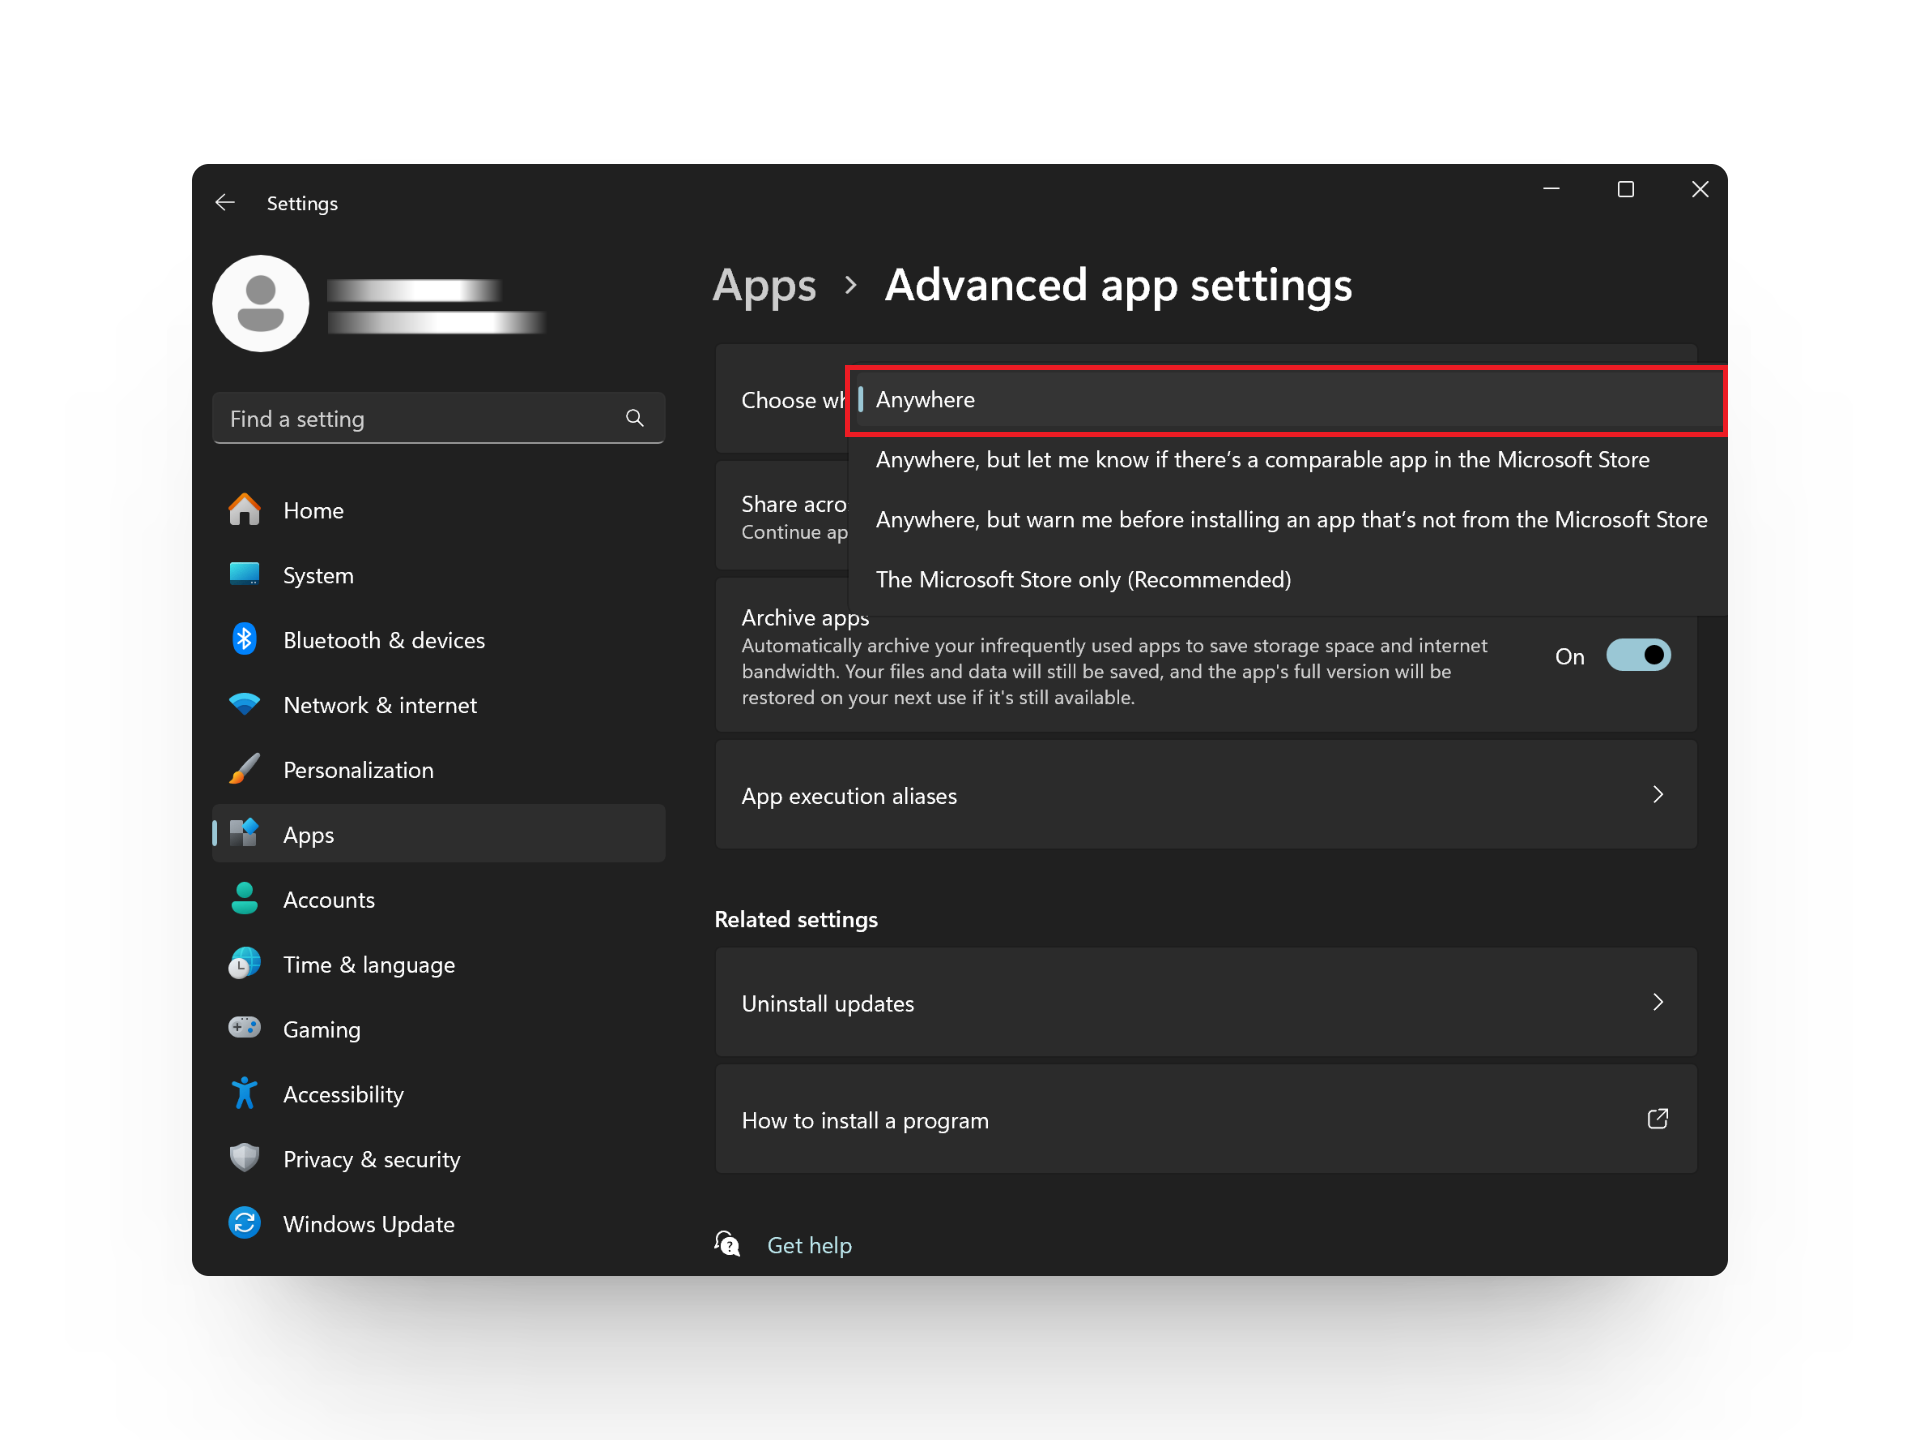
Select Anywhere
2. Disable S Mode
When S Mode is active, it restricts your computer to only install and run apps available in the Microsoft Store. You can disable this mode to install any third-party app from your preferred platform.
- Open the Settings app.
- Go to System > Activation .
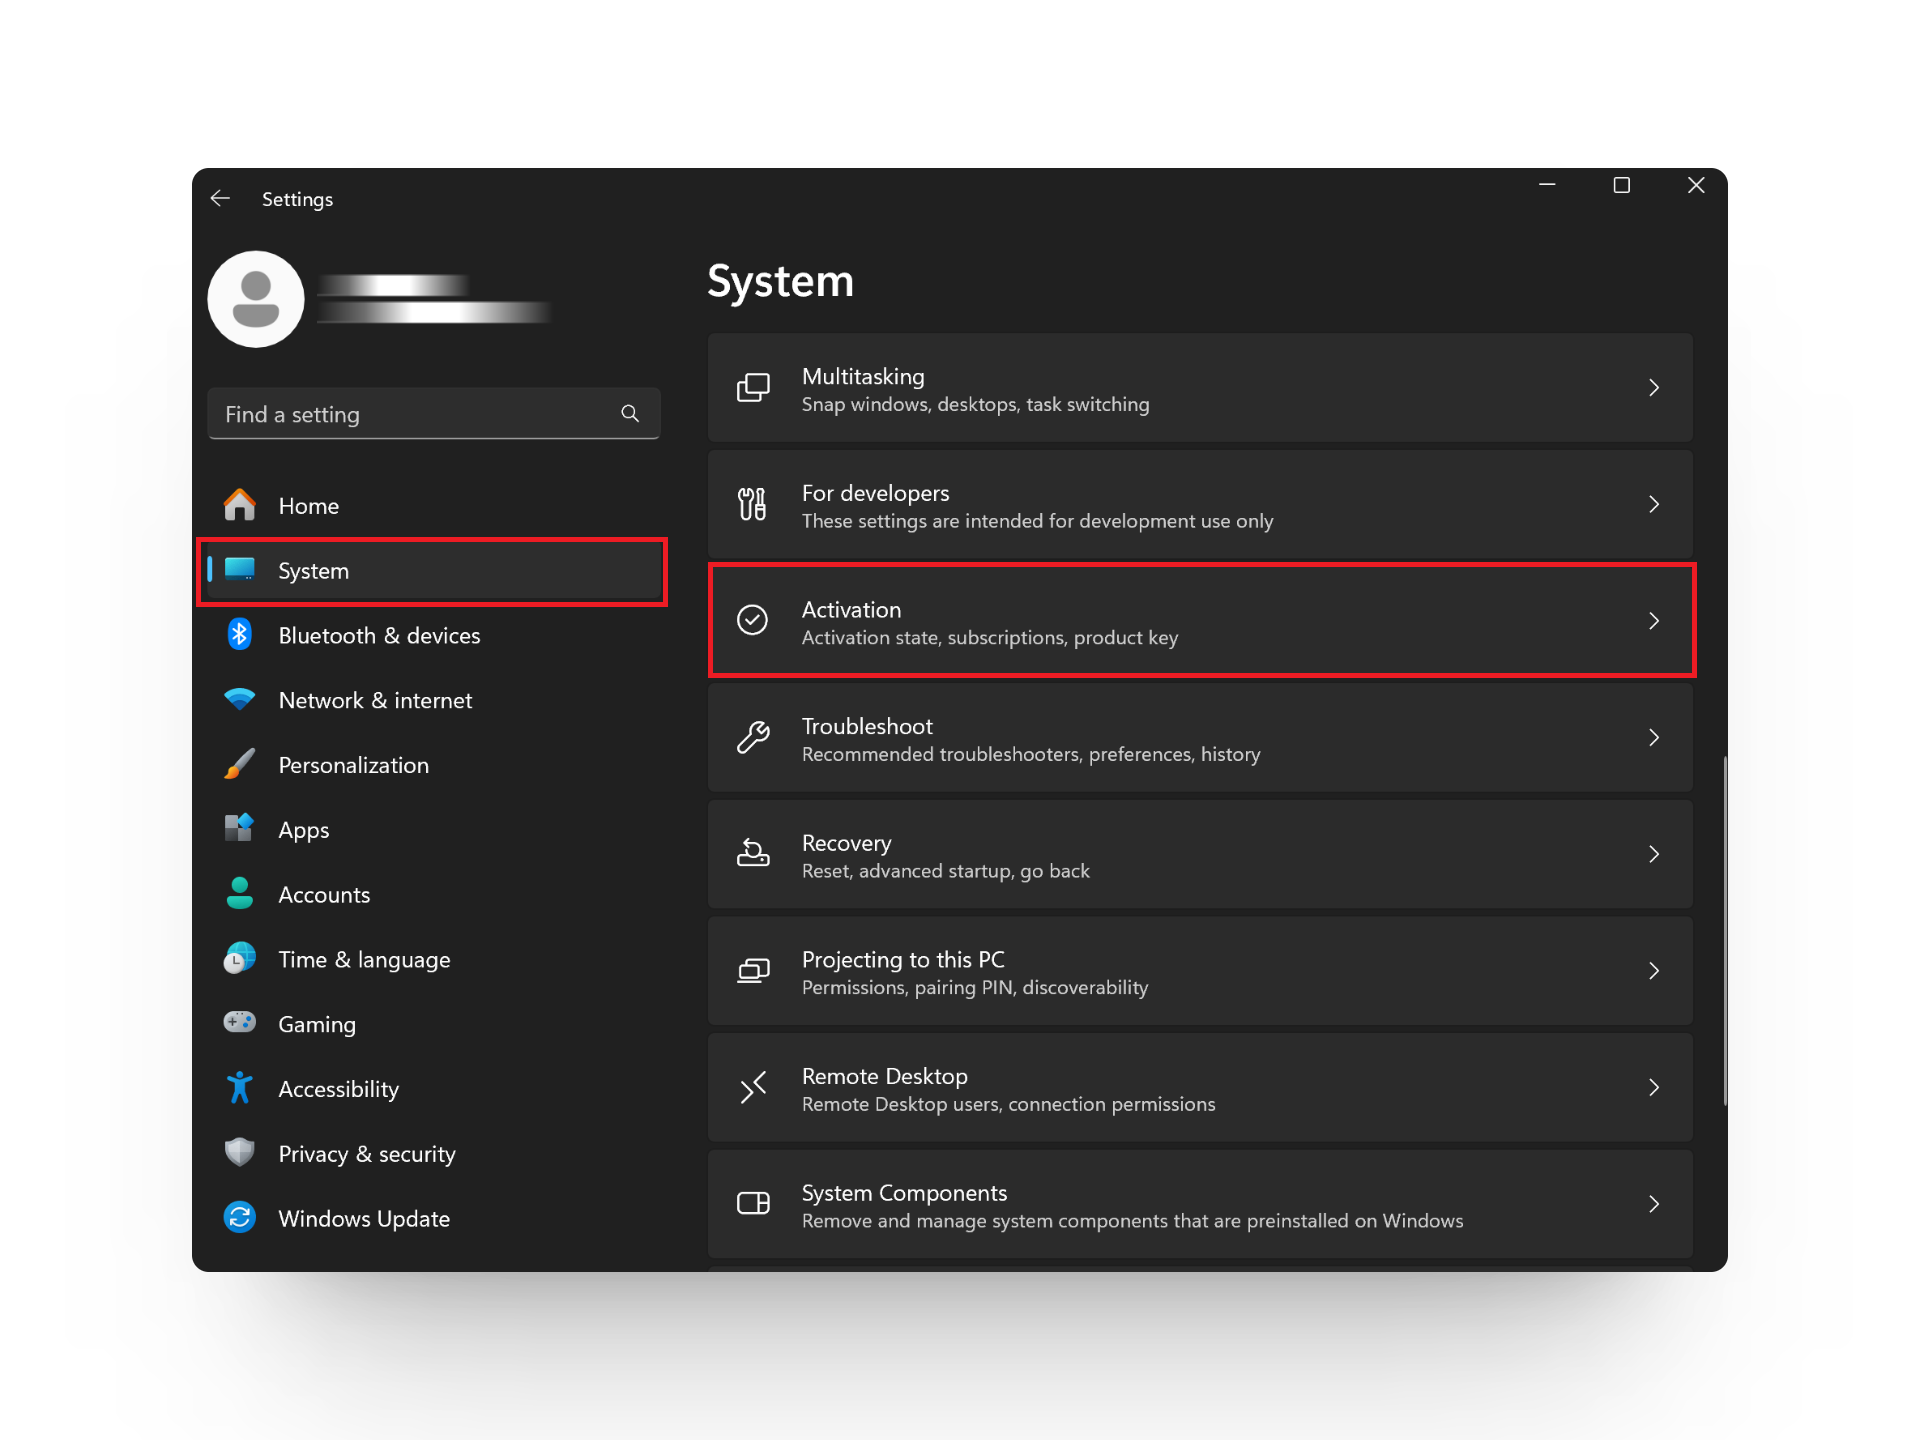
Click on Activation
- Select S Store and hit the Open Store button.
- Click on the Get button.
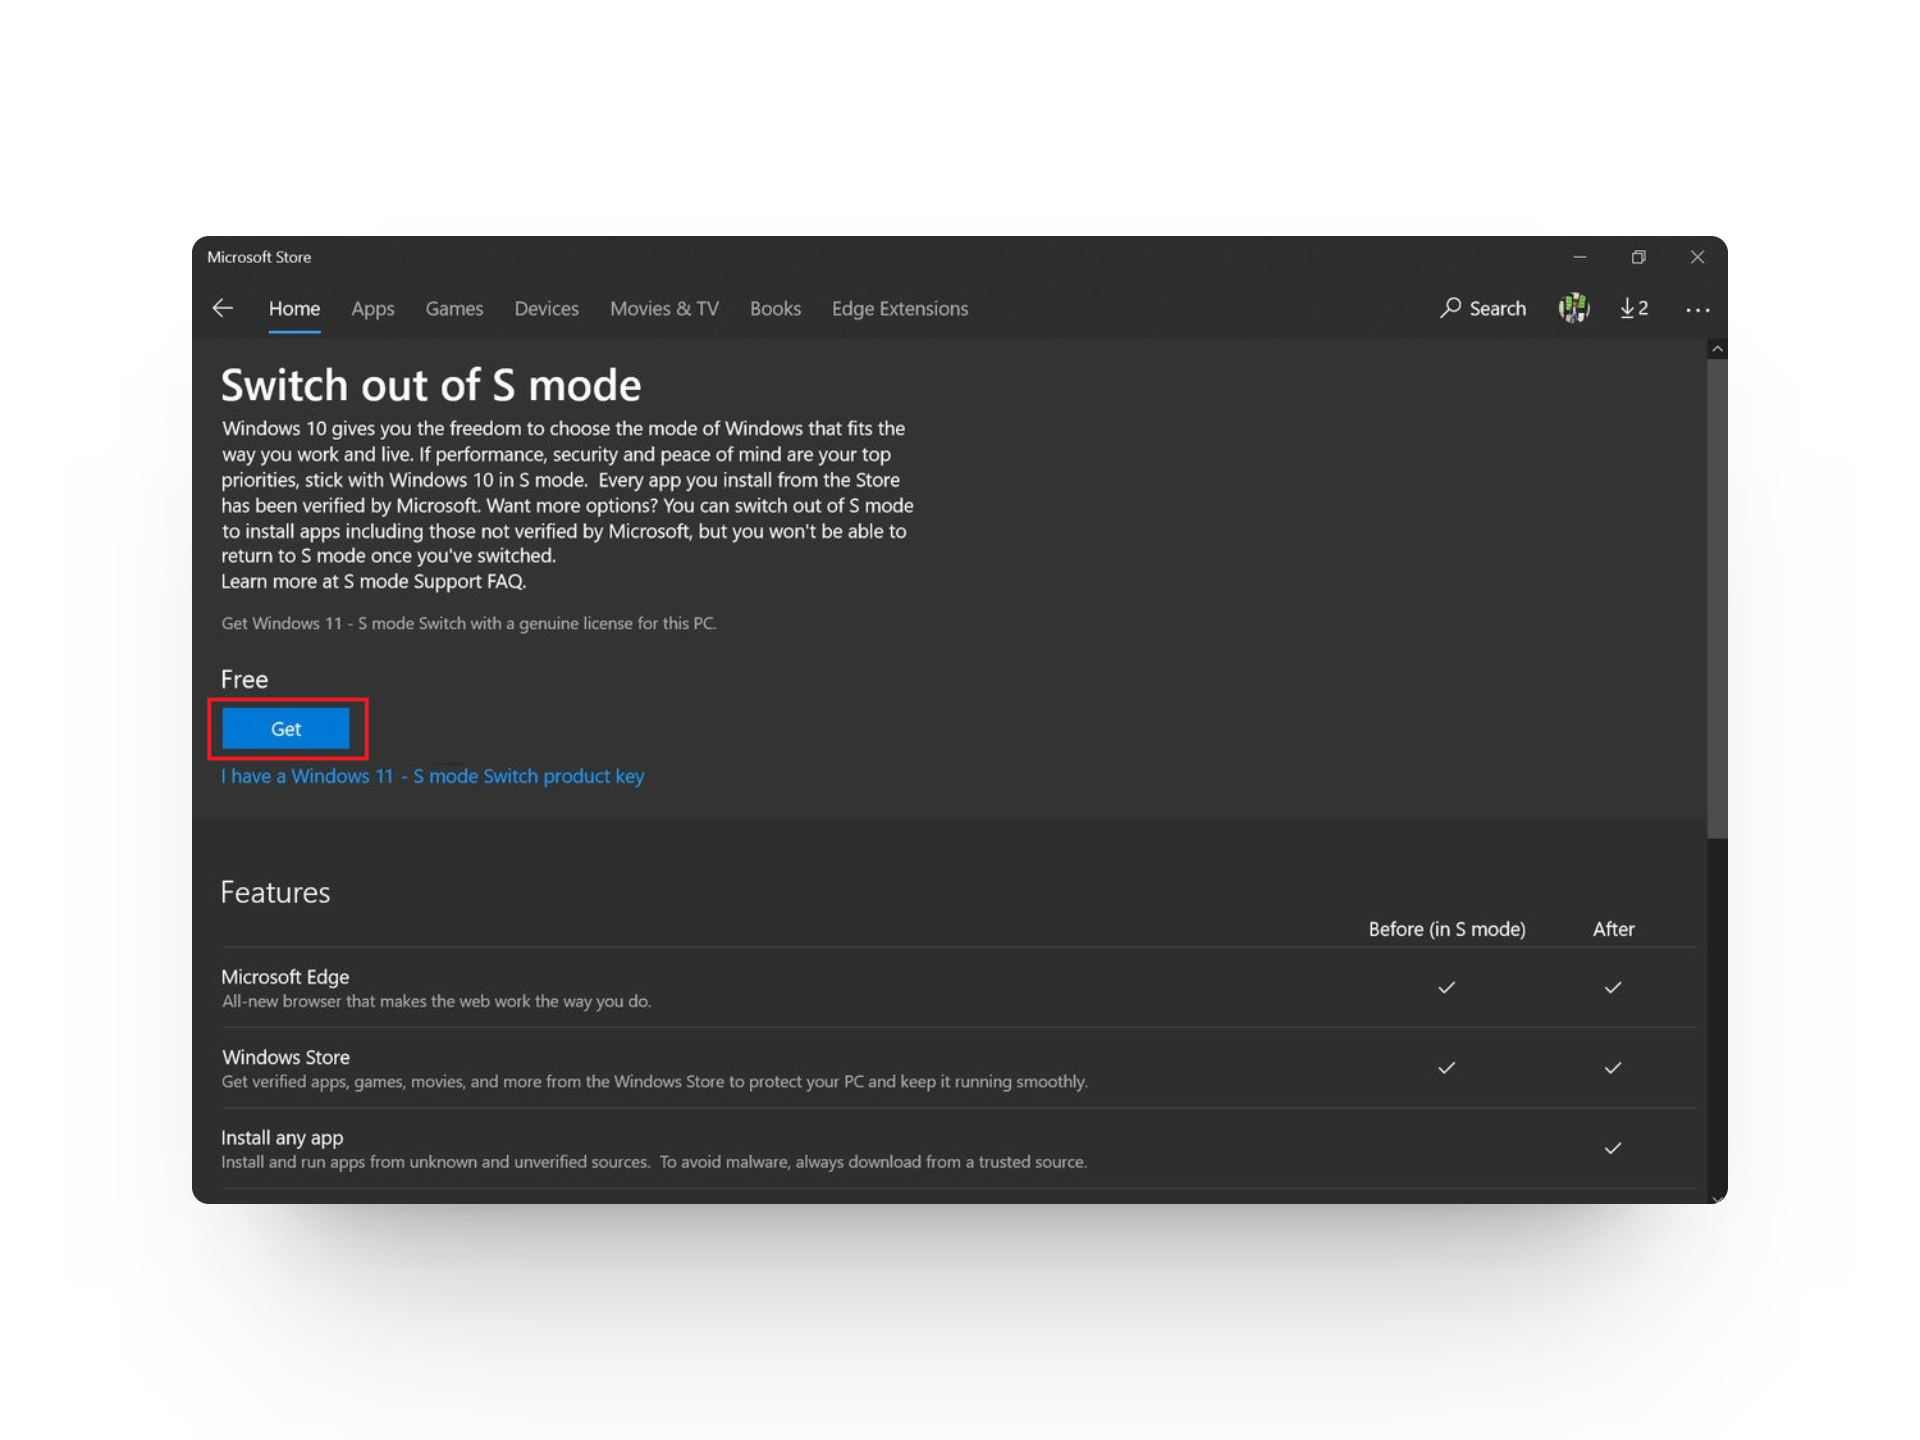
Click on Get
- Continue following the on-screen instructions to exit S mode.
3. Use the Command Prompt
The Windows Command Line Interpreter can be a convenient alternative method, especially for those comfortable using it. With one command, you can apply the desired changes effortlessly.
- Press Windows key + S to open Windows Search .
- Type cmd and select Run as administrator .
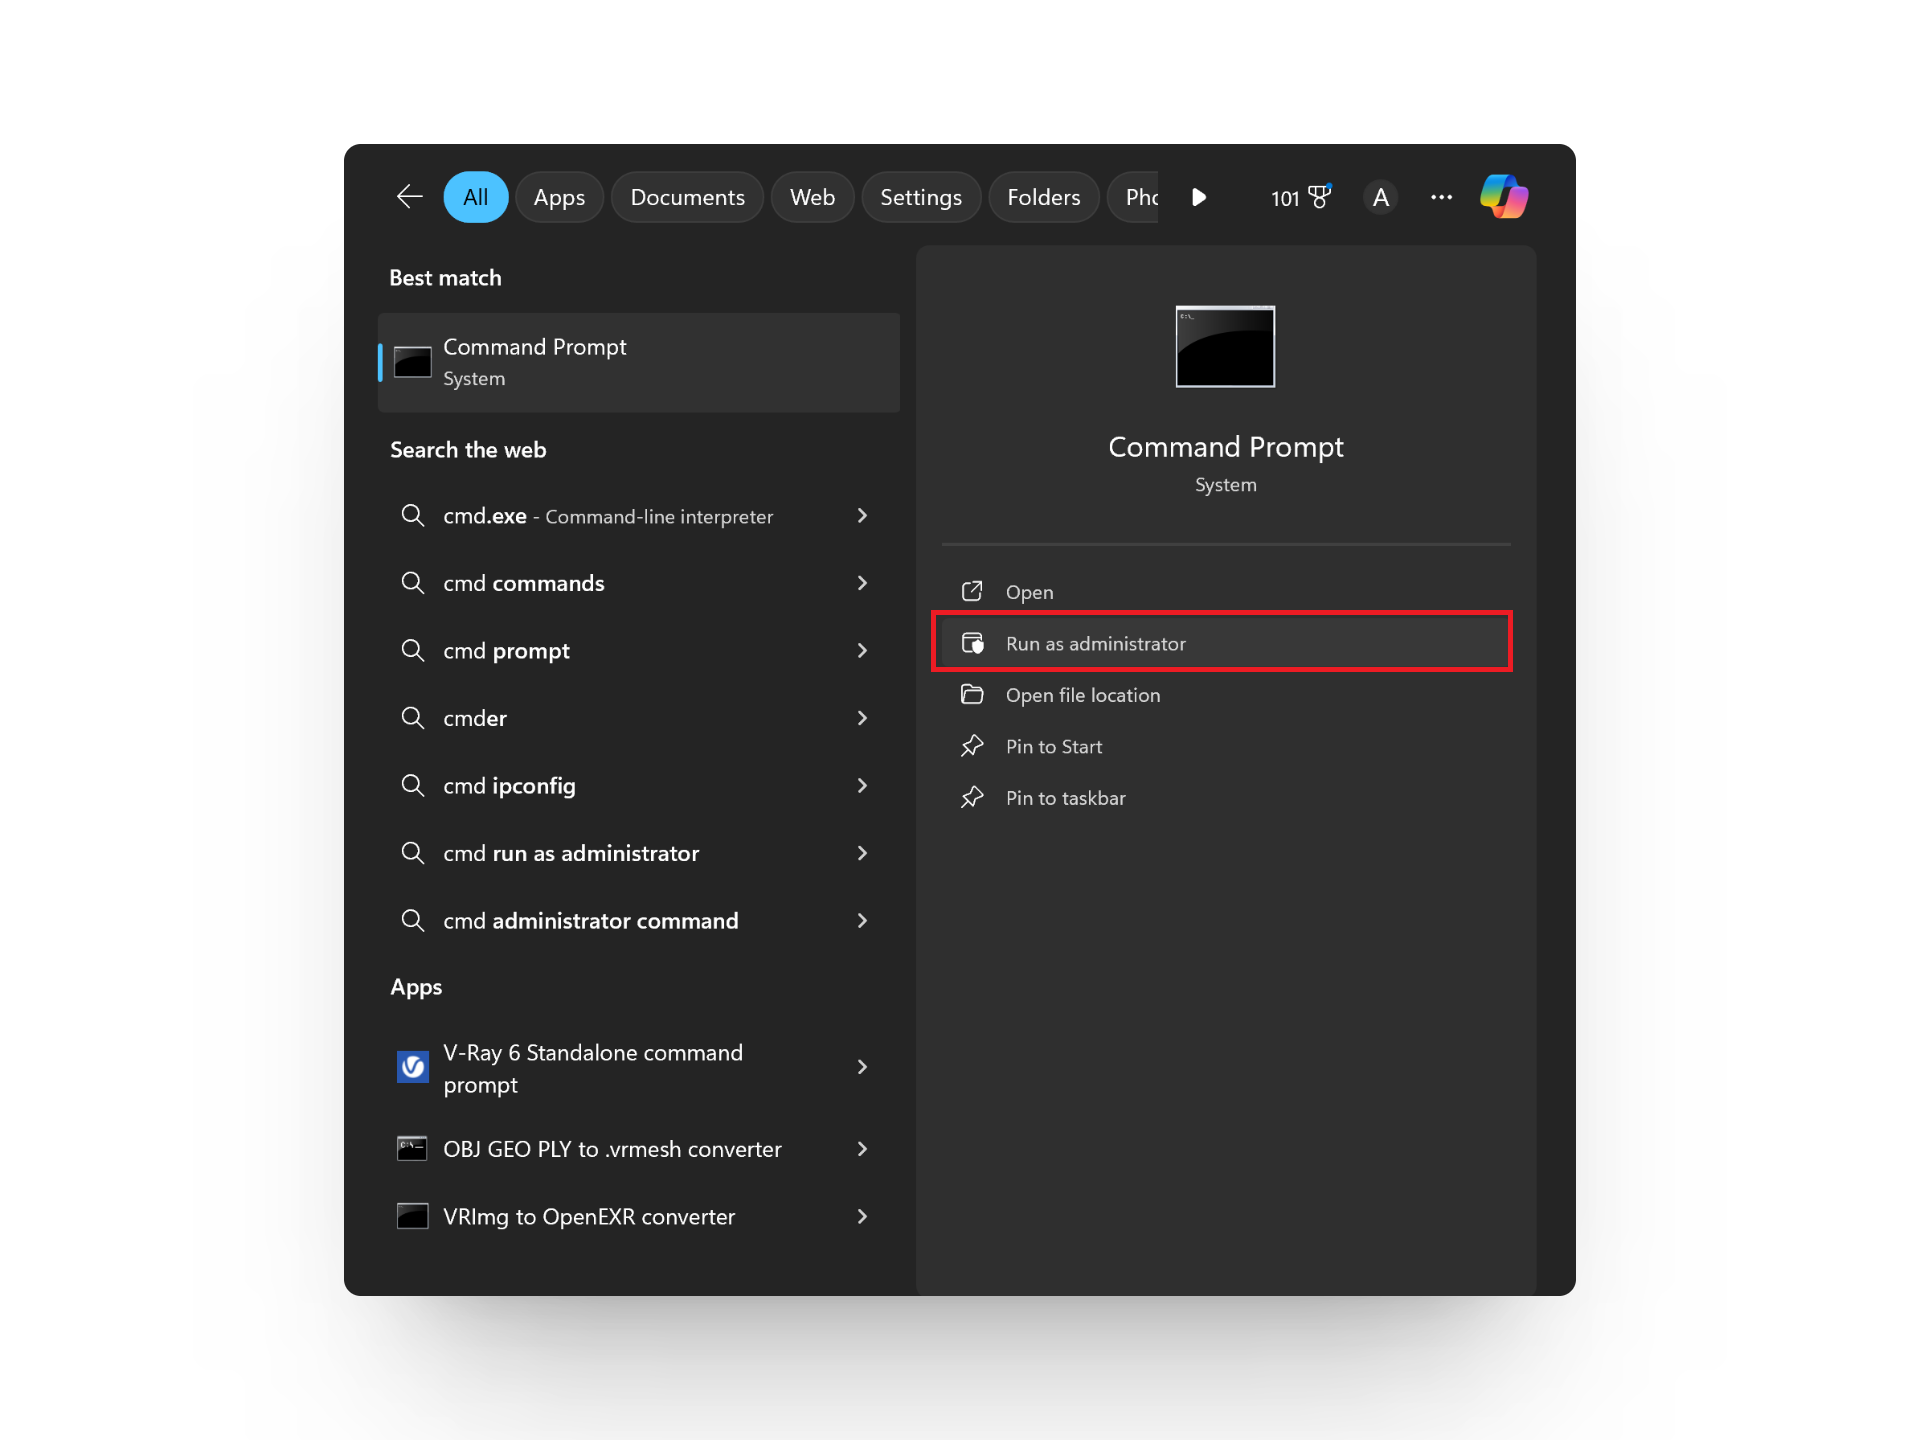
Select Run as administrator
- Enter the following command in the prompt and hit Enter to execute it:
HKEY_LOCAL_MACHINE\SOFTWARE\Microsoft\Windows\CurrentVersion\Explorer /v AicEnabled /t REG_SZ /d Anywhere
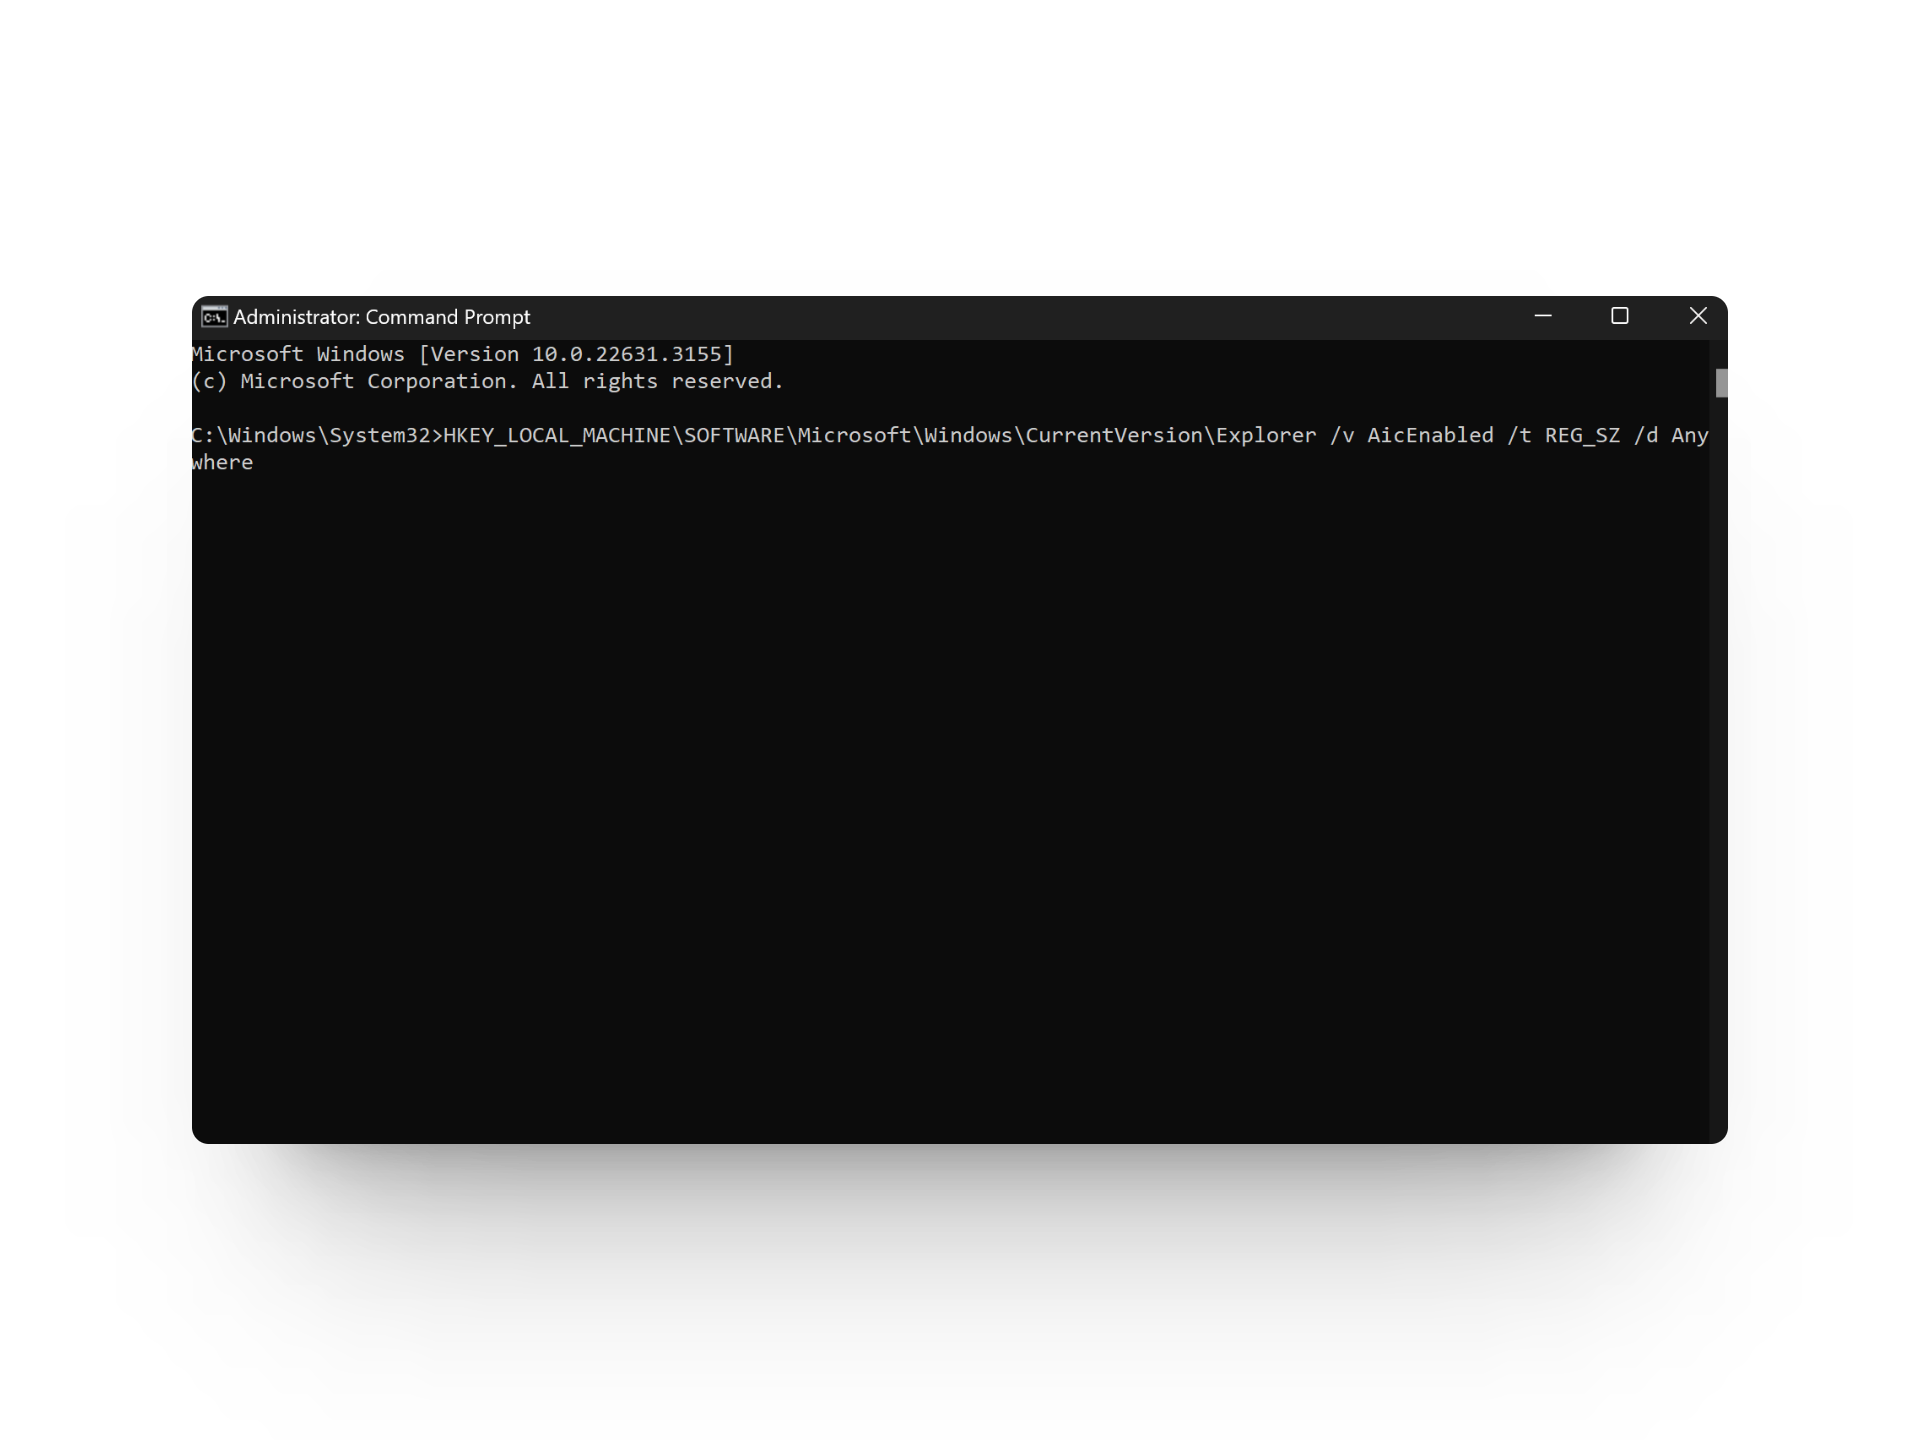
Press the Enter key
4. Via the Group Policy Editor
If your PC is part of an organization or if you need to apply settings across multiple PCs within that organization, you can use the Group Policy Editor.
- Press Windows key + R to open the Run dialog box.
- Type in gpedit.msc and click OK .
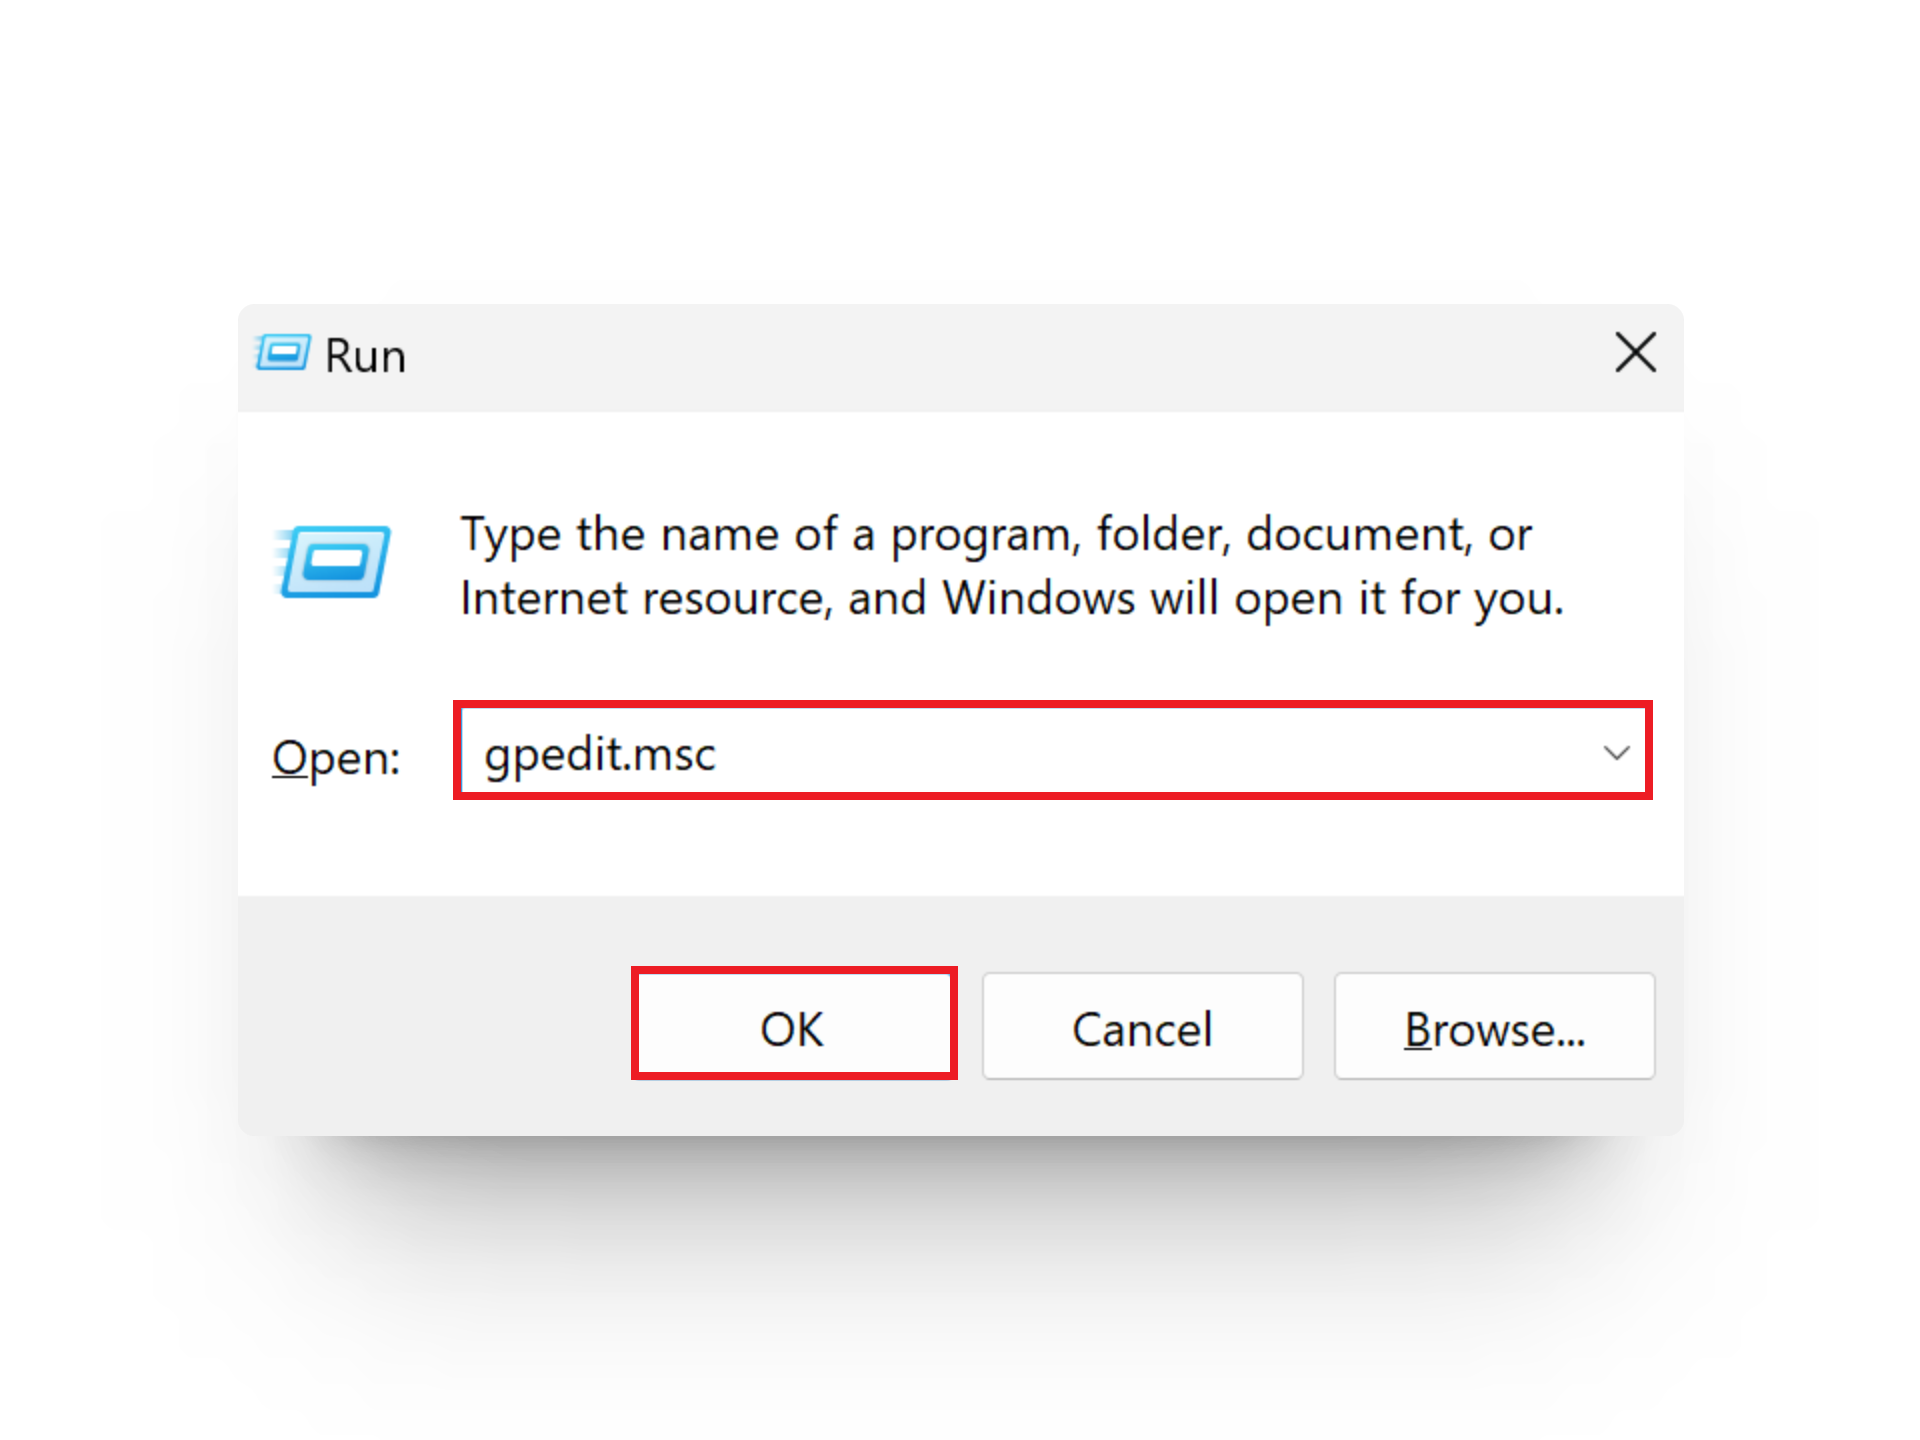
Type gpedit.msc and click OK
- Navigate to Computer Configuration > Administrative Templates > Windows Components > Windows Defender SmartScreen > Explorer .
- Double-click on Configure App Install Control .
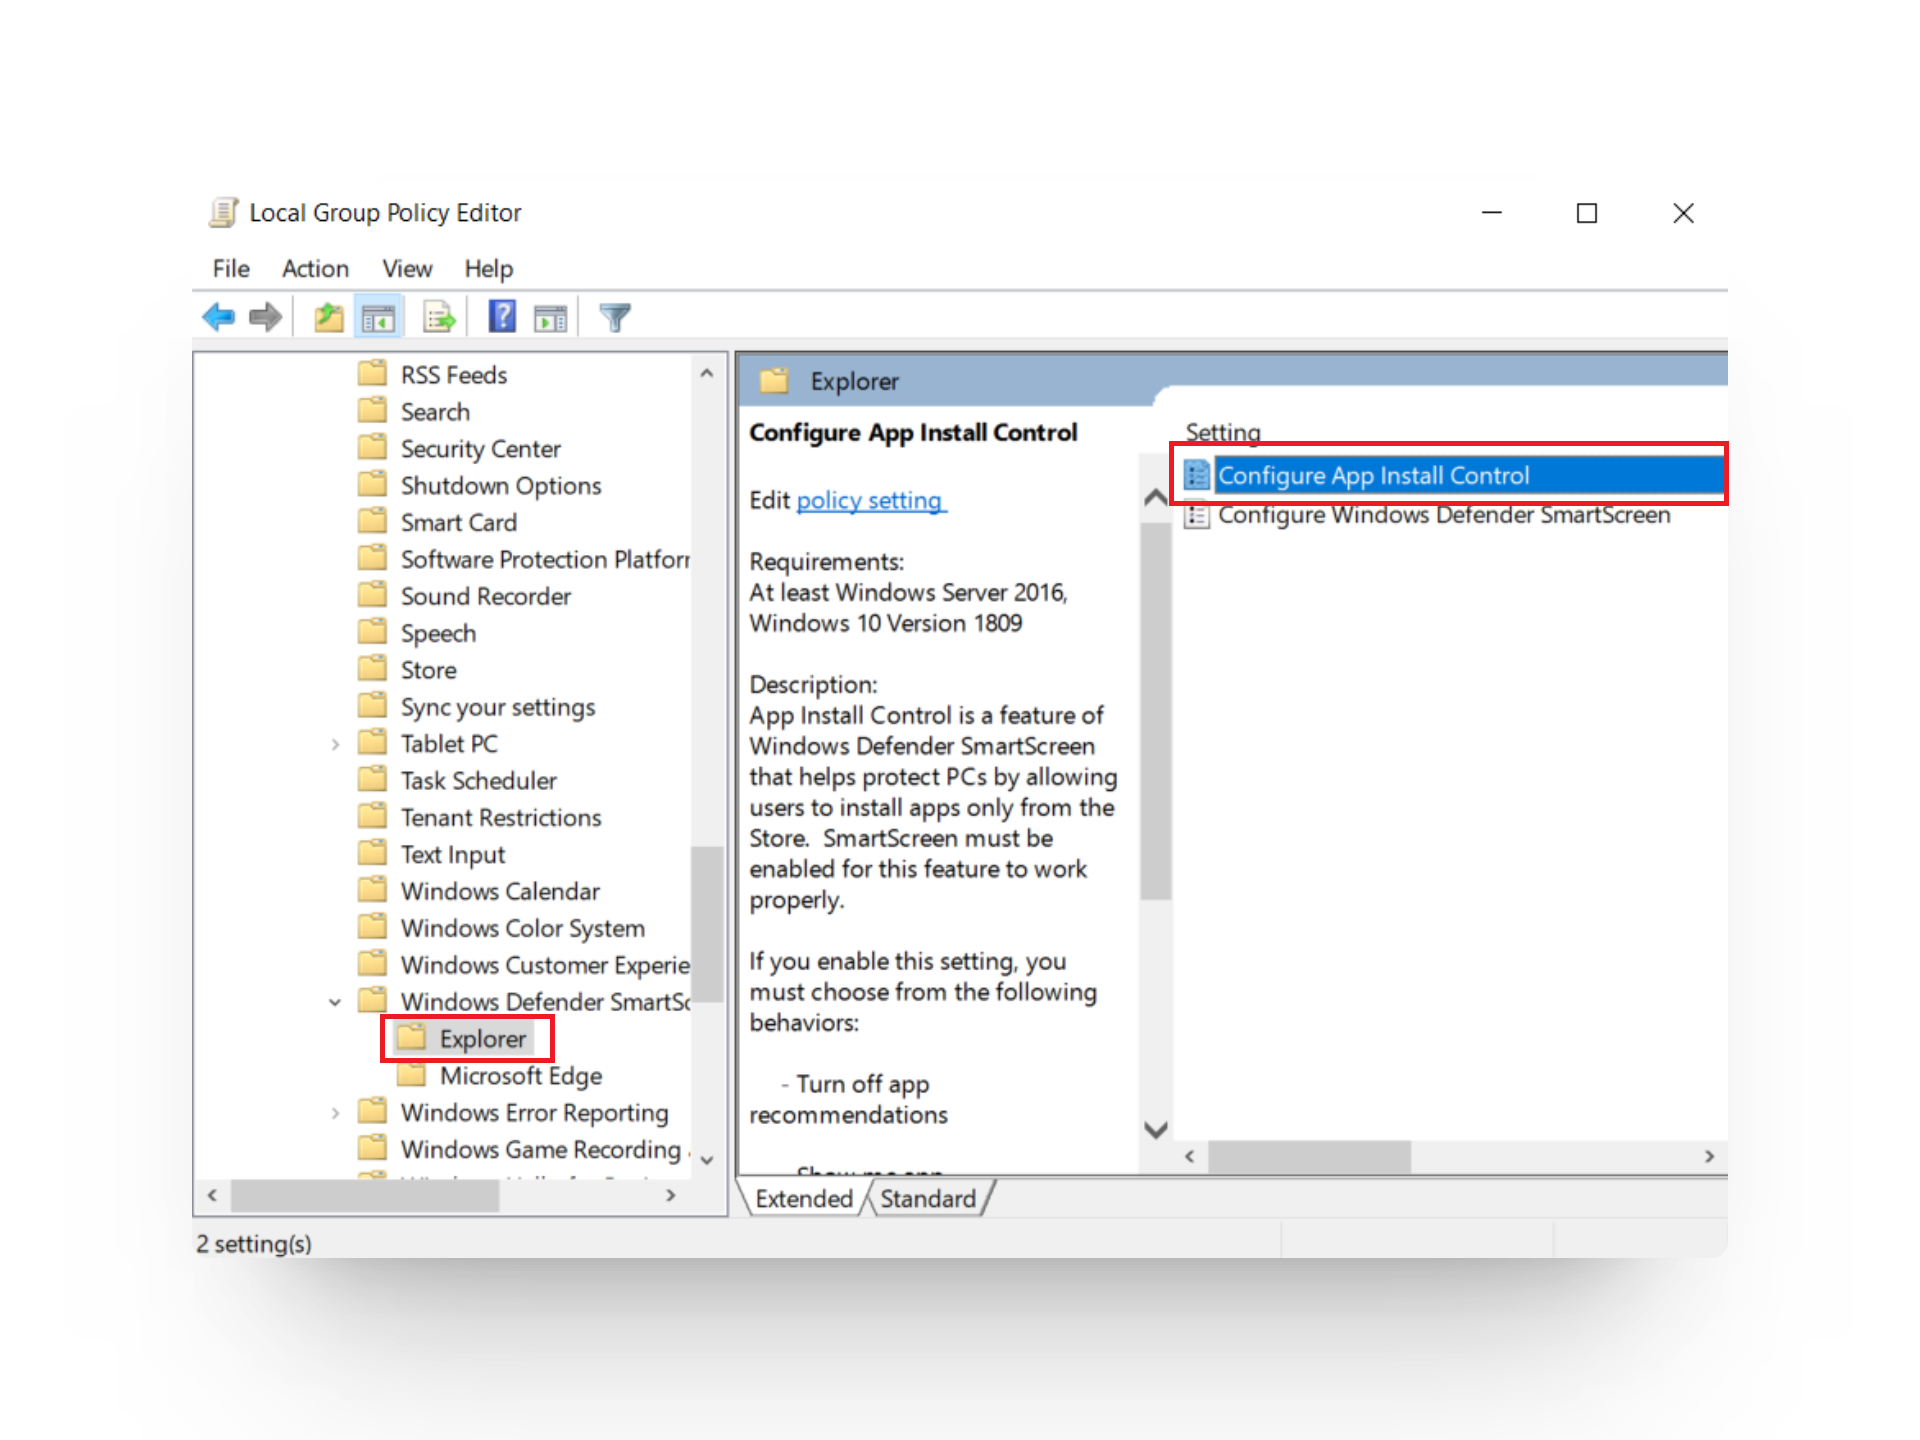
Double-click Configure App Install Control
- In the pop-up window, choose Not Configured or Disabled , and click OK .
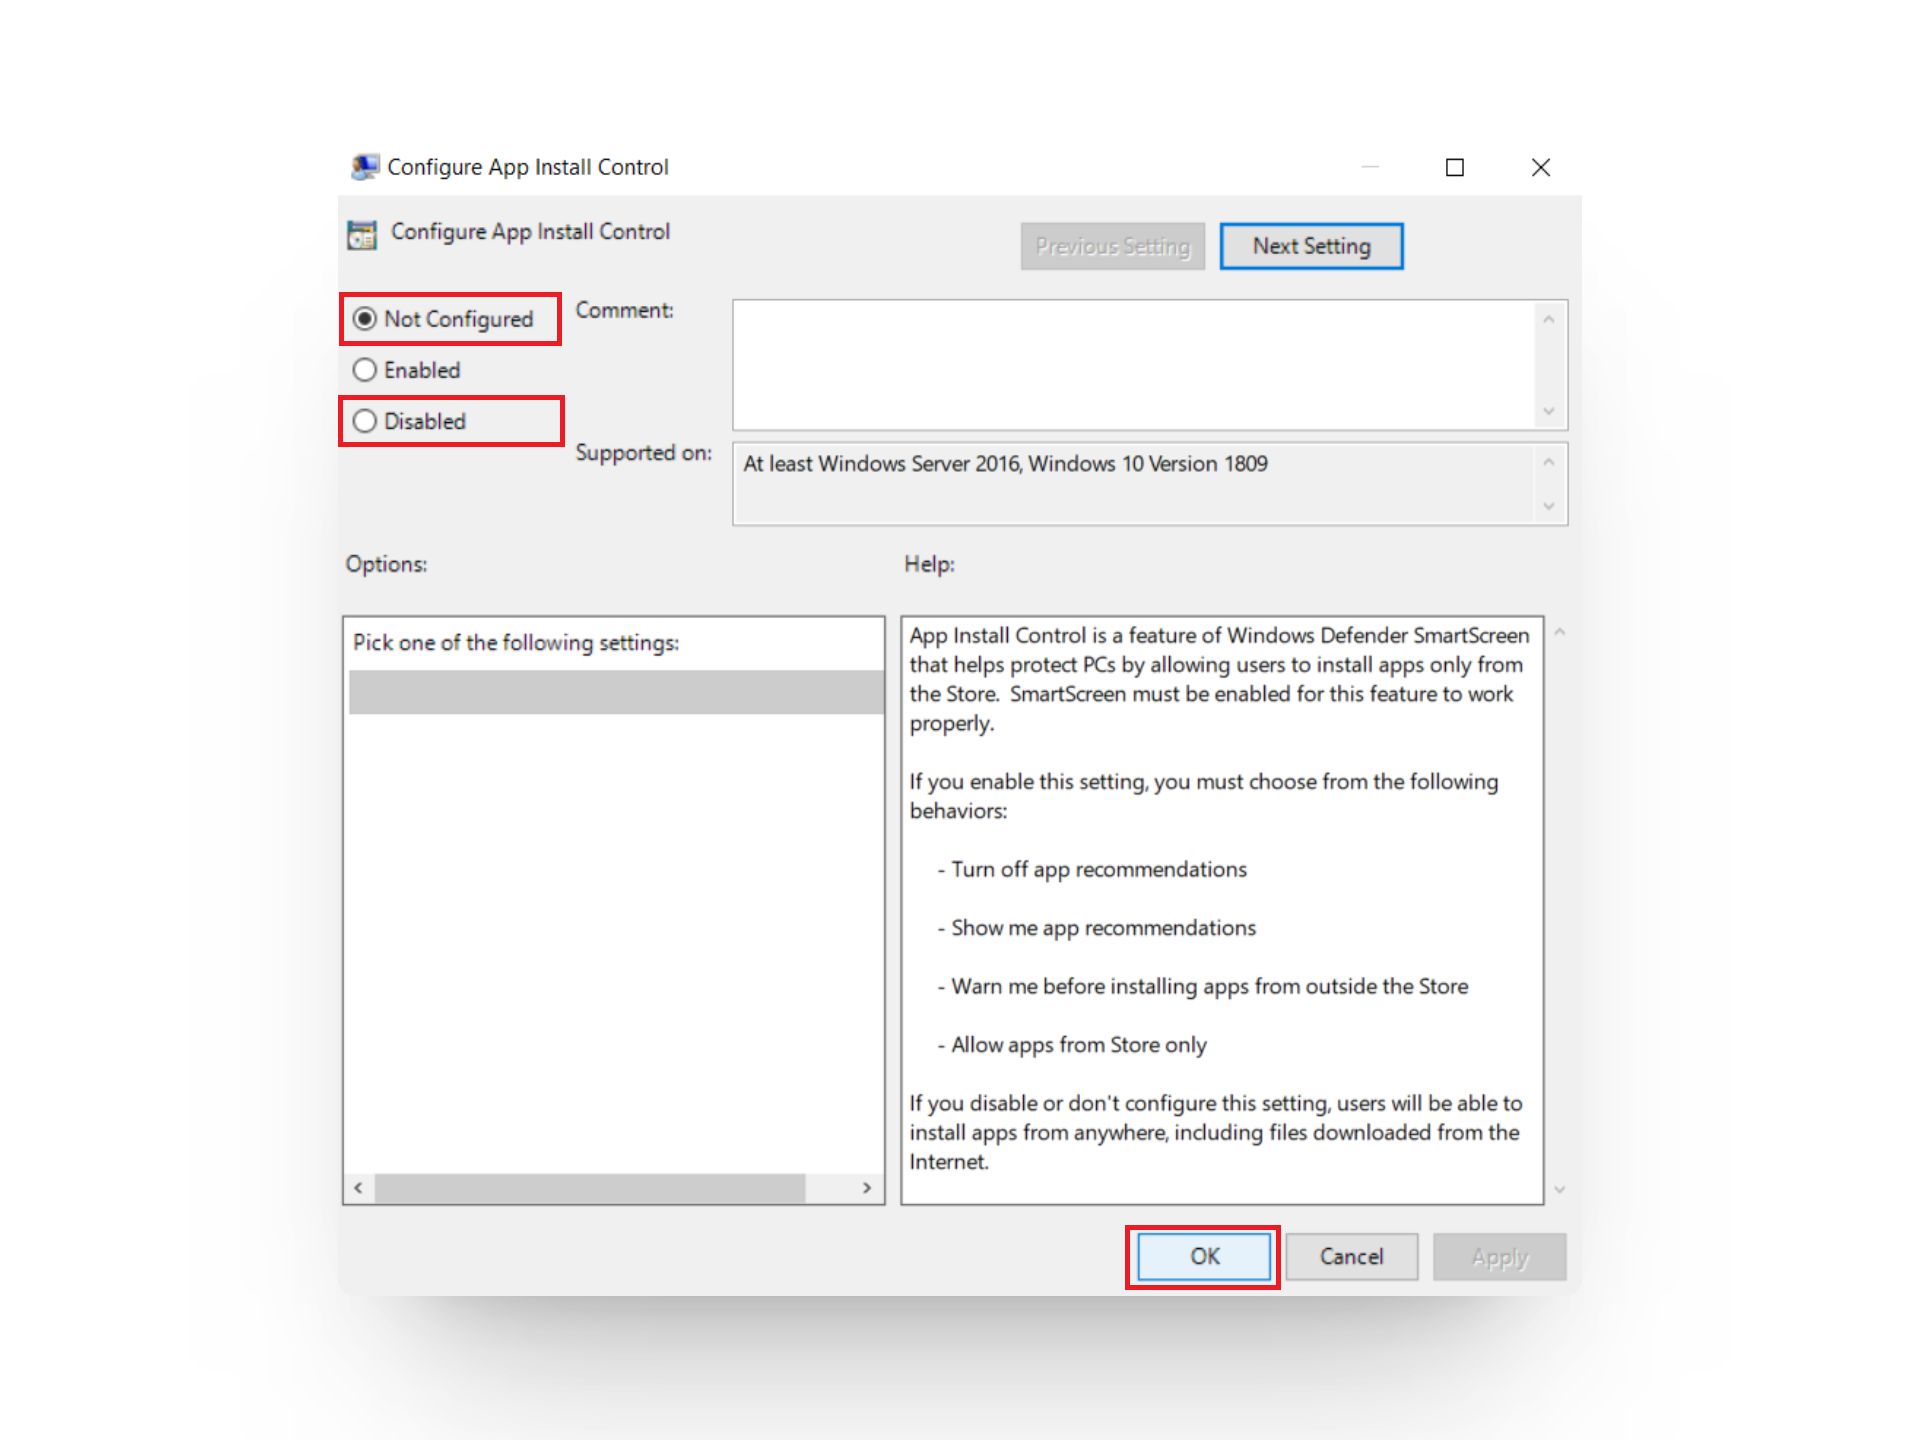
Click on OK
5. With the Registry Editor
As a final method, you can edit registry values to configure settings on your system. It’s crucial that this approach be undertaken with caution, and it should only be considered if none of the previous methods prove effective.
Editing registry values requires extreme caution because any errors during this process may lead to system failures or corruption. Before proceeding, it’s important to create a backup of the Windows Registry for added security.
- Press Windows key + S to open Windows Search .
- Search for Registry Editor and click on Open .
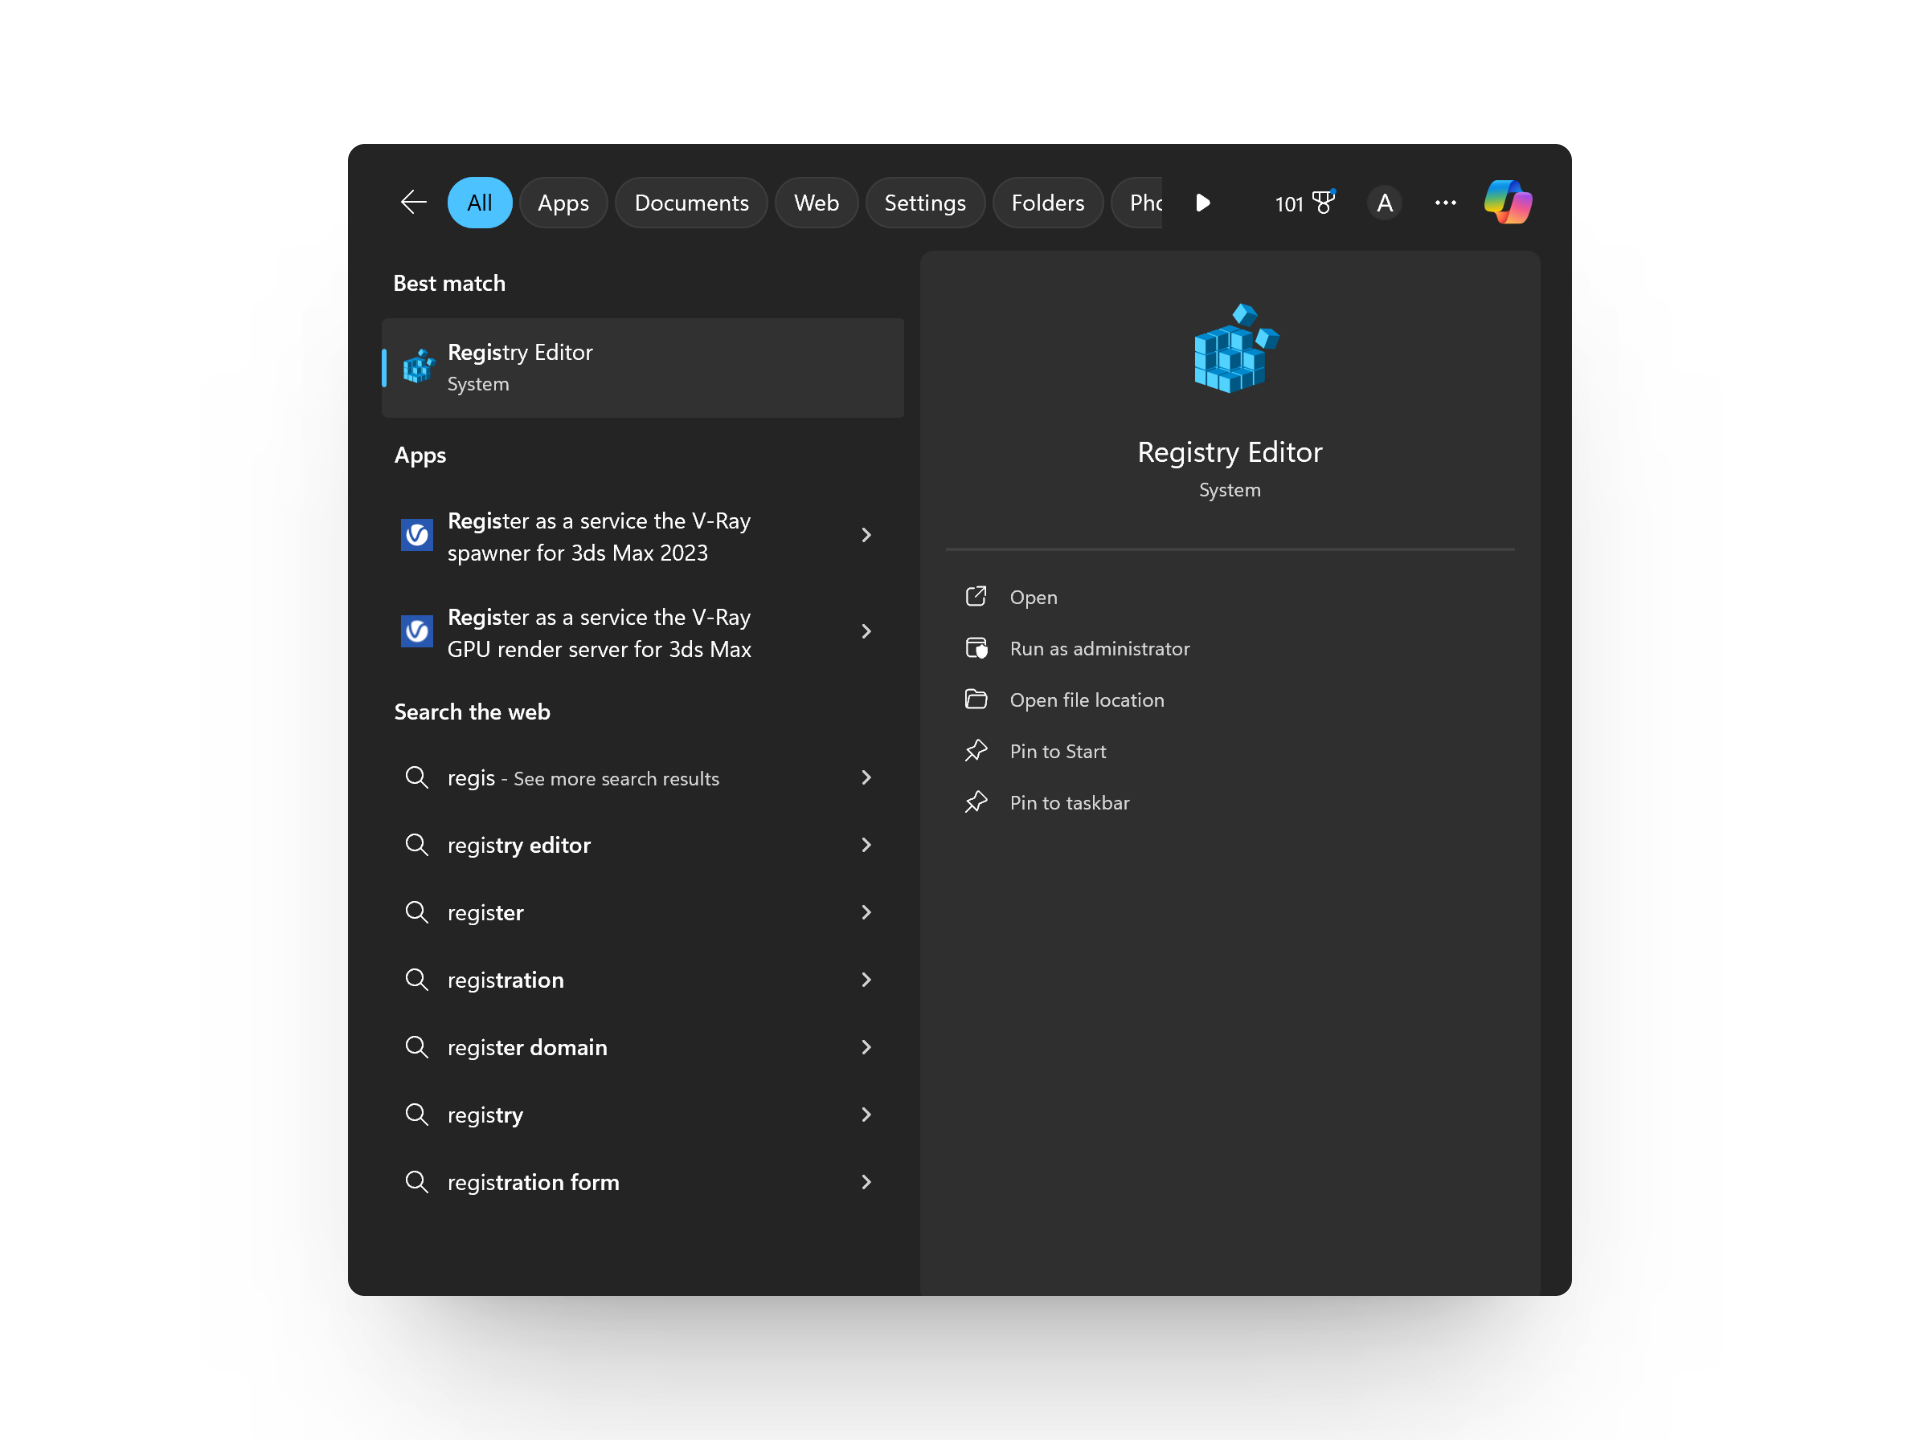
Click on Open
- Navigate to HKEY_LOCAL_MACHINE > SOFTWARE > Microsoft > Windows > CurrentVersion > Explorer .
- Right-click on Explorer and click New .
- Choose String value and name it AicEnabled .

Click on New > String Value
- Double-click on AicEnabled and change its Value data field to Anywhere .
- Click OK and close the Registry Editor.
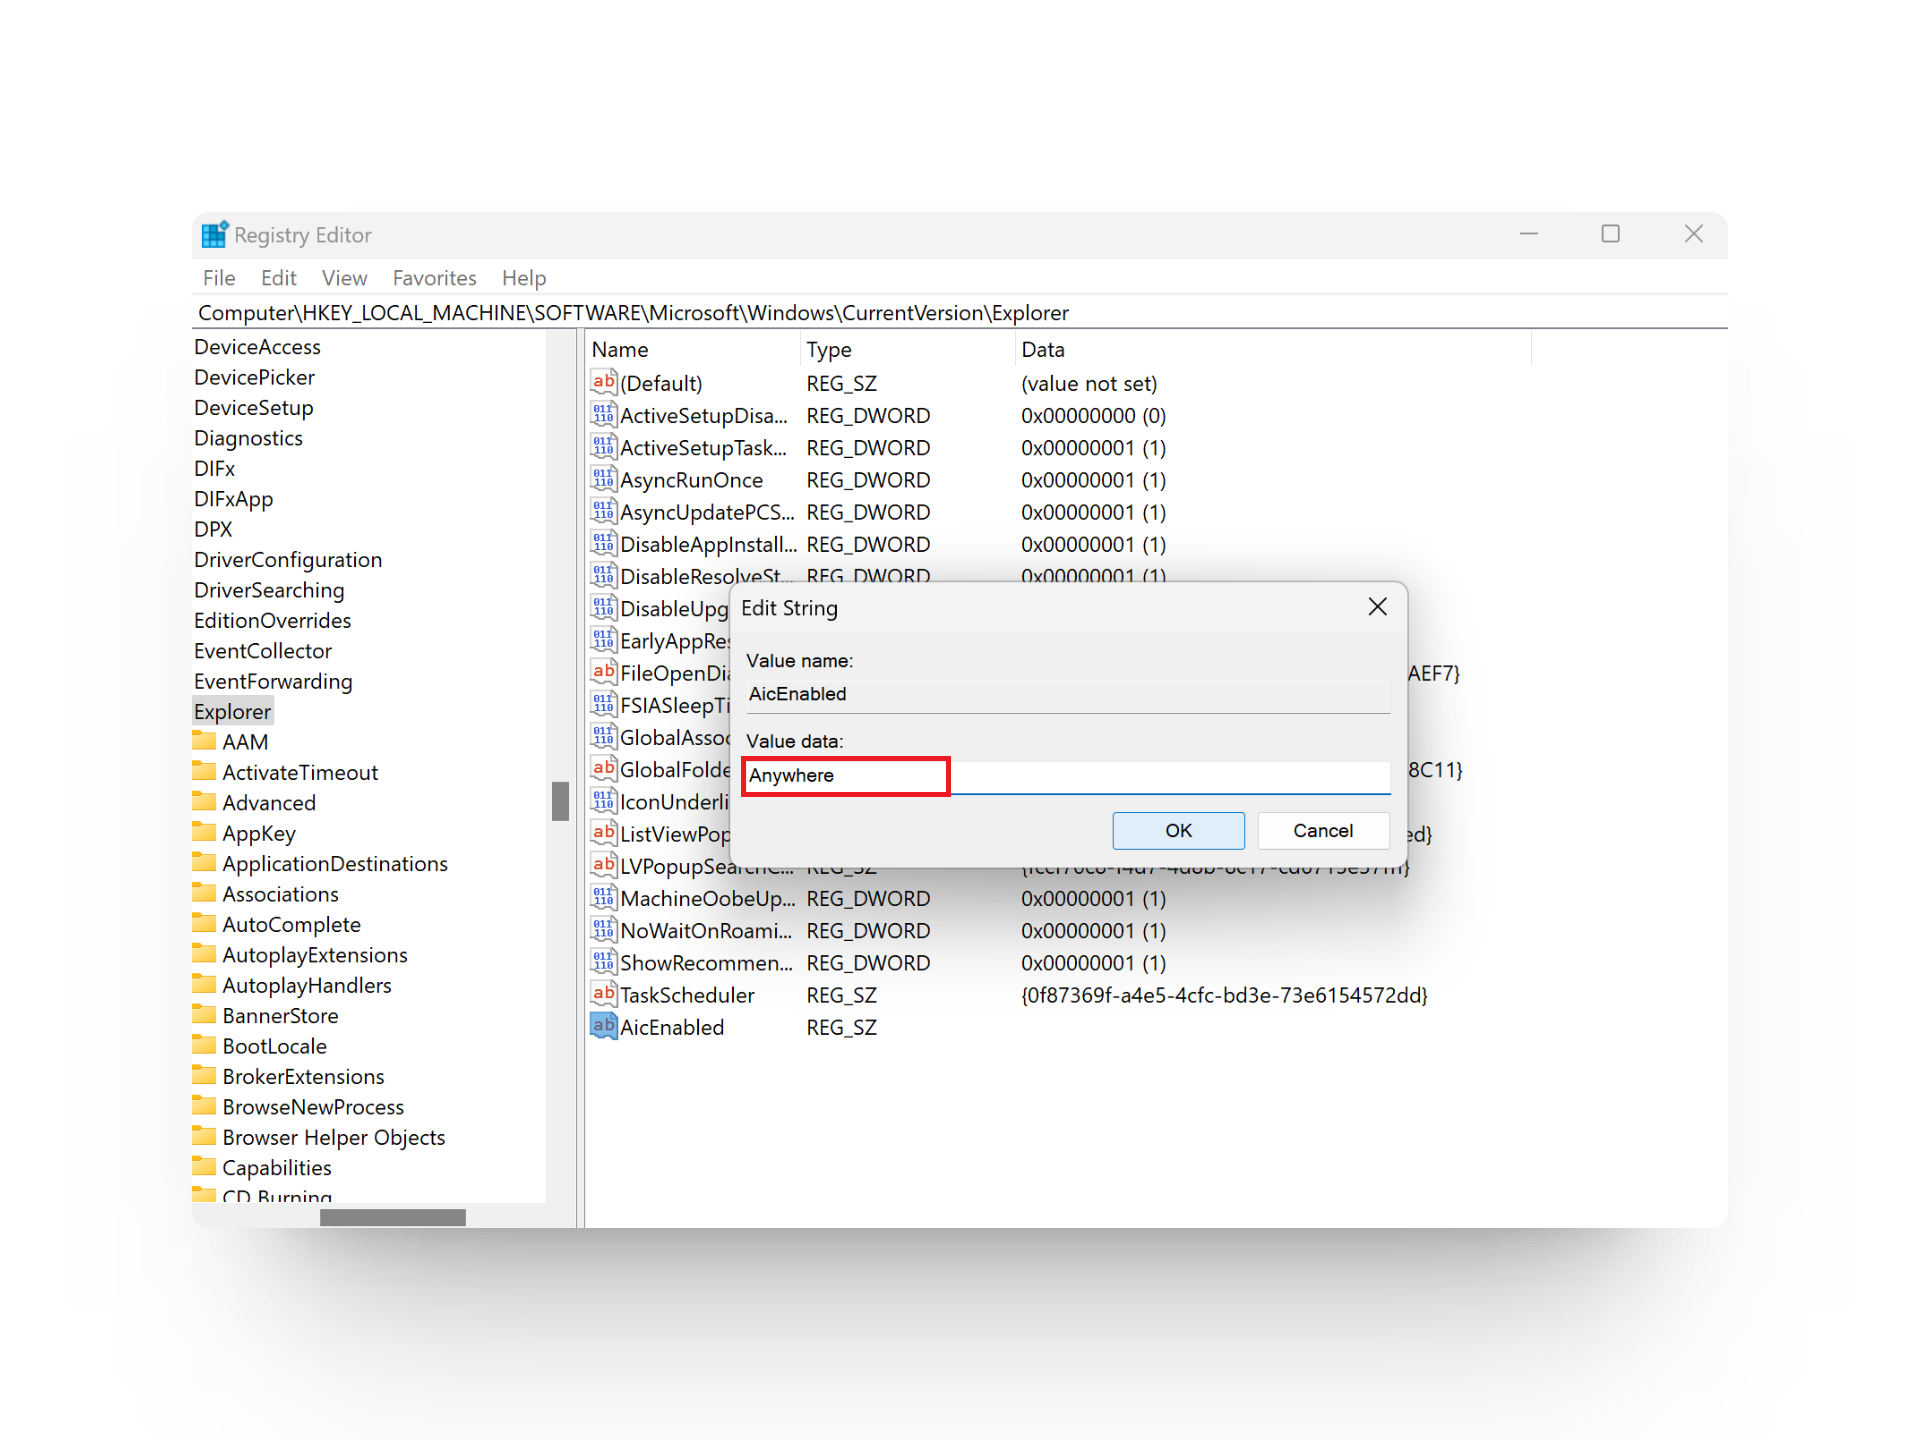
Type Anywhere and click OK
- Restart your PC to apply these changes.
-
Yes, you can re-enable Microsoft-verified apps after disabling them. Simply go to Settings > Apps > Advanced App Settings > Choose where to get apps, and then select “Prefer apps from the Microsoft Store.”
Not necessarily. While Microsoft’s verification process minimizes risks, you can take precautionary measures when downloading from non-verified sources. This includes checking reviews, scanning download links, using antivirus software, and more.
Unfortunately, no. The verification requirement applies to all applications. You can either choose to install only verified apps or opt to install any app, verified or not. There’s no option to selectively disable verification for specific apps.
If you know how to verify legitimate sources and only download applications from reputable developers, disabling Microsoft-verified apps may not expose your system to immediate threats. However, if you share your PC with others who may not be familiar with this, or if you aren’t confident in your ability to verify sources, it’s best to keep the feature enabled.
How to Fix “Printer is in an error state” Issue?
The error “ WinRAR Error: Next Volume Is Required ” usually appears when you’re extracting a multi-part RAR archive and WinRAR can’t find (or can’t correctly identify) the next file in the sequence . This often happens when a volume is missing , stored in a different folder , or renamed in a way that breaks the archive’s expected order .

In this guide, we’ll go over the most reliable fixes confirmed by affected users, along with what each method is doing behind the scenes so you can choose the right one for your situation.
Important: To extract multi-volume archives, you should always start extraction from the first file in the set. This is usually file.part1.rar , or (in older sets) the main .rar file that comes before .r01 , .r02 , and so on.
1. Download and Place the Missing RAR File
WinRAR needs all parts of a multi-volume archive to complete extraction. This error usually appears when one of the volumes in a set like .part2.rar , .r01 , .r02 , .001 , and similar naming formats is missing . Downloading the missing volume and placing it in the same folder as the other parts allows WinRAR to continue extracting normally .
- Look at the error message or review the list of archive parts in the folder.
- Identify which volume is missing (for example, part2.rar , .r02 , .001 , etc.).
- Go back to the website or source where you downloaded the archive.
- Locate and download the exact missing file using the same naming format as the others.
- Make sure the new file name matches the pattern of the rest. Example: If you have file.part1.rar and file.part3.rar , the missing one must be file.part2.rar .
- Move the downloaded missing volume into the same folder as the other archive parts.
- Confirm that all parts are in a single folder before extracting.
- Right-click the first file in the series (usually part1 or the main .rar file) and select Extract Here or Extract to Folder .
- WinRAR should now detect all volumes and continue extraction normally .
2. Manually Browse & Select the Next Volume
Use this method only if the next volume already exists , but WinRAR is failing to detect it automatically. This can happen due to incorrect naming , the file being in a different location , or a temporary file access issue. Manually browsing helps WinRAR locate the correct volume and resume extraction without interruption .
- Right-click the first file in the series (usually .rar or part1.rar ) and select Extract Here or Extract to Folder .
- When WinRAR cannot find the next volume, it will show the “ Next Volume Is Required ” message.
- A small window will appear, allowing you to manually select the next volume .
- Use the file explorer window to locate the folder where the other archive parts are saved.
- Select the next part based on the naming order (example: select file.part2.rar after file.part1.rar ).
- Make sure the selected file matches the naming format of the archive (no extra characters like (1) and no mismatched numbering).
- WinRAR will resume extraction using the selected volume .
- If additional volumes are missing or stored separately, WinRAR may prompt you again. Repeat the same process until extraction completes.
3. Rename the RAR files in Order
WinRAR relies on a proper naming sequence (such as file.part1.rar , file.part2.rar , file.part3.rar ) to extract multi-volume archives. If a file is named incorrectly, contains extra characters, or is out of order, WinRAR may fail to locate the next volume and show this error. Renaming the files correctly helps WinRAR follow the sequence and extract the archive without interruptions .
Note: Renaming only changes the file name , not the file contents. The goal is to restore the correct sequence so WinRAR can detect the next volume.
- Go to the folder where all the RAR files are saved.
- Make sure all parts of the archive are present and stored in the same folder .
- Check how the parts are currently named . Common patterns include:
file.part1.rar, file.part2.rar, file.part3.rar
file.rar, file.r01, file.r02, file.r03
- Look for files that don’t match the expected numbering pattern (for example, file.part01.rar , file.part1(1).rar , or unrelated names).
- Rename each file so it follows the same order without extra characters or mismatched numbering. Example:
Incorrect: file.part1.rar, file.part3.rar, file.part2(1).rar
Correct: file.part1.rar, file.part2.rar, file.part3.rar
- Make sure the text before the number is exactly the same for all files.
- Only the last part number should change.
- Right-click the first file in the series (usually part1.rar or the main .rar file) and select Extract Here .
- WinRAR should now recognize the sequence and continue extraction normally .
If you still get the same prompt: the archive set is likely incomplete (a part was never downloaded or was removed), or one of the volumes is corrupt and must be re-downloaded from the original source.
