The Disk Overload Error in uTorrent occurs after the download speed reaches a certain threshold. In most cases, the error lats for about one minute (during which the download drops) before returning to normal. However, in most cases, the error is recurring and returns after just a couple of minutes.
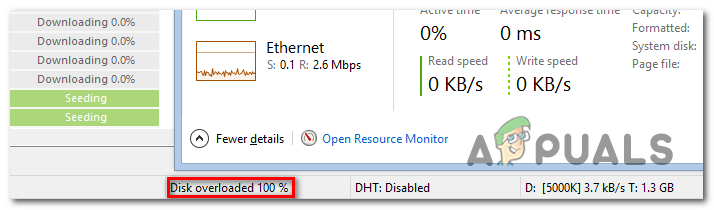
uTorrent Disk Overload error
The most common reason that will cause this problem is the way uTorrent downloads data in a non-sequential way. This approach puts a lot of stress on your HDD due to the fact that it’s forced to write hundreds of parts at the same time in a random error. In this case, one way to ensure that the problem is not occurring is to enable file pre-allocation form the Advanced settings menu.
Keep in mind that newer uTorrent version is much more efficient with Disk Usage due to the fact that they are no longer using single-thread I/O. If this scenario is applicable and you’re indeed using an older uTorrent build, uninstall the current installation and install the latest stable build available.
Another popular scenario in which this issue will occur is a situation in which partfile is turned on so the drive is forced into a lot of file skipping. This problem was resolved with newer versions, but in case you don’t want to upgrade, you can circumvent the problem by accessing the Advanced options and setting the value of diskio.use_partfile to false.
If the issue only happens when you attempt to download large files or you attempt to download multiple files at once, the problem most likely occurs due to the fact that the base Cache is insufficient. To fix this, you’ll need to access the Preferences menu and enlarge the Disk Cache to superior value in order to prevent this problem from occurring.
1. Enable File Pre-Allocation
The main reason why uTorrent users are encountering the Disk Overload Error in uTorrent is due to the fact that the client downloads and uploads pieces in a non-sequential way. This is very different from a local transfer and puts much more stress on your drive – your HDD needs to read and write hundreds of random parts of the file at the same time.
This can become a problem with slow traditional HDDs . One way to ensure that the problem no longer occurs is to enable file pre-allocation from the Preferences menu. Several affected users have confirmed that the issue was completely resolved as soon as they did this modification.
Here’s a quick guide on resolving the Disk Overload Error in uTorrent issue by enabling file pre-allocation:
- Open your Utorrent client and go to the ribbon bar at the top.
- Click on Options and then select Preferences from the drop-down menu.
- Once you’re inside the Preference menu, select General from the left-hand section.
- Next, move over to the right-hand section and check the box associated with Pre-allocate all files under When Downloading.
- Once the modifications have been made, click on Apply to save the changes.
- Restart the uTorrent client and see if the issue is resolved at the next system startup.

Enabling File Pre-allocation
If the same issue is still encountering after you enabled file pre-allocation, move down to the next method below.
2. Update to the latest uTorrent client
As it turns out, newer versions of uTorrent have become a lot more efficient with Disk usage. A simple explanation is that versions 3.1.3 and older previously used a complete single-threaded I/O.
Fortunately, the newer versions are multi-threaded and facilitate a much higher performance. With multi-threading, you no longer run the risk of seeing that a single disk job ends up blocking everything.
If you’re using uTorrent 3.1.3 or older, you should be able to fix the issue swiftly by uninstalling the current version and then downloading and installing the latest available stable build.
Here’s a quick guide on updating to the latest uTorrent client:
- Press Windows key + R to open up a Run dialog box. Next, type ‘appwiz.cpl’ inside the text box and press Enter to open up the Programs and Features menu. Type appwiz.cpl and Press Enter to Open Installed Programs List
- Once you’re inside the Programs and Files window, scroll through the list of installed applications and locate your uTorrent installation.
- Once you see it, right-click on it and choose Uninstall from the newly appeared context menu. Uninstalling uTorrent
- Inside the uninstallation screen, check the box associated with Remove my settings , then click on Uninstall and confirm to start the process. Uninstalling the old Utorrent application
- Once the process is complete, restart your computer and wait for the next startup to complete.
- After the next startup sequence is complete, access this link ( here ) scroll down and click on Download uTorrent Classic to get the latest version available. Downloading the classic version of uTorrent
- As soon as the installation executable is downloaded, open it and follow the on-screen instructions to complete the installation of the new uTorrent version.
- Once the newer version is installed, repeat the action that was previously causing the Disk Overloaded error and see if the problem is now resolved.
In case the same problem is persisting, move down to the next potential fix below.
3. Setting diskio.use_partfile to False
As it turns out, this is a known issue triggered due to file skipping when the partfile is turned on (it’s turned on by default). The majority of users have confirmed that the issue was resolved with version 3.3, but in case you don’t want to upgrade to a newer uTorrent version, there’s also an alternative.
To circumvent the Disk Overloaded error , you can open the advanced Preferences menu and set the value of diskio.use_partfile to false.
This operation will ensure that there is no more file skipping caused by the partfile. Here’s a quick guide on how to do this:
- Open up your uTorrent client and use the ribbon menu at the top to access the Options drop-down menu.
- Inside the drop-down Options menu, click on Preferences.
- Once you’re inside the Preferences menu, select the Advanced tab from the left-hand section.
- Move over to the right-hand section, paste ‘diskio.use_partfile’ in the Filter section and press Enter to locate the value.
- After you manage to find the correct name, select it by clicking on it once, then set the value from True to False and click on Apply to save the changes.
DIsabling diskio.use
In case you already enforced this modification and you’re still encountering the same Disk Overloaded error, move down to the next method below.
4. Enlarge the Base Cache
If you’re mainly encountering the issue when you attempt to download large files (10+ GB) or you attempt to download multiple files at once, it’s very likely that the issue occurs because the base Cache is insufficient.
In most cases, the issue will occur because the your disk is forced to write blocks to many different locations at the same time and it gets busy. One way to fix this issue is to enlarge the cache enough so that the writing takes place in a sequential way.
Here’s a quick guide on enforcing this change on every version of uTorrent:
- Open your default uTorrent applications and access the Options tab from the ribbon bar at the top.
- From the Options drop-down menu, click on Preferences.
- Inside the Preferences menu, click on the Advanced menu, then click on Disk Cache.
- With the Disk Cache tab selected, move over to the right section and start by checking the box associated with Override automatic cache size and specify the size manually .
- After you do this modification, change the value of the Disk Cache to 1024 Mb and click Apply to save the modifications.
- Restart uTorrent and see if the issue is resolved.

Enlarging the base cache in uTorrent
How to Fix “Printer is in an error state” Issue?
The error “ WinRAR Error: Next Volume Is Required ” usually appears when you’re extracting a multi-part RAR archive and WinRAR can’t find (or can’t correctly identify) the next file in the sequence . This often happens when a volume is missing , stored in a different folder , or renamed in a way that breaks the archive’s expected order .

In this guide, we’ll go over the most reliable fixes confirmed by affected users, along with what each method is doing behind the scenes so you can choose the right one for your situation.
Important: To extract multi-volume archives, you should always start extraction from the first file in the set. This is usually file.part1.rar , or (in older sets) the main .rar file that comes before .r01 , .r02 , and so on.
1. Download and Place the Missing RAR File
WinRAR needs all parts of a multi-volume archive to complete extraction. This error usually appears when one of the volumes in a set like .part2.rar , .r01 , .r02 , .001 , and similar naming formats is missing . Downloading the missing volume and placing it in the same folder as the other parts allows WinRAR to continue extracting normally .
- Look at the error message or review the list of archive parts in the folder.
- Identify which volume is missing (for example, part2.rar , .r02 , .001 , etc.).
- Go back to the website or source where you downloaded the archive.
- Locate and download the exact missing file using the same naming format as the others.
- Make sure the new file name matches the pattern of the rest. Example: If you have file.part1.rar and file.part3.rar , the missing one must be file.part2.rar .
- Move the downloaded missing volume into the same folder as the other archive parts.
- Confirm that all parts are in a single folder before extracting.
- Right-click the first file in the series (usually part1 or the main .rar file) and select Extract Here or Extract to Folder .
- WinRAR should now detect all volumes and continue extraction normally .
2. Manually Browse & Select the Next Volume
Use this method only if the next volume already exists , but WinRAR is failing to detect it automatically. This can happen due to incorrect naming , the file being in a different location , or a temporary file access issue. Manually browsing helps WinRAR locate the correct volume and resume extraction without interruption .
- Right-click the first file in the series (usually .rar or part1.rar ) and select Extract Here or Extract to Folder .
- When WinRAR cannot find the next volume, it will show the “ Next Volume Is Required ” message.
- A small window will appear, allowing you to manually select the next volume .
- Use the file explorer window to locate the folder where the other archive parts are saved.
- Select the next part based on the naming order (example: select file.part2.rar after file.part1.rar ).
- Make sure the selected file matches the naming format of the archive (no extra characters like (1) and no mismatched numbering).
- WinRAR will resume extraction using the selected volume .
- If additional volumes are missing or stored separately, WinRAR may prompt you again. Repeat the same process until extraction completes.
3. Rename the RAR files in Order
WinRAR relies on a proper naming sequence (such as file.part1.rar , file.part2.rar , file.part3.rar ) to extract multi-volume archives. If a file is named incorrectly, contains extra characters, or is out of order, WinRAR may fail to locate the next volume and show this error. Renaming the files correctly helps WinRAR follow the sequence and extract the archive without interruptions .
Note: Renaming only changes the file name , not the file contents. The goal is to restore the correct sequence so WinRAR can detect the next volume.
- Go to the folder where all the RAR files are saved.
- Make sure all parts of the archive are present and stored in the same folder .
- Check how the parts are currently named . Common patterns include:
file.part1.rar, file.part2.rar, file.part3.rar
file.rar, file.r01, file.r02, file.r03
- Look for files that don’t match the expected numbering pattern (for example, file.part01.rar , file.part1(1).rar , or unrelated names).
- Rename each file so it follows the same order without extra characters or mismatched numbering. Example:
Incorrect: file.part1.rar, file.part3.rar, file.part2(1).rar
Correct: file.part1.rar, file.part2.rar, file.part3.rar
- Make sure the text before the number is exactly the same for all files.
- Only the last part number should change.
- Right-click the first file in the series (usually part1.rar or the main .rar file) and select Extract Here .
- WinRAR should now recognize the sequence and continue extraction normally .
If you still get the same prompt: the archive set is likely incomplete (a part was never downloaded or was removed), or one of the volumes is corrupt and must be re-downloaded from the original source.
