Note: This article has been updated with the latest tweaks as of June 2020.
qBittorrent is one of the most popular torrent clients, as it is entirely free, lightweight, and available for all platforms.
Of course, many torrent users are not aware of how to maximize their download speeds when using a torrent client. This Appual’s guide will walk you through configuring the QBittorrent client itself to achieve maximum possible download speeds.
Note: Appual’s does not condone illegal piracy. Torrents are a wonderful method of downloading legal content, and there are numerous websites that host 100% legal, public domain torrents.
Also, numerous programs out there claim to “speed up” your torrent downloads while running in the background – these are absolutely false and typically contain adware/spyware or even worse, such as keyloggers. There is no magic bullet for increasing torrent speeds aside from having proper settings.
Experiment with your DNS
If you are using your ISP’s default DNS address, or Google’s (8.8.8.8), consider experimenting with other DNS providers out there. OpenDNS is a popular alternative, and Cloudflare offers the fastest DNS available, particularly if you live in Asia.

Changing your DNS will not make you download faster, but it can help you connect to trackers and more peers, especially if your ISP blocks torrents at the DNS level.
Is port forwarding necessary in 2020?
The subject of ports and torrent software is a strange one filled with occultic wizardry. While many torrent speed guides recommend opening ports in your router, it hardly seems to matter in 2020, depending on your ISP, router model, and overall firewall configuration.
ISPs started blocking the most common ports used for torrent sharing a long time ago, but because there is truly such a huge pool of ports available, many ISPS seem to have stopped trying to block torrent ports. The reason so many guides recommend port forwarding to increase torrent speeds is two-fold:
- Port forwarding will manually try to get around any specific port ranges blocked by your ISP.
- Port forwarding allows you to connect to more peers, resulting in higher download speeds.
However, there’s something to understand about point #2. It isn’t an exact science, because even if you don’t forward ports specifically for a torrent client in your router, your torrent client will still connect to clients.
This is because some peers will still connect to “firewalled” clients, and in a large swarm with many available seeds, it will hardly make a difference whether or not you have specific ports opened in your router for torrent clients.
It also helps that qBitorrent support UPnP (Universal Plug n’ Play), so the torrent client will actually automatically search for and temporarily open the best port for you.
So in all honesty, the only time port forwarding really makes a difference in 2020, in regards to torrent download speeds, is when you are connected to a small swarm with a low amount of peers, and your router does not support UPnP. We can get a lot more technical and explain scenarios where it’s preferable to manually set ports, but this is good enough information for the average user, okay?
If you still want to manually port forward
You should test to see if the pre-configured port in QBittorrent is already open – use a website like CanYouSeeMe and, with QBittorrent open in the background, take the port from QBittorrent’s Options>Connection>Port used for incoming connections, and put it into CanYouSeeMe.

If the port is recognized as being open, you’re all good on this front. But if not, we should open a new port on your router. Doing this depends on your router model, so it’s best to consult a guide specific to your router for achieving this.
In any case, you should choose a port between the 49160-65534 range. This is because the old port range by torrent programs was typically 6881-6999, but many ISPS started blocking those specific ports. You also want to avoid ports that are shared by other programs, and the range given above should not already be in use.
After you forward the ports in your router, change it also in the QBittorrent options, and test again with CanYouSeeMe.
If you want to be absolutely certain there won’t be any conflicts with the ports you want to use and other Windows programs, you can open a command line and type:
Netstat -a >c:\log.txt
This will do a scan of all ports in use and save a logfile. When you read through the logfile, you’ll know which ports are already being used.
As far as opening and forwarding ports on your router, there are many router-specific guides out there, so we simply can’t give a “one size fits all” guide here.
The Swarm: Seeds, Leeches, and You
One important thing you should understand is how seed/peer ratios work.
Everyone downloading or uploading a torrent is part of a ‘swarm’. If the swarm has more downloaders (leechers) than seeds (uploaders), than everyone in the swarm will experience slower download speeds, because the seeders automatically try to share a fair ratio between all of the leechers connected to them.
Imagine it like this. 1 seed has a maximum upload speed of 100Kbps. 10 leechers are connected to this seed. So the seed will try to upload to those 10 leechers at around 10Kbps each (100Kbps/10). If only 2 leechers were connected to the seed, they would get around 50Kbps. So here you can see how easily torrents become very slow when there are more downloaders than uploaders.
That kind of situation can be common in public trackers, such as on well-known torrent websites.
Private trackers (swarm networks) try to compensate for this by giving download speed priority to known seeders with high upload ratios. These trackers are usually found on private, membership-only websites, and you will be given a higher download speed priority the more you share back in uploads.
So if you completely download a torrent and let it upload for awhile and get a nice big upload ratio (1:1 or higher), you will be given a much higher priority the next time you download a torrent from that tracker. So for the best possible download speeds, after following the rest of this guide, you should consider joining private tracker groups and having an above-average seed ratio.
Change your peer sources
One thing that will help you find more quality seeders is to change your peer sources in QBittorrent’s settings.

- Go into Tools > Options > BitTorrent tab.
- Enable the checkboxes for “Enable DHT” and “Enable Peer Exchange”.
- Disable the checkbox for “Enable Local Peer Discovery” unless you’re on a large campus or LAN network.
- Set encryption mode to “Allow Encryption”.
So to explain these settings briefly. DHT and PeX peer discovery help you to discover more peers globally, which means more possible seeders for you to download from. Also, some trackers or peers will only connect to encrypted peers, for privacy, so by allowing encryption you are also widening your pool of potential peers.
Local Peer Discovery is only useful for trying to find peers on the same ISP or LAN as you. It might be useful if you belong to a huge ISP or are on a big college campus LAN with lots of people that share the same music interests as you, for example, but you also need to be wary of your ISP inserting their own trackers into popular torrents to try and catch you downloading/uploading stuff you shouldn’t.
Also, Local Peer Discovery is useless if you are using a VPN, and since you should be using a VPN while downloading torrents for better privacy, it’s best to just disable Local Peer Discovery.
Adjusting your maximum download and upload speeds in Qbittorrent
Many guides for tweaking torrent speeds recommending limiting your download and upload rates to around 80% of what you’re actually capable of. This is sound advice, but you need to understand why.

ISP plans typically offer higher download than upload rates. So for example, let’s say you are paying for 25Mbps download, and 5Mbps upload as your internet speed plan.
Now you are downloading a torrent, while uploading another torrent at the same time, both at the maximum of your download/upload speeds. If you are uploading a huge amount of data at maximum speed, your upload lane becomes full.
If you try to download big files at the same time, you’ll still need some upload bandwidth to signal to the seeder that you are in fact receiving data from them. But if your upload bandwidth is already clogged up, this query/response is going to get lost in all the data, resulting in slower download speeds.
Asymmetric connections like WiFi, ADSL and cable are especially prone to this, especially WiFi, but it can happen on fiber-optic connections as well. So if at all possible, you want to avoid doing massive download/uploads over WiFi and try connecting directly to your modem, but you also want to limit your download/upload rates in QBittorrent’s settings to around 80% – 90% of their maximum.
Now, a bit about finding your maximum download / upload rates. Some ISPs are known to give priority to speedtest websites, so the results shown to you on Speedtest.net for example may actually be manipulated by your ISP. Your results can also change throughout the day, depending on peak traffic in your area.
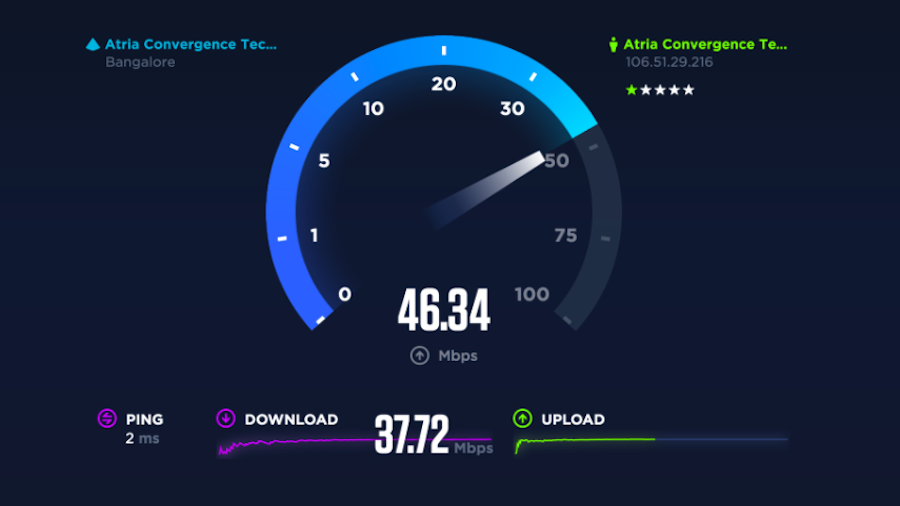
Speed Test
So what you really want to do is try a few different speedtest websites, perhaps at different times throughout the day, and find the average between them. The best speedtest websites are:
- Speedtest.net
- Speedof.me
- Testmy.net
- Fast.com
Once you know your average maximum download and upload rates, go into QBittorrent’s settings and adjust accordingly to around 80 – 90% of the maximum average for both.
Conclusion
How to Fix “Printer is in an error state” Issue?
The error “ WinRAR Error: Next Volume Is Required ” usually appears when you’re extracting a multi-part RAR archive and WinRAR can’t find (or can’t correctly identify) the next file in the sequence . This often happens when a volume is missing , stored in a different folder , or renamed in a way that breaks the archive’s expected order .

In this guide, we’ll go over the most reliable fixes confirmed by affected users, along with what each method is doing behind the scenes so you can choose the right one for your situation.
Important: To extract multi-volume archives, you should always start extraction from the first file in the set. This is usually file.part1.rar , or (in older sets) the main .rar file that comes before .r01 , .r02 , and so on.
1. Download and Place the Missing RAR File
WinRAR needs all parts of a multi-volume archive to complete extraction. This error usually appears when one of the volumes in a set like .part2.rar , .r01 , .r02 , .001 , and similar naming formats is missing . Downloading the missing volume and placing it in the same folder as the other parts allows WinRAR to continue extracting normally .
- Look at the error message or review the list of archive parts in the folder.
- Identify which volume is missing (for example, part2.rar , .r02 , .001 , etc.).
- Go back to the website or source where you downloaded the archive.
- Locate and download the exact missing file using the same naming format as the others.
- Make sure the new file name matches the pattern of the rest. Example: If you have file.part1.rar and file.part3.rar , the missing one must be file.part2.rar .
- Move the downloaded missing volume into the same folder as the other archive parts.
- Confirm that all parts are in a single folder before extracting.
- Right-click the first file in the series (usually part1 or the main .rar file) and select Extract Here or Extract to Folder .
- WinRAR should now detect all volumes and continue extraction normally .
2. Manually Browse & Select the Next Volume
Use this method only if the next volume already exists , but WinRAR is failing to detect it automatically. This can happen due to incorrect naming , the file being in a different location , or a temporary file access issue. Manually browsing helps WinRAR locate the correct volume and resume extraction without interruption .
- Right-click the first file in the series (usually .rar or part1.rar ) and select Extract Here or Extract to Folder .
- When WinRAR cannot find the next volume, it will show the “ Next Volume Is Required ” message.
- A small window will appear, allowing you to manually select the next volume .
- Use the file explorer window to locate the folder where the other archive parts are saved.
- Select the next part based on the naming order (example: select file.part2.rar after file.part1.rar ).
- Make sure the selected file matches the naming format of the archive (no extra characters like (1) and no mismatched numbering).
- WinRAR will resume extraction using the selected volume .
- If additional volumes are missing or stored separately, WinRAR may prompt you again. Repeat the same process until extraction completes.
3. Rename the RAR files in Order
WinRAR relies on a proper naming sequence (such as file.part1.rar , file.part2.rar , file.part3.rar ) to extract multi-volume archives. If a file is named incorrectly, contains extra characters, or is out of order, WinRAR may fail to locate the next volume and show this error. Renaming the files correctly helps WinRAR follow the sequence and extract the archive without interruptions .
Note: Renaming only changes the file name , not the file contents. The goal is to restore the correct sequence so WinRAR can detect the next volume.
- Go to the folder where all the RAR files are saved.
- Make sure all parts of the archive are present and stored in the same folder .
- Check how the parts are currently named . Common patterns include:
file.part1.rar, file.part2.rar, file.part3.rar
file.rar, file.r01, file.r02, file.r03
- Look for files that don’t match the expected numbering pattern (for example, file.part01.rar , file.part1(1).rar , or unrelated names).
- Rename each file so it follows the same order without extra characters or mismatched numbering. Example:
Incorrect: file.part1.rar, file.part3.rar, file.part2(1).rar
Correct: file.part1.rar, file.part2.rar, file.part3.rar
- Make sure the text before the number is exactly the same for all files.
- Only the last part number should change.
- Right-click the first file in the series (usually part1.rar or the main .rar file) and select Extract Here .
- WinRAR should now recognize the sequence and continue extraction normally .
If you still get the same prompt: the archive set is likely incomplete (a part was never downloaded or was removed), or one of the volumes is corrupt and must be re-downloaded from the original source.
