The newer versions of Outlook, particularly those in beta or updated releases, often have the Navigation Pane positioned on the side by default.
If you prefer having the Navigation Pane at the bottom, we’ll explore two methods to customize this setup.
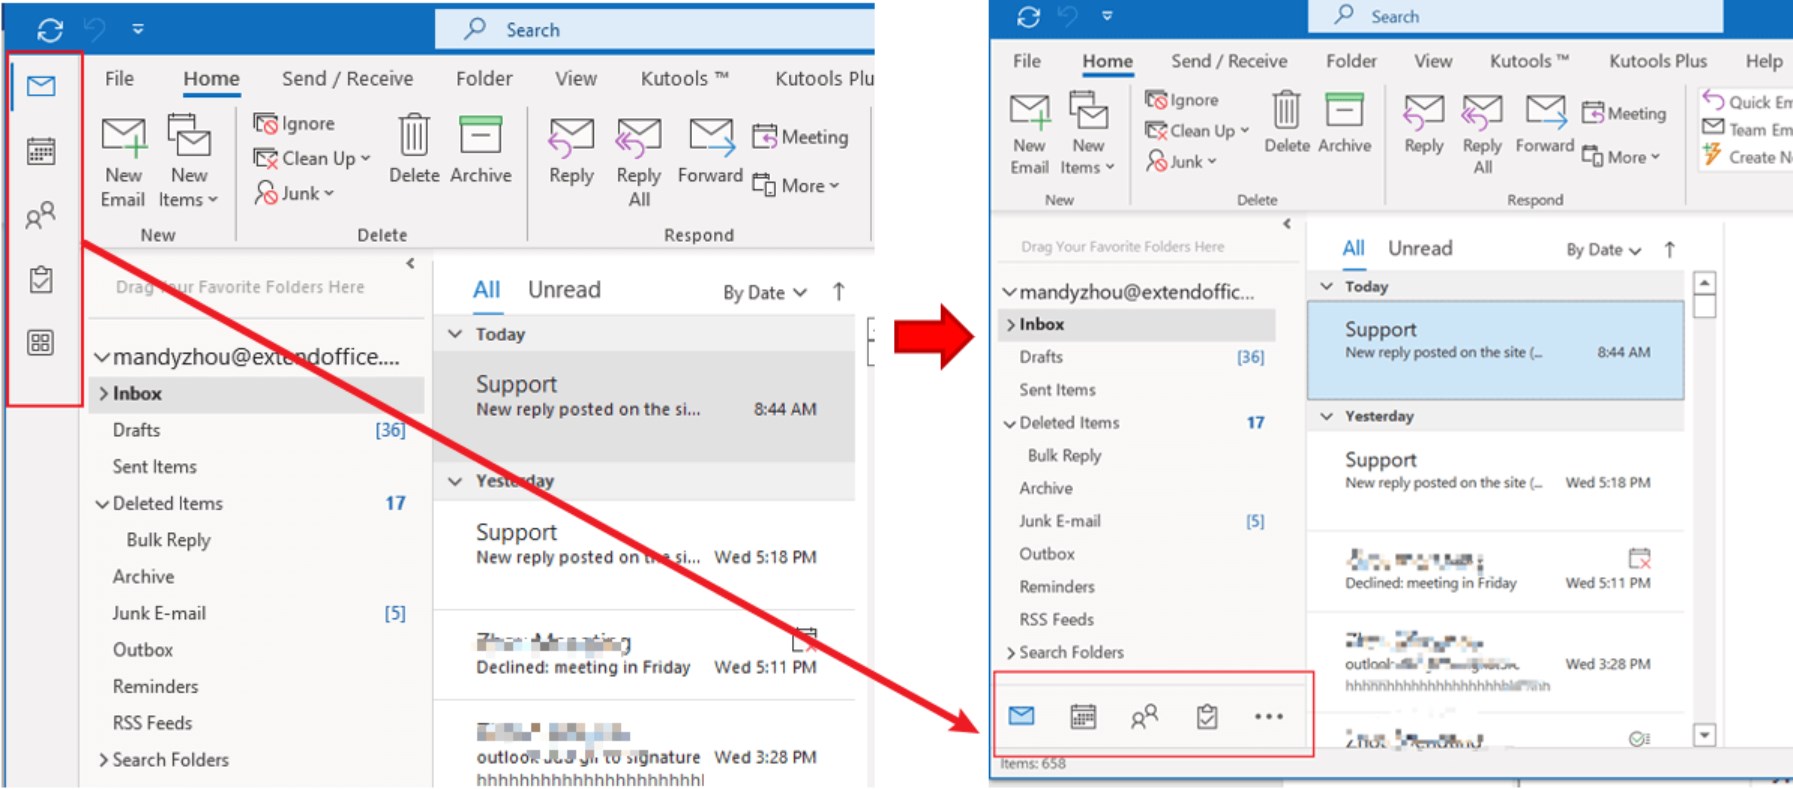
1. Via Outlook Settings
To relocate your Outlook toolbar to the original position, follow these steps:
- Click “ File ” in the top-left corner of your Outlook app. Click on File
- Choose “ Options ” from the left sidebar. Select Options
- Next, select ” Advanced .”
- Turn off the “ Show Apps in Outlook ” option in the right pane.
- Save your changes by clicking “ OK ” at the bottom. Close and reopen your Outlook app to apply the changes. Your toolbar will now appear in the bottom bar of the app. Advanced > Uncheck Show Apps in Outlook > OK
2. Through the Registry Editor
Adjusting the Navigation bar position in Outlook through the Registry Editor can be a bit complex. Here are the steps:
- Press the Windows key and R simultaneously to open the Run dialog box. Type “ regedit ” and click OK . Type regedit and click on OK
- If a User Account Control dialog box appears, click Yes to proceed.
- In the Registry Editor window, navigate to: HKEY_CURRENT_USER\SOFTWARE\Microsoft\Office\16.0\Common\ExperimentEcs\Overrides Navigate to the address
- If you don’t find the “ Microsoft.Office.Outlook.Hub.HubBar ” string value, create it. Right-click the Overrides folder, select “ New ” > “ String Value “, and name it “ Microsoft.Office.Outlook.Hub.HubBar .” New > String Value
- Double-click the newly created string value. In the Edit String dialog, set the Value data to “ False ” and click OK . Set the value data to False > OK
- Restart Outlook. The Navigation pane should now appear at the bottom of the page.
