Blurry pictures can be a common problem for photographers of all levels. There are several causes of blurry pictures, such as camera shake, subject movement, and low light conditions. In this article, we will discuss techniques for improving the clarity of blurry pictures, regardless of the cause. With the right techniques and some practice, you’ll be well on your way to getting sharp, clear pictures every time.
Basic techniques for improving picture clarityin the first place
Before things end up towards advanced techniques, it may be feasible to adapt some of these basic fixes for making a picture less blurry while actually taking the picture:
- Use a tripod: A tripod is a simple and effective way to stabilize the camera and prevent blur caused by camera shake or hand motion. It’s especially helpful when using a slower shutter speed or when taking photos in low light.
- Use a higher ISO setting: ISO measures the sensitivity of the camera’s image sensor. A higher ISO setting can help improve the clarity of a blurry picture taken in low light, but it can also increase noise (graininess) in the image. Experiment with different ISO settings to find the best balance between clarity and noise.
- Use a faster shutter speed: A faster shutter speed can help freeze the action and reduce blur caused by subject movement. It can also help reduce blur caused by camera shake.
By using these basic techniques and experimenting with different settings of your device, you can significantly improve the clarity of your blurry pictures in the first place. However, moving towards advanced techniques may become necessary in case you already have a blurry shot captured.
Advanced techniques for making pictures less blurry
Advanced techniques for improving picture clarity involve using specialized software and techniques that go beyond the aforementioned basic tips. These techniques can be practiced using your computer or mobile device with the use of their individually supported tools.
Following are some of the best and easy-to-use applications for making a picture less blurry.
PicsArt
PicsArt is a mobile app that is available on iOS, Windows and Android devices and offers a range of image editing tools and features, including a tool for sharpening blurry pictures. It has a user-friendly interface and a variety of automatic features that can make it easier to use.

PicsArt for Google Workspace |Google Workspace Marketplace
To fix a blurry image using PicsArt, follow these steps:
- Open PicsArt, select the blurry image you want to edit.
- Tap the Retouch icon at the bottom of the screen.
- Choose the HD Portrait icon from the bottom panel of the screen.
- Once you click that icon, an AI Enhance tool will takeover to reduce the blur on the image.
- You can use the slider bar to adjust the intensity of the unblur according to your satisfaction.
- Hit the Save icon to save your edited image.
Do note, that this feature remains only available to users who have access to the Gold subscription plan. Additionally, keep in mind that it may not be able to fix a blurry image completely, especially if the blur has caused the image to be disrupted drastically.
Fotor
Fotor is a photo editing software that allows users to fix and enhance their photos. It has a range of tools and features that can be used to improve the quality of blurry or damaged photos. Some of these features include the ability to sharpen images, remove blur and noise, and restore faded colors.
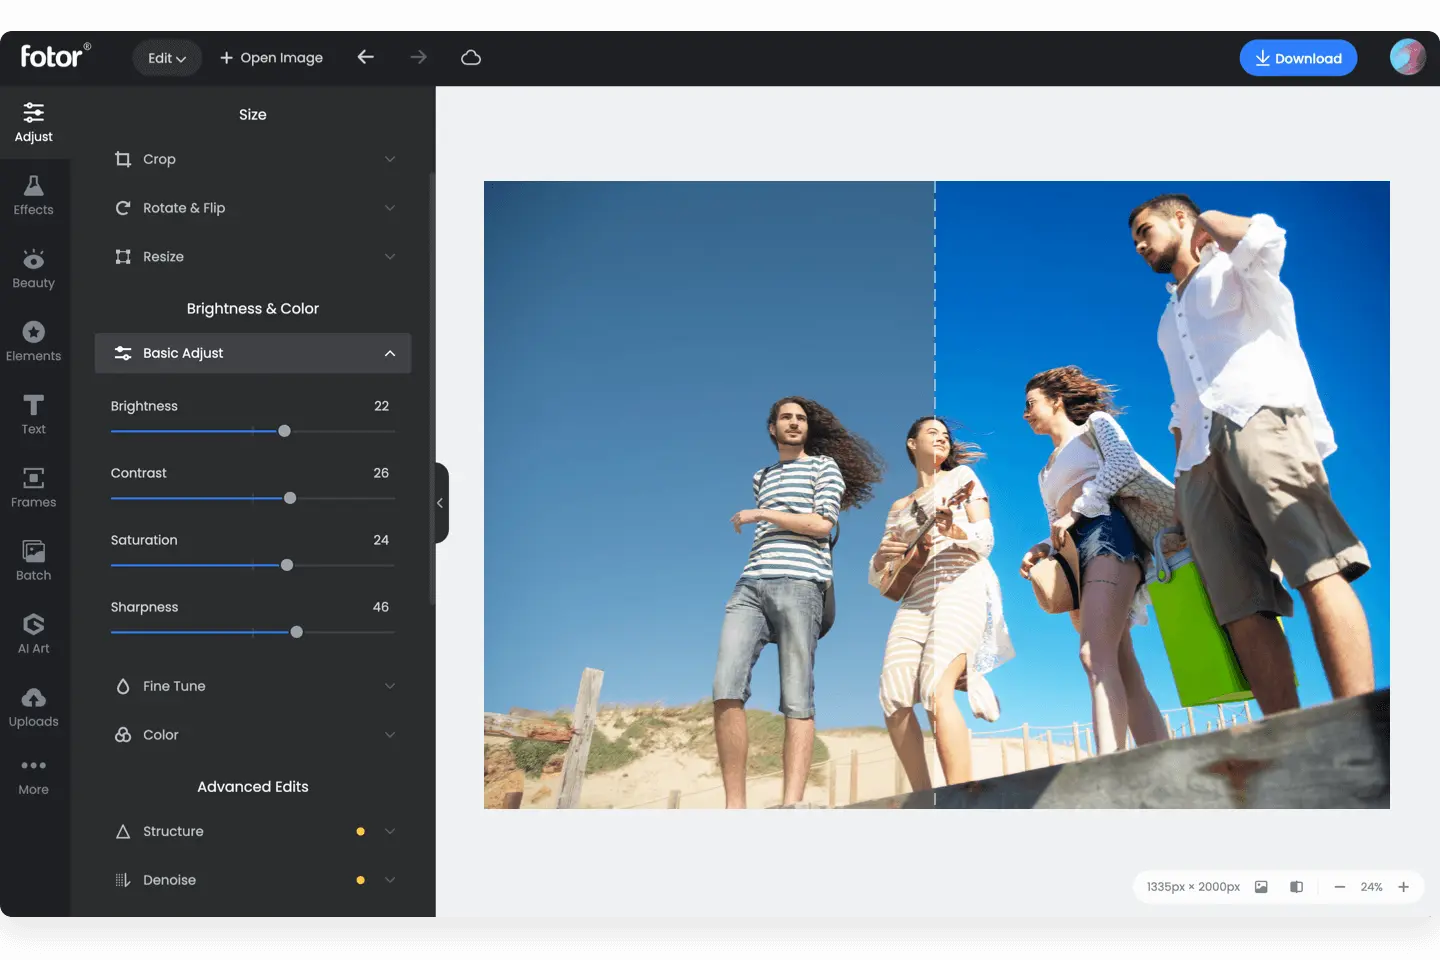
Fotor online photo editor |Fotor
To restore and fix blurry photos using Fotor:
- Select the “ Blur ” tool and adjust the strength and size of the blur effect to fix the image.
- You can also use the “ Sharpness ” tool to increase the clarity and detail of the photo.
- Additionally, Fotor has a “ Noise Reduction ” tool that can be used to remove any noise or graininess from the image.
Overall, Fotor is a useful tool for anyone looking to improve the quality of their photos and fix common issues such as blurriness. It is easy to use and has a range of features that can help users achieve professional-quality results.
Adobe Photoshop Express
Adobe Photoshop Express is a powerful and easy-to-use app that can help you improve the quality of your photos and make them look their best. One of the features of the app is its ability to fix blurry photos. You can use the “ Sharpness ” tool to increase the clarity and focus of your blurry photos, or you can use the “ Deblur ” tool to reduce the amount of blur in your photos.
The app also has other tools and features that you can use to restore and enhance your photos, such as tools for adjusting the color, exposure, and contrast of your photos, as well as tools for removing blemishes and other imperfections.
To have a detailed understanding of the use of this app and its features, take a look at this video:
GIMP
GIMP (GNU Image Manipulation Program) is a free, open-source image editing software that allows users to manipulate and edit images in a variety of ways. It is similar to Adobe Photoshop and can be used on a variety of OS, including Windows, Mac, and Linux, though it is certainly not beginner-friendly.
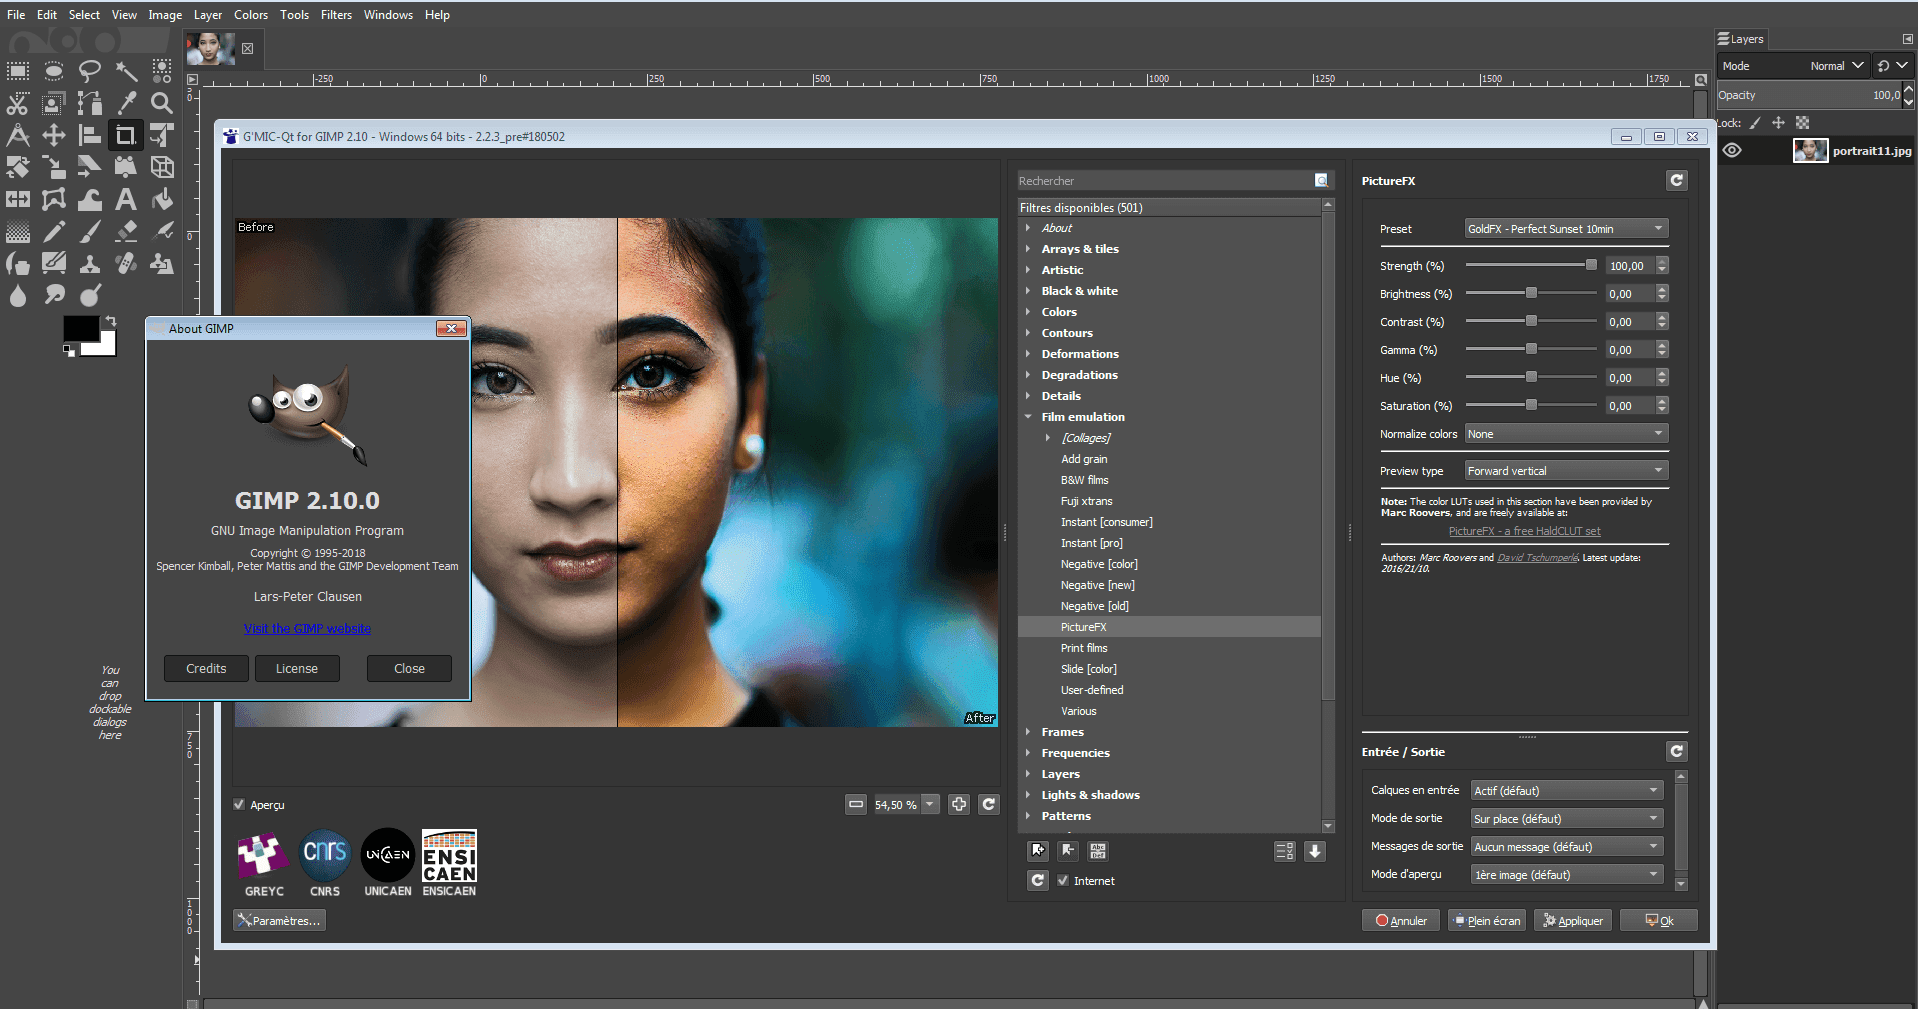
GIMP’s user interface can be overwhelming for new users |The Next Web
To restore and fix blurry photos using GIMP, follow these steps:
- Open the blurry photo in GIMP.
- Go to the “ Filters ” menu and select “ Enhance ” > “ Sharpen .” This will apply the default sharpening filter to the photo.
- Adjust the settings of the sharpening filter to your preference. You can increase or decrease the amount of sharpening, or choose a specific area of the photo to apply the filter to.
- Preview the changes and make any necessary adjustments.
- Once done, go to the “ File ” menu and select “ Save As ” to save the edited photo.
If the photo is still blurry, you can try using the “ Unsharp Mask ” filter, which can help to further sharpen the image, or try using the “Motion Blur” filter to adjust and reduce the blur caused by the camera shake.
Blurry pictures can indeed be a common and disappointing problem for photographers, but there are a variety of techniques and tools that can be used to improve the clarity of blurry photos. By experimenting and implementing these techniques and finding the ones that work best for your needs, you can improve the sharpness of the photos you take, and the ones you’ve already taken.
How to Fix “Printer is in an error state” Issue?
- Recognizing the importance of a printer’s duty cycle is crucial for choosing a device that matches your print volume needs. Staying within this limit ensures the printer operates efficiently and prolongs its lifespan, minimizing the risk of maintenance issues.
- Proper humidity, temperature, and cleanliness management can significantly enhance printer performance and maintain its duty cycle, preventing unnecessary wear.
- Enhancing a printer with upgrades like additional memory or better mechanical parts can improve its workload handling and extend its practical duty cycle, boosting overall durability and efficiency.
When choosing a new printer, you might come across the term “ duty cycle ” in the specifications. This guide will explain what a duty cycle is, why it matters, and how it can help you choose the right printer. We’ll keep things simple so you can easily understand how to use this information when shopping for a printer.
- Printer Duty Cycle: What It Means and Why It Matters?
- Why the Duty Cycle Is Key to Choosing the Right Printer?
- Duty Cycle vs. Recommended Monthly Print Volume: What’s the Difference?
- What Happens If You Ignore Printer Duty Cycle Recommendations? ↪ Real-World Scenarios: Why Exceeding the Duty Cycle Can Cost You
Printer Duty Cycle: What It Means and Why It Matters?

What is the meaning of Printer Duty Cycle?
The printer duty cycle represents the upper limit of a printer’s capacity—how many pages it can reliably process in a month before the risk of wear or malfunction increases. This figure is crucial for understanding printer performance limits and ensuring that your chosen printer can handle the expected work volume.
Manufacturers determine a printer’s duty cycle through stress testing, where the printer is pushed to its limit to identify how many pages it can produce each month before malfunctioning. These tests help set a reliable performance gateway for users.
A printer’s duty cycle is like a car’s speedometer—you wouldn’t drive a car at top speed all the time, and you shouldn’t push a printer to its maximum duty cycle. Doing so can lead to quicker wear and tear, more frequent maintenance, and a shorter lifespan.
If you’re unsure whether to choose an inkjet or laser printer, this detailed guide compares both options to help you make an informed decision.
Why the Duty Cycle Is Key to Choosing the Right Printer?

The Importance of Duty Cycle in printer selection
Knowing the duty cycle is essential when choosing a printer, as it determines how well the device can handle your monthly print volume without excessive wear or maintenance.
Here is why the duty cycle matters in printer selection:
- Fit for purpose: Selecting a printer with a suitable duty cycle ensures it can handle your monthly printing volume efficiently, reducing stress on its components.
- Longer lifespan and better performance: Staying within the duty cycle ensures optimal print quality and speed while prolonging the printer’s life, avoiding frequent breakdowns.
- Cost efficiency and reduced downtime: Operating within the duty cycle minimizes the need for repairs and reduces operational disruptions, managing long-term costs.
Duty Cycle vs. Recommended Monthly Print Volume: What’s the Difference?

Duty Cycle vs. recommended monthly print volume
The recommended monthly print volume is the optimal number of pages a printer should handle each month for the best performance and longevity. Unlike the maximum capacity indicated by the duty cycle, this number guides regular usage, ensuring the printer operates efficiently without excessive wear.
If your print volume regularly exceeds the recommended amount but stays within the duty cycle, the printer may operate safely in the short term, but it could still experience accelerated wear and reduced lifespan over time.
In such cases, consider upgrading to a higher-capacity printer or spreading print jobs across multiple devices to ensure long-term performance.
Here are the differences between the duty cycle and recommended monthly print volume:
- Duty cycle: Represents the maximum number of pages a printer can handle in a month without breaking down. It assesses the printer’s upper limit.
- Recommended monthly print volume: Suggests a practical, workable number of pages to print each month to keep the printer in good condition over its lifespan.
What Happens If You Ignore Printer Duty Cycle Recommendations?

Consequences of ignoring Duty Cycle recommendations |AndranikHakobyan via Canva
Ignoring the duty cycle limits poses more severe risks than exceeding the recommended monthly print volume, leading to serious long-term consequences.
While exceeding the recommended volume occasionally may result in additional wear and tear, consistently exceeding the duty cycle can lead to frequent breakdowns, reduced performance, and a shortened lifespan.
Ignoring duty cycle limits leads to frequent breakdowns, reduced performance, and increased maintenance, ultimately shortening the printer’s lifespan and causing more frequent operational downtime and higher repair costs. Long-term, pushing a printer beyond its limits leads to greater financial burdens due to premature replacements and inefficiencies.
↪ Real-World Scenarios: Why Exceeding the Duty Cycle Can Cost You
For example, in a busy law firm, overlooking duty cycle limits during a high-stakes period could cause a printer breakdown just before a critical deadline, delaying crucial legal filings and ultimately compromising client service.
For small businesses, consistently exceeding a printer’s duty cycle can lead to costly emergency repairs or premature equipment replacements, straining financial resources.
