The Virus & Threat Protection area is one of the seven areas of the Windows Defender Security Center. It monitors threats and runs scans on your system to keep you safe. It also gets updates for detecting the latest threats on your device. Users can also run different types of scans and see the results of their previous virus and threat scans. However, the Virus and Threat Protection areas can be hidden from the users. As an administrator, you can hide this section on a system used by multiple users. In this article, we will provide you methods through which you can easily hide the Virus and Threat Protection area in Windows 10.

Hide the Virus and Threat Protection Area
The Local Group Policy Editor method can only be used on Windows 10 Pro, Windows 10 Education, and Windows 10 Enterprise. If you are using the Windows 10 Home edition, then try using the Registry Editor method. That is because the Group Policy Editor isn’t available in the Windows Home edition.
Method 1: Using the Local Group Policy Editor
The Group Policy is a Windows feature that contains all types of settings for the operating system. Most of the settings that aren’t available in the Settings app and Control Panel can be found in Group Policy Editor. It contains all the settings for the Windows Defender Security Center. You can hide the Virus and Threat Protection area by using one of the settings in Group Policy Editor. Follow the below steps to modify the setting:
This setting is supported on at least Windows Server 2016 and Windows 10 Version 1709.
Note : If you are using the Windows 10 Home version, then skip this method, and head over to the Registry Editor method.
- Hold the Windows key and press R to open a Run dialog. Type “ gpedit.msc ” in the box and press the Enter to open the Local Group Policy Editor . Open the Local Group Policy Editor
- Now navigate to the following location in the Local Group Policy Editor. Computer Configuration\Administrative Templates\Windows Components\Windows Security\Virus and threat protection\ Navigating to the setting
- Double-click on the setting named “ Hide the Virus and threat protection area ” and that will open in another window. Now you need to change the toggle option from Not Configured to Enabled . Enabling the setting
- Click on the Apply and Ok buttons to save the changes. Basically, the group policy will automatically update the new configurations.
- However, if it does not update automatically, then you need to force update it. Search for CMD in the Windows search feature and run it as an administrator .
- Type the following command in CMD (Admin) window and press Enter . gpupdate /force Force updating the group policy
- You can always enable the Virus and Threat Protection area again by changing the toggle option to Not Configured or Disabled in step 3.
Method 2: Using the Registry Editor
Another method for hiding the Virus and Threat Protection area is by using the Registry Editor. This configures the same setting as the Group Policy Editor method. If you already used the Local Group Policy Editor method, then your keys and value will be automatically updated for that specific setting. However, if you are using it directly, then you need to create the missing key and value for it. For Windows 10 Home users, this is the only available option to hide the Virus and Threat Protection area. This is a bit technical method, so try following the below steps carefully:
- Press the Windows + R key together to open a Run dialog box. Now type “ regedit ” and press the Enter key to open the Registry Editor . If prompted by the UAC (User Account Control) dialog, then click on the Yes button. Opening the Registry Editor
- You can also create a Registry backup before making any new changes. Click on the File menu and then choose the Export option. Now name the file and select the location for it. Click on the Save button to save it. Saving the Registry backup Note : You can recover a backup by clicking on the File > Import option and then selecting the file that you previously created.
- You need to navigate to the following path in the Registry Editor window: HKEY_LOCAL_MACHINE\SOFTWARE\Policies\Microsoft\Windows Defender Security Center\Virus and threat protection Note : If some keys are missing, you can create them by right-clicking on the available key and choosing the New > Key option.
- Right-click on the right pane of the Virus and threat protection key and then choose the New > DWORD (32-bit) Value option. Now name the key as “ UILockdown “. Creating a new value
- Double-click on the newly created value to open it. Now change the value data to 1 . Enabling the value
- Finally, after making all the changes, make sure you reboot your computer to apply these changes.
- You can always enable the Virus and Threat Protection area by changing the value data to 0 . You can also simply remove the newly created value from the Registry Editor to enable it back.
How to Fix “Printer is in an error state” Issue?
- Browser fingerprinting is a method used by websites and online services to track users’ online behavior based on their unique browser and system settings.
- While it helps improve user experience and cybersecurity, it can also lead to potential privacy issues as it allows for persistent and hard-to-evade tracking.
- There are several ways to limit browser fingerprinting such as adjusting your browser’s privacy settings, using privacy-centric browsers, disabling JavaScript and Flash, using VPNs, or using the Tor Browser.
- As AI and browser technologies evolve, the techniques for browser fingerprinting and its countermeasures will become more sophisticated.
- Compliance with regulatory frameworks and privacy laws will be crucial in addressing the challenges associated with browser fingerprinting.
Browser fingerprinting is a discreet form of data collection that creates a unique digital signature based on your browser configuration, installed plugins, screen resolution, and more. This identifier allows websites and advertisers to track your activity across the internet, even without using personal information. As a result, entities can monitor your behavior and build detailed profiles for analytics or targeted advertising.
While it can improve service efficiency, browser fingerprinting poses serious privacy risks by enabling tracking without consent. This guide explores the technique in depth and offers actionable steps to help you conceal your browser fingerprint. Protecting it is crucial for maintaining anonymity and preserving your online privacy.
Your browser fingerprint typically consists of the following data points:
- User Agent : Details about your browser type, version, and operating system.
- HTTP Headers : Information on language preferences, accepted content types, and encoding.
- Screen Resolution : The size and resolution of your display screen.
- Timezone : The geographic time zone of your device.
- Installed Fonts : A list of fonts available on your computer.
- Plugins and Extensions : Information about extensions and plugins installed in your browser.
- Cookies : Small data files stored by websites on your device.
- WebGL and Canvas Fingerprinting : Data about your graphics capabilities and rendering engines.
- IP Address : A unique network identifier assigned to your device.
- Battery Status : Sometimes, information about your device’s battery level.

Why is Hiding Browser Fingerprint Important?
Any browser, regardless of its security focus, can be targeted by malicious actors. The complexity and volume of the modern web make it easier for harmful websites to take advantage of browser fingerprinting, often in subtle ways. It is vital to understand why your browser fingerprint matters so you can effectively protect yourself against potential misuse.
If you prefer, you can skip directly to our practical how-to section below.
1. Unique Identification
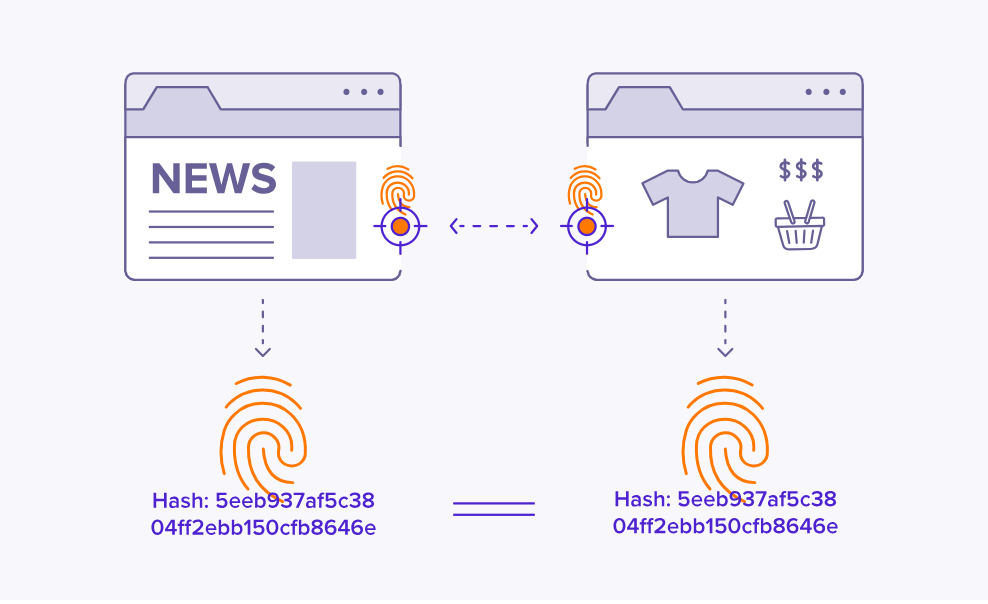
Browser fingerprinting enables the creation of a unique identifier for your browser, making it possible for third parties to recognize and track you across different sites. For instance, if you search for a product on an online store, your fingerprint can be used to associate your browsing habits with targeted ads, even after you have left the original website.
In many cases, your consent to data collection may have been obtained—often during sign-up—but users frequently overlook the fine print. Consequently, your data may be sold or shared without your full awareness.
2. Privacy Invasion
Browser fingerprinting poses a significant threat to your privacy by exposing sensitive information without your consent. For example, a news website that collects your fingerprint could infer your political preferences, which may later be exposed in a data breach or misused by third parties, potentially leading to harassment or discrimination.

The exposure of these tactics emphasized the real-world risks of browser fingerprinting—showing that data analytics can have serious implications for personal privacy and democratic processes.
3. Misuse of Data
If criminals or unauthorized users gain access to browser fingerprint databases, your personal information could be exploited for identity theft, fraud, or other malicious activities. For example, a breach at a large technology firm could expose browser fingerprints combined with other identifiers, enabling impersonation or unauthorized account access.
In many cases, this information is sold illegally on the dark web , where it can be further abused for financial or personal gain.
4. Exploitation of Security Vulnerabilities

Cybercriminals may use data from your browser fingerprint to identify weaknesses in your browser or device. By combining various data points, they may uncover unique details about your system configuration and exploit known vulnerabilities to target you with tailored malware or phishing attacks.
5. Tracking and Profiling
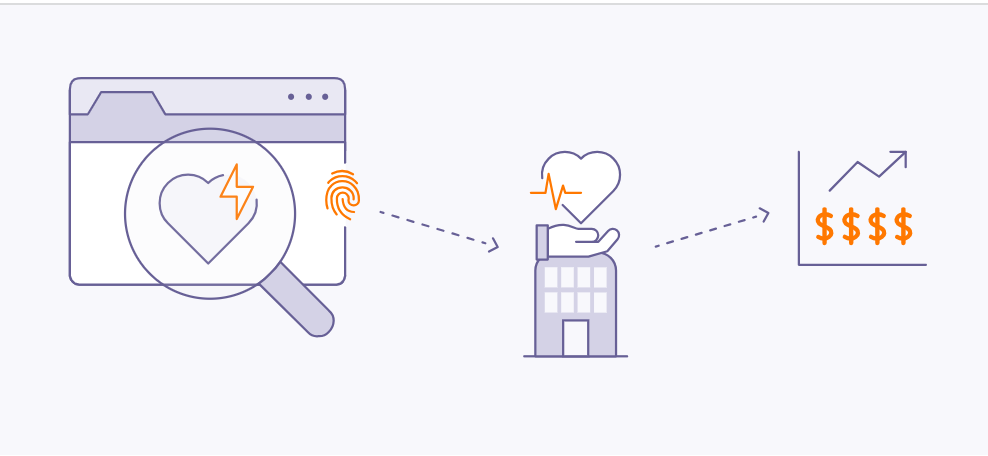
Detailed information gathered from browser fingerprints can be exploited by advertisers and data brokers to build intensive profiles of your browsing habits. For instance, repeated visits to health-related websites could reveal sensitive medical interests, potentially leading to targeted ads or even increased insurance premiums.
6. Cross-Device Tracking
Through browser fingerprinting, advertisers and data collectors can track your activities across different devices, such as smartphones and laptops, by linking your fingerprinted data. Studies, such as “ The Web Never Forgets: Persistent Tracking Mechanisms in the Wild ” by Princeton University researchers, have shown that fingerprinting can persist even when switching browsers or clearing cookies.
This persistence means your online identity remains recognizable across multiple platforms, despite efforts to minimize tracking.
7. User Deanonymization

Browser Fingerprint is Often Used for De-Anonymizing Users | Pixabay
Fingerprinting can undermine efforts to stay anonymous online, even when using VPNs or private browsing. By piecing together multiple fingerprint attributes—such as IP address, timezone, and browser configuration—attackers can potentially reveal your real identity. In 2019 , researchers from Leibniz University of Hanover and Philipps University of Marburg demonstrated they could identify 70% of users in a large, anonymized dataset by using browser fingerprinting. ( Source PDF )
8. Evasion of Privacy Settings
Browser fingerprinting can circumvent your privacy settings. For example, even if you enable features like “ Do Not Track ” in your browser, fingerprinting can still be used to follow your activities. Research from KU Leuven and Princeton University revealed that major websites were still able to fingerprint users despite privacy-enhancing browser configurations.
How to Hide Your Browser Fingerprint?
Fortunately, you can take effective steps to minimize your exposure to browser fingerprinting. By applying the following strategies, you can significantly reduce the risk of advertisers or malicious entities tracking your online activity.
1. Browser Modification

Browser modification can help protect your fingerprint
Customizing your browser settings is a direct way to restrict unnecessary data transmission. Most browsers offer features and privacy controls to reduce fingerprinting, though the level of customization varies. Below, you’ll find actionable steps for the most popular browsers to enhance your fingerprint protection.
Google Chrome
Google Chrome offers several privacy settings to limit fingerprinting and increase user anonymity.
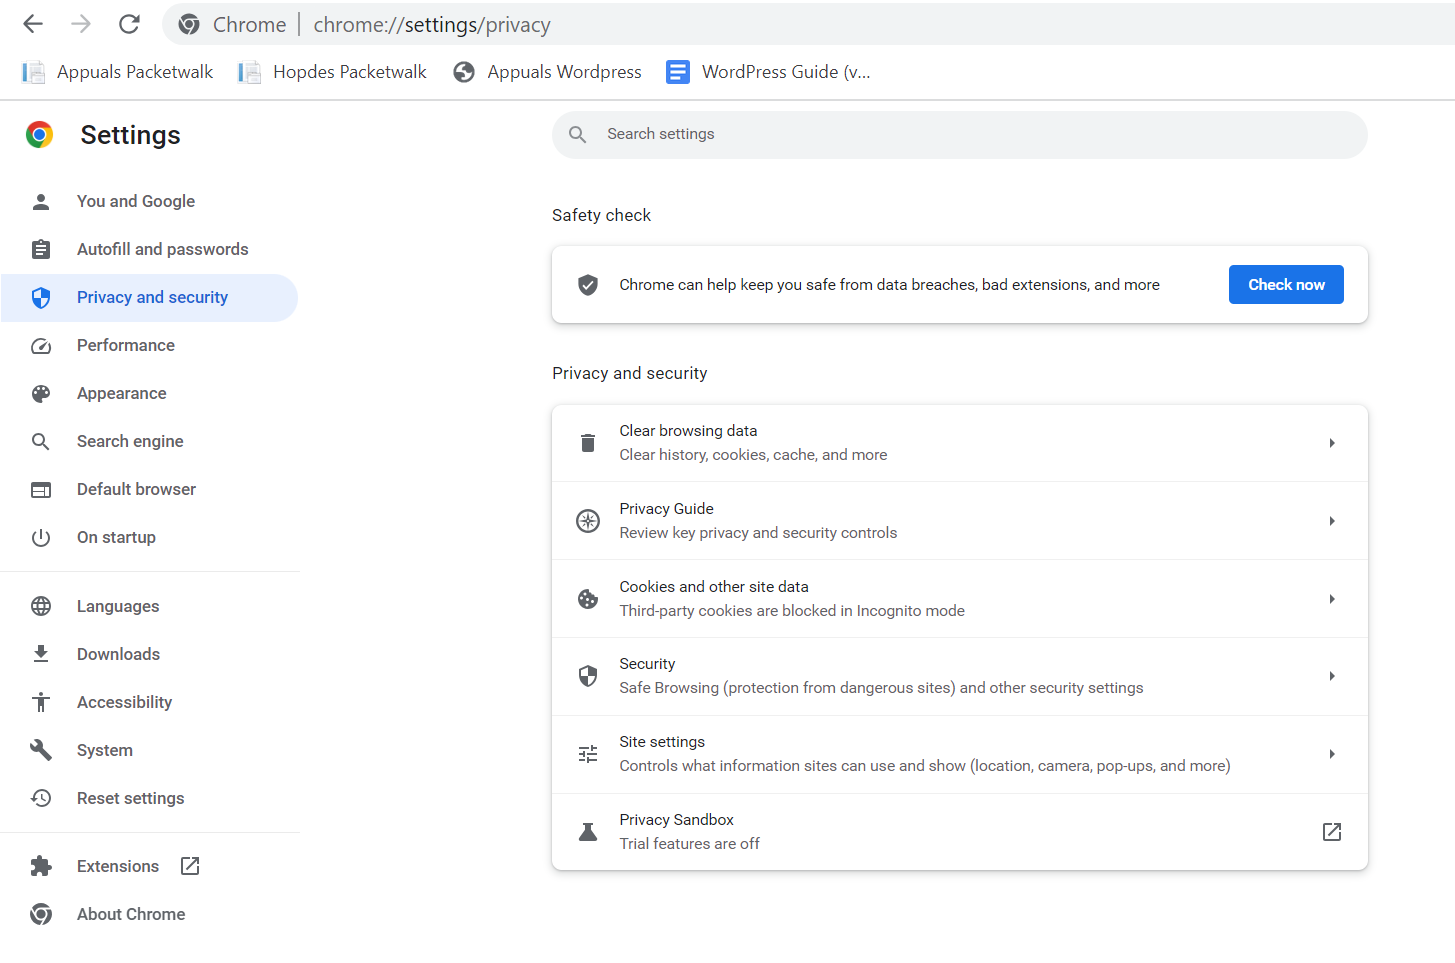
Google Chrome Privacy Settings
We recommend using the built-in “ Privacy Guide ” resource, which provides detailed instructions and explanations for adjusting Chrome’s privacy settings.
Set Chrome to automatically delete cookies each time you close the browser, or consider disabling cookies entirely for maximum privacy. This limits websites from storing persistent identifiers used in fingerprinting.
Google also experiments with Privacy Sandbox , a new feature in Chrome aimed at reducing tracking and fingerprinting by masking hardware and software characteristics. Although not yet standard, this initiative is designed to make fingerprinting significantly more difficult for websites and advertisers.
Activating these safeguards helps to obscure your unique digital signature and defend against tracking, even as browser standards evolve.
Microsoft Edge
Microsoft Edge emphasizes security and privacy, with customizable tracking prevention modes: Basic , Balanced , and Strict . For maximum privacy, select Strict —though note that some website features may be affected.
Edge visually displays which trackers have been blocked and which are permitted, giving you insight and control over your privacy. By adjusting these settings, you reduce the amount of data collected by websites and advertisers.
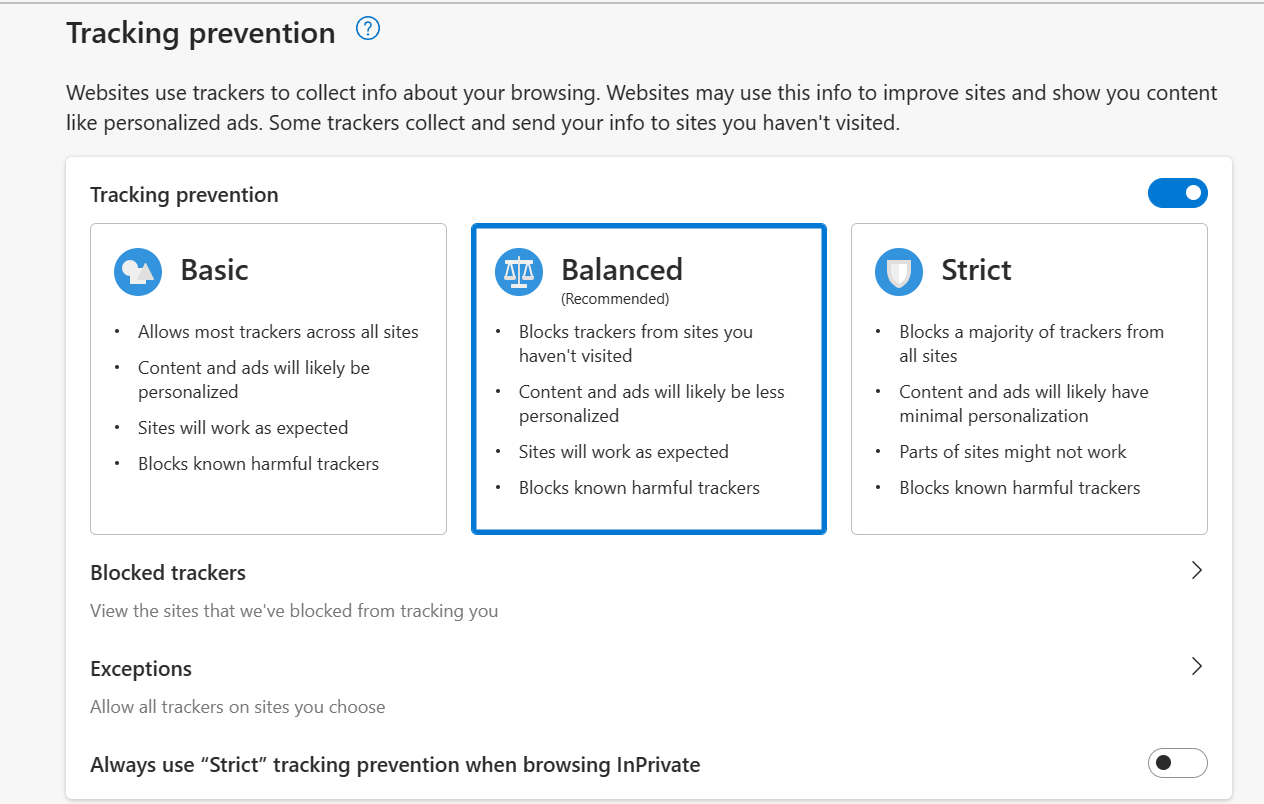
Microsoft Edge Privacy Settings
Mozilla Firefox
Mozilla Firefox is renowned for its commitment to privacy and extensive customization options. Within Firefox’s Privacy settings, you can choose between “ Standard “, “ Strict “, or “ Custom ” modes—select “ Strict ” for optimal privacy protection.
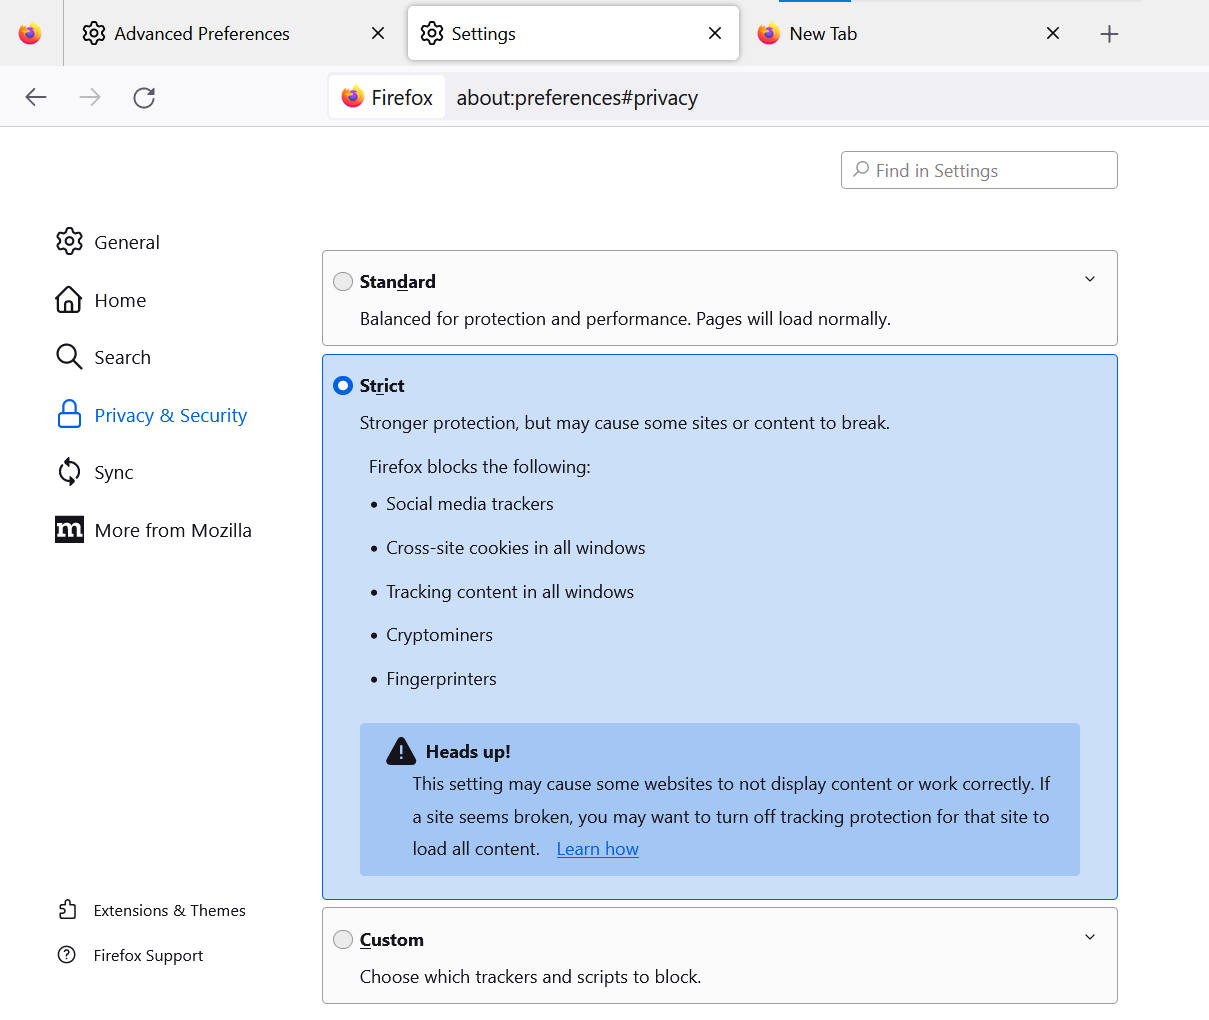
Mozilla Firefox Privacy Settings
Advanced users can further strengthen privacy by entering about:config in the address bar and modifying several key settings:
- Set privacy.resistFingerprinting to True : This Tor-inspired setting helps shield your browser from fingerprinting attempts.
- Set webgl.disabled to True : Disables the WebGL API, reducing hardware-based fingerprinting.
- Set media.peerconnection.enabled to False : Disabling WebRTC hides your real IP address, even when using VPNs.
- Set geo.enabled to False : Disables location services, preventing geo-location-based tracking.
- Set privacy.firstparty.isolate to True : Restricts cookies to their originating website, blocking cross-site tracking.
Alternatively, you may use a pre-configured user.js profile, such as the one maintained by ghacks, for an enhanced and up-to-date privacy experience.
Opera
Opera features built-in privacy tools—including an ad blocker and free VPN—and enables you to easily opt out of tracking. Access “ Settings ” > “ Privacy Settings ” to review and apply options that improve your privacy and reduce fingerprinting exposure.

Opera Browser Privacy Settings
Brave
Brave prioritizes privacy and actively combats fingerprinting through two main strategies:
- Standardizing or randomizing API values so Brave instances appear identical to each other.
- Employing per-session and per-site randomization to make tracking far more difficult.
These approaches reduce the effectiveness of fingerprinting by preventing unique tracking signatures. You can easily access privacy settings by typing “ brave://settings/privacy ” in the Brave address bar. Brave also offers a built-in VPN and Tor functionality for users seeking maximum privacy.
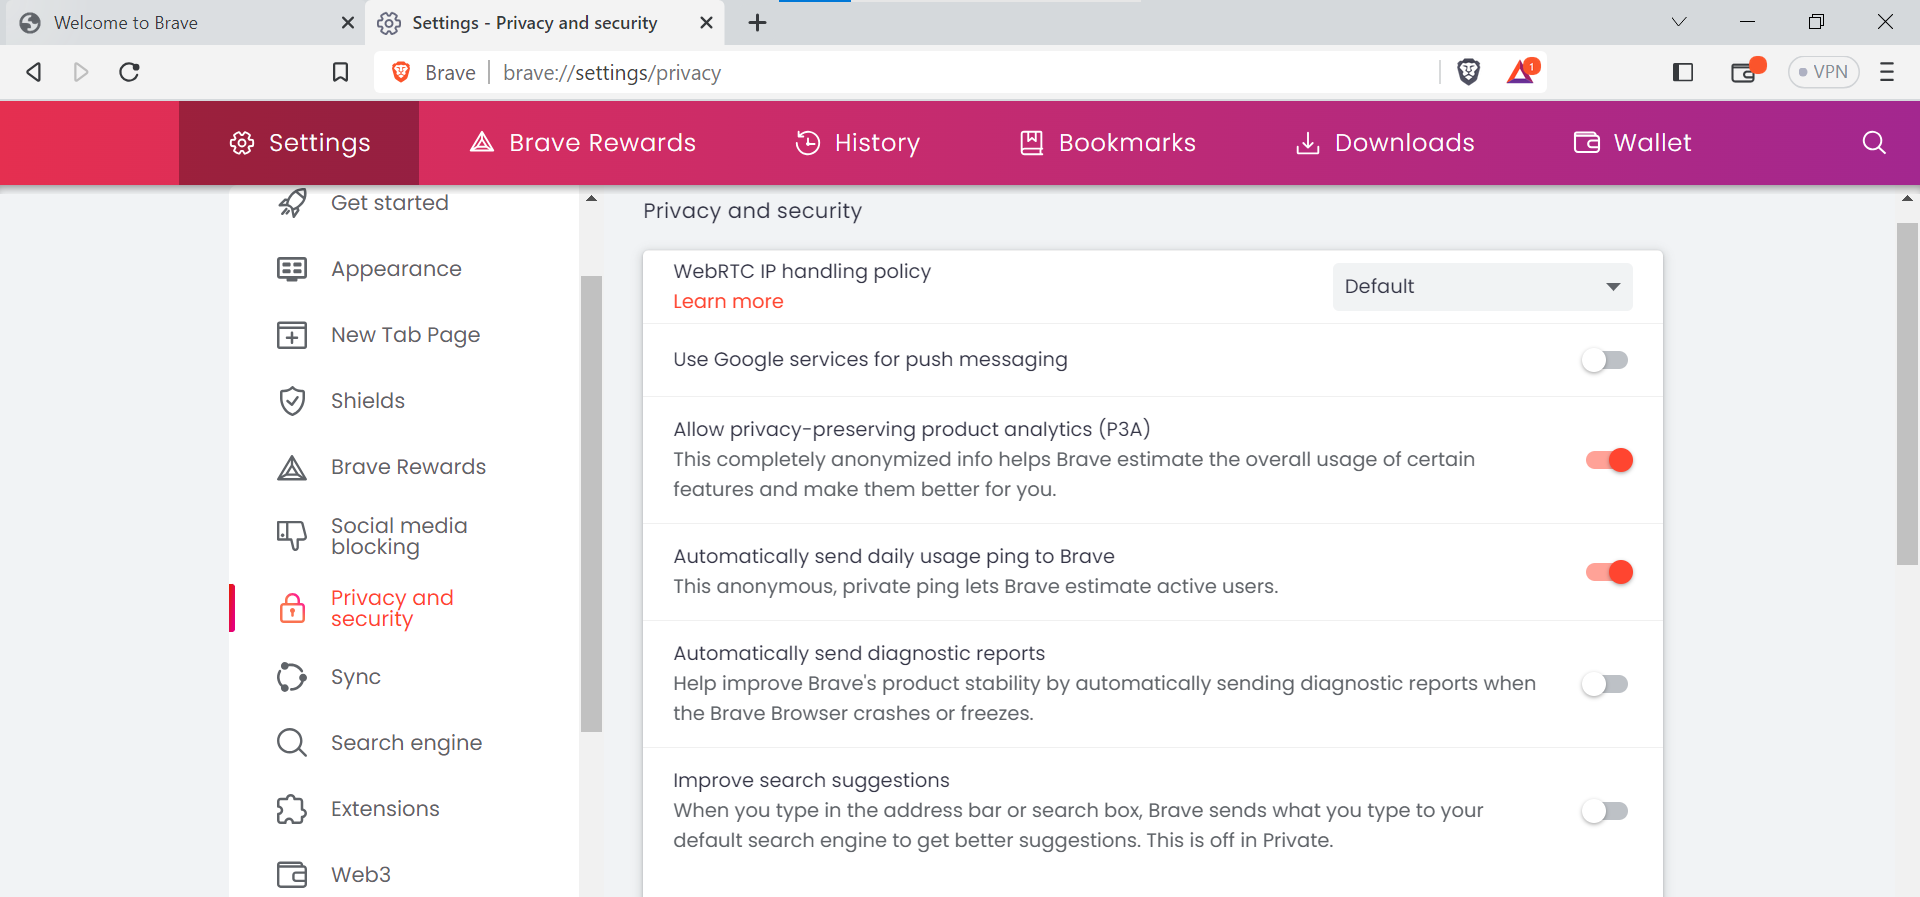
Brave Browser Privacy Settings
Brave also features integrated Tor browsing , accessible within the privacy settings for enhanced anonymity.
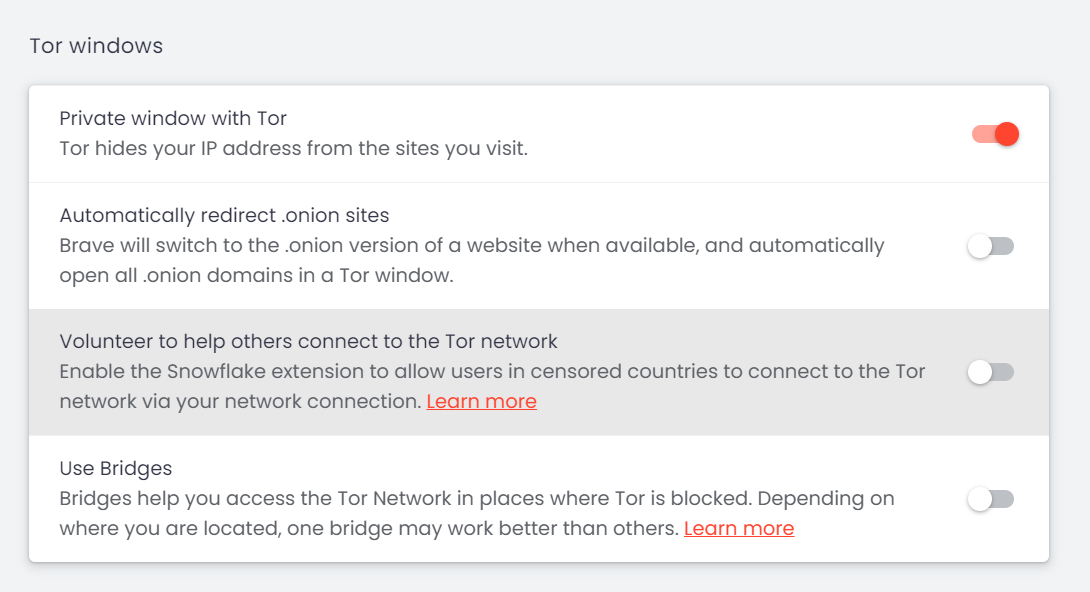
Brave and Tor Browser Coordination
Apple Safari
Safari offers strong privacy measures by default. Its Intelligent Tracking Prevention automatically blocks sites not visited for over 30 days and rejects various tracking mechanisms—including some fingerprinting techniques—without compromising user security.
- Go to the Safari menu, select “ Settings “, and open the “ Privacy ” tab.
- Check options for: Prevent cross-site tracking Hide IP Address Block All Cookies
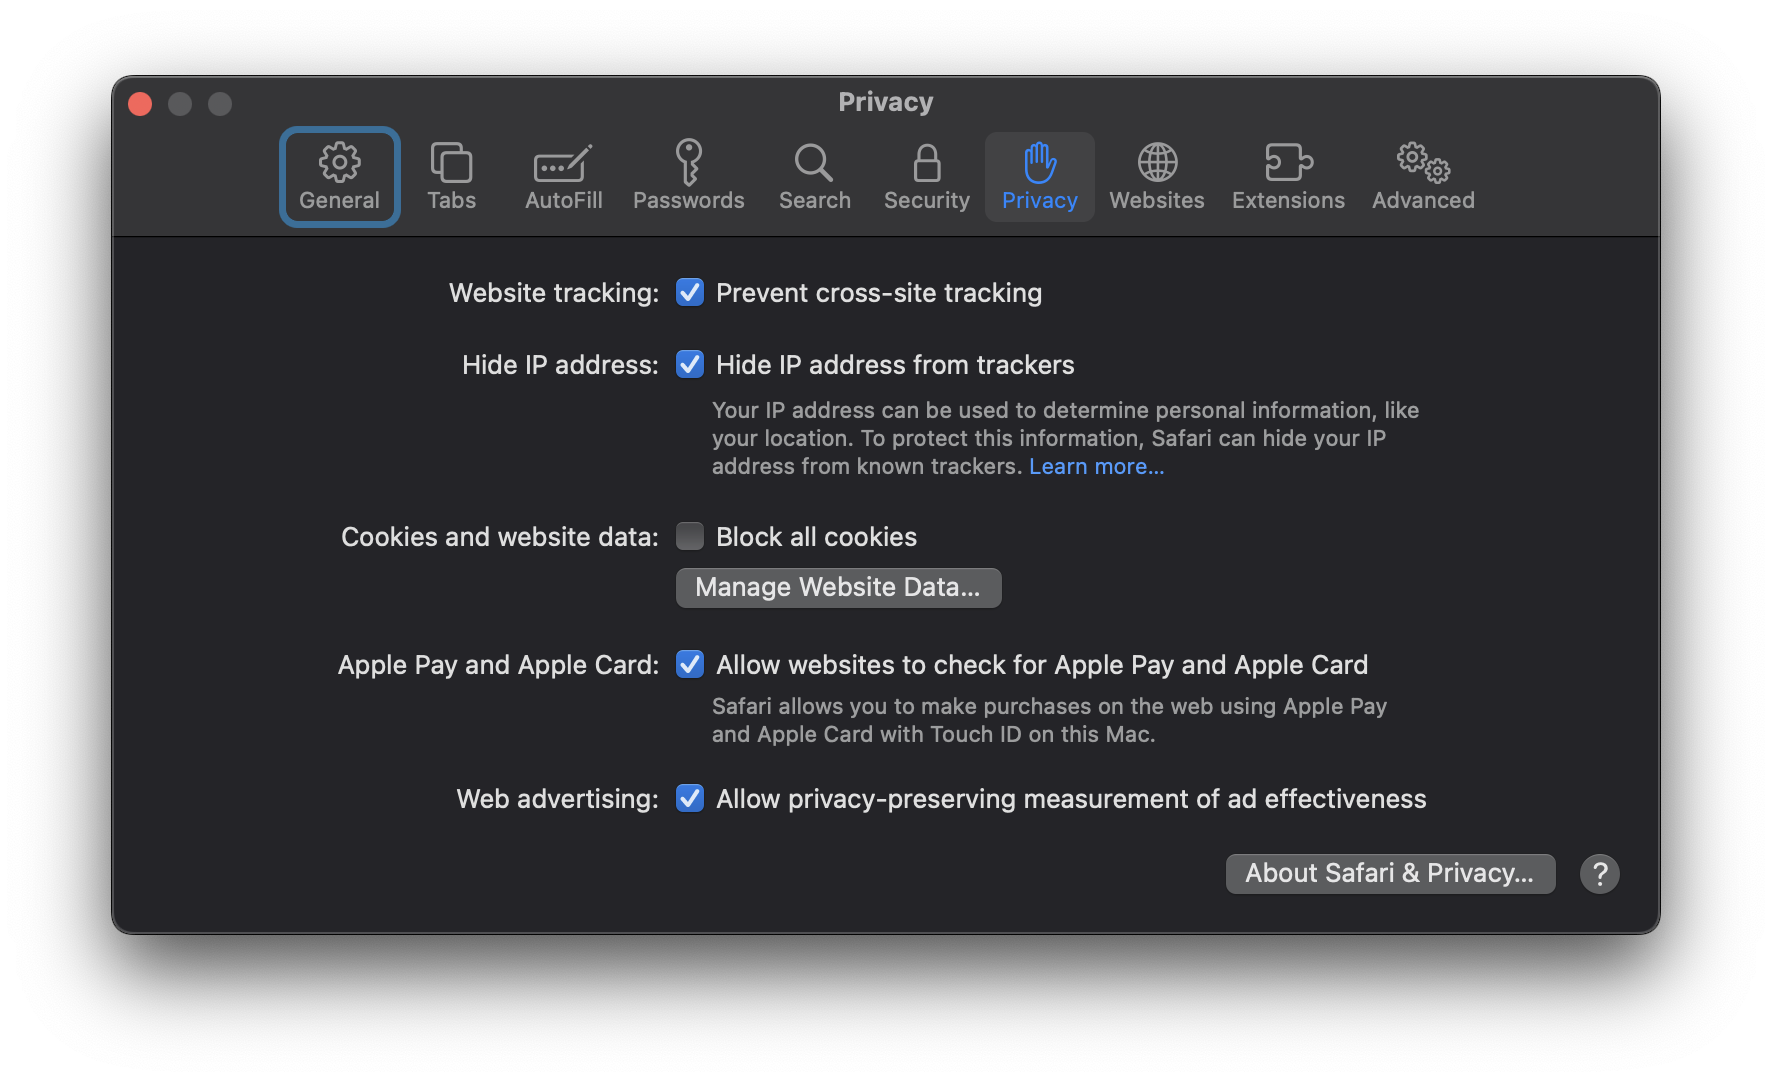
Apple Safari Privacy Settings
Selecting these options strengthens your defenses against fingerprinting and improves overall privacy while using Safari.
Other Methods to Hide Browser Fingerprint
Beyond browser-specific modifications, there are additional strategies to further reduce the risk of browser fingerprinting.
2. Use the Incognito Mode of the Browser

Activate your browser’s private or incognito mode when browsing sensitive topics. This mode minimizes the storage of browsing data and cookies, helping reduce the surface area for fingerprinting and persistent tracking. Keep in mind that incognito mode does not make your fingerprint identical to other users, but it does offer enhanced privacy for session data.
3. Browser Extensions and Add-ons
Specialized browser plug-ins can further protect against fingerprinting—however, exercise caution when choosing extensions. Only install add-ons from reputable sources, as malicious or poorly designed add-ons can both expose your data and increase your fingerprint’s uniqueness.
Popular anti-fingerprinting extensions include:
- Canvasblocker by kkapsner : Defends against canvas fingerprinting ( GitHub ).
- Trace by AbsoluteDouble : Blocks traditional and advanced fingerprinting ( GitHub ).
- Chameleon by sereneblue : Spoofs user agents and randomizes browser attributes ( GitHub ).
While using user-agent spoofing add-ons can help complicate fingerprinting, be mindful that erratic or highly unique fingerprints can also make you stand out. Consider extensions that cycle fingerprints periodically for added privacy.
4. Disable JavaScript
Disabling JavaScript prevents websites from collecting detailed information about your browser plugins, fonts, and hardware. This can serve as an effective defense against many fingerprinting methods.
However, disabling JavaScript may impair functionality on many websites. Consider using NoScript or similar tools to selectively enable JavaScript on trusted sites while blocking it elsewhere. This approach requires ongoing management but offers granular control over your exposure.
5. Use A VPN Service

A Virtual Private Network (VPN) increases your privacy by masking your IP address and encrypting your network traffic. This does not completely eliminate fingerprinting, but it prevents third parties—including ISPs and malicious websites—from connecting your browsing activity to your real-world identity and location.
6. Disable Flash

Flash is obsolete and poses unnecessary privacy risks. If you have Flash installed, disable or uninstall it—as modern browsers no longer support it as of late 2020. Eliminating Flash closes another fingerprinting avenue and strengthens your privacy even further.
7. Use Tor Browser

The Tor Browser , built on Mozilla Firefox, is engineered for maximum anonymity and privacy. It routes your online activity through multiple nodes worldwide, making it extremely difficult to link your web activity back to your real identity.
Tor comes with essential privacy features, such as HTTPS Everywhere , NoScript , and built-in anti-fingerprinting protections, blocking techniques like Canvas and WebGL fingerprinting by default. For best results, use the browser’s default settings and avoid unnecessary plugins or modifications.
8. Virtual Machines

Virtual Machine |Spiceworks
For those with higher privacy needs, using Virtual Machines (VMs) provides a highly secure environment for browsing. Tools like VirtualBox enable you to run isolated Linux VM instances, protecting your host machine and making it easy to erase and reset the environment if it is ever compromised.
Using VMs can anonymize your browsing by isolating sessions, running multiple operating systems, and layering VPNs for additional privacy. This approach is particularly valuable for advanced users who require robust anonymity or want to test websites with different setups.
Important: For Smartphone Privacy
Future Trends and Challenges in Browser Fingerprinting
Browser fingerprinting techniques are rapidly advancing and will only become more sophisticated with time, especially as the capabilities of Artificial Intelligence (AI) expand. Staying informed and proactive is essential in this evolving landscape.
Evolving Techniques of Browser Fingerprinting
Browser fingerprinting methods are continuously being refined as both attackers and defenders adapt to emerging technologies and regulations.
Using AI Techniques

AI Can be Used for Browser Fingerprinting |Tech Talks
AI-powered algorithms are making fingerprinting more precise. By analyzing larger and more complex data sets, AI can identify subtle patterns in browser behavior that create even more distinctive digital profiles, increasing the challenge for privacy-conscious users.
Evolution of Browsers
As browsers and web standards evolve, new opportunities for fingerprinting emerge, such as with WebRTC and WebGL . Privacy professionals must continuously adapt their defenses to keep pace with these technological developments.
Countermeasures to Protect Against Advanced Fingerprinting Methods
Future countermeasures may leverage emerging technologies, regulatory changes, and new privacy tools. Staying updated with best practices and utilizing privacy-focused software will remain critical.
Use of AI
AI can also be harnessed to develop anti-fingerprinting solutions that detect and neutralize tracking techniques. Such tools may analyze browser behavior in real-time, autonomously adjusting privacy settings or creating synthetic profiles to undermine fingerprinting accuracy.
Regulatory Frameworks

Laws Can Help Improve Browser Fingerprinting Concerns | Pixabay
Newer Tools
Expect continued development of anti-fingerprinting browser extensions, advanced privacy controls, and customizable settings. Features like improved cookie management, advanced tracking prevention, and machine learning–based privacy solutions will continue to help users defend against new fingerprinting tactics.
