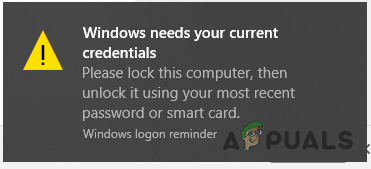
You may get the “ Windows needs your current credentials” when you try to log in to your Windows system. The error message appears even after typing the correct credential. And the error presents itself with the error message on the screen, accompanied by a suggestion that generally won’t help you to fix the error.
Windows needs your current credentials error on Windows 10
As per the users they are getting the error even after trying to login again by locking and unlocking the screen and typing the correct username and password. However, sometimes the error won’t appear while login with the password, it only appears when you log in using your PIN. This is rather the most irritating error and not limited to Windows 10 version, the Windows 7 and 8 users also reported the error.
It looks like the Windows credential manager got corrupted or something went wrong with the user account. However, we have managed to identify a series of common cases that end up showing the Windows needs your current credentials error.
Causes for Error “Windows Needs Your Current Credentials”
- Group Policy Misconfiguration – The most possible culprit that causes Windows to throw the error message during login is the underlying issues or misconfiguration with the Group Policy. The group policy includes the reliable records needed by the system while communicating and once it gets corrupted it is likely to cause the error.
- Virus infection – If your computer is corrupted with the virus or malware infection then this might be the culprit for the error. The virus present in your system takes full control over the PC’s functioning and result in causing unexpected errors.
- System file corruption – The system file corruption may sometimes affect OS functioning and trigger error messages while carrying out certain functions. So, run the SFC or use the DISM repair scans that might work for you or perform a clean install.
- Unsupported Users Account – There might be some sort of authentication problem that is causing the error. And re-verifying the user account might work in your case.
Now, here we have listed some possible solutions that will help you to the bottom of the error and solve it.
Check for Virus infection
If there is system is infected with the virus or any other malicious threats, then this starts running in the background and takes control of your system’s functioning slowly. So, if you start getting the unexpectedly on your Windows system then scanning your system will help you to detect potential threats.
Windows Firewall is a good choice but sometimes it fails to detect strong and suspicious viruses or malware. So, it is suggested to scan your system with the best antivirus program on Windows 10 and perform a full system scan. If any potential threat is found then make sure to remove it completely.
And restart your system, and try login into your Windows. Check if you get the error or head to the next solution.
Perform a System Restore
Many times, installing the 3 rd party programs or getting some 3 rd party services to start causing errors on the Windows system. So, restoring your system to the earlier image help you to get past the error. But if in case you had created a system restore point.
Please Note – Perform a system restore won’t damage the data but only remove the recent changes made by you.
Follow the instructions to perform a system restore:
- Press Windows + S key and in the search box type Recovery and from the list find and click on it
- Now on the right side click on the option Open System Restore Accessing the System Restore tool
- A new window appears then click on Next and follow the onscreen instructions to finish it. Now you will see the list of Restore Points created by you.
- And select one restore point prior to getting to the error and get back to the healthy state. Using System Restore
- Wait for the restoring process to finish and reboot your system to let the changes take effect.
Now check if the Windows needs your current credentials error is fixed or else move down to the next solution.
Modify Group Policy Configuration
Well, this solution is for the Windows 10 Pro and later Windows versions linked domains users. Here it is suggested to changes the Group Policy settings as it they get misconfigured; they also start causing unexpected problems on the Windows system.
Note: If you are using you will have to enable the group policy editor for Windows 10 Home.
Changing them to the default settings worked for many Windows 10 users to solve the error. Here follow the instructions given below:
- Press the Windows + R key to open Run Box and here type the command Gpedit.Msc and hit OK. Open Gpedit.Msc
- Then a Local Group Policy Editor window appears on your screen.
- And in the left side click on the Computer Configuration > next double click in the Administrative Templets . Open Computer Configuration
- Now select System and at the last click on the Logon option from the list.
- And at the right side double click on an Always wait for the network at computer startup and login option. Access Logon option
- Check if the option was enabled then Disable it. Or else try setting it to Not Configured
- Hit Apply and OK and exit the window Group Policy Editor.
Next reboot your computer and as the system boots, try to login to Windows 10 using your Pin or password and check if you again encounter the error to managed to log in.
But if still, the error persists then moving down to the next solution might work.
Re-authenticate the User Account
If you are able to log in using the same account in different systems then there is a possibility in your Windows 10 system there is some sort of authenticating issue. Many users confirmed verifying the user account worked for them to solve Windows needs your current credentials then Locked Out message.
Follow the steps to do so:
- Click on the Start menu and right-click on the User Profile option
- Now choose Change Account Settings Option Select Change Account Settings Option
- Then go to the option Your Info on the left side. Select Your Info option
- After that on the right side click on the option Verify Link and you will get to a sequence of the on-screen commands.
- Follow them and continue for verifying your info.
Once the verification process is finished reboot your Windows 10 computer and once the system boot it is estimated you are able to log in to Windows 10 system without seeing the error.
Try Activating the Windows 10 Trial Version
Well, it is clear to fix Windows needs your current credentials error on Windows 10, you cannot use the Windows 10 Home any longer. Here you need to upgrade your Windows system to the trial version.
Also, a number of Windows 10 users confirmed that upgrading Windows 10 from Home to Pro worked for them to fix the error.
This is a time-consuming solution but if you are using Windows 10 Home or the above solutions won’t work for you then this will definitely do the trick.
Follow the instructions to do so:
- Press Windows + I key to open the Settings window
- Now click on the Update & Security Option Click on Update & Security
- Then on the left side click on the Activation
- Now click on the option Change Product Key on the right side
- And as promoted, enter the product key: VK7JG_NPHTM_C97JM_9MPGT_3V66T and hit Enter. It will initiate the Trial version and the copy of Windows 10 Pro is not yet activated. Change Product Key
- Now you need to locate the Start Upgrade button in the next step and click on it.
- Wait till the process is finished and the system shutdown and reboots. You will see the below-given message:
“Working on upgrades
<__% complete>
Don’t turn off your computer.”
Once the process is finished, you will see a similar features screen, here you need to wait till it gets 100% complete and you will the message: Edition upgrade completed. And it is done, your system is now ready.
And now the Windows 10 is upgraded to the Pro version , you need to open the Activation screen, through Settings by pressing Windows + I key and verify the current version. Also, for activating Windows 10 Pro a genuine key is needed.
But as of now, it is estimated the error is resolved.
Refresh the OS Component
If after trying all the potential fixes you are still dealing with the error on Windows 10, then there might be some sort of serious system file corruption and this is what leading the error while login.
So, here it is suggested to reset each and every Windows component by performing a clean install or perform in-place repair. If you are looking for an easy way then perform a clean install .
But if you wondering about the different approaches that leave the personal files saved on the OS drive, then you may require compatible installation media for starting the repair install or in-place repair process.
Doing this is significantly tedious than performing a clean install, however, the main benefit is that you will be able to refresh the entire possible corrupted component without losing the data from the apps, documents, games and personal data stored on the drive.
So, it is estimated now you are able to fix Windows needs your current credentials error and login to your Windows 10 system.
How to Fix “Printer is in an error state” Issue?
The “ Cannot change fingerprint or PIN ” problem in Windows 11 happens when the options to change these settings are greyed out in Settings → Accounts → Sign-in options. Even if you are the administrator, you can’t update your Windows Hello credentials. You might also see a message like “ This option is temporarily unavailable. ”

Can’t disable PIN or Fingerprint on Windows 11
This usually happens because Windows Hello’s stored data (in the Ngc folder) is damaged or not in sync. Other reasons include security rules set by your workplace or school, connected work accounts, or restrictions set in the registry or group policy.
Now that you’re aware of the potential causes, let’s go through some steps that have helped other users fix or work around this problem:
1. Change the PIN or Fingerprint the Conventional Way
If your goal is to remove the fingerprint or PIN without setting up another sign-in method, please note that this is not possible on Windows 11.
Windows 11 requires you to have at least one Sign-in option enabled. The Remove button will remain grayed out if you only have one active sign-in method.
Can’t disable PIN or Fingerprint on Windows 11
For example, the Remove button for your PIN will stay unavailable until you add a different sign-in option (like Facial Recognition, Fingerprint, or a Security Key).
If you want to stop using your PIN or Fingerprint, you’ll need to set up an additional way to sign in.
Below are step-by-step instructions to set up a new sign-in option and then remove your current one:
- Press Windows key + I to open the Settings menu in Windows 11.
- Inside the Settings menu, click on Accounts from the vertical menu on the left. Accessing the Accounts menu Note: If the left menu is hidden by default, click the menu button (top-left corner) to reveal it.
- Once in the Accounts menu, move to the right-hand section of the screen and select Sign-in options. Accessing the Sign In Options menu
- Now, choose which sign-in method you’d like to set as a fallback. Sign-in Options Note: Your available options depend on your device. If your PC doesn’t support facial recognition or you don’t have a security key, you can switch between PIN and fingerprint.
- After you pick your new sign-in method, follow the on-screen instructions to set it up.
- Once your second sign-in option is set, you’ll be able to click the Remove button to get rid of your previous sign-in method. You can also choose Change PIN or Change Fingerprint to update, rather than remove, your sign-in credentials. Modify the current PIN or remove one of the configured sign-in options
2. Remove PIN or Fingerprint Requirement by Using a Local Account
If you want to completely remove all sign-in options like PIN or Fingerprint, you will have to switch to a local account .
We generally don’t recommend this unless you really need to, as it can limit the functionality of some built-in Windows features (like Windows Update and the Microsoft Store).
If you still want to remove your PIN or Fingerprint sign-in, you’ll need to set up a local account with a password instead. Keep in mind, this means you’ll need to stop using your Microsoft account on your PC.
Important: This method isn’t available if you’re enrolled in the Windows Insider program.
To change from a Microsoft account with PIN or fingerprint to a local password, follow these steps:
- Press Windows + I to open the Settings menu in Windows 11.
- In the Settings menu, click on Accounts from the menu on the left. Accessing the Accounts menu Note: If you don’t see the left menu, click the menu icon (top-left corner).
- Inside Accounts , click on Family & other users on the right-hand side. Accessing the Family and other users tab
- In the Family & other users tab, check for any accounts listed under Other users. If you find any, remove them before moving on.
- Next, return to the main Accounts menu and click on Your info on the right. Accessing the Your Info tab
- Scroll down to Account Settings and click on Sign in with a local account instead . Sign in with a local account instead
- On the next screen, click Next .
- When prompted, enter your current PIN or use your fingerprint as requested. Inserting the PIN
- Then, you’ll be asked to create a username and password for your new local account, along with a password hint in case you forget. Configure the local account
- Finally, click Sign out and finish to complete the switch.
