The “ Uplay is unable to start your download ” usually appears when users are trying to install or update a Ubisoft game. The game fails to download or update properly. This is considered as a major issue as users are prevented from downloading and updating their games.

Uplay Is Unable to Start Your Download
Luckily, other users who have struggled with the same problems posted their methods online and we decided to put them together in this article. Make sure you check out these methods and follow the instructions carefully to resolve the problem!
What Causes the “Uplay Is Unable to Start Your Download” Error on Windows?
The “Uplay is unable to start your download error” can be caused by various causes. The first you should check is the Ubisoft website and their social media accounts to see if there are issues with their servers. If their servers are to blame, nothing can help you until they decide to resolve the problem. For other possible causes, check out the list we have prepared below!
- DNS issues – DNS issues are related to your network settings. The best way to resolve them is to simply start using Google’s DNS address which can be used for free. Alternatively, you can try flushing your DNS and resetting TCP/IP. Make sure you see if that resolves the problem!
- Compatibility and permissions issues – If you are struggling with starting the download in Uplay, make sure you try running the client in compatibility mode for Windows 7 and providing administrator permissions. This can help you resolve some permissions issues with the installation folder.
- Antivirus is blocking Uplay – If the error only started to appear recently, make sure you try disabling your antivirus during the installation. Each antivirus tool can be disabled differently but you should also disable Windows Defender!
- Installation folder issues – Uplay may struggle to install the game in the directory you’ve chosen. This can be resolved simply by installing the game to a different directory or by renaming the folder and renaming it back to make Uplay re-scan it!
Solution 1: Switch to the Preview Version
If the issue is appearing no matter which game you try to download, you should check to see if Uplay has deployed a fix in the preview version. The preview version is the next version of the Uplay client to be released and it’s possible that the problem can be released as simple as that. Follow the instructions below to switch to this version!
- Open up the Uplay client by double-clicking its icon on the Desktop. Alternatively, you search for its entry in the start menu and left-click the first available result.
- Click the menu button at the top-left corner of the home screen and choose the Settings option from the menu.

Uplay Settings
- Stay in the General tab in the right-side navigation menu and check the box next to the Try out Preview Versions Exit the client completely.

Check this box!
- Reopen it and check to see if the “Uplay is unable to start your download” error still appears on your computer!
Solution 2: Use Google’s DNS Address
The real cause behind this problem may be your DNS address settings. The best thing you can do about that is to change the default DNS address you are using to a free one provided by Google. Many users around the world were able to resolve the problem simply by following the steps below!
- Open the Run dialog box by tapping the Windows Key + R keys at the same time. When the box opens, type “ inetcpl. cpl ” in the Open textbox and click the OK button.
- Alternatively, open Control Panel by searching for it in the Start menu. Change the View by setting to Category and click to open the Network and Internet
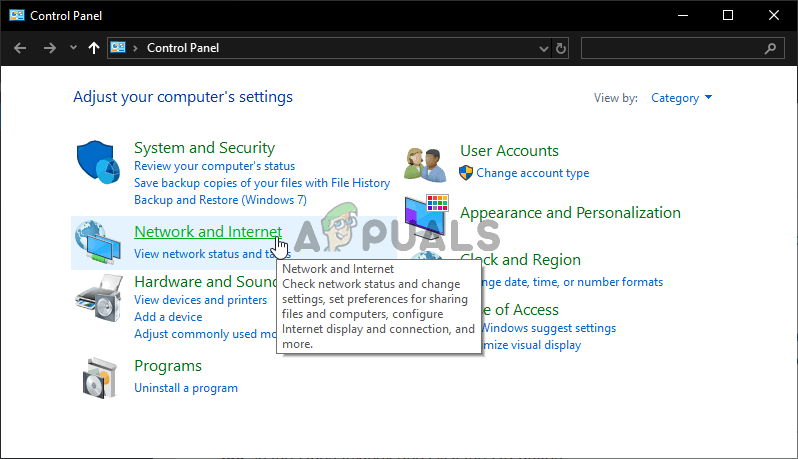
Network and Internet section in Control Panel
- Inside, click the Network and Sharing Center In this window, click the Change adapter settings option at the right-side menu.
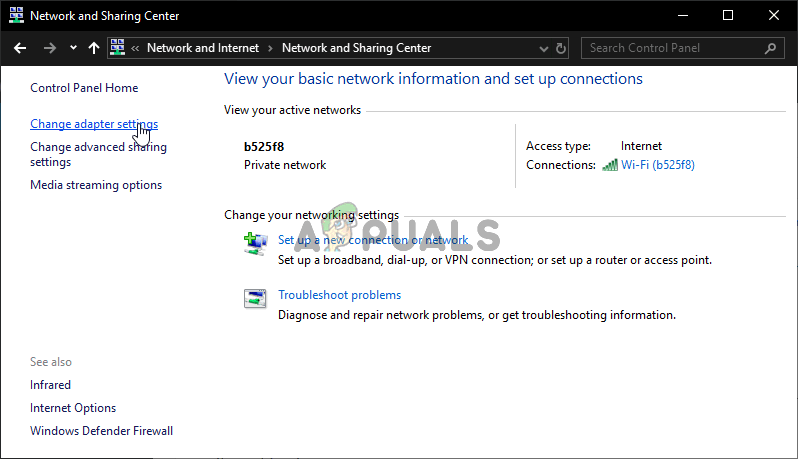
Change adapter settings
- Either way, locate the current network adapter you are using, right-click its icon, and choose Properties from the context menu which will appear. In the This connection uses the following items list, locate and left-click the Internet Protocol Version 4 (TCP/IPv4) option before clicking Properties
- In the General tab, switch the second radio button to Use the following DNS server addresses . Put 8.8.8 and 8.8.4.4 as preferred and alternate DNS server, respectively.
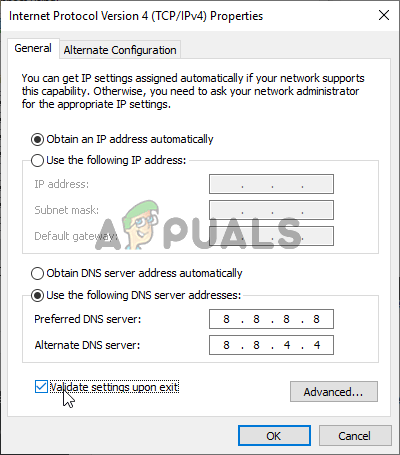
Setting up Google’s DNS address
- Check the box next to the Validate settings upon exit option and click the OK buttonet to confirm the changes. Reopen Uplay and check to see if the “Uplay is unable to start your download” error still appears.
Solution 3: Flush Your DNS and Reset TCP/IP
This method is more of an extension to Solution 2. If you have followed the steps from Solution 2 properly and the problem hasn’t been resolved, make sure you follow up with this solution. Flushing your DNS and resetting TCP/IP are two great methods of resolving various networking issues and users have reported that they worked for them! Make sure you check them out below.
- First of all, you need to open the Command Prompt. You can click the Start menu or the Search button and simply type “ cmd ”. Right-click the first result and choose Run as administrator from the context menu which will appear.
- Also, you can use the Windows Key + R key combination to open the Run dialog box. Type “ cmd ” in the box and use the Ctrl + Shift + Enter key combination to open an administrative Command Prompt session.
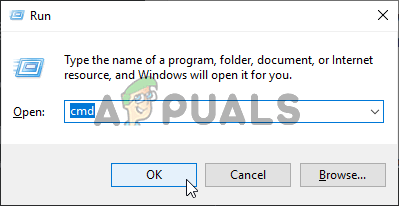
Running Command Prompt
- After Command Prompt opens, type in the following two commands in the window. Make sure you tap the Enter key after running each one and make sure the command has run successfully:
ipconfig /flushdns
netsh int ip reset
- Check to see if the “Uplay is unable to start your download” error still appears when trying to download or update a Ubisoft game.
Solution 4: Reinstall Uplay
This is probably one of the most basic fixes but we wouldn’t include if it didn’t help people resolve their problem completely. Reinstalling the Uplay client is easy and it can be done in a couple of minutes. Make sure you include this method in your troubleshooting process.
Windows 10:
- Click the Start menu button and locate the cog icon in the lower-left part of the Start menu section. Click it to open Settings . Alternatively, you can search for Settings or you can use the Windows Key + I key combination for the same effect.

Opening Settings from Start menu
- After Settings open, click to open the Apps A list of installed apps should open immediately. Wait for it to load and scroll down until you see the Uplay entry. Left-click it and click the Uninstall button to open its uninstallation wizard. Follow the instructions on the screen!
Older versions of Windows:
- Open Control Panel by searching for it in the Start menu. Also, you can use the Windows Key + R key combination to open the Run Type “ control.exe ” in the textbox and click the OK button to open Control Panel.
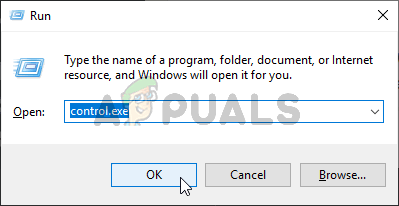
Running Control Panel
- Change the View by setting to Category and click the Uninstall a program option under Programs . A list of installed programs should appear. Scroll down until you locate Uplay , left-click on it, and choose the Uninstall button from the top of the window.
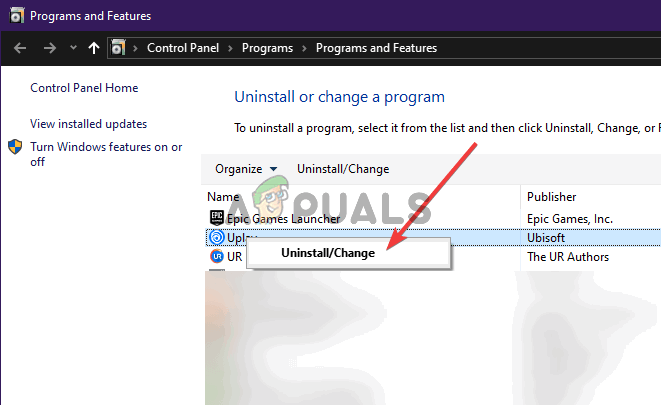
Uninstalling Uplay
- Follow the instructions which will appear by the uninstallation wizard!
Install the latest client by opening this link and clicking the Download now button at the top-right corner. Afterward, reopen the Uplay client and check to see if the problematic error message appears when trying to download anything by the client!
Solution 5: Modify the Uplay Client’s Compatibility Properties
There are two settings you need to change: running the client in compatibility mode and running it with administrator permissions. These two settings combined can resolve your problem quickly and we see no reason for you to skip this method. Check out the steps below!
- Locate the Uplay shortcut icon anywhere on your Desktop, right-click it, and choose the Open file location option from the context menu which will appear. Alternatively, you’ll need to locate the Uplay installation folder. The default location is:
C:\Program Files (x86)\Ubisoft\Ubisoft Game Launcher
- Locate the Uplay. exe file, right-click on it, and choose the Properties option from the context menu which will appear. Navigate to the Compatibility tab inside.
- In the Compatibility mode section, check the box next to the Run this program in compatibility mode for option and choose Windows 7 from the menu below.
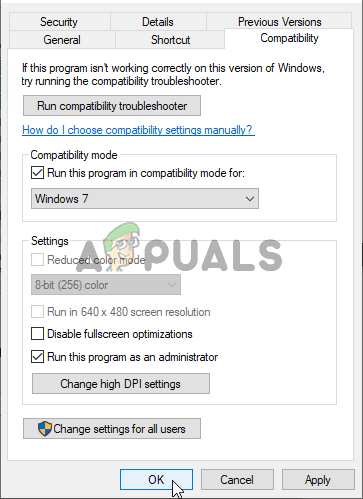
Setting up compatibility settings
- Additionally, look under the Settings section and check the box next to the Run this program as an administrator Click the OK button to apply the changes and see if the “Uplay is unable to start your download” error still appears when trying to download or update a Ubisoft game.
Solution 6: Delete a Certain Folder
The Uplay client’s cache is kept inside a folder in the AppData folder. Deleting this folder can help you resolve the problem without having to reinstall the app or lose game files. Make sure you navigate to it and delete it to hopefully resolve the problem!
- Open up File Explorer by opening any folder or by clicking the Libraries icon in the Quick Access menu. Either way, click the This PC icon from the left-side navigation menu and open up your local disk . Once inside, open the Users folder and look for the folder named like the account you are logged into.
- Once inside, open the AppData If you are unable to see it, click the View button from the top-side menu bar and check the box next to the Hidden items option.
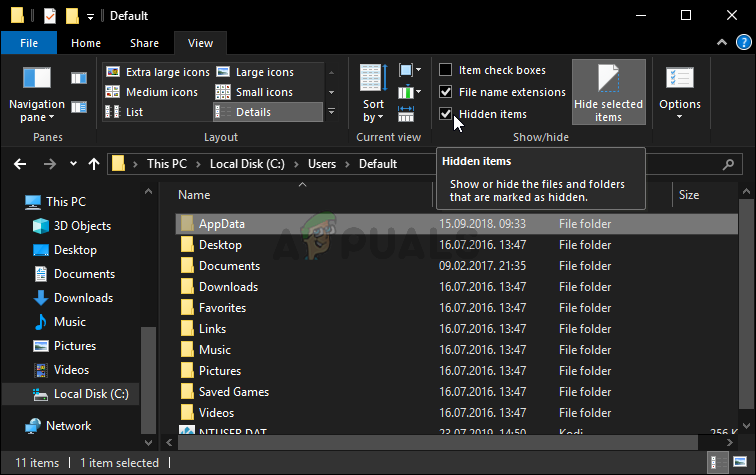
Revealing the AppData folder
- Open the Roaming folder inside and look for the Ubisoft Once you locate it, right-click on it and choose the Delete option from the context menu which will appear. Reopen the Uplay client and check to see if the same error message appears!
Solution 7: Disable Your Antivirus
It’s advisable to turn off your antivirus real-time shields if you are experiencing issues when downloading or updating games. This has helped many users who used various antivirus tools. However, make sure you re-enable your antivirus shields as soon as possible as it’s highly unadvisable to leave your PC unprotected! The steps to disable each antivirus are different. After disabling it, you also need to disable Windows Defender!
- Locate the shield icon in your system tray (right-part of your taskbar). You might need to click the upwards arrow to see more icons. Right-click on it and choose the View security dashboard
- Alternatively, click the Start menu button and locate the cog icon in the lower-left part of the Start menu section. Click it to open Settings . Also, you can search for Settings or you can use the Windows Key + I key combination for the same effect.

View security dashboard
- After Settings open, click to open the Update & security Navigate to the Windows Security tab from the left-side menu and click the Open Windows Security button at the top.
- Click the shield icon in the Windows Security window. It’s located at the left-side vertical menu. Scroll down until you reach the Virus & threat protection settings and click the Manage settings
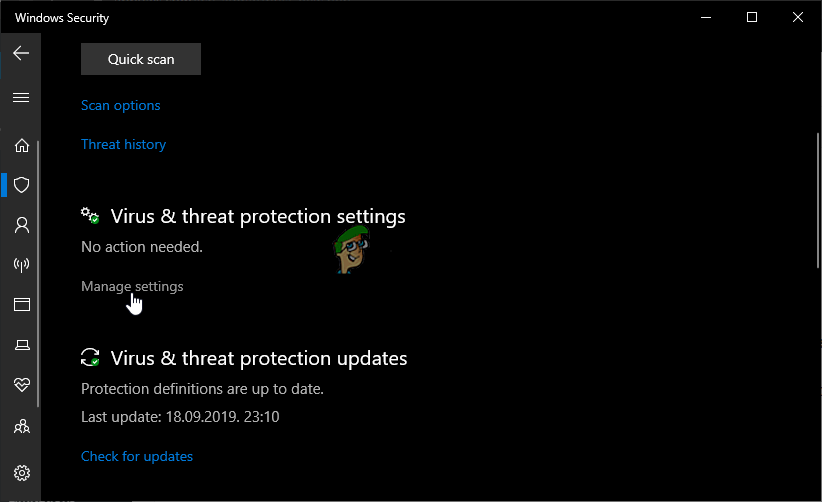
Manage Virus & Threat Protection Settings
- Set the slider to off under Real-time protection . Confirm any prompts which may appear and re-open Uplay to see if you are now able to download and update games without receiving any errors.
Solution 8: Rename the Folder of the Problematic Game
Renaming the folder where the game is ought to be installed will fool the Uplay client that the game hasn’t even started to download and you will be prompted to download it again. After that, renaming it back to its former name will cause the client to recognize it start the download again. This is useful for users trying to update their game!
- Make sure Uplay is not running. Use the Ctrl + Shift + Esc key combination to open Task Manager . You can also use the Ctrl + Alt + Del key combination and choose Task Manager from the list of options.

Opening Task Manager
- Click the More details button in Task Manager if available and navigate to the Details Inside, scroll down until you locate the Uplay.exe entry. Left-click to select it and click the End task button.
- Locate the folder where the game’s installation folder is located. By default, it’s:
C:\Program Files (x86)\Ubisoft Game Launcher\games
- Right-click the folder names as the problematic game and choose the Rename option from the context menu which will appear. Rename it to anything but keep a note of the original name.

Rename the corresponding folder
- Reopen Uplay and you will be prompted to redownload Siege. Now, rename the folder back to what it originally was. Click the Download button in Uplay and the existing files should be recognized and the game should start to update!
Solution 9: Verify Game Files
Verifying the game files of the game you are struggling to install is quite useful. It can circumvent the actual download by checking to see if all files are available and, if not, download them automatically. Users were able to resolve their issues in this manner so make sure you check this solution out!
- Open up the Uplay client by double-clicking its icon on the Desktop. Alternatively, you search for its entry in the Start menu and left-click the first available result.
- Click the Games button to access the list of games you have installed. Click the game you want to verify and click Properties from the menu which will appear.

Verify game files in Uplay
- You will see the Verify files button under the Local files section. Click it and wait for the process to complete. After that, you will see a report about whether any files were redownloaded. Check to see if the same error appears when trying to download or update Uplay games.
Solution 10: Change the Download Directory
Another possible cause of this issue might be the folder where you want to install the game. It’s quite possible you don’t have the necessary permissions or the Uplay client simply refuses to use that folder. The best thing you can do in that scenario is to simply change the default installation folder.
- Open up the Uplay client by double-clicking its icon on the Desktop. Alternatively, you search for its entry in the Start menu and left-click the first available result.
- Click the menu button at the top-left corner of the home screen and choose the Settings option from the menu.
Uplay Settings
- Make sure you navigate to the Downloads Click the Change button under the Default game installation location and try using a different location. It would be best to use a location on another disk/partition.

Change default game installation location
- Check to see if the “ Uplay is unable to start your download ” error still appears on your computer!
How to Fix “Printer is in an error state” Issue?
The error “ WinRAR Error: Next Volume Is Required ” usually appears when you’re extracting a multi-part RAR archive and WinRAR can’t find (or can’t correctly identify) the next file in the sequence . This often happens when a volume is missing , stored in a different folder , or renamed in a way that breaks the archive’s expected order .

In this guide, we’ll go over the most reliable fixes confirmed by affected users, along with what each method is doing behind the scenes so you can choose the right one for your situation.
Important: To extract multi-volume archives, you should always start extraction from the first file in the set. This is usually file.part1.rar , or (in older sets) the main .rar file that comes before .r01 , .r02 , and so on.
1. Download and Place the Missing RAR File
WinRAR needs all parts of a multi-volume archive to complete extraction. This error usually appears when one of the volumes in a set like .part2.rar , .r01 , .r02 , .001 , and similar naming formats is missing . Downloading the missing volume and placing it in the same folder as the other parts allows WinRAR to continue extracting normally .
- Look at the error message or review the list of archive parts in the folder.
- Identify which volume is missing (for example, part2.rar , .r02 , .001 , etc.).
- Go back to the website or source where you downloaded the archive.
- Locate and download the exact missing file using the same naming format as the others.
- Make sure the new file name matches the pattern of the rest. Example: If you have file.part1.rar and file.part3.rar , the missing one must be file.part2.rar .
- Move the downloaded missing volume into the same folder as the other archive parts.
- Confirm that all parts are in a single folder before extracting.
- Right-click the first file in the series (usually part1 or the main .rar file) and select Extract Here or Extract to Folder .
- WinRAR should now detect all volumes and continue extraction normally .
2. Manually Browse & Select the Next Volume
Use this method only if the next volume already exists , but WinRAR is failing to detect it automatically. This can happen due to incorrect naming , the file being in a different location , or a temporary file access issue. Manually browsing helps WinRAR locate the correct volume and resume extraction without interruption .
- Right-click the first file in the series (usually .rar or part1.rar ) and select Extract Here or Extract to Folder .
- When WinRAR cannot find the next volume, it will show the “ Next Volume Is Required ” message.
- A small window will appear, allowing you to manually select the next volume .
- Use the file explorer window to locate the folder where the other archive parts are saved.
- Select the next part based on the naming order (example: select file.part2.rar after file.part1.rar ).
- Make sure the selected file matches the naming format of the archive (no extra characters like (1) and no mismatched numbering).
- WinRAR will resume extraction using the selected volume .
- If additional volumes are missing or stored separately, WinRAR may prompt you again. Repeat the same process until extraction completes.
3. Rename the RAR files in Order
WinRAR relies on a proper naming sequence (such as file.part1.rar , file.part2.rar , file.part3.rar ) to extract multi-volume archives. If a file is named incorrectly, contains extra characters, or is out of order, WinRAR may fail to locate the next volume and show this error. Renaming the files correctly helps WinRAR follow the sequence and extract the archive without interruptions .
Note: Renaming only changes the file name , not the file contents. The goal is to restore the correct sequence so WinRAR can detect the next volume.
- Go to the folder where all the RAR files are saved.
- Make sure all parts of the archive are present and stored in the same folder .
- Check how the parts are currently named . Common patterns include:
file.part1.rar, file.part2.rar, file.part3.rar
file.rar, file.r01, file.r02, file.r03
- Look for files that don’t match the expected numbering pattern (for example, file.part01.rar , file.part1(1).rar , or unrelated names).
- Rename each file so it follows the same order without extra characters or mismatched numbering. Example:
Incorrect: file.part1.rar, file.part3.rar, file.part2(1).rar
Correct: file.part1.rar, file.part2.rar, file.part3.rar
- Make sure the text before the number is exactly the same for all files.
- Only the last part number should change.
- Right-click the first file in the series (usually part1.rar or the main .rar file) and select Extract Here .
- WinRAR should now recognize the sequence and continue extraction normally .
If you still get the same prompt: the archive set is likely incomplete (a part was never downloaded or was removed), or one of the volumes is corrupt and must be re-downloaded from the original source.
