Photoshop is an incredibly powerful application. Even if you’re a die-hard fan of Corel Draw, you’ll probably admit that some Photoshop features are simply superior. But while the UI of Photoshop is overly intuitive, the same cannot be said about dealing with Photoshop errors.

By far, the most common Photoshop error is “ scratch disk is full “. Some users get it when they try to start Photoshop, others when trying to complete a certain action. But why does this happen and how can we fix this issue?
What causes the Scratch Disk Error?
Before we get to the potential fixes that will remove photoshop scratch disk full error, it’s important to understand what a scratch disk actually is.
All Adobe programs like Photoshop or After Effects need a working space to store temporary project files. If Photoshop, (or another program) doesn’t have enough RAM memory to store something temporarily, it uses hard drive space as a temporary virtual memory holder. This hard drive space is referred to as a scratch disk.
Photoshop is more than capable of creating a mountain of temp files if you’re working with large elements, so don’t be quick to put the blame on your computer. If both the RAM and the scratch disk become full with temporary files, you will get a “ Scratch Disk is full ” error which might also prevent you from creating new files .
If you get “ scratch disk is full ” errors when you start Photoshop or when performing certain actions, there are a few potential fixes that proved to be effective. Below you have a collection of methods that proved to be effective in removing the “scratch disk is full” error. Please follow each guide in order until you find a fix that works in your situation.
Before You Continue: Make sure that you don’t set the blank page/image resolution to something unreasonable like 1920×1080 inches. Sometimes users confuse inches and pixels and set the resolution in inches instead of setting it in pixels which is a very unreasonable length. Make sure to set the resolution in pixels and not in inches.
1. Free up enough disk space

Once you’re into the Preferences menu , confirm which storage drives serve as a scratch disk and make sure it has at least 40 GB of free space. If it doesn’t, access your drive and start removing unwanted files until you free enough space.
2. Delete temporary files
The good news is, Photoshop files can be easily identified and deleted. Usually, their name starts with ~PST or Photoshop Temp (in newer versions). You can delete them safely without any risk of affecting your system. Your temp folder is located in C:/ > Users > “YourUser” > AppData > Local > Temp.

3. Changing the scratch disk location

Select another partition from the drop-down menu near First and hit Ok . Your Photoshop should know restart without showing the “ scratch disk is full ” error.
4. Increasing the RAM allowed by Photoshop
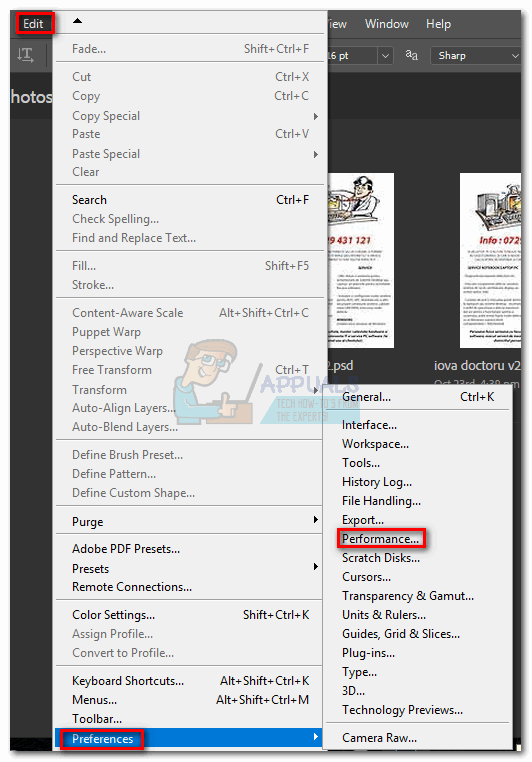
- Open Photoshop and go to Edit > Preferences a nd click on Performance.
- Once you’re in the performance menu, adjust the sliders in Memory Usage to increase the RAM memory that Photoshop is allowed to access. Do not set it about the 80% threshold, as it can make your PC run slower.
5. Adjusting your scratch disks
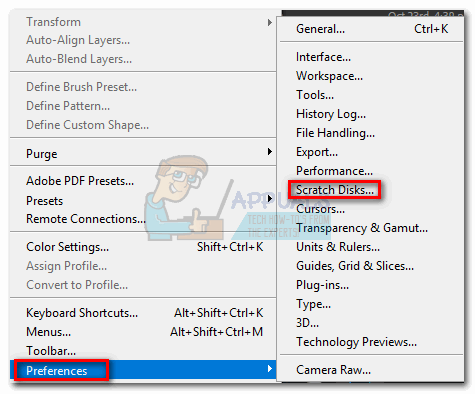

Once you reach the Scratch Disks tab, check the box near each partition to enable them as scratch disks. Then click Ok and restart Photoshop.
6. Purging Cache
- Open the Photoshop window in which you are currently working.
- In the top tray, click on the “Edit” option and select the “Purge” button. Clicking on the “Purge” button
- There are a couple of options here. These are explained as follows. Undo: Clears the record of your changes and by deleting you won’t be able to undo your changes. Clipboard: Clears the clipboard of the things that you might have copied. You won’t be able to paste anything that you have copied so far if you clear this. History: Deletes the history of your changes to the image. The changes stay but you won’t be able to lookup the changes that you have made to an image. All: Deletes all cache. Video Cache: Deletes all video cache that you might have in store. Deleting this won’t allow you to revert changes made to a video.
- Click on the option which you want to clear and confirm the warning prompt.
- Check to see if the issue persists.
7. Creating Partition for Scratch Disks
- Open Run by Pressing the “ Windows + R ” keys together. 2. Once Run is opened type “ diskmgmt.msc” and press enter. 3. Now select a disk that you were using as a Scratch Disk before. Right-click on it and press Shrink Volume. 4. Now Select the Size you want your Scratch Disk to be. 5. After creating a new partition, Open Photoshop and press “CTRL + ALT” then select the new Partition you just created.
