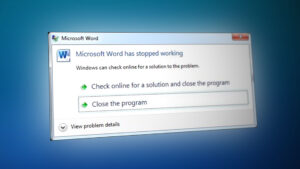
With the increasing fame of Microsoft Office, its applications like MS Word, have gained worldwide users’ favor. However, the more users there are, the more problems there are. “Microsoft Office Word has stopped working” is one of the top concerned questions for many Word users. Usually, when a Microsoft word stopped working error shows up, you have two available options to undertake: check online for a solution or close the program. When you choose to close the application, you may run into another problem that Microsoft won’t open. When you choose to check a solution online, it will open a window with a bing search by default which also doesn’t help the situation itself. The error notification is as follows:
Microsoft Word Stopped Working Fix
What Causes Microsoft Word Stopped Working on Windows 10?
Except for finding the right solutions to solve the Microsoft office has stopped working error on Windows 10, it’s highly necessary to know the reasons that cause your Word malfunction to avoid problems like these to occur in the first place. The list of reasons is as follows:
- Compatibility: This problem is likely to occur if your MS Office version is not compatible with the current Operating System on your PC. The mismatch may occur from either of the concerned parties i.e. Operating System and Microsoft Word. Some people have connected it to the fact that certain applications are made for older versions of Windows, and aren’t fully compatible with newer releases.
- Outdated Software: Using an older version of Microsoft Word on an updated operating system will most likely cause this error. That’s because software updates address any new-found security issues, fix recently discovered bugs, and add support for drivers and new hardware.
- Device Driver Update: Device drivers are essential pieces of software that help different hardware components work smoothly with your computer. When these drivers are properly updated, your computer will run smoothly. However, when they have become outdated they can start causing problems like the one under consideration.
- Word Add-in Issue: To enhance their functionality, Word and many other Office tools support add-ins. These little applications allow you to expand the functionality of Word or any other Office tool with new features. Unfortunately, not all add-ins are compatible with Windows 10 or with your version of Office therefore, there is a high probability that add-ins may lead to the error under consideration.
- Corrupted Word File: A Word document may get corrupt for several reasons that will prevent you from opening it or may cause this error. This behavior may be related to damage to the document or to the template on which the document is based.
All the causes mentioned above are the result of thorough online research done by our technical researchers. Let us move forward now.
Pre-requisites:
Before jumping into the solutions, our advice is to go through these short but promising workarounds that helped many individuals online. In case these do not work for you, you can sort out your problem by following the solutions, provided right-after. Discussed workarounds are as follows:
- Update Microsoft Word/Office: The user should keep the software updated, so to update Microsoft word, open Microsoft Word and click File > Account > Product Information > Update Options and click Enable Update and then select Update Now .
- Check Corrupted File: Sometimes the word document file is corrupted which can not open in Microsoft Word and gets an error of Microsoft Word Stopped Working. The user can try to open another file in MS Word to check either it’s a software issue or the file is corrupted.
Solution 1: Disable Add-Ins in Safe Mode
Starting a Microsoft Word for Windows application in Word Safe Mode can allow you to safely use it when it has encountered certain problems. This is useful when you need to open a file that you can’t under normal mode because the application is crashing or if you need help in identifying an add-in or extension that may be causing a problem on startup. The first troubleshooting step is to see if Word works in Safe mode. If it works in Safe mode, a COM add-in may be causing problems (A COM add-in is a supplemental program that extends the capabilities of Microsoft Word by adding custom commands and specialized features).
- Close Microsoft Word by right-clicking the Microsoft Word icon in the taskbar and select the Close window. This will end all the background ongoing processes related to Microsoft Word.
- Press Windows + R keys on your keyboard to open the Run dialog box.
- Type winword /safe and press Enter or click OK . This will start Microsoft Word in Safe mode. Note : If MS Word works fine in Safe mode, disable all COM Add-ins (while being in safe mode) and restart Word. Re-enable the add-ins one a time to identify the culprit. Follow the steps below to disable the add-ins. Opening Microsoft Word in Safe Mode
- Click File and then click Options . This will open a window that contains all options you can go through in MS Word. Opening Microsoft Word Options
- Click on Add-Ins from the options list, located on the left pane. Opening Add-Ins Option
- At the bottom, select COM Add-ins from the drop-down menu and click on Go . This will open a dialog box. Managing COM Add-Ins
- Uncheck all the add-ins and click OK to confirm. Some outdated add-ins are more likely to cause problems like the one under consideration. Unchecking COM Add-Ins
- Close the Dialog Box and MS Word. Now try running MS Word normally and see if it works.
- Repeat steps 1 – 3 to enable the add-ins, one at a time, and check which add-in is causing this error.
If the Office application doesn’t start on Step 7, check If there is another Add-ins option in the Manage list (just like COM Add-ins). In case there is, repeat this process for those add-ins as well.
We’ve received reports of crashes that occur when the Office Compatibility Pack Add-in is installed. This add-in allows people to use older versions of Office i.e. Office 2003, Office 2000, etc. so that they may open, edit, and save documents, workbooks, and presentations that were created in newer versions of Word, Excel, and PowerPoint. If you’re using Office 2010 or later, you can safely uninstall this add-in to get rid of the problem. To uninstall the add-in:
- Click Start , search Control Panel, and open it. This will open the Control Panel window that contains all the settings related to different Windows modules i.e. Networking, System and Hardware, etc. Opening Control Panel
- Under Programs, click Uninstall a Program . This will open a list of currently installed programs on your PC. Clicking Uninstall a Program Window
- In the list of currently installed programs, select Compatibility Pack for the Office System , right-click on it, and select Uninstall . If a dialog box appears, follow the on-screen instructions to remove the program completely from your PC.
If you are still facing the problem then this error isn’t related to add-ins. Please move onto the next solution to get rid of this problem.
Solution 2: Repair Microsoft Word Installation
There is a high probability that you are facing this error because some system files for Microsoft Word may have gotten corrupted. Microsoft Office comes with a feature of Installation Repair that verifies the integrity of the current system files and fixes or repairs all the corrupted ones. This solution proved to be helpful for many users online. Please follow the steps given below:
- Click Start , search Control Panel, and open it. This will open the Control Panel window that contains all the settings related to different Windows modules i.e. Networking, System and Hardware, etc.
- Under Programs, click Uninstall a Program . This will open a list of currently installed programs on your PC.
- Locate Microsoft Word , right-click on it, and select Change . This will open a window that contains options i.e. Repair, Uninstall, etc. for Microsoft Word. Note: Your office version will be written right next to Microsoft Word as shown in the picture below. Opening Microsoft Word Repair Settings
- From the multiple given options, select Repair and click Continue . This will start the repairing process. It may take time so wait until it gets finished. Note: For newer versions of Microsoft Office i.e Microsoft Office 365, you can choose Quick Repair and click Repair after step 3. It is a good practice to use the Quick Repair option first as it will fix many things fairly and quickly. Repairing Microsoft Word
- If Quick Repair doesn’t help, use the Online Repair option. It will not delete your existing Office settings or your Outlook profile and data files. Your problem should be fixed now. In case it does not, move to the final solution.
Solution 3: Clean Uninstall and Reinstall MS Word/Office
If the above solutions do not work for you then there is a strong possibility that some of the Microsoft Word system files are permanently corrupted and can not be fixed using the Repair utility. The easy fix would be to completely uninstall Microsoft Word and reinstall the latest fresh copy. This solution proved to be helpful for many users online. Follow the steps given below to do so:
- Click Start , search Control Panel, and open it. This will open the Control Panel window that contains all the settings related to different Windows modules i.e. Networking, System and Hardware, etc.
- Under Programs, click Uninstall a Program . This will open a list of currently installed programs on your PC.
- Select Microsoft Word/Office from the list of installed programs and click Uninstall . This will start the uninstall procedure. This procedure may take time so wait until it gets finished. Uninstalling Microsoft Office/Word
- Press Windows + R keys on your keyboard to open the Run dialog box.
- Type %appdata% and click OK. This will take you to a hidden folder named AppData where user data is stored for different applications installed on your PC. Opening Windows AppData Folder
- Open Microsoft folder , right-click on Word folder and select Delete . Furthermore, click Yes to confirm the deletion process. Deleting MS Word App Data
- Close all windows and again press Windows + R keys on your keyboard to open the Run dialog box.
- Type %Programdata% and click OK . This will take you to a hidden folder named ProgramData where program-related settings or data are stored. Opening Windows ProgramData Folder
- Repeat step 5. Now you have completely uninstalled Microsoft Word/Office from your PC.
- Install Microsoft Word/Office again from the downloaded setup. This should finally fix your problem.
How to Fix “Printer is in an error state” Issue?
The error “ WinRAR Error: Next Volume Is Required ” usually appears when you’re extracting a multi-part RAR archive and WinRAR can’t find (or can’t correctly identify) the next file in the sequence . This often happens when a volume is missing , stored in a different folder , or renamed in a way that breaks the archive’s expected order .

In this guide, we’ll go over the most reliable fixes confirmed by affected users, along with what each method is doing behind the scenes so you can choose the right one for your situation.
Important: To extract multi-volume archives, you should always start extraction from the first file in the set. This is usually file.part1.rar , or (in older sets) the main .rar file that comes before .r01 , .r02 , and so on.
1. Download and Place the Missing RAR File
WinRAR needs all parts of a multi-volume archive to complete extraction. This error usually appears when one of the volumes in a set like .part2.rar , .r01 , .r02 , .001 , and similar naming formats is missing . Downloading the missing volume and placing it in the same folder as the other parts allows WinRAR to continue extracting normally .
- Look at the error message or review the list of archive parts in the folder.
- Identify which volume is missing (for example, part2.rar , .r02 , .001 , etc.).
- Go back to the website or source where you downloaded the archive.
- Locate and download the exact missing file using the same naming format as the others.
- Make sure the new file name matches the pattern of the rest. Example: If you have file.part1.rar and file.part3.rar , the missing one must be file.part2.rar .
- Move the downloaded missing volume into the same folder as the other archive parts.
- Confirm that all parts are in a single folder before extracting.
- Right-click the first file in the series (usually part1 or the main .rar file) and select Extract Here or Extract to Folder .
- WinRAR should now detect all volumes and continue extraction normally .
2. Manually Browse & Select the Next Volume
Use this method only if the next volume already exists , but WinRAR is failing to detect it automatically. This can happen due to incorrect naming , the file being in a different location , or a temporary file access issue. Manually browsing helps WinRAR locate the correct volume and resume extraction without interruption .
- Right-click the first file in the series (usually .rar or part1.rar ) and select Extract Here or Extract to Folder .
- When WinRAR cannot find the next volume, it will show the “ Next Volume Is Required ” message.
- A small window will appear, allowing you to manually select the next volume .
- Use the file explorer window to locate the folder where the other archive parts are saved.
- Select the next part based on the naming order (example: select file.part2.rar after file.part1.rar ).
- Make sure the selected file matches the naming format of the archive (no extra characters like (1) and no mismatched numbering).
- WinRAR will resume extraction using the selected volume .
- If additional volumes are missing or stored separately, WinRAR may prompt you again. Repeat the same process until extraction completes.
3. Rename the RAR files in Order
WinRAR relies on a proper naming sequence (such as file.part1.rar , file.part2.rar , file.part3.rar ) to extract multi-volume archives. If a file is named incorrectly, contains extra characters, or is out of order, WinRAR may fail to locate the next volume and show this error. Renaming the files correctly helps WinRAR follow the sequence and extract the archive without interruptions .
Note: Renaming only changes the file name , not the file contents. The goal is to restore the correct sequence so WinRAR can detect the next volume.
- Go to the folder where all the RAR files are saved.
- Make sure all parts of the archive are present and stored in the same folder .
- Check how the parts are currently named . Common patterns include:
file.part1.rar, file.part2.rar, file.part3.rar
file.rar, file.r01, file.r02, file.r03
- Look for files that don’t match the expected numbering pattern (for example, file.part01.rar , file.part1(1).rar , or unrelated names).
- Rename each file so it follows the same order without extra characters or mismatched numbering. Example:
Incorrect: file.part1.rar, file.part3.rar, file.part2(1).rar
Correct: file.part1.rar, file.part2.rar, file.part3.rar
- Make sure the text before the number is exactly the same for all files.
- Only the last part number should change.
- Right-click the first file in the series (usually part1.rar or the main .rar file) and select Extract Here .
- WinRAR should now recognize the sequence and continue extraction normally .
If you still get the same prompt: the archive set is likely incomplete (a part was never downloaded or was removed), or one of the volumes is corrupt and must be re-downloaded from the original source.
