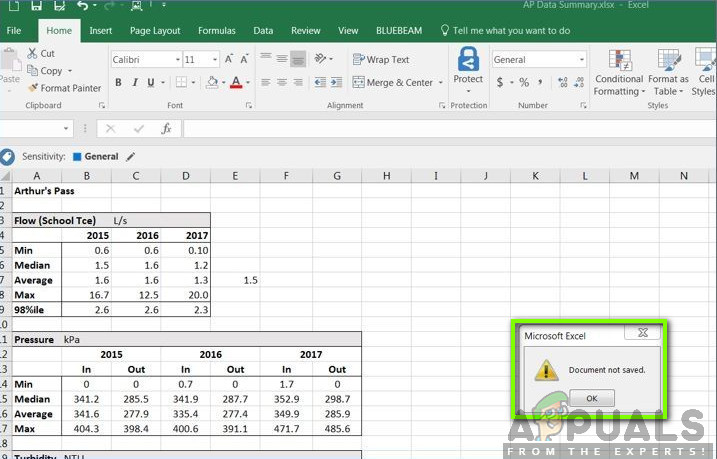
Several users of Microsoft Excel report that they are faced with the issue where they get an error message of ‘Document not Saved’. They also experience the issue where their document doesn’t get saved at all despite trying all the actions. Microsoft has officially acknowledged this issue on their official website.
How to Fix Excel Document not Saved
Despite what Microsoft was stating, we found that there are several other reasons as to why this issue was occurring and what are the workarounds present. Make sure that you follow the solutions from the start and work your way down accordingly. Also, we are assuming that you have an activated copy of Microsoft Office and are also an administrator.
What causes the Error messages ‘Document not Saved’, ‘Document not completely saved’, and ‘Document not Saved. Any previous saved copy has been deleted’?
After analyzing all the user reports and combining our research, we came to the conclusion that there were several different reasons as to why this issue might occur. Some of the reasons as to why you might experience the error messages listed are but not limited to:
- Process interrupted: The saving process was interrupted by you either intentionally or unintentionally. This is usually done by pressing the ESC button or pressing the close icon present at the top-right side of the window.
- Network issues: If you are saving the Excel document over the internet, there might be cases where because of a bad connection, the file sharing is interrupted and because of this, you receive an error message. Checking the network works here.
- Hardware problems: There are also situations where you are saving the Excel file to external hardware such as a USB or hard drive. If that hardware is causing issues or the file is not getting through, you will experience the error message.
- Permission issues: We also found some cases where users were saving the Excel files to a system directory where there were no permissions. If there are no permissions, the user will not be able to save the file and the error message will surface.
Before we move on to the solutions, we will try to save the existing Excel file which is open on your computer using another dummy file. This will save the contents of the file just in case and then we will proceed to troubleshoot the error message. Make sure that you are logged in as an administrator.
- Open a new Excel file. Now navigate back to the file which is causing the error and press Ctrl + C . This will copy the entire contents of the Excel file.
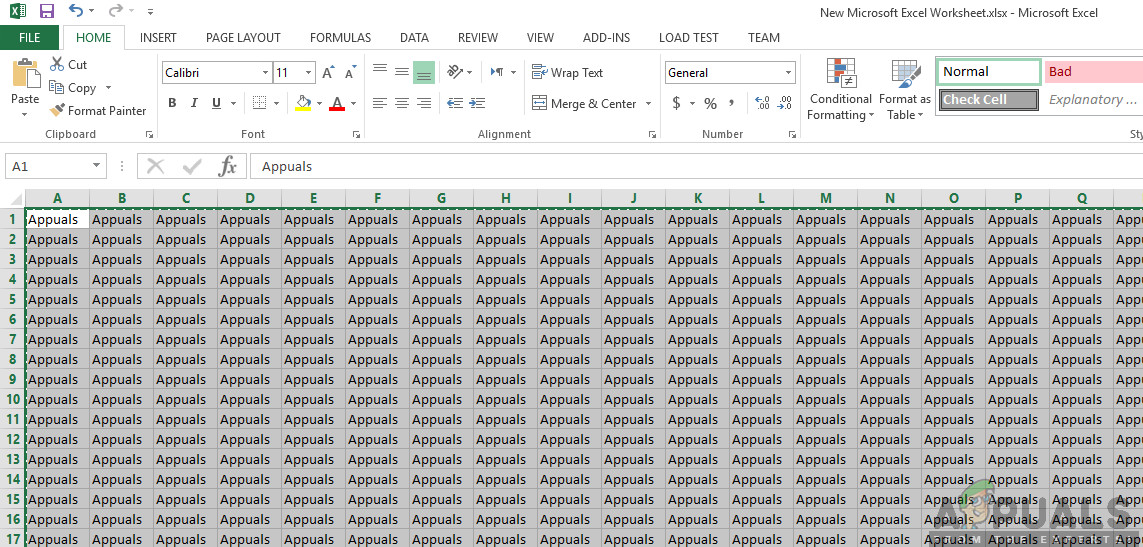
Copying Excel File Contents
- Now move back to the dummy excel file which we just created. Now click on the top-left cell and then press Ctrl + V . This will copy the entire contents including the formulas to the new file.
Saving Excel File Contents
- Once done, click on File > Save As and then select a local location which is present in your computer’s physical hard drive.
After saving the file, move on below to the troubleshooting methods:
Solution 1: Checking for Interruptions
There are also several cases where Excel is itself interrupted from saving the file to its required destination. This might occur in occasions where you accidentally press the Esc button or some other software/process prevents the saving from continuing.
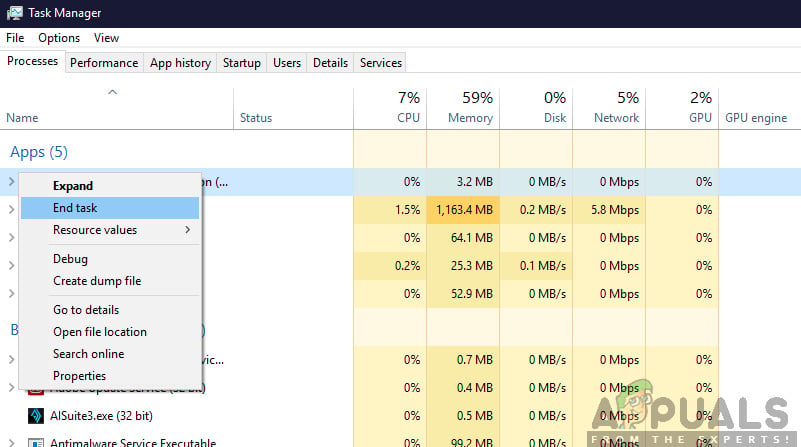
Ending Problematic Processes
Here, you should navigate back to the saving tab and then try saving again without pressing any other key. If this doesn’t work, press Windows + R, type “ taskmgr ” in the dialogue box and press Enter. The task manager should launch. Now check for any potential services which might disrupt the saving process. If you spot any, end the process and try saving again.
Solution 2: Checking Network Connection
There are numerous cases where you are saving the Excel file to a network location over a local network (for example, in organizations, employees sometimes save files remotely to another file location over the network). In these cases, the network should not have much delay and should have a stable property.
According to Microsoft, if your work network has disruptions every now and then and there is a high delay, there are chances that you will not be able to save the document. We also replicated the steps on our own systems and testing this statement positively.
If you are on an organizational network, try sending a remote file from other peer’s computer (considering he is already using the same network). If the same issue occurs, it means that there is some problem with the network connection properties and you should contact IT.
Solution 3: Checking Hardware Components
Another thing to check before we move on to the permissions is making sure that all your hardware is working properly. If you are saving the Excel file to an external flash/hard drive, then you should make sure that the connection is proper and seamless. Even if there is some physical damage to the external drive, you will receive this error message.
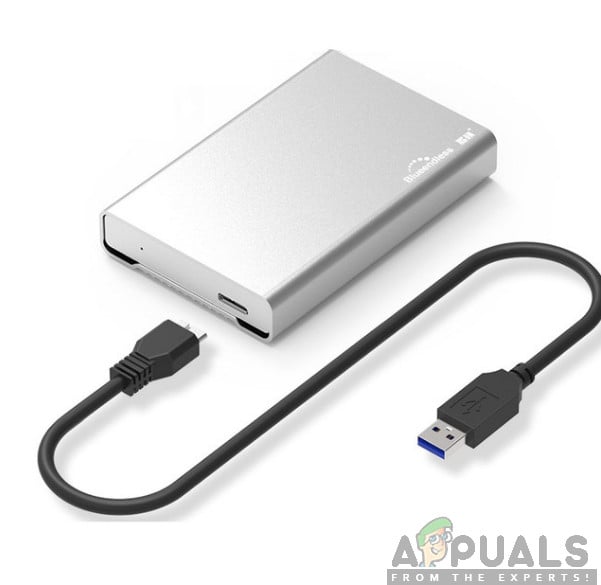
Checking External Hard drive
Hardware components also include your disk drive. If the disk head is not working properly, you will have issues accessing and writing files to your storage. Here you should check saving other files using software such as Microsoft Work and see if the issue occurs there as well. If it doesn’t, it means there is something wrong with the file location or with Excel itself. If the same issue occurs, you should dig deeper and make sure your hard drive is working as expected.
Note: You can also run a disk check to see for any errors.
Solution 4: Checking Permissions
If you are saving the Excel file to a location where your current user doesn’t have permissions, you will experience the error message as well. Each driver or folder has its own permissions which are usually granted to administrators (same with the ownership). However, some system folders might be restricted to one user or the main administrator (same goes for custom folders whose permissions have changed deliberately). In this solution, we will navigate to the directories and change the permissions.
Note: Make sure that you are logged in as a normal administrator. If you aren’t, make sure you log in with one as you will not be able to make changes in a normal account.
- Press Windows + E and navigate to the directory where you are trying to save the file. Now, go one step back and open the directory where this folder is present.
- Right-click on the folder and select Properties .
- Navigate to the “Security” tab and click on “ Advanced ” present at the near bottom of the screen. As you can see there are no proper permissions for your account in this case.
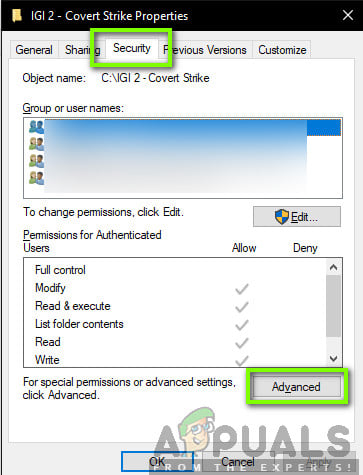
Advanced Security options
- Click on the “ Change ” button present in the preceding screen. It will be right in front of the owner value. Here we will change the owner of this folder to your computer account.
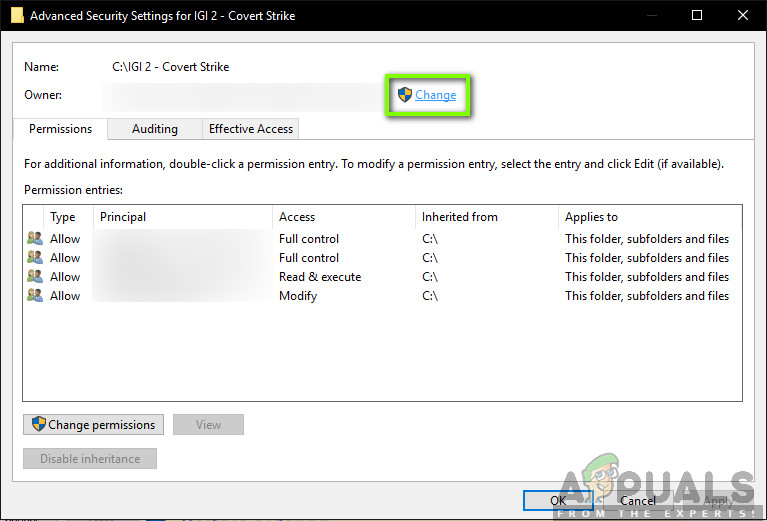
Changing ownership of File
- Click on “ Advanced ” and when the new window comes forth, click on “ Find Now ”. A list will be populated at the bottom of the screen consisting of all the user groups in your computer. Select your account and press “ OK ”. When you are back at the smaller window, press “ OK ” again.
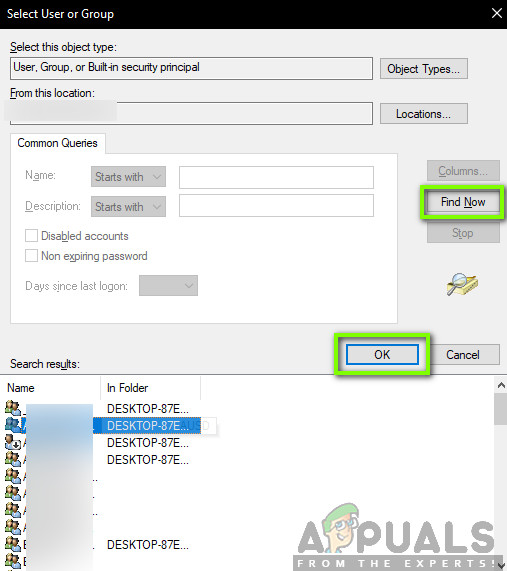
Finding your Username
- Now check the line “ Replace owner on sub containers and objects ”. This will ensure that all the folders/files within the folder also change their ownership. This way you won’t have to proceed with all the process again and again for any sub-directories present. You can also check “ Replace all child object permission entries with inheritable permission entries from this object ” according to your preference.
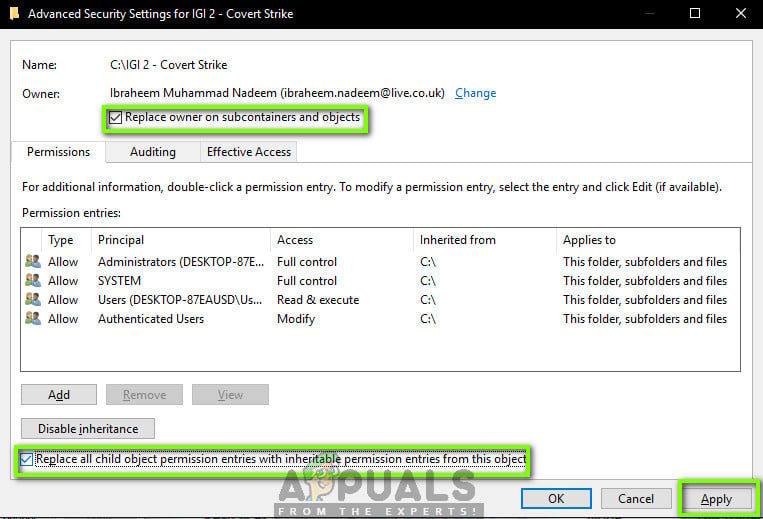
Setting Ownership Preferences
- Now close the Properties window after clicking “ Apply ” and open it again afterward. Navigate to the security tab and click “ Advanced ”.
- On the permissions window, click on “ Add ” present at the near bottom of the screen.
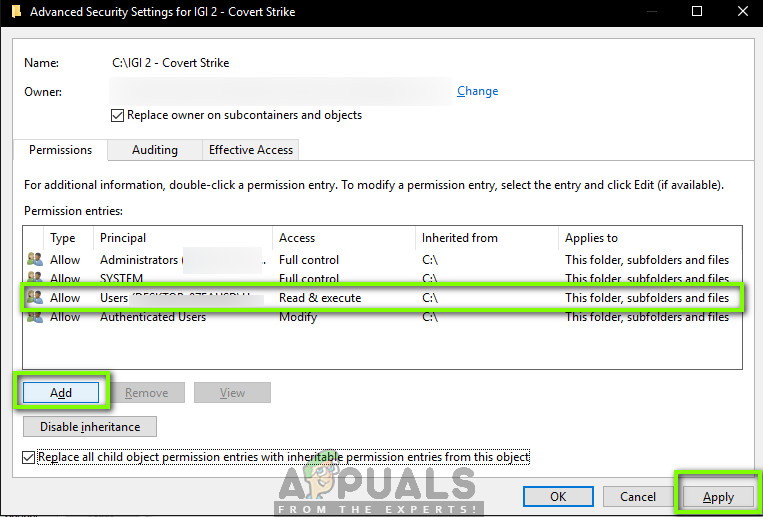
Adding your Account for Full Control
- Click on “ Select principle ”. A similar window will pop up like it did in step 4. Repeat step 4 again when it does.
- Now check all the permission (giving full control) and press “ OK ”.
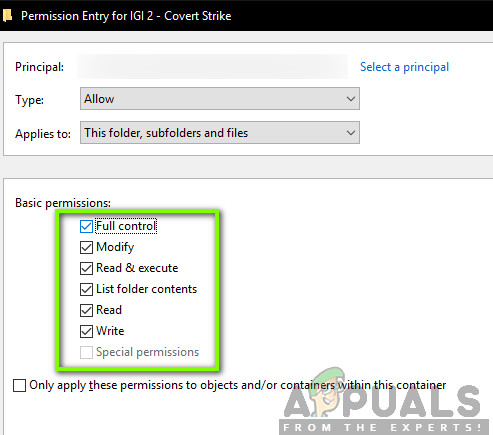
Granting Full Control to Profile
- Check the line “ Replace all child object permission entries with inheritable permission entries from this object ” and press Apply.
- Now, you have exclusive control of the directory in which want to save the Excel file. Try saving now and check if the issue still persists.
Solution 5: Launching Excel in Safe Mode
If all the above methods don’t work, we can try launching the Office Suite in Safe mode. When you launch the Office application is safe mode, it disables all the plugins which are running in the application and launching with only the basic editor. This might help troubleshoot problems where bad plugins are causing issues. Make sure that you are an administrator.
- Press Windows + R to launch the Run dialogue and type the following
excel /safe
- Now, press Enter. Excel will now be launched in save mode. Now try replicating the data into it and then try saving in safe mode. Troubleshooting whether the issue lies with some plugin or not.
Note: If you diagnose any plugin causing the issue, navigate to the plugin menu and disable it.
If the above method doesn’t work you can try starting your operating system in safe mode. This will help diagnose if any application is causing the problem. If the editor works normally there, then enable the applications one by one and identify. You can try the following article to boot your computer in Safe Mode:
How to: Start Windows 10 in Safe Mode
How to Enter Safe Mode in Window 7, Vista & XP
How to Fix “Printer is in an error state” Issue?
The error “ WinRAR Error: Next Volume Is Required ” usually appears when you’re extracting a multi-part RAR archive and WinRAR can’t find (or can’t correctly identify) the next file in the sequence . This often happens when a volume is missing , stored in a different folder , or renamed in a way that breaks the archive’s expected order .

In this guide, we’ll go over the most reliable fixes confirmed by affected users, along with what each method is doing behind the scenes so you can choose the right one for your situation.
Important: To extract multi-volume archives, you should always start extraction from the first file in the set. This is usually file.part1.rar , or (in older sets) the main .rar file that comes before .r01 , .r02 , and so on.
1. Download and Place the Missing RAR File
WinRAR needs all parts of a multi-volume archive to complete extraction. This error usually appears when one of the volumes in a set like .part2.rar , .r01 , .r02 , .001 , and similar naming formats is missing . Downloading the missing volume and placing it in the same folder as the other parts allows WinRAR to continue extracting normally .
- Look at the error message or review the list of archive parts in the folder.
- Identify which volume is missing (for example, part2.rar , .r02 , .001 , etc.).
- Go back to the website or source where you downloaded the archive.
- Locate and download the exact missing file using the same naming format as the others.
- Make sure the new file name matches the pattern of the rest. Example: If you have file.part1.rar and file.part3.rar , the missing one must be file.part2.rar .
- Move the downloaded missing volume into the same folder as the other archive parts.
- Confirm that all parts are in a single folder before extracting.
- Right-click the first file in the series (usually part1 or the main .rar file) and select Extract Here or Extract to Folder .
- WinRAR should now detect all volumes and continue extraction normally .
2. Manually Browse & Select the Next Volume
Use this method only if the next volume already exists , but WinRAR is failing to detect it automatically. This can happen due to incorrect naming , the file being in a different location , or a temporary file access issue. Manually browsing helps WinRAR locate the correct volume and resume extraction without interruption .
- Right-click the first file in the series (usually .rar or part1.rar ) and select Extract Here or Extract to Folder .
- When WinRAR cannot find the next volume, it will show the “ Next Volume Is Required ” message.
- A small window will appear, allowing you to manually select the next volume .
- Use the file explorer window to locate the folder where the other archive parts are saved.
- Select the next part based on the naming order (example: select file.part2.rar after file.part1.rar ).
- Make sure the selected file matches the naming format of the archive (no extra characters like (1) and no mismatched numbering).
- WinRAR will resume extraction using the selected volume .
- If additional volumes are missing or stored separately, WinRAR may prompt you again. Repeat the same process until extraction completes.
3. Rename the RAR files in Order
WinRAR relies on a proper naming sequence (such as file.part1.rar , file.part2.rar , file.part3.rar ) to extract multi-volume archives. If a file is named incorrectly, contains extra characters, or is out of order, WinRAR may fail to locate the next volume and show this error. Renaming the files correctly helps WinRAR follow the sequence and extract the archive without interruptions .
Note: Renaming only changes the file name , not the file contents. The goal is to restore the correct sequence so WinRAR can detect the next volume.
- Go to the folder where all the RAR files are saved.
- Make sure all parts of the archive are present and stored in the same folder .
- Check how the parts are currently named . Common patterns include:
file.part1.rar, file.part2.rar, file.part3.rar
file.rar, file.r01, file.r02, file.r03
- Look for files that don’t match the expected numbering pattern (for example, file.part01.rar , file.part1(1).rar , or unrelated names).
- Rename each file so it follows the same order without extra characters or mismatched numbering. Example:
Incorrect: file.part1.rar, file.part3.rar, file.part2(1).rar
Correct: file.part1.rar, file.part2.rar, file.part3.rar
- Make sure the text before the number is exactly the same for all files.
- Only the last part number should change.
- Right-click the first file in the series (usually part1.rar or the main .rar file) and select Extract Here .
- WinRAR should now recognize the sequence and continue extraction normally .
If you still get the same prompt: the archive set is likely incomplete (a part was never downloaded or was removed), or one of the volumes is corrupt and must be re-downloaded from the original source.
