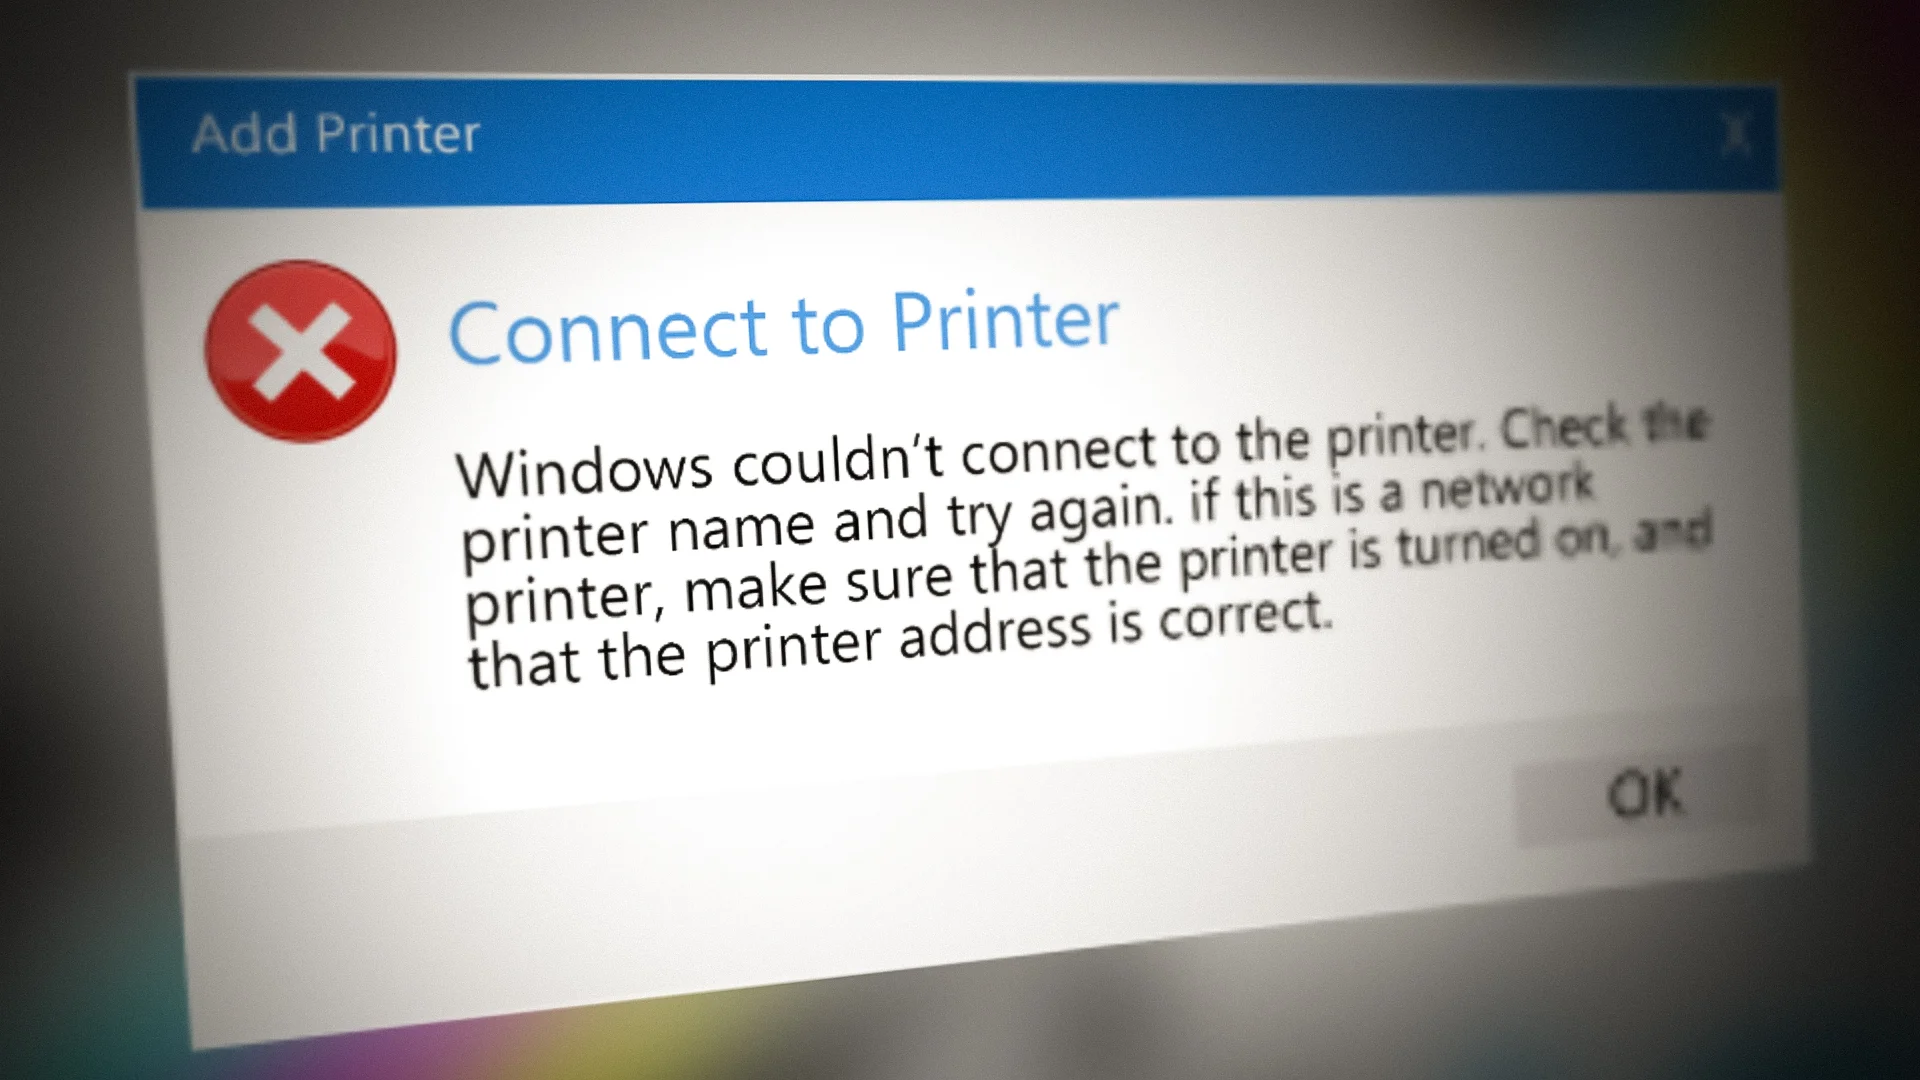
Microsoft can’t catch a break. Ever since Windows 11 launched, there’s at least one problematic update that fixes one thing while breaking another each month. The latest occurrence? The November KB5007247 ends up causing the 0x000006e4 (RPC_S_CANNOT_SUPPORT) error when the user tries to connect to a remote printer shared on a Windows print server.

Printer Error on Windows 11 – 0x000006e4 (RPC_S_CANNOT_SUPPORT)
Update: Depending on the type of printer that you’re using, you might also encounter the 0x00000709 (ERROR_INVALID_PRINTER_NAME) or 0x0000007c (ERROR_INVALID_LEVEL) error instead. These error codes are also directly linked with the bad KB5007247 error.
After investigating this particular issue thoroughly, we realized that several different scenarios might be causing this issue. Here’s a list of potential culprits that might be responsible for this issue:
- Hotfix for KB5007247 is not installed – Keep in mind that Microsoft has already announced that it’s investigating this particular issue and is working on a fix. Although we don’t have a delivery date yet, the word around the ‘Microsoft Tech street’ is that the hotfix will be out by the end of this month. Depending on when you end up reading this article, the first thing you should do is install any available update via WU.
- Generic printer inconsistency – Depending on the printing equipment that you’re using, you might be able to resolve the issue automatically simply by running the Windows Printer Troubleshooter and applying the recommended fix. This won’t work for situations where you’ve installed this problematic update on a Domain Controller (DC).
- Inconsistent Print Providers reg keys – As it turns out, this particular issue can also be repeated to a series of conflicting keys related to the Client Side Rendering Print Providers that are currently active for your network printers. To fix this issue, you’ll need to use the Registry Editor to delete the reg inconsistency.
- Printer Package glitch – If you noticed that this issue only started to occur after more computers were added to the local network and you’re using Windows 11, chances are you’re dealing with a reasonably common printer package glitch. To fix this issue, you’ll need to use the Print Management utility to temporarily remove the printer package from your print server before adding it back up.
- Poorly configured print jobs – If you’re on Windows 11 and only see this error when you attempt to install new printers to the network, you might be able to get away from the issue by running an automated Powershell script on every affected machine. This fix can only be deployed from an elevated PowerShell script.
- Missing Print Server Registry keys – One of the tricky things that this update ends up doing is removing a series of Reg. keys that are important to the printing flow. One way to fix it is to re-add the missing keys (RestrictDriverInstallationToAdministrators) and ( RpcAuthnLevelPrivacyEnabled ) back to your printing server.
- Rendering of print jobs is enabled – If you’re experiencing this issue, are the two removed reg keys mentioned above. Another way to ensure that your printing protocols keep functioning is to disable the ‘Render print jobs on client computers’ option using the Print Management utility.
- Outdated / Corrupted Printer driver – The KB5007247 is not always responsible for this particular error on WIndows 11. The issue can also be rooted in an improper driver (either outdated or corrupted after an upgrade). You will need to install the latest printer driver (either manually or via Windows Update) to fix this problem.
This problem is widespread, judging by the sheer number of people talking about it on the internet.
Fortunately, there are a lot of viable fixes that have surfaced from all of these discussions about Microsoft’s inability to fix one thing without breaking another.
Here’s a list of methods that other affected users have successfully used to fix the 0x000006e4 printer error on Windows 11.
1. Install hotfix via Windows Update
Since Microsoft already acknowledged that it’s working on a hotfix to fix the issuer brought about by the KB5007247, the first thing you should do when troubleshooting this issue is see if the hotfix is waiting to get installed.
If you have any pending updates waiting to get installed and one of them is a cumulative update, chances are one of the issues addressed is the 0x000006e4 (RPC_S_CANNOT_SUPPORT) error.
Note: Even when Microsoft is ready to release this hotfix, the updating will be handled upon segments, so don’t expect to get your prompt to update immediately after MS announces it.
Follow the instructions below for step-by-step instructions on installing the hotfix and ensuring that you’re using the latest available build for Windows 11.
Here’s what you need to do:
- Open up a Run dialog box by pressing Windows key + R . Next, type ‘ms-settings:windowsupdate’ and press Enter to open up the Windows Update page of the Settings menu. Accessing the Windows Update screen
- Once you’re inside the Windows Update screen, move over to the right-hand section of the screen and click on download Now if any new updates are available.
- Once the download is complete, click on Install Now in case the installation doesn’t start automatically.
- If the hotfix is successfully installed and you’re not prompted to restart, do so manually. Install Windows Updates
- After your PC boots back up, attempt to connect your Windows 11 PC to the network printer again and see if the problem is now fixed.
In case no hotfix is available in your case, move down to the next potential fix below.
2. Run the Windows Printer Troubleshooter
If you’re dealing with a standard printer inconsistency, chances are your Windows 11 installation will be able to fix the issue automatically.
To test this theory, you should try running the Windows Printer Troubleshooter and applying the recommended fix.
Note: This utility will start analyzing your current situation and determine if any of the repair strategies that this tool knows are applicable in your scenario.
For detailed instructions on how to do this, follow the instructions below to run the Windows Troubleshooter and apply the recommended fix:
- Press Windows key + R to open up a Run dialog box. Next, type’ ms-settings:troubleshoot’ inside the text box and press Enter to open up the Troubleshooting tab of the Settings app. Accessing the troubleshooting tab
- Once you’re inside the Troubleshooting tab, move over to the right-hand section and click on Other Troubleshooters. Accessing the Other Troubleshooters tab
- Next, from the Other Troubleshooters tab, click on the Run box associated with Printer. Opening the Printer tab
- Wait until the initial scan detects any potential issues with your currently connected Printer.
- If a viable fix is identified, click on Apply this fix and wait until the utility automatically repairs your connection with the Printer. Applying the fix
- Once the operation is complete, reboot your PC and see if you’re still dealing with the same 0x000006e4 error.
If the problem is still not fixed, try the next potential fix below.
3. Remove Client Side Rendering Print Providers reg key
As it turns out, you might expect to see this error due to an inconsistent key related to the Client Side Rendering Print Providers that are currently active for your network printer.
Other users dealing with this issue (particularly network administrators) have managed to fix this issue by using the Registry Editor utility to delete the Providers value before restarting the Print Spooler service and adding the Printer once again.
If you haven’t tried this fix yet, follow the step-by-step instructions below to deploy it:
Note: Before starting this process, it’s essential to take your time to back your registry data in advance .
- Press Windows key + R to open up a Run dialog box. Next, type ‘regedit’ inside the text box and press Ctrl + Shift + Enter to open the Registry Editor with admin access. Open up the Registry Editor
- When the User Account Control prompts you , click Yes to grant admin access.
- Once you’re inside the Registry Editor, use the left-hand menu to navigate to the following location: HKLM\SOFTWARE\Microsoft\Windows NT\CurrentVersion\Print\Providers Note: You can either navigate to this location manually or paste the full path directly into the navigation bar to get there instantly.
- Once you arrive in the correct location, right-click on the Providers key and choose Delete from the context menu that just appeared. Deleting the Providers key
- Once the Providers key has been deleted, close the regedit window.
- Press Windows key + R to open up another Run box. Next, type ‘services.msc’ and press Enter to open up the Services screen. Open up the Services screen Note: If the User Account Control prompts you , click Yes to grant admin.
- Once you’re inside the Services screen, scroll down through the list of services and locate the Print Spooler service.
- When you locate the service, right-click on it and click on Stop from the context menu. Restart the Spooler Service
- Next, right-click on the same Print Spooler service again and click on Start this time.
- Close the services screen, try adding the Printer once again and see if the same 0x000006e4 error is still occurring.
If you’re still unable to your network printer, move down to the next potential fix below.
4. Remove the printer package via Print Management
If you’re managing your Printer via Print Management, another thing you should try is to remove the printer package from the utility before making the connection once again.
This will be effective in those cases where the problem only started to occur after more PCs were added to the local network that was all using the same printer server.
Follow the instructions below to remove the printer package via Print Management temporarily:
Note: The instructions below should work on every recent Windows version where the Print Management utility is present .
- Press Windows key + R to open up a Run dialog box. Next, type’ printmanagement.msc’ inside the text box, then press Enter to open the Print Management utility. Accessing the Print Management utility
- Depending on your UAC (User Account Control) settings, you might be prompted to grant admin access. If this happens, click Yes at the prompt.
- Inside the Print Management Utility, access your current Print server from the menu on the left, then double-click on Printers from the central pane. Accessing the Printers tab
- Next, right-click on the Printer that is giving you troubles from the central pane and choose Delete from the context menu. Deleting the Printer menu
- Click Delete once again at the confirmation prompt to enforce the deletion of the printing package.
- Reboot your PC and start reinstalling your Printer once the next startup is complete.
If the problem is still not fixed even after removing the printer package via Print Management, move down to the next potential fix below.
5. Create an automated PowerShell script
Suppose you are dealing with this issue when attempting to install printers from a print server, and this problem started to occur immediately after installing the KB5006670 update. In that case, you can automate this process by re-configuring the server to render print jobs on the client computers.
However, if you have to do this for multiple printer servers, the best solution would be to automate the actual steps via Powershell. This way, you can quickly deploy the 0x000006e4 fix for every affected machine easily.
Here’s what you need to do:
- Press Windows key + R to open up a Run dialog box. Next, type ‘powershell’ inside the text box and press Ctrl + Shift + Enter to open up an elevated Powershell command. Accessing an elevated PowerShell window
- At the User Account Control, click Yes to grant administrative access.
- Once you’re inside the elevated Powershell window, run the following command to apply the automated solution: Get-Printer -Full | ForEach-Object { If($.RenderingMode -eq “CSR”) { Set-Printer -Name $.Name -RenderingMode SSR Set-Printer -Name $.Name -RenderingMode CSR } If($.RenderingMode -eq “SSR”) { Set-Printer -Name $.Name -RenderingMode CSR Set-Printer -Name $.Name -RenderingMode SSR } }
- Once the command is processed successfully, close the elevated CMD prompt and reboot the affected PC.
- After it boots back up, attempt to operate a printing job using the same printer error 0x000006e4.
If this problem is still not fixed, move down to the next potential fix below.
Re-add the removed reg keys onto the Print Server
As it turns out, one of the main reasons that label the kb5006670 update as bad is because, on some configurations, it ends up removing two reg keys – these keys (RestrictDriverInstallationToAdministrators) and (RpcAuthnLevelPrivacyEnabled) is a requirement for a lot of printers that are set up over a local network.
So if you want to get the old functionality back, one way to do it is to add both of these keys back to the print server, and you should be good to go.
Follow the instructions below for steps on doing this:
- Log in to your print server that’s currently experiencing the printer error.
- Add the following Reg keys: [HKEY_LOCAL_MACHINE\Software\Policies\Microsoft\Windows NT\Printers\PointAndPrint\RestrictDriverInstallationToAdministrators] [HKEY_LOCAL_MACHINE\System\CurrentControlSet\Control\Print\RpcAuthnLevelPrivacyEnabled]
- Attempt a printing job once again and see if the problem is now fixed.
If the same kind of issue is still occurring, move down to the next potential fix below.
6. Disable ‘Render print jobs on client computers’ for your Print Server (if applicable)
If adding the two reg keys that the problematic update has most likely removed didn’t fix the issue in your case, the next thing you should try is to see if you can select the problem by using the Printer Management utility.
Several affected users that we’re also dealing with this problem have confirmed that the problem was finally fixed after they accessed the Printer Server via the Print Management utility and disabled ‘ Render print jobs on client computers’ from the hearing tab of the Printer that’s triggering the 0x000006e4.
Follow the instructions below for specific instructions on disabling the ‘Render print jobs on client computers’ feature from the Sharing tab of your Printer server via the Print Management utility:
- Press Windows key + R to open up a Run dialog box. Next, type’ printmanagement.msc’ inside the text box and press Enter to open the Print Management utility. Accessing the Print Management utility
- When the User Account Control window prompts you, click Yes to grant admin access.
- Once you’re inside the Print Management tool, use the left-hand pane to expand the Print Servers section from the left-hand pane, then right-click on your Printer from the list and choose Properties. Accessing the Properties screen of your active Printer
- Once you’re inside the Properties screen, access the Sharing tab from the menu at the top, then uncheck the box associated with Render print jobs on client computers before clicking on Apply to save the changes. Uncheck render print jobs
- Once you’ve disabled the ended print jobs functionality and enforced the change, reboot your PC and see if the printing issue is fixed once the next startup is complete.
If the same 0x000006e4 error is still occurring, move down to the next potential fix below.
7. Install the latest printer driver
If you’ve come this far without tangible results, you should also consider that a problematic driver might be the root cause of this particular issue.
As it turns out, the 0x000006e4 error might occur if an outdated or corrupted printer driver ends up affecting the connection between the printer server and the Printer that’s connected to the local network.
If you find yourself in this particular scenario, there are two ways forward:
- Update your printer driver version manually
- Force Windows Update to install the latest compatible printer driver
Fortunately, you don’t have to choose between the two methods since we covered both potential approaches.
Follow one of the sub-guides below, depending on the system that you wish to take.
7.1. Update printer manually
If you decide to go this route, you will essentially rely on Device Manager to scan for a new driver version that’s newer than the one you’re currently using for your Printer. Depending on your printer model, this might work, or it might not. Results will vary.
Here’s what you need to do:
- Press Windows key + R to open up a Run dialog box. Type ‘devmgmt.msc’ and press Enter to open up the Device Manager utility inside the text box. Opening up Device Manager
- When the User Account Control prompts you , click Yes to grant admin access.
- Once you’re inside Device Manager, go ahead and scroll down through the list of installed devices and expand the drop-down menu associated with Printers (Print Queues).
- Next, right-click on the Printer that you’re having issues with and choose Update Driver from the context menu that just appeared. Update the Print driver
- After you get to the next screen, click on Search automatically for updated driver software and see if the utility manages to find a newer version of your current printer driver. Search for the updated driver version
- If a new printer driver version is identified and installed, follow the remaining on-screen instructions to complete the installation.
- Reboot your PC and repeat the action that was previously causing the error to see if the problem is now fixed.
7.2. Update Printer via Windows Update
Another way to go around fixing this issue is to rely on force Windows Update to download the latest compatible driver version for your Printer.
The way you do this is by using Device Manager to uninstall the printer device. By doing this, you’ll force your operating system to download and install the latest compatible version the next time you boot up.
Follow the instructions below:
- Press Windows key + R to open up a Run dialog box. Next, type’ devmgmt.msc’ inside the text box and press Enter to open up Device Manager. Open up Device Manager
- Once you’re inside Device Manager, scroll down through the list of devices and locate Printers (Print Queues).
- After you locate the correct menu, expand the drop-down menu and right-click on the Printer that gives you troubles.
- Next, from the list of options available in the context menu, click on Uninstall Device. Uninstall the printing device
- At the confirmation prompt, click Uninstall once again and wait until the operation is complete.
- At this point, you have two options: Access your printer manufacturer’s website and download & install the latest printer driver compatible with Windows 11 Restart your PC and force your OS to use Windows 11 to download and install the latest compatible printer driver
- Regardless of your choice, reboot your PC and see if the problem is fixed once the next startup is complete.
If you’re still encountering the same 0x000006e4 error after following the instructions above, move down to the following method below.
8. Uninstall problematic Windows Update
If you’ve come this far without a solution, it’s time to get back to the root of the issue.
We know for sure that the KB5007247 is responsible for this printing issue on Windows 11. So if everything else has failed, the final thing you can try is to uninstall the bad update and see if the printing connectivity resumes.
But keep in mind that just uninstalling the KB5007247 update won’t be enough – you’ll also need to use a specialized utility to hide the update and make sure it doesn’t install again (at least until MS releases an official fix)
Follow the instructions below to uninstall and hide the problematic KB5007247 Windows Update:
- Press Windows key + R to open up a Run dialog box. Next, type’ appwiz.cpl’ inside the text box, then press Enter to open up the Programs and Features menu. Open up the Programs and Features menu. Note: If prompted by the User Account Control window, click Yes to grant admin access.
- Once inside the Programs and Features menu, click on View installed updates from the side menu on the left. Accessing the ‘View Installed Updates’ menu
- Once you’re inside the View installed updates menu, look for the KB5007247 update. When you see it, right-click on it and choose Uninstall from the context menu. Uninstall the KB5007247 update
- At the confirmation prompt, click Uninstall once again and wait until the operation is complete.
- Next, download the Windows Show/Hide Update Troubleshooter from this download page .
- Extract the contents of the wushowhide archive to an easy-to-access location.
- Next, right-click on wshowhide.diagcab, then choose Run as administrator from the context menu that just appeared.
- Once you get to the first window of the Show or hide updates Troubleshooter , click on the Advanced hyperlink, then check the box associated with Apply Repairs Automatically, then click on the Next button. Apply repairs automatically
- Wait until the initial scan is complete, then click on Hide Updates from the list of presented options. Hiding the updates
- Next, from the list of updates, check the box associated with the KB5007247 update, then press Next once again and wait until the update is hidden.
- Reboot your PC and attempt to connect to your printer server – you should have no issues doing so.
Note: Once Microsoft finally gets around to releasing a fix for this issue, you can use this utility again to unhide the update. To do so, click on Show Hidden update instead and select KB5007247.
How to Fix “Printer is in an error state” Issue?
There have been reports of users encountering an issue with their printers. As it turns out, upon attempting to change the default printer on their system, the “Operation could not be completed (error 0x00000709)” error message is triggered. On the other hand, some users are experiencing this error message in a shared network where a deleted printer keeps reappearing. The error message appears when they try to connect to the said printer when it reemerges. In this article, we will guide you through the process of fixing the aforementioned problem quite easily, so please follow along.

Operation Could not be Completed Error 0x00000709
As it turns out, printers remain one of the most widely used devices, especially in work environments. Not only that, but some of us also use printers in our homes for our convenience. When you set a default printer, all print jobs are sent to the selected printer automatically, instead of having to select a printer every time you wish to print something, which can be quite repetitive. In some cases, Windows may refuse to change the default printer on your computer. In such a scenario, you can get the job done quite easily by modifying some keys in your Windows Registry. With that said, let us get started and show you how to change your default printer on your operating system without any issues.
Change the Default Printer via the Windows Registry.
As it turns out, when encountering the 0x00000709 error code while trying to change the default printer on your computer, do not worry, as there are alternative ways to change the default printer.
In such a case, as we have mentioned previously, what you can do is use the Windows Registry to change the default printer on your computer. The Windows Registry is responsible for how the operating system on your computer behaves, and as such, it stores the default printer in a key. When facing the problem in question, you can edit this key to change the default printer on your computer. Normally, making changes to the Windows Registry is not recommended, especially when you do not know what you are doing. This is because any unwanted changes can cause serious damage to the operating system. Therefore, before proceeding with the instructions that we are going to provide, we would recommend creating a backup of the Windows Registry in case anything goes wrong.
The instructions below are quite straightforward, and if you follow them strictly, you won’t face any issues. With that said, let’s get started and show you how to change the default printer via the Windows Registry.
- First of all, open the Run dialog box on your computer by pressing the Windows key + R on your keyboard.
- In the Run dialog box, type “ regedit ” and then press the Enter key on your keyboard. Opening up Windows Registry
- In the follow-up User Access Control dialog box, click the Yes button.
- This will bring up the Windows Registry . In the address bar, copy and paste the following path, then hit Enter to navigate to the respective location automatically.
- Computer\HKEY_CURRENT_USER\Software\Microsoft\Windows NT\CurrentVersion\Windows Navigating to Appropriate Path
- Once you are there, on the right-hand side, double-click the device key. Opening up Device Key
- In the dialog box that appears, you will need to change the Value data . Changing Default Printer
- There are three parts to the value data, each separated by a comma, and you will be changing only the first part, which is the name of your printer.
- Thus, change the first part to the name of the printer you wish to make the default.
- Once you are done, click “ OK .” It should look something like this: PrinterNAME,winspool,Ne01: Changed Default Printer via Registry
- Make sure to replace ‘PrinterNAME’ with the actual name of your printer. In addition, the last two parts may differ depending on your case, and you should leave them as is.
- In case you do not know the name of the printer that you wish to make the default, open the Control Panel by searching for it in the Start Menu . Opening up Control Panel
- Then, in the Control Panel window, click on the Hardware and Sound option. Control Panel
- There, click on the “ Devices and Printers ” option provided. All Devices
- Here, you will see all of the devices connected to your computer, including your printer. Provide this name in the Value data box above.
- Once you have finished with that, go ahead and restart your computer for the changes to take effect. After your computer boots up, the problem should be resolved.
Clear the printer’s folder.
If you are facing an issue in a network where a deleted printer keeps reappearing , you can solve the problem by clearing the printer’s folder residing on your computer. These are called ghost printers, and there are a few ways to remove them. One method is to empty the printer’s folder, as mentioned earlier. To accomplish this, you will first need to stop the Print Spooler service. Follow the instructions below to do this:
- First of all, press Windows key + R on your keyboard to open up the Run dialog box.
- Then, in the Run dialog box, type “ services.msc ” and press the Enter key. Opening up Services
- The Services window will open up, listing all the services available on your system.
- From the list of services, search for the Print Spooler service. To make this task easier, press the “ P ” key on your keyboard, which will direct you to all the services starting with the specified letter. Locating Print Spooler Service
- Once you have located the service, right-click on it and, from the drop-down menu, click the Stop button. Stopping Print Spooler Service
- After doing that, open up Windows Explorer .
- In the address bar, copy and paste the following path: C:\Windows\System32\spool\PRINTERS Navigating to Printers Folder
- There, delete all the files and folders. Make sure that you have hidden files enabled so that you can clear them out as well.
- Once you have done that, open up the Services window again and start the Print Spooler service. The problem should now be resolved.
Use the Print Management.
As it turns out, another way to get rid of the ghost printer is by using the Print Management utility, which allows you to manage and handle all the printers connected to your computer, including any print servers and more. To use the Print Management utility, follow the instructions provided below:
- First of all, open the Start Menu and search for Print Management . Open it. Opening up Print Management
- On the left-hand side, expand the Custom Filters list. Expanding Custom Filters
- Then, click on ‘ All Printers. ‘ Opening up All Printers
- After doing that, locate the ghost printer on the right-hand side.
- Right-click on it, and from the drop-down menu, click the Delete option. Deleting Ghost Printer
- Once you have done that, the ghost printer will no longer appear.
When trying to connect to a shared network printer, you might see the error message “Windows cannot connect to the printer. Operation failed with error 0x0000007c”. This error prevents you from installing or using the printer as expected. The error code 0x0000007c stands for ERROR_INVALID_LEVEL, which usually means there is a mismatch or compatibility issue between your computer and the print server.

Windows Cannot Connect to the Printer – Error 0x0000007c
This problem often occurs after installing certain Windows updates, specifically KB5006670 for Windows 10 or KB5006674 for Windows 11. These updates changed how the Print Spooler service works, which can cause issues with authentication or driver installation.
Other possible causes include outdated or corrupted printer drivers, incorrect registry settings, or problems with the Print Spooler service itself. Now that you know what’s behind the error, let’s look at how to fix it.
1. Uninstall Problematic Security Update
As mentioned earlier, one of the most effective ways to fix this error is to remove the security update that caused the problem. The most common culprit is KB5006670. Removing Windows updates is straightforward and is often enough to solve the issue.
However, after uninstalling the update, you should temporarily pause Windows Updates. If you don’t, Windows may automatically reinstall the update, causing the problem to return.
- Press the Windows key + I on your keyboard to open Windows Settings .
- Go to Windows Update from the left-hand menu. Windows Settings
- Click on View update history . Windows Update Settings
- On the new page, under Update history , click Uninstall updates .
- This will open a Control Panel window showing installed updates.
- Find KB5006670 in the list.
- Double-click on the update to uninstall it. Uninstalling Windows Update
- After uninstalling, go back to the Windows Update section in Settings.
- Click on Pause updates for 7 days to temporarily stop Windows from reinstalling the update. Windows Update Settings
- Restart your computer.
- After the restart, check if the printer issue is resolved.
2. Reinstall the Printer
Another reliable way to fix this error is to reinstall your printer. But before you do that, you need to clear out old printer drivers from your computer. The steps are a bit different depending on whether you use a 64-bit or a 32-bit version of Windows, but don’t worry–we’ll explain how to check and what to do. You’ll also need to restart the Print Spooler service using the Services manager.
- Open File Explorer .
- Depending on your system type, copy and paste the appropriate address into the address bar: 64-bit OS: C:\Windows\System32\spool\drivers\x64\3 32-bit OS: C:\Windows\System32\spool\drivers\W32X86\3 Navigating to Printer Driver Folder
- Once inside the folder, cut all the files and save them somewhere safe, like your Desktop. This will back up your drivers just in case.
- Press Windows key + R to open the Run dialog box.
- Type services.msc and press Enter to open the Services window. Opening up Windows Services
- Find the Print Spooler service in the list. Print Spooler Service
- Right-click on Print Spooler and select Restart . Restarting Print Spooler Service
- Next, open Control Panel (you can search for it in the Start menu).
- Click on Uninstall a program . Control Panel
- Find your printer in the list and uninstall it by double-clicking it.
- Next, add your printer again and install the latest drivers—download these directly from your printer manufacturer’s website for best results.
- After completing these steps, your printer should work correctly and the error should be gone.
3. Cancel Driver Installation Midway
If the previous solutions didn’t work for you, here’s another trick that has helped some users. Start by downloading the newest drivers for your printer from the manufacturer’s website. Begin installing the driver, and when the installer asks you to connect the printer using a cable, choose the option for connecting to a remote or network printer instead.
Once you have set up the connection and it looks like the process is starting, cancel the installation. Now try using your printer to see if the error is fixed. While this method might sound a bit odd, it has resolved the issue for some people.
The KB5005565 is a security update that was mainly released to patch the PrintNightmare vulnerability in the depreciated Point and Print technology. In the Point and Print technology, a client PC is connected to a remote printer that is managed by a print host or server system without requiring installation media at the client side.
The printer driver and configuration files are pulled from the host/server system and installed locally on the system. The print job created on the client PC is relayed to the host’s print queue for the print.
‘Inaccessible Shared Printer’ after the KB5005565 Update
With the PrintNightmare vulnerability in the Point and Print technology, a hacker may be able to bypass the security setup of an organization and may gain administrative privileges on the systems. Despite the update’s usefulness, this update caused a lot of trouble for some organizations/users, when the users could not access the shared or networked printer (sometimes with an error code).
The shared printer access issue after the KB5005565 update (despite the update’s itself incompatibility with the system) was mainly caused by the following:
- Incompatible or Outdated Printer Driver : As the KB5005565 update enabled the new printer technology (replacing the older Point and Print) and the client system is still using the older one, it may not be compatible with the KB5005565 update, resulting in the loss of the printer connectivity.
- Outdated OS of the Client System : If the client system is outdated whereas the print host/server is updated to the latest, both systems may become incompatible with each other, resulting in the printer issue at hand.
Update the PC’s Windows to the Latest Build
The KB5005565 mainly patches the old print technology (i.e., Point and Print) against the PrintNightmare exploit and if any of the PCs involved (print server or client) are not updated to the latest Windows build, then that may not be compatible with the newer update which may cause the printer access issue at hand. Here, updating the PCs’ (print server and client) Windows to the latest build may solve the problem.
- On the Print Server system , click Windows , search and open Check for Updates . Open Check for Updates
- Now click on the Check for Update button and if updates are available, download and install the updates . Make sure to install Optional Updates as well. Check for Windows Updates
- Once the updates are installed, restart your print server system.
- Then repeat the same on the client system (or systems) and once all the systems are updated, check if the shared printer can be accessed.
Re-add the Printer and Reinstall its Driver
The KB5005565 update has redefined the printer technology used between the client and print server which may cause incompatibility between the both, resulting in the shared printer issue. Here, re-adding or reinstalling the printer may solve the problem.
Re-add the Printer
- Click Windows , search for Services , right-click on it, and select Run as Administrator . Open Services as Administrator
- Now, double click on the Print Spooler service and set its Startup Type to Automatic . Double-click the Print Spooler Service
- Then click on the Stop button and afterward, click on the Start button. Set the Startup Type of the Print Spooler Service to Automatic and Stop/Start the Service
- Now, right-click on Windows and select Settings . Open Windows Settings
- Then open Devices and head to the Printers and Scanners tab. Open Devices in Windows Settings
- Now select the problematic printer and click on Remove Device . Remove Device in Printers and Scanners
- Then confirm to remove the device and wait till the device is removed.
- Now, remove all the other printers that use the same driver as the problematic printer.
- Then, click on Print Server Properties in the right pane of Devices» Printers and Scanners. Open Print Server Properties
- Now, head to the Drivers tab and remove the problematic printer driver from there as well. Remove Driver and Driver Package in the Print Server Properties
- Afterward, restart your system and upon restart, head to Settings» Devices» Printers and Scanners .
- Then, in the Printers and Scanners window, click on Add a Printer or Scanner and re-add the printer to check if the shared printer is accessible. Click on Add a Printer or Scanner
Keep in mind, in the case of Windows 7 client systems , firstly, disable password-protected sharing on the printer host. Then map a local port to the shared printer using the following command (make sure to replace the PC Name and Printer Name as per your environment).
net use lpt1 \\pc-name\printer-name /persistent:yes
Afterward, locally install the printer driver and check if that resolves the shared printer issue on Windows 7 systems.
Update the Driver Through the Device Manager
- Right-click Windows and select Device Manager .
- Now expand Printers (or Print Queues) and right-click on the problematic printer .
- Then select Update Driver and select Search Automatically for Drivers . Update the Network Printer Driver in the Device Manager
- Now select Search for Updated Drivers on Windows and afterward, check if the shared printer issue is resolved. Search Automatically for Drivers
- If not, then check if reinstalling the printer driver clears out the printer problem.
Add the Print Server Credentials to the Credential Manager of the Client System
As the printer cannot be accessed from the client system, adding the print server credentials to the credential manager of the client system may let the user access the printer.
- Firstly, remove the problematic printer from the client system .
- Now, in an administrator account on the client system, click Windows , search and open Credential Manager . Open Credential Manager
- Then head to the Windows Credential tab and click on Add a Windows Credential . Add a Windows Credential of an Administrator Account of the Print Server
- Now add the user like ServerPCNAME\UserName of the print server account and enter the password. Make sure you are using the credentials of the administrator account of the print server .
- Now restart the Print Spooler service on the client and print server system. Restart the Print Spooler Service
- Then, on the client PC , click Windows , search: Command Prompt , right-click on it, and select Run as Administrator . Open Command Prompt as Administrator
- Now execute the following (that will launch printer install UI in administrator mode): rundll32 printui.dll,PrintUIEntry /il
- Then follow the prompts to add the printer and afterward, check if the printer access issue is resolved.
Edit the System’s Registry
The main object of the KB5005565 update was to patch the print spooler vulnerabilities and for this purpose, the update enables the RpcAuthnLevelPrivacyEnabled registry value. But if any of your systems (print server or client) are not RPC_C_AUTHN_LEVEL_PKT_PRIVACY compliant, then the shared printer may not be accessible. In this scenario, disabling the RpcAuthnLevelPrivacyEnabled in the system’s registry may solve the problem.
Warning :
Proceed at your own risk as editing the system’s registry is a skillful task and if not done properly, you may expose your system to threats. Also, do not forget to create a backup of the system’s registry .
- Click Windows , type: Registry Editor , right-click on it, and select Run as Administrator on the host machine. Open Registry Editor as Administrator
- Then click Yes (if the UAC prompt is shown) and head to the following path: HKEY_LOCAL_MACHINE\System\CurrentControlSet\Control\Print Create a New DWORD (32-bit) Value Under the Print Key
- Now, in the left pane, right-click on the Print key and select New» DWORD (32-bit) Value .
- Then name the key as RpcAuthnLevelPrivacyEnabled and double-click on it.
- Now set its value as 0 and close the editor. Name the Value as RpcAuthnLevelPrivacyEnabled and Set its Value to 0
- Then click Windows , search for Services , right-click on it, and select Run as Administrator .
- Now, right-click on the Print Spooler service and select Restart .
- Then check if the shared printer is accessible to the client systems.
- If the issue persists, then restart the print server as well as client systems and check if the printer issue is resolved.
- If that did not work, check if making the above registry edit on the clients solves the problem.
- If the issue is still there, then check if executing the following command on the client systems in an elevated Command Prompt solves the issue: rundll32 printui.dll,PrintUIEntry /il
Uninstall the KB5005565 Update
If the update KB5005565 is not compatible with your particular print setup and other methods are not working, then uninstalling the KB5005565 update may solve the printer problem.
Remove the KB5005565 Update
- On the host system, click Windows , search, and open Check for Updates .
- Now open View Update History and near the top, click on Uninstall Updates . View Update History of Your System
- Then select the KB5005565 update and click on Uninstall . Open Uninstall Updates
- Now follow the prompts on your screen to complete the KB5005565 uninstallation. Uninstall the KB5005565 Update
- Once completed, restart your system, and upon restart, repeat the same on the client systems as well. Now check if the shared printer is accessible.
If the issue persists and you have KB5006670 , then check if uninstalling it clears out the issue. If you cannot uninstall the KB5005565 update, then performing a system restore to the point when the update in question was not installed, may solve the problem.
Perform a Network Reset After Uninstalling the Update
- If uninstalling the update did not work, then right-click Windows and select Settings on the host system.
- Now open Network and Internet and click on Network Reset . Open Network & Internet in the Windows Settings
- Then click on Reset Now and afterward, connect the system to a network (if required). Open Windows Network Reset
- Then repeat the same on the client computers and check if the printer access issue is resolved. Press Reset Network Button
Re-apply the Registry Edit and Reinstall the KB5005565 Update
If the registry edit discussed above did not work for you, then it may work after removing the update and may let you reinstall the update again. You may try this only on the host system.
- Remove the RpcAuthnLevelPrivacyEnabled registry key from the system (if present) and restart your system.
- Upon restart, re-add the RpcAuthnLevelPrivacyEnabled key to the registry and set its value to 0 .
- Now restart your system and upon restart, check if the shared printer is working fine.
- Then download and install the KB5005565 update.
- Now restart your system and upon restart, check if the shared printer issue is resolved.
Remove the Printers from the Spool Folder and Reinstall the KB5005565 Update
If the printer has become inaccessible after reinstalling the update, then deleting the printers from the Spool folder and reinstalling the update may let you keep the update.
- Firstly, remove the RpcAuthnLevelPrivacyEnabled registry key from the system (if present) and restart your system.
- Now remove any GPO applied printers from the system.
- Then click Windows , search for Services , right-click on it, and select Run as Administrator .
- Now, in the Services window, right-click on the Print Spooler service and select Stop . Stop the Print Spooler Service
- Then right-click on Windows and select Run . Open the Run Command Box from the Quick Access Menu
- Now navigate to the following path and if asked to, click Continue to allow access to the directory: \Windows\System32\spool\PRINTERS Open the Printers Folder in the Spool Directory
- Then delete all the printers present there and uninstall the KB5005565 update .
- Now, re-add the RpcAuthnLevelPrivacyEnabled key to the registry and set its value to 0 .
- Now restart your system and upon restart, repeat the above process on the client PC as well. Make sure to stop the print spooler service on the client system .
- Then restart the Print Spooler service on the printer server system and afterward, start the Print Spooler service on the client system .
- Now, re-configure and re-share the printer (if required) and then reinstall the KB5005565 update to check if the printer issue is resolved.
- If that did not work, then on a safe system (proceed at your own risk), where KB5005565 update is not installed, copy the Win32spl.dll file (in the Properties» Details tab, it should show a version less than 1320) from \Windows\System32 folder and place the same on the host PC. Afterward, check if that resolves the issue. Copy the Win32spl.dll File from a Safe System
If removing the update does the trick for you, but the update is installed again, then you may have to pause or hide the update .
If none of the above has worked for you and your printer has the ethernet or Wi-Fi capability , then you may set up your printer through that channel to access it.
Modern operating systems, including the latest iterations of Windows, strive to provide seamless integration with peripheral devices. Printers, as essential peripherals, however, sometimes pose unique challenges. Users have encountered issues ranging from driver incompatibilities to persistent difficulties when attempting to remove printer software and hardware entries from their systems.

These problems can manifest in various ways; error messages may indicate unresolved printer issues, and the typical removal processes may falter—leaving devices in limbo within system settings. Attempting to uninstall printers sometimes leads to perpetual ‘removal in progress’ indicators, while other times, printers linger in the device list even after supposed successful uninstallation.
Despite the sophistication of Windows and frequent updates, such issues persist, necessitating a set of troubleshooting methods to aid users in effectively managing and removing their printer devices. This article provides a comprehensive guide on tackling these stubborn printer removal problems across various versions of Windows.
Method 1: Remove Old Drivers From Print Server Properties
Sometimes, printer drivers can get corrupted or become incompatible after a system update, leading to issues such as the printer being stuck in a state where it cannot be removed.
To address this, users have found success in resolving printer issues by removing outdated or problematic drivers directly from the Print Server Properties. This approach can often dislodge a printer that seems permanently attached to the system, paving the way for a cleaner and more conventional removal process.
- Open a new Run window by pressing Windows key + R . Then, type “ control ” and press Enter to open Control Panel . Open Control Panel
- Inside Control panel, click on Device and Printers . Open Devices and Printers
- In the Devices and Printers window, select the printer that you are having trouble removing and click on Print server properties (top ribbon bar). Open Print Server Properties
- In the Print Server Properties window, click on the Drivers tab. Then, systematically remove any driver that belongs to the printer that refuses to uninstall by selecting it (via the Installed printer drivers box) and clicking Remove . Remove the Faulty Printer’s Driver
- Once the printer driver is removed, click on Apply and restart your computer.
Method 2: Remove the Corrupted Printer Registry Entries
Some users have successfully resolved their printer issues by deleting registry entries related to the malfunctioning printer using the Registry Editor.
Removing these specific registry keys and subkeys removes the corresponding printer’s configuration data, potentially fixing corruption issues. After clearing the registry and restarting the computer, many were able to remove the printer in the usual way without further complications.
- Press Windows key + R to open up a Run box. Then, type “Regedit” and hit Enter to open Registry Editor . Open Regedit
- Inside Registry Editor, navigate to the following location using the left pane: HKEY_LOCAL_MACHINE > SYSTEM > CurrentControlSet > Control > Print > Printers
- In the Printers key, locate the entry associated with your the printer that you want to remove, right-click and choose Delete . Delete Faulty Printer’s Registry Entries Once the key (and subkeys) associated with your printer has been deleted, close Registry Editor and reboot your system.
Method 3: Clear the Print Jobs Queue
Many users have encountered a scenario where a printer cannot be removed due to stuck print jobs. These pending jobs can interfere with the printer’s removal process. Clearing the spooler, which stores print commands, can often resolve this issue by removing any obstructions and allowing the printer to be uninstalled successfully.
- Press Windows key + R to open up a Run box. Then, paste (or type) C:\Windows\System32\spool\PRINTERS in the Run box and hit Enter to open the folder holding the printing jobs. Open C:\Windows\System32\spool\PRINTERS
- Hit Yes at the UAC prompt to get permissions to edit the PRINTERS folder.
- If the PRINTERS folder is not empty, delete everything there to free up the printing queue.
- Once the PRINTERS folder is empty, try to remove (or uninstall) the printer again, then restart your computer.
Method 4: Remove the Printer from the Settings Menu
- Press Windows key + R to open up a Run window. Then, type ms-settings:connecteddevices and hit Enter to open the Connected Device tab of the Settings menu. Open ms-settings:connecteddevices
- In the Connected Devices menu, move over to the left pane and click on Printers & Scanners to expand the list. Now, click on your printer to expand the drop-down menu, then click on Remove Device .
- Hit Yes to confirm the removal of the device at the next prompt, then close the Settings menu and restart your computer to force the changes to take effect.
If you’re still seeing your printer listed in the Devices list at the next restart or if it continues to show “being removed”.
Method 5: Remove Printer via Control Panel
Using the legacy Control Panel interface can sometimes circumvent issues with removing a printer that persists in Windows. This method has proven effective especially after clearing old drivers through Print Server Properties, which can resolve conflicts or corruption within the printer’s installation files.
- Press Windows key + R to open up a Run window. Then, type “ control ” and hit Enter to open Control Panel . Open Control Panel
- Inside Control Panel, click on Devices and Printers, then expand the Printers drop-down menu.
- Right-click on the printer that you want to remove, then select Remove Device . Remove the Printer
- Hit Yes at the confirmation prompt, close Control panel and restart your system.
Method 6: Remove the Printer via Print Management (if applicable)
- Press Windows key + R to open up a new Run box. Then, type printmanagement.msc and hit Enter to open the Print Management wizard. Open printmanagement.msc
- In the Print Management window, expand the Print Servers drop-down menu and double-click on Printers to open them in the left pane.
- From the left pane, right-click on the printer that you want to remove and click on Delete.
- Click the Yes button to confirm the deletion, then close Print Management and restart your computer for the changes to take full effect.
At the next startup, see whether the printer driver has been successfully removed. If you’re still seeing listed among your other devices, move over to the other method below.
Method 7: Remove Printer via Device Manager
Removing the printer from the list of devices can also be done from Device Manager, but keep in mind that some users have reported that this method was ineffective in their case – the printer has only briefly removed from the list of devices and was back at the next startup.
- Press Windows key + R to open a Run box. Then, type devmgmt.msc and hit Enter to open Device Manager . Open devmgmt.msc
- In Device Manager, expand the Print queues drop-down menu, right-click on our printer and choose Uninstall Device . Uninstall the Faulty Printer in Device Manager
- Close Device Manager and make sure you disconnect the printer cable from the PC, then restart your computer.
Method 8: Remove the Printer via Command Prompt
Some users have finally managed to remove the printer using an elevated Command Prompt. This method will require you to get a little technical, but it has the potential of succeeding where other methods failed.
Note: The following procedure will not be successful unless you do the command in an elevated Command Prompt.
- Press Windows key + R to open up a new Run box. Then, type “ cmd ” and hit Ctrl + Shift + Enter and click Yes at the UAC (User Account Control) prompt to open an Elevated Command Prompt . Open Command Prompt
- In the Elevated Command prompt, type or paste the following command and press Enter to see a list with all your printers that are currently active: wmic printer get name
- Open a Notepad or a similar text editor and make a note of the exact name of the printer that you want to remove. Note Down Exact Name of the Faulty Printer
- Type the following command and press Enter to remove the printer from your Windows computer: printui.exe /dl /n “Name of Printer”
Note: Keep in mind that the Name of Printer is just a placeholder for the name that you previously noted down at step 3. Replace the placeholder with the actual name of the printer that you want to remove. The result should look like this:
Remove-Printer -Name "Canon IP1188 Inkjet Printer"
To verify if this method was successful, close the elevated Command Prompt and restart your computer. At the next startup, see whether your printer is still among the devices list. If it is, move over to the other methods below.
Method 9: Remove the Printer UsingPowerShell
Some users have successfully managed to remove the stubborn printer that was refusing to go away on Windows by using PowerShell. While this method will require you to get a little technical, it’s reportedly more efficient than the majority of methods that are done through a graphical interface.
- Press Windows key + R to open up a Run box. Then, type “ PowerShell ” and press Ctrl + Shift + Enter and hit Yes at the User Account Control prompt to open an elevated Powershell window. Open PowerShell
- In the Elevated PowerShell window, type or paste the following command and press Enter to get a list of all your active printers: Get-Printer | Format-List Name
- Open notepad and copy the exact name of the printer that you wish to remove. You’ll need it briefly. Copy the Faulty Printer Name
- In the same elevated Powershell window, type the command below and press Enter . Remove-Printer -Name " Printer name" Note: Be mindful that “Printer name” is just a placeholder for the actual name of your printer. Replace the placeholder with the name of the printer that you extracted at step 3 . The result should end up looking like this: Remove-Printer -Name “Canon IP1188 Inkjet Printer”
- Once the command has been successfully registered, close the Elevated PowerShell window and restart your system.
At the next startup, see whether the printer device is still present in the printer’s list. If it is, move down to the next method.
Method 10: Remove the Printer From the Printers Folder
- Open a new Run box by pressing the Windows key + R . Then, paste (or type) explorer shell:::{2227A280-3AEA-1069-A2DE-08002B30309D} in the Run box and press Enter to open the Printers folder. Open Printer Folder
- In the Printers folder, right-click on the printer that you wish to remove and choose Delete .
- Click Yes to confirm the removal of the printer, then restart your computer to force the changes to take effect.
At the next startup, see whether the printer has been removed from your computer.
