Going wireless is the new norm in the printing world and Canon, being one of the top companies to produce imaging and optical devices., is not an exception. To connect a Canon printer is not a very difficult job but certainly a bit technical, depending on the printer and the device you are trying to connect to the printer.
How to Connect Canon Printer to Wi-Fi
There are different scenarios where a client may try to connect a Canon printer to a Wi-Fi:
- A Canon printer with a built-in Wi-Fi Antenna that can only connect to a Wi-Fi network but cannot create its Wi-Fi network.
- A Canon printer that can create its Wi-Fi network and can also connect to any other Wi-Fi network.
- A non-Wi-Fi Canon printer that is wired to a wireless router.
- A non-Wi-Fi Canon printer that is connected through a USB cable to a system that is part of a Wi-Fi network.
Except for the first case (or in the second case, where a client is connecting to a Wi-Fi), the other scenarios can be easily said to be beyond the scope of this article but if you want to, there are other similar articles on our websites covering those scenarios.
To use a Canon printer wirelessly, the process can be easily divided into the following steps:
- Connect the Printer to the Router.
- Set up your device (PC, Mac, phone, etc.) to use with the printer.
Keep in mind that the milage for some of the readers may vary, depending on the model of the Canon printer, router type and the device to be used for Wi-Fi printing.
Connect a Canon Printer to a Router
The process to connect a Canon printer to a router depends upon the type of the router or access point i.e., routers with a WPS button or without a WPS button. Keep in mind that the Canon printers support WPA (Wi-Fi Protected Access) or WPA2 Wi-Fi protocols, so, make sure the Wi-Fi network you are trying to connect to is using any of these protocols.
Connect a Canon Printer to a Router by Using a WPS Button
If you have a router or access point with a WPS (Wi-Fi Protected Setup) button, then setting up a Canon printer with that router is perhaps the easiest way. To do so:
- Turn on your printer and press the Settings button on the printer and by using the arrow keys, steer to the Wireless LAN Setup option on the printer’s screen. Open Wireless LAN Setup on the Canon Printer
- Now press the OK button and use the arrow keys to show WPS (Push Button) option on the printer’s screen. Show and Select the WPS (Push Button) on the Canon Printer
- Then press the OK button and a connecting prompt will be shown on the printer’s screen.
- Now head to the router or access point and press its WPS button (make sure you complete this step within 2 minutes after step 2). Press the WPS Button on Your Router
- Once the printer successfully connects to the Wi-Fi, the printer’s screen will show a connected message and then you can set up your device/PC to use the Canon printer (discussed later in the article). Connected Shown on the Canon Printer’s Screen After Successful WPC Connection
Connect a Canon Printer to a Router by Using Wi-Fi Credentials
If your router does not have a WPS switch, then you may use the Wi-Fi credentials to connect the Canon printer to a Wi-Fi network.
- Firstly, make sure the wireless router is powered on.
- Then power on your printer and once properly powered on, press the Settings icon on the printer.
- Now press the next button till the Device Settings are shown on the printer screen and then tap on the OK button. Open Device Settings of the Canon Printer
- Then press the next button till the LAN Settings are shown and then tap on OK . Open LAN Settings of the Canon Printer
- Now press the next button on the printer till the Wireless LAN Setup is shown and press the OK button. Open Wireless LAN Setup on the Canon Printer
- Then the printer will start searching for available networks and its Wi-Fi light will start blinking. In some cases, you may have to select Easy WL Connect and press OK . Open Easy WL Connect on the Canon Printer
- Now the list of available Wi-Fi networks will be shown on the printer’s screen and then use the arrow keys on the printer to show the required Wi-Fi network on the screen.
- Then press the OK button to select the Wi-Fi network and enter the Wi-Fi’s password . Select Your Required Wi-Fi Network on the Canon Printer
- Now comes the trickiest part as you may have to switch between different input modes to enter the Wi-Fi password. To change the input mode (from number, upper case letters, lower case letters) of the printer, you may press the * key of the printer and once the required mode is selected, use it to enter the Wi-Fi key. Press the * Key on the Canon Printer to Switch Between Different Input Modes
- Then press OK and wait till the successful connection is established.
- Now a connected message is shown on the printer’s screen and you can set up your PC or device to use the Canon printer (discussed below).
Set up Canon Printer Wirelessly on a Windows PC
- Firstly, download the Canon printer driver from the Canon website and install it as an administrator . Make sure to select a Wireless printer during the driver setup. Use the Cableless Setup During the Canon Driver Installation
- Then right-click Windows and open Settings . Open Windows Settings Through the Quick Access Menu
- Now, in the left pane, head to the Bluetooth & Devices tab, and the right pane, select Printers & Scanners . Open Printers & Scanners in the Bluetooth & Devices Tab of the Windows Settings
- Then, near the top of the screen, click on Add Device and once the list of the printers is shown, select the required Canon printer . If the Canon printer is not shown in the list, follow step 5. Click on Add Device in the Windows Settings to Add the Canon Printer to Your System
- Now follow the prompts on your screen to complete the process and that will successfully, add the Canon printer to your Windows PC.
- If the Canon printer is not shown at step 3, then you may click on Add Manually and follow the prompts on the screen to complete the process. You can confirm this by printing a test page . Manually Add the Canon Printer to Your Windows PC
Set Up Canon Printer Wirelessly on a Mac
- Firstly, download the Canon printer driver from the Canon website and install it. Make sure to select the wireless option during the installation of the driver.
- Now click on the Apple menu and select System Preferences . Open System Preferences on Your Mac
- Then open Printers & Scanners and click on the plus sign to add the printer. Open Printers & Scanners in the MAC’s System Preferences
- Now, in the list of printers, select the Canon printer and click Add . Click on the Plus Sign in Mac’s Printers and Scanners Preferences
- Then follow the prompts on your screen to complete the addition of the Canon printer to your Mac and afterward, print a test page to check if everything is working fine.
Set UP Canon Printer Wirelessly on a Linux Machine
- Launch a web browser and steer to the Canon website.
- Now switch to its Support section and select your Canon printer .
- Then download the DEB package of the driver for your Canon printer and install it. Make sure to select the wireless or cableless option during the setup.
- Now launch Linux Settings and head to Printers . Click on Add a Printer in the Printers Tab of the Linux Settings
- Then click on Add a Printer and in the list of printers shown, select your Canon printer . If your Canon printer is not shown, then you may use the CUPS interface to add the printer to your Linux distro.
- Now follow the prompts on the screen to complete the process and the Canon printer will be successfully added to your Linux distro. You can confirm by printing a test page .
Set Up Canon Printer Wirelessly on an Android Phone
Before proceeding, please note that the Canon printers support Android 4.1 and above, so, make sure the Android device you are trying to print from meets this requirement.
- Launch the Google Play Store and search for Canon Print Service .
- Now open Canon Print Service and install it. Install Canon Print Service App from the Google Play Store
- Then launch it and give it the required permissions (if it asks to).
- Now open a document that you may want to print and expand its Options .
- Then select Print or Share » Print . Open Print Dialogue for a Document on An Android Phone
- Now, in the list of printers, select the Canon printer and edit the print settings (like page range, etc.). In some cases, you may have to tap on All Printers . Select the Canon Printer in the List of Printers on an Android Phone
- Then check if the Canon printer has started to print. If not, then make sure the printer and phone are connected to the same Wi-Fi network . Also, you may restart your phone and Canon printer to check if the printer has started to work fine.
Set Up Canon Printer Wirelessly On an iPhone
- Open the document that you want to print and expand its Options .
- Now select Print and check if the Canon printer is shown in the list of available printers . If not, follow steps 4 and onwards. Select Print for the Document on the iPhone
- If so, then print the document and check if the Canon printer is working fine. Select the Canon Printer in the Printer’s List on the iPhone
- If not or the printer is not shown at step 2, then open Apple App Store and search for Canon Print . Send the Print Command to the Canon Printer Through the iPhone
- Now open Canon Print Inkjet/SELPHY and install it. Install Canon Print Inkjet/SELPHY from the Apple App Store
- Then launch it and give the app its required permissions .
- Now tap on Add Your Printer and let the app search for available printers . Search for Available Printers on the Canon Print App
- Then select your required Canon printer and afterward, you can use the Canon Print app to print from your iPhone to a Canon printer wirelessly. Select Your Canon Printer on the Canon Print App on the iPhone
Keep in mind that if wireless printing fails to work, then you may restart your device (like a PC, Mac, etc.), router , and Canon printer to retry the wireless printing.
How to Fix “Printer is in an error state” Issue?
How to Fix “Error: UnsupportedProtocol” PCL XL Error on a Printer?
The “Printer is in an error state” message appears when Windows fails to properly communicate with your connected printer. In this condition, print jobs may stay stuck in the queue or fail to initialize entirely, even though the printer seems powered on and connected. The issue can occur with both USB and network printers and usually points to a driver, spooler, or port configuration problem .

Other recurring causes include communication timeouts over USB or Wi-Fi, incomplete driver installations after Windows updates, and queued print data that traps the spooler in an error loop.
1.Clear the Print Spooler and Reinstall the Printer
Over time, damaged or leftover print files can accumulate inside the spool folder. These corrupted entries may prevent new print commands from being processed, locking the spooler into an error state and making Windows think your printer is malfunctioning.
Clearing the print spooler removes those faulty files, while reinstalling the printer refreshes driver links and registry configurations to restore proper communication.
- Press Windows + R , type services.msc , and press Enter .
- Find Print Spooler , right-click it, and select Stop .
- Open File Explorer and navigate to: C:\Windows\System32\spool\PRINTERS
- Delete all files in this folder these are stuck print jobs causing the conflict.
- Return to the Services window, right-click Print Spooler , and choose Start .
- Finally, reinstall your printer through Settings > Bluetooth & Devices > Printers & Scanners .
2.Install the Correct Printer Driver
Sometimes, Windows automatically installs a generic or incompatible driver that prevents proper communication between the printer and the system. This mismatch leads to failed print jobs or detection errors.
Installing the manufacturer’s official driver ensures both devices communicate correctly and eliminates compatibility problems.
- Press Windows + I to open Settings , then navigate to Bluetooth & Devices .
- Select Printers & Scanners .
- Choose your printer and click Remove .
- Visit the official website of your printer’s manufacturer.
- Download and install the latest driver for your exact model (or the Universal driver if recommended).
- Restart your PC and reconnect the printer.
3.Enable Legacy Plug and Play for LPT Port
Older printers connected through LPT ports may rely on Legacy Plug and Play detection to initialize properly. When this option is disabled, Windows might fail to detect the printer during startup.
Re-enabling this feature restores the hardware handshake and allows the printer to initialize automatically when your system boots.
- Press Windows + X and select Device Manager .
- Expand Ports (COM & LPT) , right-click your printer port (e.g., LPT1 ), and select Properties .
- Go to the Port Settings tab.
- Check Enable legacy Plug and Play detection .
- Click OK and restart your computer.
- Inkjet printers excel in high-quality color printing, making them ideal for photos and images but require frequent ink replacements.
- Laser printers are better suited for high-volume, text-heavy documents, offering faster printing speeds and lower long-term costs.
- Choose based on needs—inkjet for versatile, vibrant prints and laser for durability, speed, and cost efficiency in office settings.
Just as a Polaroid camera isn’t suited for professional wedding shoots but excels at capturing true moments, in the world of printing, the two printer types— inkjet and laser — excel in their respective use cases , and one cannot overshadow the other as the best option for everyone. But there certainly can be a better choice for you! How would you know which one? By learning about both, of course !

Which Is Better Inkjet or Laser Printer
- How Do Printers Work?
- What is an Inkjet Printer?
- What is a Laser Printer?
- Inkjet vs. Laser Printer: Pros & Cons 1. Paper Compatibility 2. Timing 3. Cost 4. Durability
- Which One Should You Use?
How Do Printers Work?
With advancements in technology and increased resource availability , printers that were once exclusive to specific groups are now accessible to a broader audience. However, affordability in no way equals a compromise in quality, all thanks to the wide range of printer options available today.
At the basic level, all printers transfer minuscule dots onto a sheet of paper to replicate images and text documents. This is done by sending electronic signals from the computer to the printer’s control board , which interprets them into instructions suitable for the specific printing technology used. And that’s exactly what differentiates the various printer types from one another.
While there are various printing technologies available today, the two most common ones are inkjet and laser . Funny enough, the difference between the two is what remains a mystery for many.
What is an Inkjet Printer?

Inkjet Printer
The mechanism of an inkjet printer is hinted at by its name. But for those who want a bit more explanation, this type of printer produces text and images by spraying liquid ink droplets onto paper. It uses ink cartridges that come in separate colors or combined into a single unit . These cartridges have one or more nozzles that dispense ink in precise patterns, producing the desired output.
But what does that say about inkjet printers’ applications, you ask ? Well, due to their ability to produce vivid colors and fine details , these high-quality prints make them popular for personal / home use and even some areas of commercial printing.
What is a Laser Printer?

Laser Printer
Laser printers, on the other hand, use electrical currents and toner (fine solid particles of powder) to produce images and text on paper.
The laser beam is targeted at a light-sensitive rotating drum to create charged particles (an electrostatic image) that attract the toner dust. This toner is then transferred to a sheet of paper , which passes through a set of heated rollers called a fuser . This helps bond the toner particles to the paper, resulting in a permanent print.
This is what makes laser printers ideal for office and business use. They’re also larger than inkjet printers and capable of printing high volumes at a faster speed. What’s more ? Considering their target audience, they also come with optional trays and advanced security features .
Inkjet vs. Laser Printer: Pros & Cons
While the fundamental difference between the two printer types lies in their printing mechanism , one cannot ignore how the prints come out to be, leading to distinctions in quality , performance , and overall cost .
In terms of quality, both printers have areas in which one excels the other. Inkjet is particularly useful for image printing and color reproduction because of the use of ink cartridges and laser for text-based documents ideal for high-volume environments. But wait, there’s more to the debate !
1. Paper Compatibility
Inkjet printers are capable of printing on numerous paper types , so they can produce glossy photographs, matte prints for framing, or even prints on non-traditional materials like vinyl or plastic .

Various options for photo paper
On the other hand, laser printers don’t work well with many options, which limits their applications beyond those requiring standard printer paper , especially because heat-sensitive paper won’t work with the heat rollers .
2. Timing
Though laser printers are known for quick batch printing, they do, however, take time to warm up before getting started, something that inkjet printers do not require. In terms of printing, inkjet printers do take a little extra time , but they are lighter and more compact , making them easy to fit into cramped settings or limited space desks.
3. Cost
There’s a price at purchase and a price you pay in the long run . Laser printers have a higher initial cost , however, they rely on toner rather than ink cartridges, which takes longer to use up.
Contrarily, ink cartridges get used up quickly and require either a replacement or a refill (if you want to go green ). In fact, they may even dry out if there’s an extended gap between printing jobs , rendering them unusable. However, between ink and toner cartridges, the replacement is easier and cheaper for the former than the latter.

Ink Cartridge (left), Toner Cartridge (right)
4. Durability
One thing’s for sure, laser printers outperform when it comes to text-based documents, and inkjet printers when it comes to graphics and image printing. Of course, both printers can print anything you want, but each has its strong suit.
Inkjet printers blend colors seamlessly, producing sharp , clear pictures but slightly fuzzy text . Conversely, laser printers deliver crisp , bold , and well-defined lettering , but they’re not ideal for printing-colored photos .
Moreover, since laser printers use fusers for binding, their prints are more durable . Then again, ink cartridges are water-based , so printed images may fade and have a higher chance of being damaged when exposed to moisture .
Which One Should You Use?
Asking a cashier to do your taxes or a chef to work on your car sounds pretty silly, right? Well, so does expecting a laser printer to handle photographs and an inkjet printer to manage reports and bulk documents. Each product is designed with specific strengths, even though they may perform multiple tasks.
When choosing a printer, consider factors such as speed , efficiency , affordability , and the desired output . Inkjet printers offer high-quality prints, are affordable , compact , and compatible with various paper types, but they require more frequent ink replacements .
Whereas, laser printers, though pricier , excel in printing clear office documents with greater print yields and lower running costs . Ultimately, the best choice depends on your specific needs and usage patterns .
Printer durability depends on usage frequency and the length of printing jobs. Because laser printers are known for frequent batch printing, they’re made of robust components designed for durability. And due to their reliance on toner rather than liquid ink, they don’t experience issues with ink drying or clogging, thus requiring less frequent maintenance and extending their operational lifespan. However, it cannot be said that an inkjet printer, if used with proper care and not overburdened, cannot last just as long, if not longer.
Although laser printers are popular for printing black and white documents with excellence, they absolutely can produce a range of colors and thus deliver color prints, although their quality is not the very best to rely upon.
Printing professional photo prints is better with inkjet printers as they support higher GSM (grams per square meter) paper and produce better color reproduction. Laser printers, on the other hand, do not offer as much color accuracy and detail, which is needed for high-quality, vibrant printed images.
- Even in our digital age, physical materials like paper still play a vital role, especially in printing, where the type of paper can greatly affect the final product.
- Different printers are best suited to specific paper types, such as glossy for photos or cardstock for invitations, highlighting the importance of choosing the right paper for your project.
- The variety of paper options, with different textures, weights, and finishes, allows for creativity and precision in achieving the desired look and feel for each print job.
Choosing the right paper for your print job is not an easy task. You need to understand factors like paper weight , finish , and brightness . The combination of these qualities results in numerous paper types, each suited to a specific use case.

Types of Paper for Printing
You wouldn’t want to print your cherished pictures on cardstock paper, and you certainly wouldn’t want to print your business card on standard printer paper. Knowing the different options available can help you make the most of your printer for a broader range of projects.
- Types of Printer Papers 1. Inkjet Paper 2. Laser Paper 3. Copy Paper 4. Matte Paper 5. Glossy Paper 6. Photo Paper 7. Card Stock Paper 8. Bond & Label Paper
- Which Paper is Best for Your Print Job?
Types of Printer Papers
1. Inkjet Paper

Inkjet Paper
As the name suggests, inkjet paper is specifically designed for inkjet printers to create clear text and sharp images . It can be further classified into various types, such as glossy , matte , and card , to suit different needs. However, this doesn’t mean that other paper types won’t work with these printers. The specification is simply to achieve the best results, as inkjet paper tends to absorb ink and is thus made slightly thicker .
2. Laser Paper

Laser Paper
Similarly, laser paper is specifically designed for laser printers to produce high-quality results. This type of paper is usually best for office use, such as memos , invoices , and high-volume documents . The finish is typically matte to avoid delaying drying time.
Since the toner stays on the surface of the paper in laser printing, it is not designed for maximum absorption, unlike inkjet paper, which can withstand more moisture comparatively.
3. Copy Paper

Copy Paper
While some may use copy paper and laser paper interchangeably, there’s a distinct difference between the two. Copy paper is the kind you usually find next to your office printer in a large box. It is thinner and less expensive than laser paper and, well , gets the job done. However, color accuracy and print quality may sometimes be compromised .
4. Matte Paper

Plain Matte Paper
Matte paper, or more commonly known as printer paper, features a non-reflective, smooth , and non-textured finish that provides a clean and professional appearance. For this reason, it is ideal for printing reports and resumes , although the latter is less common these days.
But what’s even better, you ask ? You can produce double-sided printouts without having silhouettes show on the other side. Talk about a great balance of cost-effectiveness and resource efficiency in the long run!
5. Glossy Paper

Glossy Paper
Looking for a touch of pizzazz ? Then a glossy finish is the way to go. It not only enhances contrast and color saturation , but when combined with durable inks and color-depth cartridges, it produces brilliant and crisp photographs and marketing materials . Text documents are not the best use of this paper, unless , of course, you’re aiming for an extra element of sophistication.
6. Photo Paper

Photo Paper
Photo paper is specifically designed for printing photographs and is available in several finish options, such as matte , glossy , and satin . In fact, it often has a different finish on each side and is thicker than most papers.
The purpose of this paper, as clear as the results it produces, is to deliver exceptional sharpness and color reproduction . After all , what good is a photograph if it’s not preserved in its best quality for many years to come? However, you should check your printer’s manual or the manufacturer’s website to see if it can handle photo paper and its thickness.
7. Card Stock Paper

Card Stock Paper
You might still be wondering what to use for printing business cards , wedding invitations , flyers , or other formal materials for your brand. Using regular printer paper or glossy paper for these purposes may not be very convincing. For this, you need the durability and sturdiness offered by card stock paper.
The premium feel and longevity of this material can withstand harsh handling and minimize damage. However, keep in mind that not all printers are designed to handle card stock. So, if you use an incompatible printer , be prepared for paper jams or other similar issues.
8. Bond & Label Paper

Bond & Label Paper
Ever noticed how receipts and labels paper feel different from your everyday paper? That’s because it’s a special material called thermal roll or bond roll , which features a texture similar to fabric.
The “ thermal ” in its name refers to the printing process that uses heat to imprint the image onto the paper. This method not only reduces ink costs but also prevents smudging and smearing . However, receipts and labels aren’t its only applications. Thermal paper is used in various fields, from art to business and beyond . But mostly where ink permanence is the top priority.
Which Paper is Best for Your Print Job?
Since everyday tasks typically require standard matte paper and most office printers use laser paper for document reproduction, you don’t need extraordinary printers or thicker paper for these tasks.
But if you wish to print cards , invitations , and brochures , you’ll definitely need to stock up on card stock and glossy paper. And if you’re a photographer with a studio, you wouldn’t need to purchase anything other than photo paper —until you decide to leave the profession, that is.

A and C-Series Paper Sizes
But it doesn’t end there. Each paper type is available in various sizes , ranging from A1 to A10 . While standard printers typically support A4 and/or A3 sizes, specialized printers can accommodate a wider range of sizes, along with different coatings and weights, providing maximum flexibility for your printing needs.
Embarking on the journey of 3D printing is both exciting and, at times, a bit daunting. Thankfully, this innovative technology has become considerably accessible, allowing users to convert digital designs into real-world objects. For 2024, a wide selection of 3D printers is designed specifically for beginners.

This guide offers genuine recommendations whether you are an educator, an entrepreneur working on prototypes, or a hobbyist pushing creative boundaries, to help establish a solid base for your 3D printing endeavors. But before we dive into these top picks, let’s explore what makes a 3D printer truly outstanding. Here’s a breakdown of the key considerations based on specific needs and applications.
Print Quality: Focus on obtaining high-quality prints first and foremost. Opt for a printer that generates detailed, clean, and precise prints, as these are crucial for any printing project. Elements such as resolution, measured in microns, play a role; a lower micron count results in a higher resolution. Furthermore, the layer height is pivotal, with thinner layers yielding finer details. While faster speeds can reduce print time, they might affect print quality, hence balancing speed and quality is key.
Build Volume: The build volume dictates the maximum size of objects you can print. Choose a printer with a build volume that aligns with your intended print sizes.
Reliability and Durability: A dependable 3D printer should consistently produce quality prints and remain durable over time. Prioritize printers with robust construction and reliable components.
Ease of Use: For beginners and those desiring easy printing, prioritize features that enhance usability. Look for elements like a user-friendly interface, perhaps via touchscreens or intuitive software. Automatic bed leveling diminishes the necessity for manual calibration, streamlining the process. Additionally, filament sensors are handy for notifying users about low filament levels or if issues arise during printing.
Material Compatibility: Projects may require diverse materials. Top 3D printers support multiple filaments like PLA, ABS, PETG, and specialized filaments such as flexible or composite variants.
Connectivity: Depending on your setup, connection options for your printer may include USB , SD card, Wi-Fi , or Ethernet. Some models even offer remote monitoring and control via apps.
Software: The software included with the printer, or compatible options, should smoothly translate designs into printable files. Look for slicer software balancing user-friendliness with advanced features.
Safety Features: Safety is paramount, particularly in educational settings or around children. Consider printers with enclosed areas for temperature regulation and burn prevention. Furthermore, HEPA filters reduce potentially harmful particle emissions, enhancing operational safety.
Support and Community: Having a strong user community and excellent customer support is invaluable, especially for troubleshooting and learning how to use your printer.
Price: Lastly, consider the cost. The best printer for you balances these factors with your budget.
Here, we have intricately curated a list of the best 3D printers for beginners. So, let’s get started.
1. Creality Ender 3 V2 Neo
Best Value
Pros
- Auto-Leveling
- Improved Extruder System
- Removable Build Plate
- Print Resume Feature
Cons
- No Touchscreen
- Print Speed Limitations
- No Double Z-Axis
- Bare-Bones Appearance
No products found.
No products found.
The Creality Ender 3 V2 Neo combines accessibility with precision, designed to make 3D printing approachable without sacrificing quality. This model exemplifies Creality ‘s dedication to innovation, incorporating a CR Touch auto-leveling system for perfect layering. The printer features a PC steel printing platform, delivering strong adhesion and a smooth foundation for creations.
Its all-metal Bowden extruder ensures durability and stable performance, suitable for both beginners and experienced users. This upgraded version of the well-known Ender 3 V2 model is crafted with user-friendliness and print quality in focus. It comes 95% pre-installed, facilitating an easy setup.

Creality Ender 3 V2 Neo
The addition of the CR Touch auto-leveling kit significantly improves leveling accuracy, while the PC steel platform and all-metal Bowden extruder support its dependability and longevity.
↪Pros
- Auto-Leveling: The CR Touch auto-leveling feature performs excellently, simplifying the process for beginners by negating manual leveling challenges.
- Improved Extruder System: Enhanced with metal construction, the extruder system boosts the printer’s performance and durability.
- Removable Build Plate: The removable build plate eases print removal, preventing damage caused by overly adhered prints.
- Print Resume Feature: The print resume feature saves progress during power outages, allowing for a smooth continuation once power is restored.
↪Cons
- No Touchscreen: Despite its improvements, the Ender 3 V2 Neo lacks a touchscreen interface, which could enhance user experience.
- Print Speed Limitations: Higher speeds (around 120mm/s) may result in reduced print quality, indicating an optimization for moderate speeds.
- No Double Z-Axis: Missing a double Z-axis, the printer might not offer the maximum stability and precision that some users seek.
- Bare-Bones Appearance: Some might find the Ender 3 V2 Neo’s design quite basic, lacking the aesthetic appeal found in other models.
This printer is part of Creality’s initiative to make 3D printing more accessible and user-friendly while incorporating features catering to advanced users. It strikes a balance between usability and performance, making it a suitable choice for many 3D printing enthusiasts.
2. Original Prusa i3 MK3S+
Best Overall
Pros
- High-Quality Prints
- User-Friendly Software
- Good Support Resources
- Included PLA Spool
Cons
Build Volume
No Built-In 3D Scanner
Dated Interface
Price
The Original Prusa i3 MK3S+ symbolizes continuous innovation, reflecting years of meticulous enhancement to provide superior print quality and reliability in 3D printing. A key feature is the SuperPINDA probe, which ensures meticulous first-layer calibration, paving the way for flawless prints. Its advanced extruder is engineered to handle filament smoothly and adapt seamlessly to various types, ensuring hassle-free printing.
More than a tool, this printer opens a world of precision and limitless possibilities, built upon Prusa’s lasting dedication to quality. As an evolution from the MK3S , the MK3S+ introduces enhancements while preserving the reputable Prusa i3 series’ legacy.
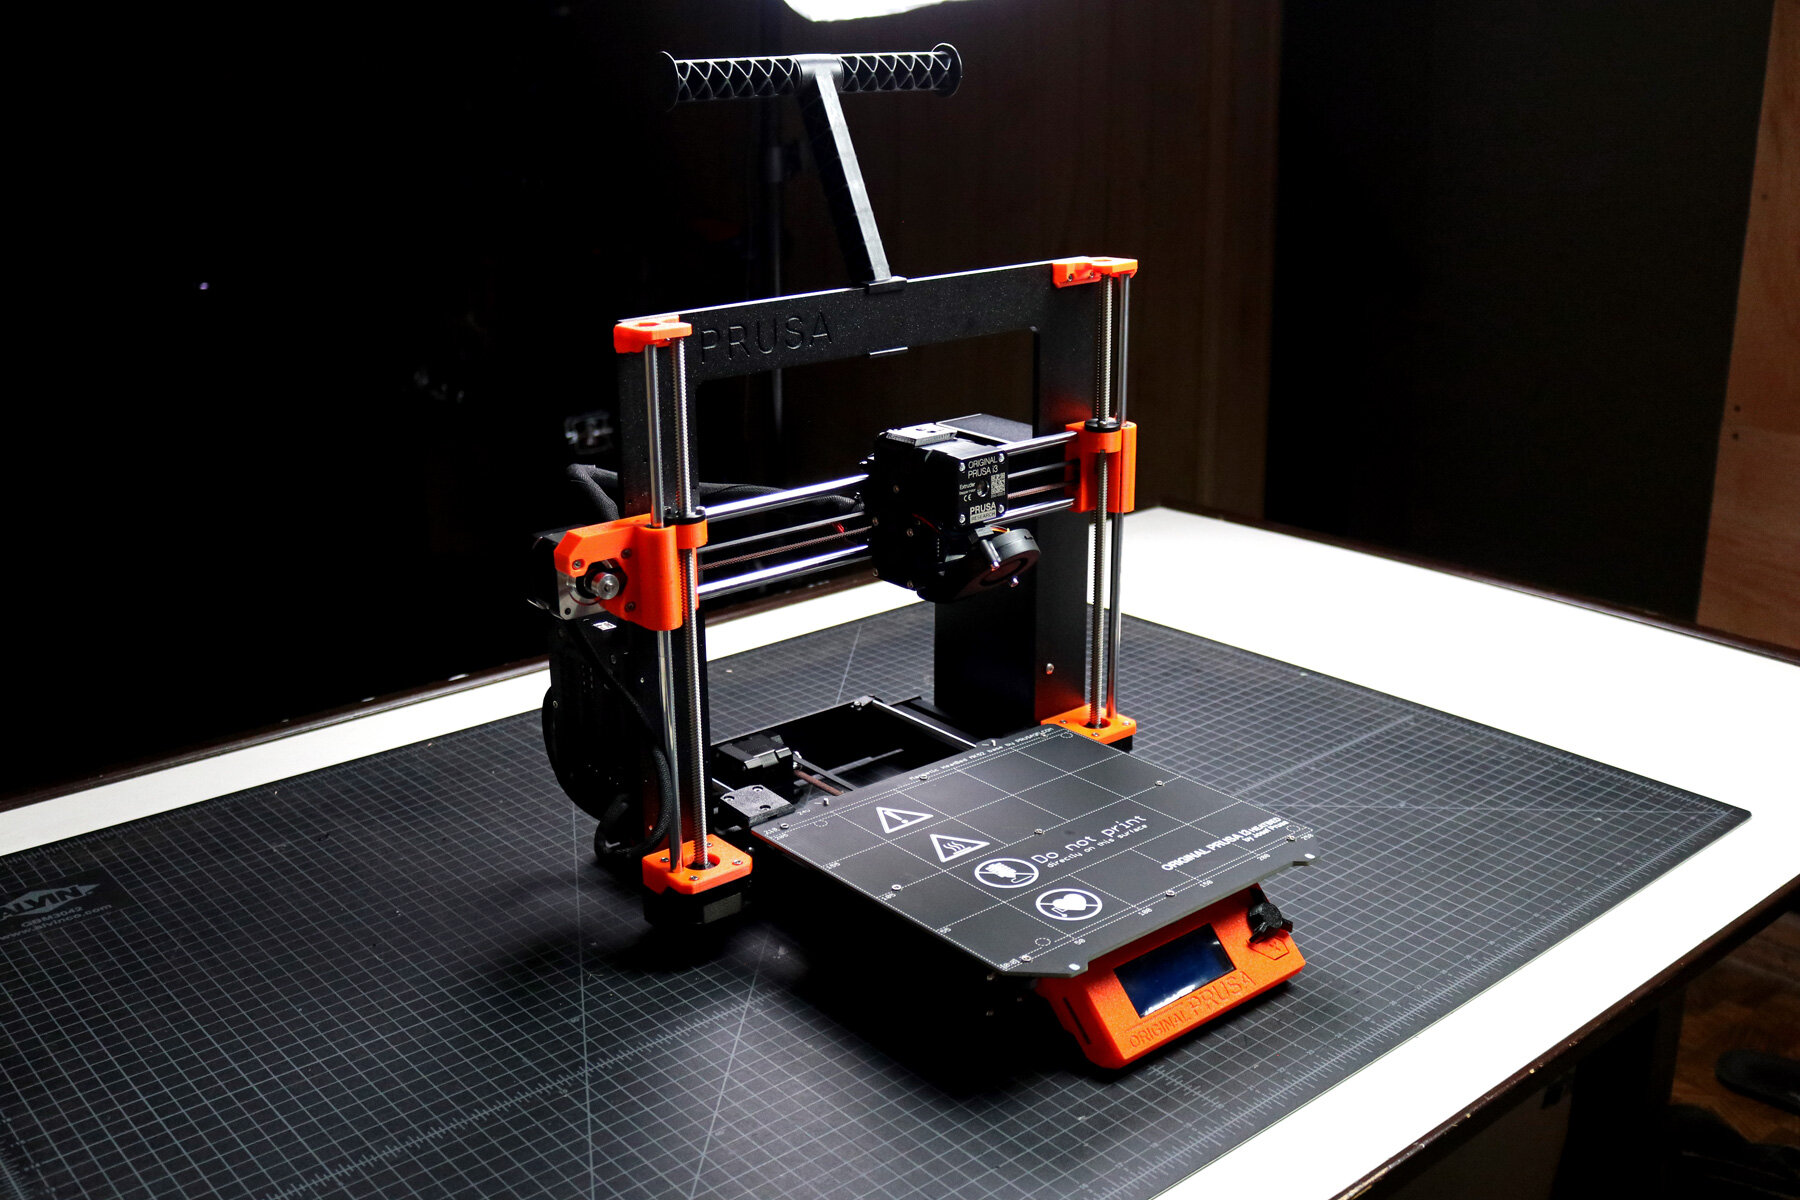
Original Prusa i3 MK3S+
Additionally, the integrated filament sensor detects any filament type or color, enhancing its functionality. Retaining its direct drive system, the MK3S+ remains notably advantageous for printing flexible materials, lending versatility to a broad spectrum of printing requirements.
↪Pros
- High-Quality Prints: The MK3S+ consistently delivers high-quality prints without errors, demonstrating its dependability.
- User-Friendly Software: The printer is accompanied by easy-to-use yet powerful software that supports multiple filament types.
- Good Support Resources: Prusa offers a professionally printed user guide and excellent support materials for the MK3S+.
- Included PLA Spool: A 1-kilogram PLA spool is included with the MK3S+, a beneficial bonus for beginners.
↪Cons
- Build Volume: The build volume might be slightly small for the price, which could limit larger projects.
- No Built-In 3D Scanner: The MK3S+ lacks a built-in 3D scanner, unlike some other models.
- Dated Interface: The LCD screen and interface are somewhat outdated compared to more current 3D printers.
- Price: Although the MK3S+ is a robust printer, some users may feel it doesn’t justify the cost considering market alternatives.
The Original Prusa i3 MK3S+ remains popular in the 3D printing community for its consistent performance and Prusa’s commitment to open-source development. It strikes a balance between ease of use and advanced capabilities for both enthusiasts and professionals.
3. Bambu Lab P1P
Best Speed
Pros
- Blazing Speed
- Simple Auto Bed Leveling
- DIY Custom Side Panels
- Optional Multicolor Capabilities
Cons
Appearance
Noise Level
Proprietary Parts
Filament Wastage
The Bambu Lab P1P excels in speed, characterized by a robust CoreXY framework engineered for rapid printing results. Ready for action from the start, this printer features a direct drive extruder and an all-metal hot end, accommodating various filament types.
Its automatic bed leveling sensor ensures a perfect first layer is effortlessly achieved, enabling prints that are both swift and visually appealing. Bambu Lab’s creation emphasizes not just speed but also reliability and versatility. The P1P offers a spacious build volume of 256 x 256 x 256 mm , coupled with impressive speeds reaching 500 mm/s and an acceleration of 20,000 mm/s .
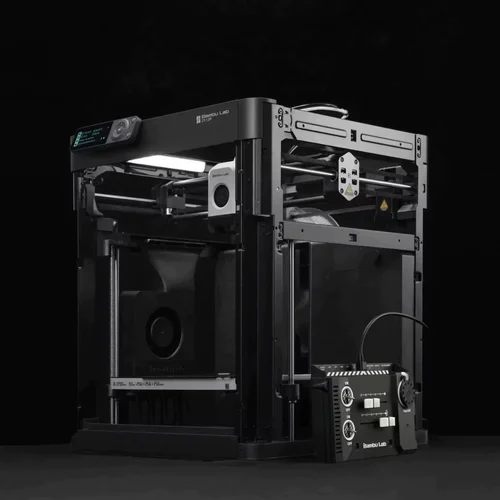
Its direct drive extruder and high-temperature hot end facilitate printing with various filaments, including PLA, PETG , and TPU .
Additionally, the P1P is designed with future enhancements in mind, being compatible with Bambu Lab’s Automatic Material System (AMS) for multicolor printing, and can be further customized with printable mod plates, adding layers of flexibility to meet changing needs.
↪Pros
- Blazing Speed: A key highlight is the P1P’s speed, which facilitates rapid printing without compromising quality.
- Simple Auto Bed Leveling: The auto bed leveling streamlines the printing process, particularly advantageous for beginners.
- DIY Custom Side Panels: Customizable side panels add a degree of personalization.
- Optional Multicolor Capabilities: Utilizing the AMS unit, the P1P supports multicolor prints, enhancing creative opportunities.
↪Cons
- Appearance: The P1P’s “naked” design may not appeal to everyone as it lacks side panels.
- Noise Level: The printer can be loud in operation, which may be a concern for certain settings.
- Proprietary Parts: Using proprietary parts can increase maintenance and upgrade costs.
- Filament Wastage: The AMS unit can lead to filament wastage, affecting cost-efficiency.
The Bambu Lab P1P is appealing to those seeking speed, reliability, and customization with the flexibility to adapt to various needs.
4. Anycubic Kobra Max
Best for Large Prints
Pros
- Enormous Build Size
- Accurate Auto Bed Leveling
- Convenient Build Plate
- Comprehensive Kit
Cons
Large Footprint
Bed Slinger Design
No Larger Nozzle Included
Slow Printing
The Anycubic Kobra Max is a powerhouse in 3D printing, offering an impressive build volume that allows creators to manifest large-scale concepts. With its responsive touchscreen and remarkable printing speed, the Kobra Max distinguishes itself in FDM printing.
Its robust frame and automatic bed leveling offer stability and precision, making it a preferred choice for tackling substantial projects. Designed for hobbyists, enthusiasts, and professionals, the Anycubic Kobra Max boasts a large build volume of 400 x 400 x 450 mm , perfect for ambitious prints. The 4.3-inch LCD touchscreen simplifies navigation and operation.
Anycubic Kobra Max
With a maximum printing speed of 180mm/s , faster than many rivals, it ensures swift progress without sacrificing quality, supported by its solid aluminum frame for continuous stability and precision.
↪Pros
- Enormous Build Size: Ideal for large prints like props and costumes, accomplishing projects in a single run.
- Accurate Auto Bed Leveling: The auto leveling yields precise results, simplifying usage.
- Convenient Build Plate: The coated glass bed facilitates easy print releases as they cool.
- Comprehensive Kit: It comes with essential tools and a PLA sample to start off immediately.
↪Cons
- Large Footprint: The significant size requires ample space to operate effectively.
- Bed Slinger Design: The design might be a drawback for some users.
- No Larger Nozzle Included: Lacking a larger nozzle, which can expedite larger prints.
- Slow Printing: Despite a high maximum speed, actual printing can be slow.
The Anycubic Kobra Max offers a budget-friendly solution for those requiring significant build volume, prized for automatic bed leveling and touchscreen interface. However, consider the large size and slower operation pace.
5. Toybox 3D Printer
Best for Newbies/Children
Pros
- Ease of Use
- Creative Freedom
- Kid-Friendly Design
- Educational Value
Cons
Small Build Area
Internet Dependency
Unheated Bed
Proprietary Filament
The Toybox 3D Printer introduces a delightful touch of innovation, sparking creativity for both kids and adults. Its compact, intuitive design reshapes play by allowing users to easily design and print toys. With a simple, user-friendly interface, the Toybox invites everyone into the realm of 3D printing, serving as an ideal gateway for young enthusiasts.
Featuring a modest build volume of 7 x 8 x 9 cm , perfect for small hands and big imaginations, the Toybox operates at a pace of 60 mm/s with a resolution of 200 microns , ensuring precise toy reproduction. The 4mm Smooth-Flow Extruder Head and Easy-Peel bed simplify the printing experience, eliminating complexities.
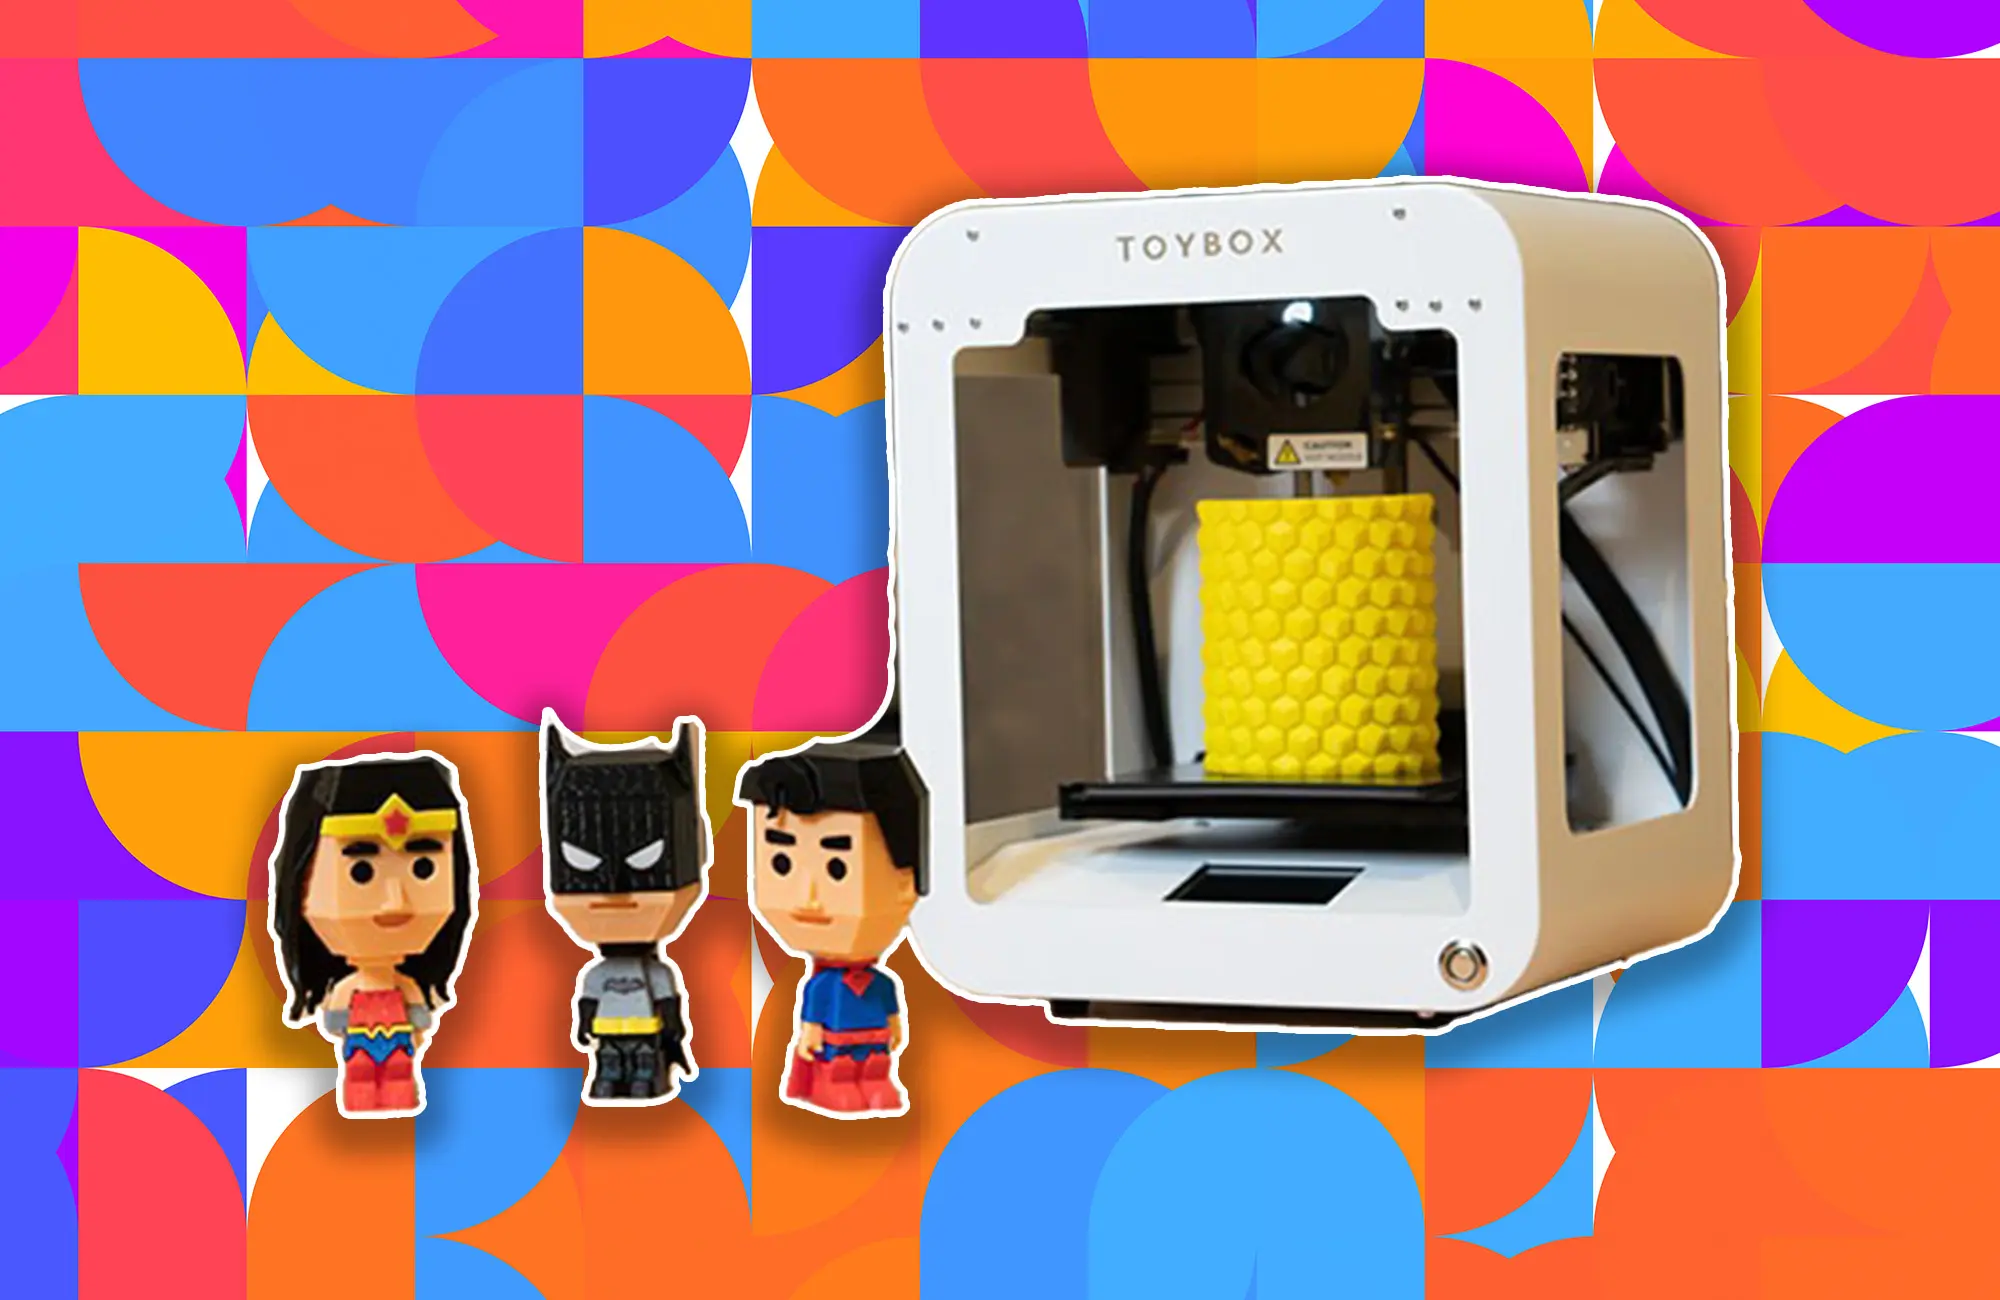
Toybox 3D Printer
Compatible with STL, OBJ , and gCode formats, and offering easy connectivity via 2.4GHz Wi-Fi , sending designs from your smartphone or tablet is seamless. The Toybox puts the magic of creation at your fingertips.
↪Pros
- Ease of Use: Known for reliable, misprint-free performance and one-touch operation, ideal for kids and beginners.
- Creative Freedom: Access to more than 2,000 printable toys and crafting your own designs expands imaginative possibilities.
- Kid-Friendly Design: The robust all-metal frame features rounded edges, safe and easy enough for children to operate with minimal supervision.
- Educational Value: Introduces children to 3D printing and design basics, fostering creativity and problem-solving skills.
↪Cons
- Small Build Area: The build area may limit the size of toys that can be printed.
- Internet Dependency: Requires an internet connection to access its design library, which could be a constraint.
- Unheated Bed: An unheated bed may affect print adhesion compared to other printers.
- Proprietary Filament: Limited to its brand of filament, which may restrict material variety and increase long-term costs.
The Toybox 3D Printer is a doorway into 3D printing, offering a joyful and educational experience that encourages creative thinking and idea realization.
Look for printers with an easy setup, intuitive controls, good customer support, and a robust online community.
Entry-level 3D printers can range from $200 to $500, depending on features and quality.
You can print a wide variety of objects, but always check the printer’s material compatibility and build volume limits.
Yes, if you follow the manufacturer’s safety guidelines, such as proper ventilation and not touching hot surfaces.
Regular maintenance includes cleaning the build plate, lubricating moving parts, and updating firmware.
Check for common issues like bed leveling, filament quality, and slicer settings. Online communities can also offer support.
