- Login into AWS Management Console
- Click on Services and then click on EC2

- Click on Elastic IPs
- Click on Allocate Elastic IP address at the top right side of the window.
- Under Allocate Elastic IP address click on The elastic IP address can be allocated from Amazon’s pool or you can bring your public IPv4 or customer’s owned pool. Elastic IPs does not support IPv6 addresses. In our case, we will assign an IP address from Amazon’s pool.
- Click on Associate this Elastic IP address at the top right side of the window. You can see that Amazon has allocated Elastic IP, and we need to confirm it.
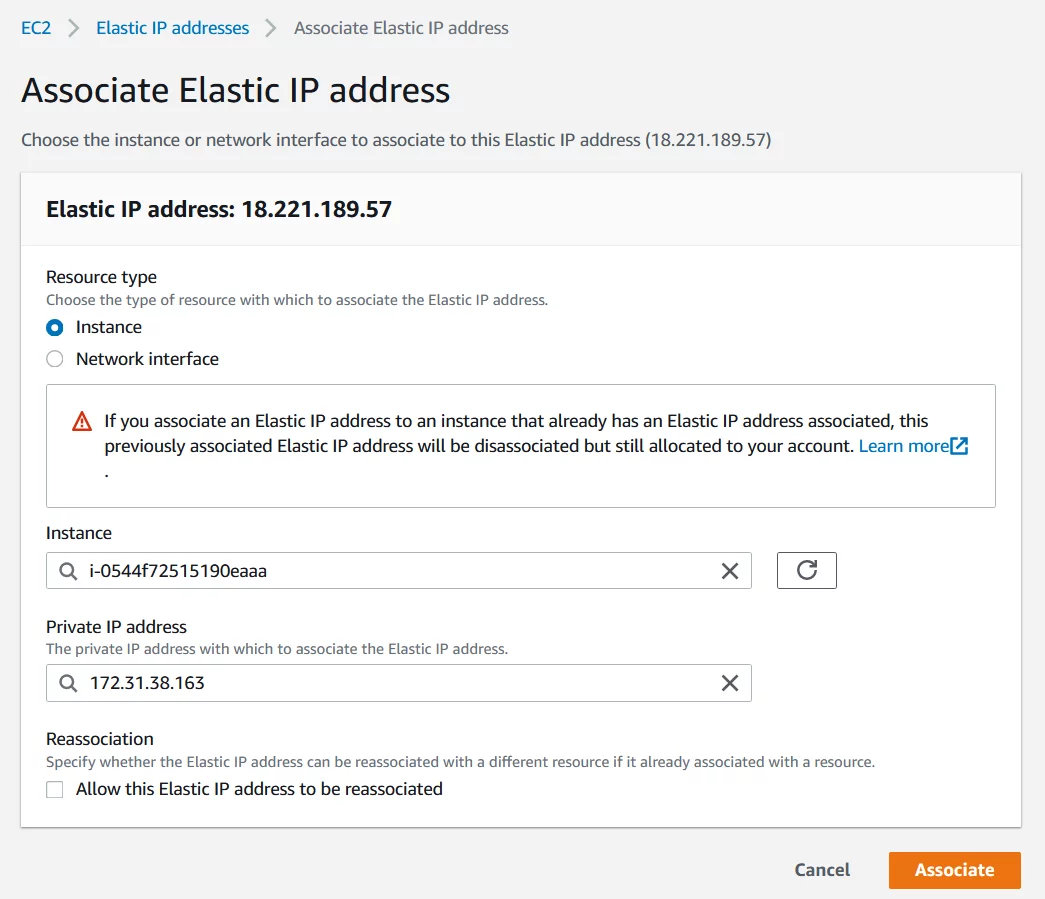
- Under Associate Elastic IP address , search for the running instance that should get an elastic IP address and choose the private IP address that will be associated with Elastic IP address, and then select Associate . If you associate an Elastic IP address to an instance that already has an Elastic IP address associated, this previously associated Elastic IP address will be disassociated but still allocated to your account.
- The elastic IP address is successfully associated with the instance.
- Go back to EC2 instance (for example, click on EC2 or click on Services – EC2). As you can see there is one Elastic IPs associated with Amazon account and running instance.
If you click on running instance, you will also what Elastic IP address is associated with it.
