The recent popularity of Zoom made several users register on the platform as everyone was forced to work and study from home. While using the desktop client of Zoom, one of the issues that users often come across is the error code 5003. The error code reads “ Unable to connect ” along with some additional text that provides some troubleshooting steps. The error message occurs when users try to join a meeting through the desktop application. The issue seems to be only limited to the desktop client as the meetings work fine on the browser.
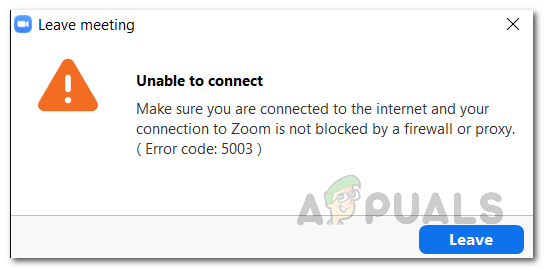
Zoom Error Code 5003
In this article, we will be going through the error code 5003 to provide you some methods that can circumvent the issue. As it turns out, the said error code appears when your system is not able to establish a connection with the Zoom servers. This means that something on your system is interfering with the desktop client and thus, preventing it from establishing a connection. As a result, you are not able to join meetings and the mentioned error message pops up. There are different factors that could actually trigger this behavior. Let us go through them one by one.
- Third-party antivirus or VPN software — One of the most common reasons why such issues often occur is the existence of a third-party antivirus or VPN software. In most cases, the antivirus software on your system can interfere with the applications on your system which as a result causes unexpected behavior. The case is similar here. If your antivirus software is interfering with the Zoom application, it won’t be able to establish a connection and thus the error message pops up. Along with that, in some cases, the VPN apps can also be the culprit party. If you are using a VPN while establishing a connection, it could be blocking the connection due to which the error is emerging.
- Network settings — As it turns out, in some scenarios, the issue can also be triggered by your Windows network settings which aren’t allowing the connection to be established successfully. In such a scenario, you will simply have to reset your network adapter settings to circumvent the issue.
With that said, you probably have established an understanding of what could be causing the error message. Now that we have gone through the potential causes of the issue, let us go through the different methods that you can implement to get the issue resolved.
Method 1: Uninstall Third-Party Antivirus
As you are probably aware at this point, the error message comes up when your desktop client cannot establish a connection with the Zoom servers successfully. This occurs when something on your system is blocking this process or simply interfering with it. Antivirus software is widely known to be interfering with other applications installed on your system to make sure that they are safe to use. While this is appreciable, oftentimes they can trigger a false alarm that stops certain applications from working as intended. In such a scenario, you will have to completely turn off the antivirus software on your system and then try joining a meet on Zoom.

Turning off Antivirus
In case it works out and you don’t get the error message, then that means the issue is being caused by the third-party antivirus software on your system. If this is applicable to you, what you can do is completely remove the antivirus from your system and look for a better replacement. It is recommended that you uninstall the antivirus software and then reboot your system before checking if the issue has been resolved.
In addition, if you have a VPN running in the background, turning that off might also help as certain VPNs have poor connection or the connection could simply be blocked. Once you have turned it off, check if that resolves the issue for you.
Method 2: Reset Network Adapter Settings
In some scenarios, the issue can also be caused by your network setting as we have mentioned above. What you will have to do, in such a case, is to simply reset the network adapter settings on your system and then try to see if the issue has been resolved. The network adapter settings can be easily reset, just follow the instructions given down below:
- First of all, you will have to open up an elevated command prompt. To do this, search for the command prompt in the Start Menu and then right-click on it. Choose Run as an administrator from the drop-down menu. Running Command Prompt as an Admin
- Once you have done that and the command prompt window launches, type in the following command flush the DNS on your system:
ipconfig /flushdns

Flushing DNS
- After that, enter the following command to reset the Windows Socket (winsock):
netsh winsock reset

Resetting Winsock
- Once you have done that, go ahead and reset the system as instructed on the command prompt screen.
- When your system boots up, open up the Zoom app and check if the issue persists.
Method 3: Change DNS
As it turns out, the issue can also be triggered by your DNS settings. In some cases, the DNS settings from your ISP could be blocking a connection with the Zoom servers due to which you are not able to establish a connection. This can be easily averted by simply changing your DNS or Domain Name Server from the Network settings window. To do this, just follow the instructions down below:
- First of all, right-click on the Network icon at the bottom-right corner on your taskbar and choose Open Network & Internet settings .
- On the Settings window, click on the Change adapter options option. Windows Network Settings
- This will bring up the Network Connections window. Right-click on your network adapter and choose Properties from the drop-down menu. Network Connections
- Then, highlight the Internet Protocol Version 4 (TCP/IPv4) option and click the Properties button. Network Adapter Properties
- At the bottom, click on the Use the following DNS server addresses option.
- Enter 8.8.8.8 and 8.8.4.4 in the Preferred and Alternate DNS server fields respectively. Changing DNS
- Finally, click OK.
- Once you have done that, go ahead and open up the Zoom app. See if the issue persists.
How to Fix “Printer is in an error state” Issue?
The error “ WinRAR Error: Next Volume Is Required ” usually appears when you’re extracting a multi-part RAR archive and WinRAR can’t find (or can’t correctly identify) the next file in the sequence . This often happens when a volume is missing , stored in a different folder , or renamed in a way that breaks the archive’s expected order .

In this guide, we’ll go over the most reliable fixes confirmed by affected users, along with what each method is doing behind the scenes so you can choose the right one for your situation.
Important: To extract multi-volume archives, you should always start extraction from the first file in the set. This is usually file.part1.rar , or (in older sets) the main .rar file that comes before .r01 , .r02 , and so on.
1. Download and Place the Missing RAR File
WinRAR needs all parts of a multi-volume archive to complete extraction. This error usually appears when one of the volumes in a set like .part2.rar , .r01 , .r02 , .001 , and similar naming formats is missing . Downloading the missing volume and placing it in the same folder as the other parts allows WinRAR to continue extracting normally .
- Look at the error message or review the list of archive parts in the folder.
- Identify which volume is missing (for example, part2.rar , .r02 , .001 , etc.).
- Go back to the website or source where you downloaded the archive.
- Locate and download the exact missing file using the same naming format as the others.
- Make sure the new file name matches the pattern of the rest. Example: If you have file.part1.rar and file.part3.rar , the missing one must be file.part2.rar .
- Move the downloaded missing volume into the same folder as the other archive parts.
- Confirm that all parts are in a single folder before extracting.
- Right-click the first file in the series (usually part1 or the main .rar file) and select Extract Here or Extract to Folder .
- WinRAR should now detect all volumes and continue extraction normally .
2. Manually Browse & Select the Next Volume
Use this method only if the next volume already exists , but WinRAR is failing to detect it automatically. This can happen due to incorrect naming , the file being in a different location , or a temporary file access issue. Manually browsing helps WinRAR locate the correct volume and resume extraction without interruption .
- Right-click the first file in the series (usually .rar or part1.rar ) and select Extract Here or Extract to Folder .
- When WinRAR cannot find the next volume, it will show the “ Next Volume Is Required ” message.
- A small window will appear, allowing you to manually select the next volume .
- Use the file explorer window to locate the folder where the other archive parts are saved.
- Select the next part based on the naming order (example: select file.part2.rar after file.part1.rar ).
- Make sure the selected file matches the naming format of the archive (no extra characters like (1) and no mismatched numbering).
- WinRAR will resume extraction using the selected volume .
- If additional volumes are missing or stored separately, WinRAR may prompt you again. Repeat the same process until extraction completes.
3. Rename the RAR files in Order
WinRAR relies on a proper naming sequence (such as file.part1.rar , file.part2.rar , file.part3.rar ) to extract multi-volume archives. If a file is named incorrectly, contains extra characters, or is out of order, WinRAR may fail to locate the next volume and show this error. Renaming the files correctly helps WinRAR follow the sequence and extract the archive without interruptions .
Note: Renaming only changes the file name , not the file contents. The goal is to restore the correct sequence so WinRAR can detect the next volume.
- Go to the folder where all the RAR files are saved.
- Make sure all parts of the archive are present and stored in the same folder .
- Check how the parts are currently named . Common patterns include:
file.part1.rar, file.part2.rar, file.part3.rar
file.rar, file.r01, file.r02, file.r03
- Look for files that don’t match the expected numbering pattern (for example, file.part01.rar , file.part1(1).rar , or unrelated names).
- Rename each file so it follows the same order without extra characters or mismatched numbering. Example:
Incorrect: file.part1.rar, file.part3.rar, file.part2(1).rar
Correct: file.part1.rar, file.part2.rar, file.part3.rar
- Make sure the text before the number is exactly the same for all files.
- Only the last part number should change.
- Right-click the first file in the series (usually part1.rar or the main .rar file) and select Extract Here .
- WinRAR should now recognize the sequence and continue extraction normally .
If you still get the same prompt: the archive set is likely incomplete (a part was never downloaded or was removed), or one of the volumes is corrupt and must be re-downloaded from the original source.
