The Unsupported GPU Processing Mode error in DaVinci Resolve occurs when the program is encountering an incorrect response from the graphics drivers on your computer. This usually happens when the drivers are restricting the application from accessing CUDA functionality, in the case of an NVIDIA graphics card.
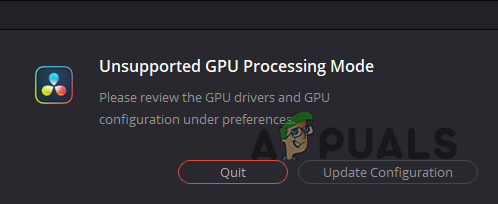
Unsupported GPU Processing Mode Error Message
However, if you are running an AMD GPU on your system, the issue is mostly related to the graphics drivers on your device. In this article, we will take you through a diverse list of solutions that you can implement on your machine in an attempt to resolve the problem in question.
Fix Unsupported GPU Processing Mode in DaVinci Resolve
In most cases, you can overcome the error message in question by reinstalling the graphics drivers on your PC. This removes any inconsistencies which can be causing the driver to send an invalid response. However, there are scenarios where the environment variables in Windows can help exhibit this behavior.
- Manually Set GPU Processing Mode : The first thing that you should do when starting to troubleshoot the problem in question is to manually set the GPU processing mode in DaVinci Resolve. This can be helpful when the program is unable to auto-detect the processing mode to use between CUDA and OpenCL. In such an instance, manually selecting a GPU processing mode can help circumvent the problem.
- Update Graphics Drivers : The video drivers on your machine are often the most apparent cause of the Unsupported GPU Processing Mode error message. As we have mentioned, this occurs when the DaVinci Resolve app requests information from the drivers and an invalid response is sent, such as restricting access to CUDA technology, in the case of NVIDIA cards. To resolve this, you will have to reinstall the video drivers on your machine.
- Check Environment Variables : Another reason that the error message can occur is when your environment variables are preventing the program from accessing the CUDA interface. This happens when you have an environment variable that makes CUDA invisible to the processes on your system. In such an instance, you will have to remove the environment variable or edit it to fix the problem.
- Reinstall AMD Adrenalin : AMD Adrenalin is a software that allows you to control and manage the AMD devices on your computer. This application can sometimes cause inconsistencies with the AMD graphics drivers, thus resulting in issues with the programs that are graphic intensive. To fix this, you will need to reinstall the app and factory reset the configurations stored locally.
- Reinstall DaVinci Resolve : In some instances, the issue can also appear when the DaVinci Resolve program is running into corruption or damaged installation files. When this happens, you will have to reinstall the Davinci Resolve program on your computer to mitigate the problem.
- Reinstall Windows : Finally, if none of the above methods fixes the issue for you, your last resort would be to reinstall the Windows operating system. This can help when the problem is neither related to the graphics drivers, nor the DaVinci Resolve program itself. Performing a clean install of Windows can result in losing your data, which is why it is important to back up your important data before proceeding.
1. Manually Set GPU Processing Mode
- First, open the DaVinci Resolve app.
- Then, go to DaVinci Resolve > Preferences in the top-left corner. Opening DaVinci Resolve Preferences
- On the Preferences window, make sure you are on the Memory and GPU section under the System tab.
- Then, untick the Auto checkbox next to GPU processing mode . Disabling Auto-Detect GPU Processing Mode
- From the drop-down menu, choose CUDA if you have an NVIDIA graphics card.
- Otherwise, select OpenCL and click Save.
2. Update Graphics Drivers
- First, download the Display Driver Uninstaller (DDU) utility from the official website here .
- Then, unzip the downloaded file to any location.
- After that, open the Display Driver Uninstaller.exe file.
- Once you do that, click Continue on the General Options window. DDU General Options
- Then, select GPU from the Select device type menu. Selecting Device Type
- Follow this up by choosing your GPU brand from the Select device menu. Selecting GPU Brand
- Finally, click the Clean and restart option. Uninstalling Video Drivers
- Wait for your PC to boot up. Then, navigate to your graphics card manufacturer’s website and download the latest video drivers for your card.
- Install the new display drivers and see if the issue persists.
3. Check Environment Variables
- Open the Start Menu and search for environment variables.
- Then, open the Edit the system environment variables option. Opening System Properties window
- On the System Properties window, click the Environment Variables option. Opening Environment Variables
- After that, go through the variables and locate any CUDA_VISIBLE_DEVICES variable. Environment Variables
- Remove the variable or edit the value to 0 .
- Restart your computer and see if the issue still occurs.
4. Reinstall AMD Adrenalin
- First, open the Control Panel window via the Start Menu. Opening Control Panel
- In the Control Panel window, click on the Uninstall a program option. Navigating to Installed Apps
- From the list of installed apps, double-click on AMD Adrenalin to uninstall it.
- After that, download the setup from the official website and install it.
- Make sure to select the Factory reset option when installing AMD Adrenalin.
- See if that resolves the issue.
5. Reinstall DaVinci Resolve
- Start by opening the Control Panel via the Start Menu. Opening Control Panel
- Navigate to Uninstall a program on the Control Panel window. Navigating to Installed Apps
- Then, look for the DaVinci Resolve app in the list.
- After that, double-click on the program to remove it from your computer.
- Download the setup from the official website and install it on your system.
6. Reinstall Windows
- First, open the Settings app via the Win key + I on your keyboard.
- In the Settings app, navigate to System > Recovery . Navigating to Recovery Settings
- Then, click on the Reset PC option. Resetting this PC
- If you wish to keep your files, click on the Keep my files option. Reset This PC Prompt
- After that, click on the Local reinstall option if you have a downloaded ISO file of Windows.
- Otherwise, click on the Cloud download option to download and reinstall Windows. Choosing Windows Install Point
- After that, go through the on-screen prompts to complete the process.
You should be able to subside the error message in question with the methods above. To avoid the issue in future, ensure that your graphics drivers are not running into any issues and keep them updated.
Still facing Unsupported GPU Processing Mode?
If you are still encountering the error message in question, you will have to reach out to the official support team for DaVinci Resolve via their forums, or email. They will be able to go through the program logs to help identify the issue more precisely.
How to Fix “Printer is in an error state” Issue?
The error “ WinRAR Error: Next Volume Is Required ” usually appears when you’re extracting a multi-part RAR archive and WinRAR can’t find (or can’t correctly identify) the next file in the sequence . This often happens when a volume is missing , stored in a different folder , or renamed in a way that breaks the archive’s expected order .

In this guide, we’ll go over the most reliable fixes confirmed by affected users, along with what each method is doing behind the scenes so you can choose the right one for your situation.
Important: To extract multi-volume archives, you should always start extraction from the first file in the set. This is usually file.part1.rar , or (in older sets) the main .rar file that comes before .r01 , .r02 , and so on.
1. Download and Place the Missing RAR File
WinRAR needs all parts of a multi-volume archive to complete extraction. This error usually appears when one of the volumes in a set like .part2.rar , .r01 , .r02 , .001 , and similar naming formats is missing . Downloading the missing volume and placing it in the same folder as the other parts allows WinRAR to continue extracting normally .
- Look at the error message or review the list of archive parts in the folder.
- Identify which volume is missing (for example, part2.rar , .r02 , .001 , etc.).
- Go back to the website or source where you downloaded the archive.
- Locate and download the exact missing file using the same naming format as the others.
- Make sure the new file name matches the pattern of the rest. Example: If you have file.part1.rar and file.part3.rar , the missing one must be file.part2.rar .
- Move the downloaded missing volume into the same folder as the other archive parts.
- Confirm that all parts are in a single folder before extracting.
- Right-click the first file in the series (usually part1 or the main .rar file) and select Extract Here or Extract to Folder .
- WinRAR should now detect all volumes and continue extraction normally .
2. Manually Browse & Select the Next Volume
Use this method only if the next volume already exists , but WinRAR is failing to detect it automatically. This can happen due to incorrect naming , the file being in a different location , or a temporary file access issue. Manually browsing helps WinRAR locate the correct volume and resume extraction without interruption .
- Right-click the first file in the series (usually .rar or part1.rar ) and select Extract Here or Extract to Folder .
- When WinRAR cannot find the next volume, it will show the “ Next Volume Is Required ” message.
- A small window will appear, allowing you to manually select the next volume .
- Use the file explorer window to locate the folder where the other archive parts are saved.
- Select the next part based on the naming order (example: select file.part2.rar after file.part1.rar ).
- Make sure the selected file matches the naming format of the archive (no extra characters like (1) and no mismatched numbering).
- WinRAR will resume extraction using the selected volume .
- If additional volumes are missing or stored separately, WinRAR may prompt you again. Repeat the same process until extraction completes.
3. Rename the RAR files in Order
WinRAR relies on a proper naming sequence (such as file.part1.rar , file.part2.rar , file.part3.rar ) to extract multi-volume archives. If a file is named incorrectly, contains extra characters, or is out of order, WinRAR may fail to locate the next volume and show this error. Renaming the files correctly helps WinRAR follow the sequence and extract the archive without interruptions .
Note: Renaming only changes the file name , not the file contents. The goal is to restore the correct sequence so WinRAR can detect the next volume.
- Go to the folder where all the RAR files are saved.
- Make sure all parts of the archive are present and stored in the same folder .
- Check how the parts are currently named . Common patterns include:
file.part1.rar, file.part2.rar, file.part3.rar
file.rar, file.r01, file.r02, file.r03
- Look for files that don’t match the expected numbering pattern (for example, file.part01.rar , file.part1(1).rar , or unrelated names).
- Rename each file so it follows the same order without extra characters or mismatched numbering. Example:
Incorrect: file.part1.rar, file.part3.rar, file.part2(1).rar
Correct: file.part1.rar, file.part2.rar, file.part3.rar
- Make sure the text before the number is exactly the same for all files.
- Only the last part number should change.
- Right-click the first file in the series (usually part1.rar or the main .rar file) and select Extract Here .
- WinRAR should now recognize the sequence and continue extraction normally .
If you still get the same prompt: the archive set is likely incomplete (a part was never downloaded or was removed), or one of the volumes is corrupt and must be re-downloaded from the original source.
