Quicken is a personal finance management tool which is available on several platforms including Windows and Mac. It aims to automate the financial entries which the users would have to otherwise perform on a piece of paper.
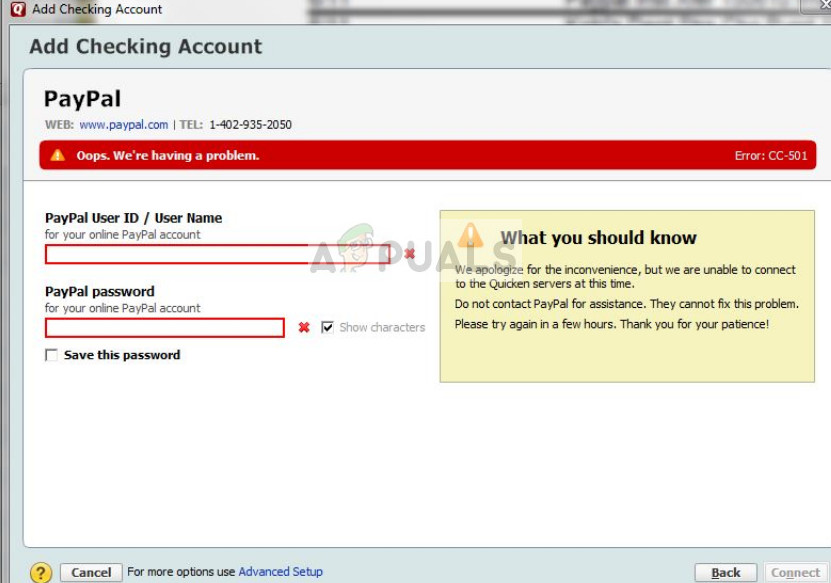
Quicken Error cc-501
Many users experience the error ‘ Quicken Error cc-501 ‘ when accessing their personal account in Quicken and making a new entry. This error message is also documented officially in Quicken support website who show that the error message is mostly due to the profile not being in-sync correctly.
What causes the Quicken Error cc-501?
Like mentioned before, this error message mostly occurs when your user login information is not being either read correctly or you are not able to add entries to a user account. The causes of this behavior are:
- Bad online account information entered in the platform. If the account information is set incorrectly, Quicken is unable to update your account.
- The tool is either badly installed or consists of corrupt files in its installation folder.
- Somehow the work you have been doing offline is not in sync with your account status saved online.
Before we proceed with the solutions, make sure that you have a valid Quicken account and are using a good internet connection on your computer without any proxies or firewalls. Bad internet connection with limited access is also known to cause issues.
Solution 1: Updating Account Information
The simplest workaround which works for several users is to update the user account information stored in Quicken. It is possible that the account is either not updated or the state of the accounts is not in sync.
- Open the transaction register for the account in which you are experiencing the error message.
- Click on the gears icon (action) present at the top-right side of the screen and select Update now .
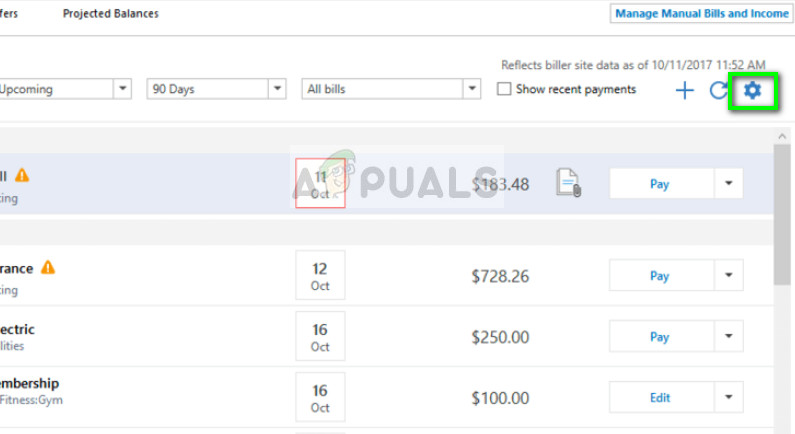
Updating Account information – Quicken
- Now follow the on-screen instructions to complete the update process properly. After updating the account, refresh Quicken and see if the error message went away.
You can perform this solution for all the accounts in which you are having errors.
Solution 2: Forcefully updating account status
If the automatic update in solution 1 is not working for your account, we can try a workaround which will attempt at forcefully updating your account status. This solution will work if you are having issues with several accounts such as investments.
- Select Tools and Online Center .
- Under the transactions, you will see the offending transactions listed. One by one, go to the listed transaction and cut it (in case we need to restore it in the future).
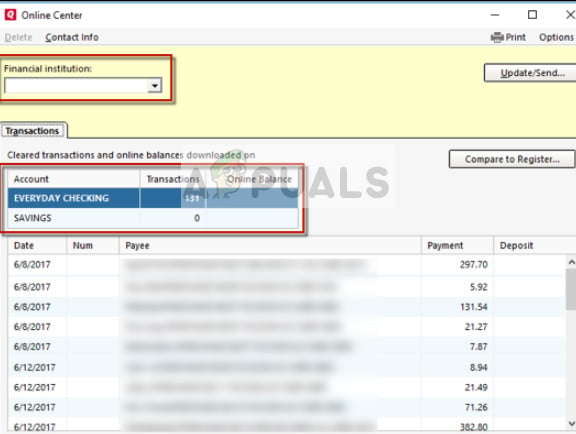
Transactions – Quicken
- Now perform an Online Update of your account. You will notice that the deleted transactions should reappear as clear but not as reconciled.
- Attempt a reconcile of your account and check if the flag is gone. If it is, your account will be free of the error message.
Solution 3: Resetting CC Credentials
If both the above methods don’t work out, we can try resetting the CC credentials on Quicken. This will effectively deactivate all the services currently running such as Express Web Content and when you enter the credentials, they will be active again but fetching the correct data this time.
- Select Tools > Online center and try the option Recent CC Credentials which is usually popped after Shift + Click.
- Follow the on-screen instructions to reset your CC credentials.
- After resetting, relaunch Quicken and access your account. Check if the error message still persists.
Solution 4: Reinstalling Quicken
If all the above methods don’t work, we can try to reinstall Quicken properly and see if the error still persists. When re reinstall Quicken, all the local files in addition to the application get removed from your computer. When you install the application and enter your details, fresh data will be fetched from the backend and errors will be removed.
- Press Windows + R, type “ appwiz. cpl ” in the dialogue box and press Enter.
- Once in the application manager, search for the entry of Quicken, right-click it and select Uninstall . Make sure that all the local temporary files are also erased at this point.
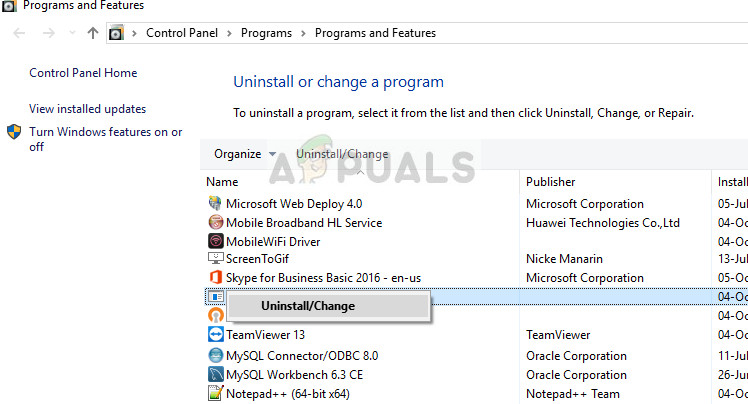
Uninstalling Quicken
- Now Download Quicken from its official website and install it on your computer.
- Enter your account credentials and let the data load. Check if the error message still persists.
How to Fix “Printer is in an error state” Issue?
The error “ WinRAR Error: Next Volume Is Required ” usually appears when you’re extracting a multi-part RAR archive and WinRAR can’t find (or can’t correctly identify) the next file in the sequence . This often happens when a volume is missing , stored in a different folder , or renamed in a way that breaks the archive’s expected order .

In this guide, we’ll go over the most reliable fixes confirmed by affected users, along with what each method is doing behind the scenes so you can choose the right one for your situation.
Important: To extract multi-volume archives, you should always start extraction from the first file in the set. This is usually file.part1.rar , or (in older sets) the main .rar file that comes before .r01 , .r02 , and so on.
1. Download and Place the Missing RAR File
WinRAR needs all parts of a multi-volume archive to complete extraction. This error usually appears when one of the volumes in a set like .part2.rar , .r01 , .r02 , .001 , and similar naming formats is missing . Downloading the missing volume and placing it in the same folder as the other parts allows WinRAR to continue extracting normally .
- Look at the error message or review the list of archive parts in the folder.
- Identify which volume is missing (for example, part2.rar , .r02 , .001 , etc.).
- Go back to the website or source where you downloaded the archive.
- Locate and download the exact missing file using the same naming format as the others.
- Make sure the new file name matches the pattern of the rest. Example: If you have file.part1.rar and file.part3.rar , the missing one must be file.part2.rar .
- Move the downloaded missing volume into the same folder as the other archive parts.
- Confirm that all parts are in a single folder before extracting.
- Right-click the first file in the series (usually part1 or the main .rar file) and select Extract Here or Extract to Folder .
- WinRAR should now detect all volumes and continue extraction normally .
2. Manually Browse & Select the Next Volume
Use this method only if the next volume already exists , but WinRAR is failing to detect it automatically. This can happen due to incorrect naming , the file being in a different location , or a temporary file access issue. Manually browsing helps WinRAR locate the correct volume and resume extraction without interruption .
- Right-click the first file in the series (usually .rar or part1.rar ) and select Extract Here or Extract to Folder .
- When WinRAR cannot find the next volume, it will show the “ Next Volume Is Required ” message.
- A small window will appear, allowing you to manually select the next volume .
- Use the file explorer window to locate the folder where the other archive parts are saved.
- Select the next part based on the naming order (example: select file.part2.rar after file.part1.rar ).
- Make sure the selected file matches the naming format of the archive (no extra characters like (1) and no mismatched numbering).
- WinRAR will resume extraction using the selected volume .
- If additional volumes are missing or stored separately, WinRAR may prompt you again. Repeat the same process until extraction completes.
3. Rename the RAR files in Order
WinRAR relies on a proper naming sequence (such as file.part1.rar , file.part2.rar , file.part3.rar ) to extract multi-volume archives. If a file is named incorrectly, contains extra characters, or is out of order, WinRAR may fail to locate the next volume and show this error. Renaming the files correctly helps WinRAR follow the sequence and extract the archive without interruptions .
Note: Renaming only changes the file name , not the file contents. The goal is to restore the correct sequence so WinRAR can detect the next volume.
- Go to the folder where all the RAR files are saved.
- Make sure all parts of the archive are present and stored in the same folder .
- Check how the parts are currently named . Common patterns include:
file.part1.rar, file.part2.rar, file.part3.rar
file.rar, file.r01, file.r02, file.r03
- Look for files that don’t match the expected numbering pattern (for example, file.part01.rar , file.part1(1).rar , or unrelated names).
- Rename each file so it follows the same order without extra characters or mismatched numbering. Example:
Incorrect: file.part1.rar, file.part3.rar, file.part2(1).rar
Correct: file.part1.rar, file.part2.rar, file.part3.rar
- Make sure the text before the number is exactly the same for all files.
- Only the last part number should change.
- Right-click the first file in the series (usually part1.rar or the main .rar file) and select Extract Here .
- WinRAR should now recognize the sequence and continue extraction normally .
If you still get the same prompt: the archive set is likely incomplete (a part was never downloaded or was removed), or one of the volumes is corrupt and must be re-downloaded from the original source.
