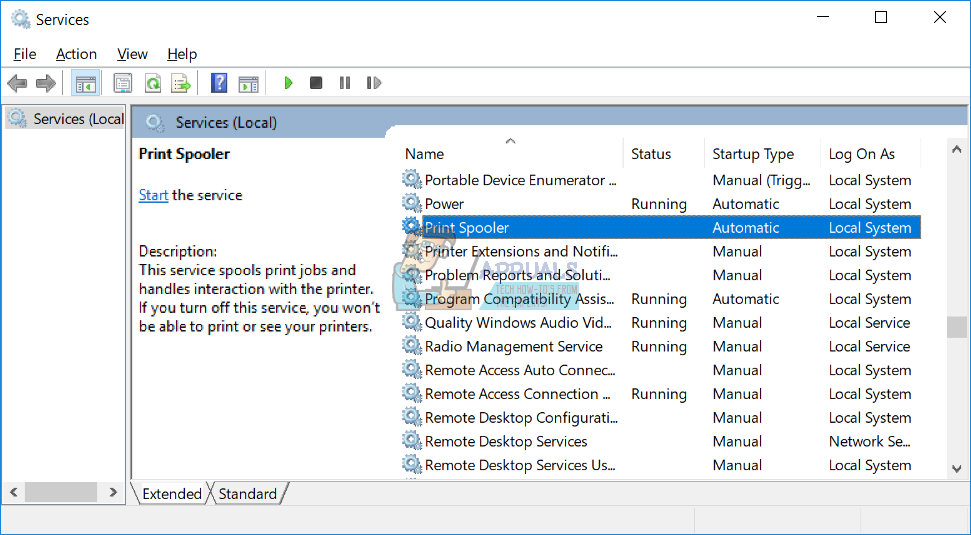
Print spooler is service which spools print jobs and handles interaction with the printer. If you turn off this service, you won’t be able to use your printer. That means print spooler services should be running, so you can print properly. You can start Print Spooler service through Services tool and fix the problem. But sometimes, when you start Printer Spooler services, it automatically stopped.
So, why this problem occurs? There are different reasons including file or document corruption, driver corruption, not compatible drivers, malware infection, the problem with spoolsv.exe ownership and others.
We created 15 methods which will help you to solve this issue.
Method 1: Delete content from Spool folder
In this method, we will delete content from two folders, including folder PRINTERS and folder drivers . We will show you how to do it using Windows 10 1703 version. Also, this method is compatible with another operating system, from Windows XP to Windows 8.1. These two folders are located within Windows\System32\spool.
- Hold Windows logo and press E to open Windows Explorer or File Explorer
- On the left side click on This PC or My Computer
- Navigate to following location C:\Windows\System32\spool
- Open folder drivers and delete all files and folders
- Delete content from folder Printers and restart Print Spooler service using tool available on this LINK
- Restart your Windows machine
- Enjoy printing on your machine
Method 2: Reinstall printer driver
Sometimes the bad driver can make problems with your printer. In this method, you will need to download and install the latest driver for your printer. In most cases, vendors are providing two types of drivers, basic driver, and full package driver. What is the difference between them? As the name says, the basic driver includes the only driver for the printer, and the full package includes driver and additional software for managing printer. Few users solved their problem, by reinstalling the current driver and installing the only basic driver. You will need to download the driver from official vendor’s website. For example, if you are using printer HP LaserJet 1320 you will need to open this LINK and download the basic driver. After you finish reinstalling printer driver, you will need to restart your Windows machine and restart Print Spooler service, by downloading and running tool from the link in step 5 of method 1.
Method 3: Remove duplicated drivers
In this method, you will need to remove all duplicated drivers from your Windows machine. Please follow the procedure described (Method 4) . After you finish deleting duplicated drivers, you will need to restart your Windows machine and restart Print Spooler service .
Method 4: Set Driver Isolation
In this method, we will show you how to set your printer driver to isolation. Why should we do this? The main reason is to avoid conflict between drivers. This procedure is compatible with the operating system from Windows 7 and Window 10. Driver Isolation is not a part of previous operating systems. If you are not using Windows 7, Windows 8 or Windows 10, please check method 5.
- Hold Windows logo and press R
- Type printmanagement.msc and press Enter to open Print Management
- Choose All drivers
- Select your printer driver
- Right click and choose Set Isolation , and then choose Isolated instead of System Default (Shared)
- Close Print Management
- Restart your Windows machine
- Restart Print Spooler service
- Enjoy printing on your machine
Method 5: Take ownership of spoolsv.exe
In this method, you will need to take ownership of spoolsv.exe application which is responsible work Print Spooler service. We will show you how to do it using Windows 10. The same procedure is compatible with another operating system.
- Hold Windows logo and press E to open Windows Explorer or File Explorer
- On the left side click on This PC or My Computer
- Navigate to following location C:\Windows\System32
- Select file spoolsv.exe
- Right click on spoolsv.exe and choose Properties
- Select Security tab
- Under Group and user names choose Users and then click Advanced
- Under Owner click Change and type your user account. In our example, it is user account named Jasmin Kahriman
- Click Check Names and then click OK
- Click Apply and then OK
- Click Apply and then OK , again
- Restart Print Spooler service
- Restart your Windows machine
- Enjoy printing on your machine
Method 6: Reset Internet Explorer settings
If you tried to print some files from Internet Explorer and you are not able to do that because of issue with Print Spooler service, we are recommending you to reset settings on your Internet Explorer. For resetting Internet Explorer please follow method 1. After you finish restarting Internet Explorer to default settings, you will need to restart your Windows machine and restart Print Spooler service.
If you are not printing from Internet Explorer, please check next method.
Method 7: Delete unnecessary key from Registry
End users do not like to do some changes in Registry Editor because wrong changes can damage your Windows, drivers or applications. Do not worry, we will show you how to do it step by step. In this method, we will delete unnecessary keys from Registry database on following location Computer\HKEY_LOCAL_MACHINE\SYSTEM\CurrentControlSet\Control\Print\Providers. Before you do any registry configuration, we are recommending you to backup registry database. Why do you need to do registry backup? In the case of some misconfiguration, you can revert registry database to the previous state when everything worked without any problems. For this method, you will need to use a user account with Administrator privilege, because Standard user account is not allowed to do any system changes.
- Hold Windows logo and press R
- Type regedit and press Enter to open Registry Editor
- Click Yes to confirm running Registry Editor with Administrator privilege
- Click File , and then Export to save current registry configuration
- Choose Desktop as location where you will export registry configuration
- Under File name type Backup06092017 and choose All under Export range
- Click Save
- Navigate to the following location: Computer\HKEY_LOCAL_MACHINE\SYSTEM\CurrentControlSet\Control\Print\Providers . You will need to delete all keys, but LanMan Print Services and Internet Print Provider which are the default and which should not be deleted. In case you find the additional key, you should delete that key. In our example, there is an additional key named Printing Services .
- Delete key Printing Services
- Close Registry Editor
- Restart Print Spooler service
- Restart your Windows machine
- Enjoy printing on your machine
Method 8: Scan your hard disk for malware
In this method, you will need to scan your hard disk for malware using Malwarebytes. Please follow instructions to download and run a scan on this internet explorer has stopped working , method 10. Also, you can scan your hard disk for malware using Avira Antivir or Microsoft Defender. You will find more information on this LINK , method 5. After you finished removing malware from your machine, you will need to restart your Windows machine and restart Print Spooler service
Method 9: Use CCleaner
CCleaner is a powerful tool for deleting unnecessary files from your Windows machine. In this method, we will download and install CCleaner and delete unnecessary files stored on hard disk. We will show you how to do it on Windows 10.
- Open Internet browser (Google Chrome, Mozilla Firefox, Edge or other)
- Download CCleaner from this LINK
- Install and run CCleaner on your machine
- Under Windows, tab select all actions and click Run Cleaner
- Follow the same procedure under Application tab
- Wait until CCleaner is finished procedure
- Close CCleaner
- Restart your Windows machine
- Restart Print Spooler service
- Enjoy printing on your machine
Method 10: Uninstall Oracle SealedMedia or IRM
Sometimes some applications can block Print Spooler service and you will need to uninstall that application, to continue printing without any problems. In this method, we will uninstall Oracle IRM from Windows machine. If this method did not solve your problem, then you can install Oracle IRM again.
- Hold Windows logo and press R
- Type appwiz.cp l and press Enter to open Program and Features
- Navigate to Oracle IRM
- Right click on Oracle IRM and choose Uninstall
- Wait until Windows is finished procedure
- Restart your Windows machine
- Restart Print Spooler service
- Enjoy printing on your machine
Method 11: Run CHKDSK /R
In case you have a problem with system file corruption or you can not write or read data from hard disk, you should do CHKDSK /R. Check disk is a utility which will help you to find bad sectors, and fix them in case there are fixable. The procedure is the same for all operating system from Windows XP to Windows 10. Please check instructions here (Method 10)
Method 12: SFC /SCANNOW
System File Checker (SFC) is a command line utility integrated into Windows that checks for system file corruption. In case SFC found some issues with system file corruption, SFC will try to fix them. SFC includes additional commands as SCANNOW. SCANNOW scans integrity of all protected system files and repairs files with problems when possible. How to run SFC /SCANNOW? Please follow instructions on this msvcr71.dll missing , method 4
Method 13: System Restore
System Restore is recovery mechanism integrated into Windows operating systems. It is not enabled by default, and it should be enabled by the end user or IT Administrator. If System Restore is not enabled on your Windows, please follow instructions for enabling System Restore on this system restore . If System Restore is already enabled on your Windows machine, you will need to do System Restore by reading method 13 on this remote procedure call failed .
Method 14: Replace your old printer
If you do not want to downgrade your operating system and you have planned budget for a new printer, then you can purchase a new printer. Before you change printer, you will need to uninstall all drivers and software related to old printer. Which brand should you purchase? There are different vendors including HP, Lexmark, Canon, Samsung, Kyocera, and others. Today, almost all new printers are compatible with the operating system from Windows 7 to Windows 10.
How to Fix “Printer is in an error state” Issue?
This error message can occur when you add a new printer to your computer or send print operations to an existing printer in the network. There are several reasons why the Print Spooler service might stop or not start automatically at all. These reasons can range from your Windows Firewall to your printer drivers, among multiple other factors.
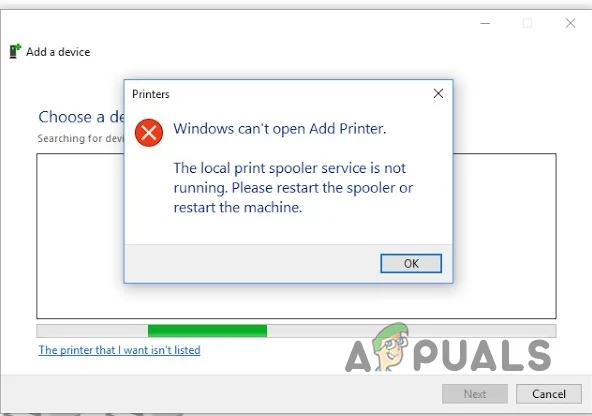
Local Print Spooler Service is not Running Error Message
When the Print Spooler service is down, you will not be able to interact with your printer. This is because the Print Spooler service acts as a communication bridge and facilitates the interactions you wish to have with your printer. Therefore, ensuring the service runs in the background without any issues is a high priority.
In this article, we will guide you through several methods you can use to rectify the problem. As it turns out, the cause of the error message can vary in each case, which is why it is essential that we examine the possible sources of the issue before diving into the solutions. With that in mind, let’s start right away.
- Windows Defender Firewall interfering with the connection – One of the reasons that can result in the error message in question is the Windows Defender Firewall. This happens when the Windows Firewall prevents your computer from sending the request due to a false positive. As a result, the Print Spooler service is affected Is kept at bay, unable to perform its tasks. The service may stop running in such situations, resulting in an error message. When this occurs, you will need to disable your Windows Firewall temporarily to fix the issue.
- Windows Update bug – Another cause for the Print Spooler failing to start, which can be a problem with a specific update. This has been reported by several users who experienced the same issue. In most cases, the issue was resolved by a new update. If this case is applicable, you must check for any pending updates and install them on your computer.
- Malfunctioning Printer Drivers – As it turns out, the printer drivers you are using on your system can also cause the issue at hand. This can happen when the drivers malfunction or become damaged due to a recent Windows update. In such a scenario, you will need to reinstall the proper drivers to resolve the issue.
- Windows file corruption – System file corruption can result in various issues. The Print Spooler service is no exception, as it is part of the operating system for facilitating printing jobs. You can get rid of corruption through a couple of built-in utilities, i.e., SFC (System File Checker) and DISM (Deployment Image Servicing and Management).
- Intervention of third-party programs – Interference from a third-party program on your computer is not new; rather, it occurs frequently. As it turns out, in some cases, third-party programs on your computer can interfere with the Print Spooler service, resulting in the service malfunctioning. These issues can often be traced back to security software or the printing programs responsible for your printer.
- Damage to existing print files – Any previous or pending printing tasks are stored on your computer within a specific directory. In some cases, corruption of these files in your Windows directory can cause the service to malfunction. The service spools these files to the printer to perform the printing task. In such a case, you will have to remove those files to fix the error message..
- Duplicate printers – Finally, if you have multiple printers on your network, the issue can also arise due to duplication. Duplication can occur when you have multiple printers connected to the same port or IP address. In such a scenario, you will need to remove the duplicate printers to get everything back to working properly.
Now that we have gone through various possible causes of the issue in question, let us start going through the possible solutions you can implement to resolve the error message.
1. Set the Print Spooler Service to automatic.
If the Print Spooler service cannot start automatically when required, you will not be able to perform any printing jobs. This can happen when the service’s startup type is set to manual. In that case, you will have to manually start the service before performing any print tasks.
When you begin troubleshooting the problem in question, you first need to ensure that the Print Spooler service can start automatically. If the service is not running in the background when you attempt to issue any printing commands, your system will be unable to communicate with the printer.
If this case is applicable, you will need to change the service’s startup type so it can start automatically whenever needed. To do this, follow the instructions below:
- First, open the Run dialogue box by pressing the Windows key + R on your keyboard.
- In the Run dialogue box, type “ services.msc ” and then press Enter. Opening up Services
- In the Services window, look for the Print Spooler service. You can press P on your keyboard to jump to services starting with the letter P. This should make the search easier.
- Once you find the Print Spooler service, double-click on it to open the Properties window. Print Spooler Service
- In the Properties window, change the Startup type to Automatic Print Spooler Service Properties
- Click “ Apply ,” and then hit “ OK.
- See if the error comes up again.
If you still face the error message, move on to the next fix below.
2. Edit the Print Spooler Service Configuration.
If changing the startup type of the Print Spooler to automatic does not fix the issue for you, you can try configuring the service even further as a possible solution. As it turns out, there have been reports of users resolving the problem in question by altering the computer’s response when the service fails.
You can do this from the properties window of the service. You have the ability to specify actions for the first, second, and subsequent failures of the service. To do this, follow the instructions below:
- Open the Run dialog box by pressing the Windows key + R shortcut.
- Type “ services.msc ” in the Run dialogue box and press Ente. Opening up Services
- Locate the Print Spooler service and double-click on it to open the Properties window. Print Spooler Service
- In the Properties window, switch to the Recovery tab.
- There, select the ‘ Restart Service ‘ option for ‘First Failure,’ ‘Second Failure,’ and ‘Subsequent Failures.’ This will restart the print spooler service upon any failures it encounters. Changing Print Spooler Recovery Actions
- Once you have done that, click “ Apply ” and “ OK .” Check if the error message disappears with this action.
3. Remove duplicate printers (if applicable).
One of the reasons the problem occurs is when multiple printers share the same port or IP address. This can be helpful when the error message occurs only on specific systems in your network. When this happens, you need to check if the systems use the same network printer.
If this case is applicable, you must remove the duplicate printers, which should do the trick for you. Removing devices from your computer is a straightforward process with the help of the Control Panel. Follow the instructions below to do this:
- First, open the Control Panel by searching for it in the Start Menu. Opening up Control Panel
- In the Control Panel window, navigate to Hardware and Sound . Control Panel
- There, click on the Devices and Printers option. Navigating to Devices and Printers
- Now, if you are using Windows 11, a Settings window should appear.
- On the Settings window, click on Devices. Navigating to Devices
- There, at the bottom, click on the ‘ More devices and printer settings ‘ option. Accessing Additional Devices and Printers Settings
- After that, in the Devices and Printers window, locate the duplicate printers and right-click on them.
- From the drop-down menu, choose the ‘ Remove device ‘ option. See if this resolves the issue. Removing Printer
If you are still experiencing the error message, proceed to the following method below.
4. Install pending Windows updates.
As it turns out, in some cases, Windows updates can cause issues with certain operating system components. While Windows updates bring new features and patches for known bugs, specific updates can be problematic. However, such issues are often resolved in subsequent updates.
Many users have reported that they began facing the issue after installing a specific Windows update. Additionally, there have been claims of the issue being resolved in subsequent updates. As such, if you are someone who has not installed any updates recently, doing so might be a good option, as it could potentially fix the problem for you. Follow the instructions below to install any pending updates:
- To begin, open the Settings window by pressing the Windows key + I on your keyboard. Windows Settings
- In the Settings window, navigate to Windows Updates .
- Once you are there, click on the “ Check for Updates ” button to download and install any pending updates. Checking for Windows Updates
- Wait for the updates to install. Your computer will restart automatically during the process. After that, check if the problem persists.
5. Disable the Windows Defender Firewall.
The Windows Defender Firewall is a vital part of the Windows operating system. As the name suggests, the Windows Defender Firewall monitors your computer’s incoming and outgoing connections. As a result, it helps keep your computer secure on the internet.
In some scenarios, the Windows Defender Firewall may be the culprit for the error message in question. This can occur when the Windows Firewall does not allow spooler requests to go through correctly. If this case is applicable, you will need to temporarily disable the Windows Defender Firewall to resolve the issue. To do this, follow the instructions provided below:
- First, open up the Control Panel by searching for it in the Start Menu. Opening up Control Panel
- On the Control Panel window, navigate to System and Security . Control Panel
- There, click on the Windows Defender Firewall option. Navigating to Windows Defender Firewall
- Now, on the Windows Defender Firewall screen, click the ‘ Turn Windows Defender Firewall on or off’ option on the left-hand side. Windows Defender Firewall Settings
- Then, click the “ Turn off Windows Defender Firewall ” option for both Public and Private networks. Turning off Windows Defender Firewall
- Finally, click OK to save the changes.
- See if the issue goes away with this.
If the problem no longer persists, you can try adding your printer software to the firewall’s whitelist. Once you do this, the firewall will allow any requests made by the software, and the issue should not resurface. In addition, you will be able to turn the firewall back on. Follow the instructions below:
- On the Windows Defender Firewall screen, click on the ‘ Allow an app or feature through Windows Defender Firewall ‘ option. Navigating to Allowed Apps Section
- There, click on the “ Allow another app ” button. Windows Defender Firewall Allowed Apps
- After that, click on the ‘ Browse ‘ button and navigate to the installation directory of your printing software. Open the executable file. Allowing a New App Through Windows Defender Firewall
- Once you do that, click on the Network Types button and check both the Public and Private checkboxes. Changing Network Types
- Finally, click ‘ Add ‘ and then hit ‘OK
6. Close third-party programs.
According to several user reports, the error message can also occur due to the interference of a third-party program with the Print Spooler service. Background processes interfering with another process are not new, and they happen all the time. This is especially true for any computer security programs you might use.
However, the problem may not be due solely to a third-party security program. Any process running in the background can be the culprit. Some users have reported HP Wolf Security as the culprit. Therefore, we recommend closing any unnecessary third-party programs running in the background.
Once you close the unnecessary programs, check if the error message goes away. If it does not, move on to the next fix below.
7. Delete the printer files.
As it turns out, the spooler sends files you wish to print to a folder inside the Windows directory. These files exist in the respective directory for the purpose of any pending print tasks. However, in some cases, corruption or damage to these files can result in the malfunction of the Print Spooler service.
When this occurs, you will need to clear out the contents of the respective folder to resolve the issue. To accomplish this, you will require administrative privileges, as the folder resides in the Windows installation directory. With that in mind, please follow the instructions below:
- First of all, open up a File Explorer window.
- Using the File Explorer window, navigate to the C:\Windows\System32\spool\PRINTERS directory. Navigating to Printers Folder
- Once there, delete all the files inside.
- After doing that, restart your system.
- Once your PC boots up, see if the problem still occurs.
8.Reinstall the printer drivers.
Drivers are essential in the Windows operating system, as they are used for communication with their respective hardware. There have been reports of error messages occurring due to faulty or malfunctioning drivers. It turns out that if the drivers on your system for your printer are not working correctly, you will not be able to use your printer.
If this case is applicable, you will need to uninstall your current printer drivers and then reinstall them. Doing so will also update the drivers, as you will be downloading them fresh from your printer’s manufacturer. To do this, follow the instructions below:
- To begin, open the Device Manager window by searching for it in the Start Menu. Opening up Device Manager
- In the Device Manager window, expand the Print Queues list. Device Manager
- From the drop-down list, locate your printer and right-click on it. Click on the ‘ Uninstall Device ‘ option. Uninstalling Printer
- After that, head to your printer manufacturer’s website and download the latest drivers available for your printer.
- Before you install the new drivers, restart your computer.
- Once your PC boots up, install the latest drivers and see if the issue goes away
If you still encounter the ‘Print Spooler service not running’ error message, proceed to the next method below.
9. Repair Corrupted System Files.
Finally, if none of the methods above have freed you from the problem in question, it is very likely that the issue is occurring due to the corruption of the system files. In such a scenario, you can use two built-in utilities to repair the corrupt files.
The utilities in question are System File Checker (SFC) and Deployment Image Servicing Management (DISM). Running these scans will locate corrupt files and replace them with functioning copies. To do this, follow the instructions below:
- First, open the Start Menu and search for the command prompt. Click the “ Run as administrator ” option to open it. Opening up Command Prompt as Admin
- Once the command prompt window is open, type in “ sfc /scannow ” and then press Enter. Performing SFC Scan
- Wait for the SFC scan to complete the system scan and search for any corrupt files.
- After the SFC scan, type in “ dism /Online /Cleanup-image /RestoreHealth ” and press Enter. Running DISM Utility
- Wait for the DISM utility to restore any corrupted files.
- Once you do that, see if the problem still persists.
Sometimes doing a simple thing such as adding a network shared printer can become a hell of a task when Windows cannot connect to the printer error is returned. The issue is usually seen with windows 7 based 64 bit systems, however it is not limited to it and many, around 30% of users running 32-bit have also reported this. The most common reason for this to occur is if the print spooler service is stucked, has a document pending in the que locked, a corruption or update and improper installation of the print-driver, more specifically the incorrect installation pushes the printer and the system to look for files in a subfolder different then windows\system32 subfolder. The printer may still work on the source system where it is physically connected to.

The error may have a different message then the one in the picture of which the most common is “ Windows cannot connect to the printer 0x0000007e ”
Solution 1: Create A New Local Port
Click Start and search for “ Devices and Printers “.


Open Devices and Printers and then Click the Add a printer on top of the window. Make sure you have Administration rights for this step on the computer.
Select “ Add a local printer” by clicking on it. Select “ Create a new port” and make sure there is “ Local Port” selected for “ Type of port:”

You will be asked for a port name in a new window. Type the printer’s address in the following format: \IP address or the Computer Name\Printer’s Name
For example, the printer’s name is HP LaserJet P2050 Series PCL 6, and IP address of the computer it’s attached with 192.168.1.130 so the port name will be
\\192.168.1.130\HP LaserJet P2050 Series PCL 6
Now click OK and Next .

If you don’t know the IP Address of the computer where the printer is physically connected to and shared from, Hold Windows Key and Press R. Now type cmd in the run dialog and press enter . Type ipconfig in the black window and press enter . Look for IPv4 Address for the computer’s IP in the black window. Scroll up if you have to.

Select your printer model from the directory to install its drivers. Click Next . If you have a disk, insert the disk, click “Have Disk” and browse to the driver’s location in the disk. Click OK . Type in a name for your new printer. Click Next . Print a test page to check its connection. And click Finish. If it still won’t work, then run the hotfix from here before proceeding to Solution 2 and giving Solution 1 a try after applying the hotfix.
Solution 2: Copy mscms.dll manually
This mscms.dll is a color module which maybe failing to reach its destination folder. To copy it manually, press Windows Key + R . In the run dialog, type: Type system32 and press enter to open System32 folder.
Now type mscms.dll in the search bar . Copy the file exactly matching the name mscms.dll . (CTRL + C) to copy / (CTRL + V) to paste.

Now, if you have a 32 bit Windows installed, navigate to the following folder and paste the previously copied mscms.dll file in it:
C:\windows\system32\spool\drivers\w32x86\3\
And, If you have a 64 bit Windows installed, navigate to the following folder and paste the previously copied file in it:
C:\windows\system32\spool\drivers\x64\3\
Now try connecting to the printer. If it doesn’t connect, re-add the printer and test.
Solution 3: If this is an HP Printer
On the source maching where the printer is shared from, open Registry Editor and browse to the following registry path.
HKEY_LOCAL_MACHINE\SYSTEM\CurrentControlSet\Control\Print\Printers\PRINTERNAME\CopyFiles\BIDI
Locate the entry for
spool\DRIVERS\W32X86\3\hpcpn6de.dll
and delete it. Then, re-try connecting.
Solution 4: Remove Unnecessary Printer Drivers
An installation of previous printer can prevent the printer spooler from adding new printers. To remove them, press Windows Key + R . Make sure you have Administration rights for this step on the computer. In the run window type printmanagement.msc and press enter .

Double click on “All Drivers” . Now delete any printer’s driver that is unnecessary or questionable. To delete, right click on the driver and click on delete in the pop up menu.

After removing the drivers for the printer in question, re-add it normally, and if it still doesn’t work then re-add it using Solution 1. If it still won’t work, move to Solution 3.
Solution 5: Delete Pre-existing Driver Files From Registry
An already existing but corrupted driver file can be stopping the windows from connecting to the printer.
Press Windows Key + R . Type regedit and press enter . Make sure you have Administration rights for this step on the computer. Registry editor’s new window will appear . In the left pane , navigate to the following location by double clicking on the folders:
HKEY_LOCAL_MACHINE\SYSTEM\ControlSet001\Control\Print\Printers\*YOUR PRINTER’S NAME*\CopyFiles
Delete the “ICM” folder which is under the “CopyFiles” folder .
Now try connecting to the printer.
Solution 6: Run Microsoft’s Automated Printer Troubleshooter
Download the file from this link. Open the file with troubleshooting wizard .
Let the troubleshooter detect and fix the issues. Test it by clicking the Add new printer button. After the troubleshooting has finished, try re-adding the printer normally and if it still won’t work, then use Solution 1 again.
Solution 7: Resetting Printer Spooler
Follow the guide here to reset print spooler.
