Back when Windows 8.1 first started rolling out, countless users who upgraded to this then-latest version of Windows began complaining about their computers’ inability to communicate with their printers, and their Print Spoolers not starting. The Print Spooler is a Windows program that enables communication between your computer and printer to order and initiate prints, scans, faxes, and photocopies. Currently, the latest and greatest version of Windows is Windows 10. Quite a large number of users who have upgraded to Windows 10 have also complained about their computers’ inability to communicate with their printers, and their Print Spoolers not opening up.
Reports indicate that when the Print Spooler fails to open, users often encounter error code 0x800706b9. Generally, an error message states that the computer lacks the necessary resources to start the Print Spooler service . There can be numerous causes behind the Print Spooler error 0x800706b9 – a corrupted registry key or value resulting from a Windows 10 upgrade, a third-party antivirus or firewall program blocking the Print Spooler’s start, and anything in between. The good news is, a number of effective solutions for resolving error 0x800706b9 have worked for a large number of Windows 10 users with first-hand experience of this issue. Below are a few of these solutions:
Solution 1: Turn the Print Spooler service’s startup type to Automatic
If your computer’s Print Spooler isn’t starting, it might not be configured to start automatically. In this case, resetting the Printer Spooler to start automatically should solve the issue.
Press the Windows Logo key + R .
hen a Run dialog opens, type services.msc into it and press Enter .

Locate the Print Spooler service and right-click on it. Click on Properties .

Open the drop down menu in front of Startup type and click on Automatic . Click on Apply . Click on OK .

If the Print Spooler service is not already running , right-click on it and click on Start.
Restart your computer, and the Print Spooler should start seamlessly once your computer boots up.
Solution 2: Fix the issue by editing your computer’s registry
Press the Windows Logo key + R,
When a Run dialog opens, type regedit into it and press Enter .

If you are prompted by a User Access Control message, click on Yes or, if asked to do so, provide your password.
In the left pane of the Registry Editor , navigate to HKEY_LOCAL_MACHINE\SYSTEM\CurrentControlSet\Services\Spooler .
Click on the Spooler key to display its contents in the right pane.
Locate a value named DependOnService and double-click on it to be able to modify it.
The Value data field will contain the term RPCSS , followed by http in the next line. Delete the http part, leaving behind only the term RPCSS as the value’s data.
Click on OK to save the changes.

Close the Registry Editor and restart your computer. After this, there should be no trace of error 0x800706b9, and your Print Spooler will be able to function correctly once your computer boots up.
Solution 3: Uninstall any and all third-party system protection programs
Many Windows 10 users who have suffered from error 0x800706b9 and overcame it reported that the culprit behind the issue was a third-party system protection program (a Kaspersky program, in most cases). So if you are suffering from this problem and have any third-party antivirus, anti-malware or firewall programs on your computer – especially if you have any Kaspersky programs installed – this solution has significant chances of being the right fit for you.
If a third-party system protection program is causing your computer’s Print Spooler service to fail at startup, simply navigate to the Add/Remove programs section of the Control Panel and uninstall all third-party system protection programs on your computer. Once completed, restart your computer. Check if the Print Spooler starts up successfully once your computer reboots. If it does, this indicates that the third-party system protection programs were indeed the cause of the issue. After confirming that your Print Spooler is functioning properly, you can reinstall any necessary third-party system protection programs. Be careful not to reinstall any programs that originally caused error 0x800706b9.
Solution 4: Refresh your Windows 10 computer.
If none of the solutions above work, the only option you will have left is to refresh your Windows 10 computer. The system refresh is a new feature that Microsoft has introduced with Windows 10 – a feature that deletes all of the applications and programs on your computer that didn’t come with it but keeps all your files and data. To perform a system refresh, you need to:
Open the Start Menu . Click on Settings . Click on Update & Security . Click on Recovery .
Click on the ‘Get Started’ button located under ‘Reset this PC .’

Click on Keep my files and allow your computer to be refreshed. Once your computer boots up after the refresh, error 0x800706b9 should be no more and your computer’s Print Spooler should start successfully.
How to Fix “Printer is in an error state” Issue?
Canva is the most popular freemium online graphic design tool out there. Despite being (humorously?) seen as inferior to “real” graphic-design software like Photoshop , it offers a vast array of image and video editing options that include presentations, social media posts, poster design, AI image generation , and more.
While most print their designs by simply downloading it locally and using their printer, what many don’t know is that Canva offers a special custom print service. That’s why today, we’ll be taking a closer look at how you can print on Canva and the precise nuances of either option.
- Methods of Printing with Canva
- Printing using your device’s built-in application ⤷ Printing on Windows ⤷ Printing on macOS
- Printing using Canva’s special service
- Printing Yourself vs. Printing with Canva (or Other Services)

Canva is one of the best online freemium graphic design tools | Canva
Methods of Printing with Canva
If we were to break down printing on Canva at the top-most level, there is only one divide. Hence, there are 2 methods of printing with Canva:
- Printing using your device’s built-in app
- Printing using Canva’s special printing service
1. Printing using your device’s built-in application
A method that has been used ever since printing became commonplace, this involves downloading the design you created in Canva and printing it using the built-in application on your device. We’ll be addressing Windows and macOS devices in particular.
But first, here’s how to create and download your design on Canva on to your device:
- Head on over to Canva . Start your new project by clicking on any one of the options present on the site. Choose from any of the creative options present on the homepage
- Now, create a design of your liking. Try out all kinds of tools from the sidebar. The sidebar hosts a wide variety of tools for modifying and enhancing your design
- Once you’re done and ready to print, click on the Share button on the top-right corner of the screen. Click on “Share”
- A drop-down menu will appear. Click on Download . Click on “Download”
- Next, the Download menu will appear. Click on the File type drop-down and choose PDF Print from the options. Choose “PDF Print” from the “File type” drop-down
- Then, configure the settings given below the File type drop-down. ⤷ Crop marks and bleed : Used to highlight the parts you intend to cut out after printing. ⤷ Flatten PDF : Places all the elements of your design in a single layer, preventing it from being edited and allowing for a smoother printing process. ⤷ Include notes : Downloads the notes you’ve made under page along with your design. We suggest leaving these options disabled. Except for the Flatten PDF option. Configure these settings to your liking
- Next, select your desired Color Profile by clicking on the drop-down. ⤷ RGB : This is suited for digital previews, like in presentations. ⤷ CMYK : This is much better suited for printing, as it has more prioritizes 4 different colors and is able to produce more vibrant colors
- If you want to save these settings by clicking on the Save download settings checkbox. Click on Download . Enable the checkbox if you want and then click “Download”
- Your design will be downloaded. You can check the download progress here
Some of these features may require you to have Canva’s paid plan . Anyways, now that the design has been downloaded, all that’s left is to print it.
⤷ Printing on Windows
- Open up the File Explorer and navigate to your Downloads folder. Double-click on the downloaded design to open it. You design should be a PDF file
- By default, the PDF file should open up on Microsoft Edge . Click on the printer icon to open up the Print menu. Click on the printer icon
- The Print menu will appear. Choose your printer from the Printer drop-down. Choose your printer from the drop-down
- Click on More settings and make the required changes as per your specifications. Click on “More settings” to access more options
- After you’re done making the required changes, click on Print . Click on “Print”
⤷ Printing on macOS
- Open up the PDF file you downloaded by just double-clicking on it in the Finder. Double-clicking the PDF will open it in Preview
- After that, click on the File option in the menu bar and from the drop-down menu, choose the Print option. Click on File and select Print Navigating to Print Options
- Make the changes based on your specifications. macOS print menu
- Once you do that, click the Print button to start printing your design. Imagine this is a modern macOS screenshot
2. Printing using Canva’s special service
Canva also offers a paid printing service for professional prints for all kinds of things: yard signs, banners, water bottles, mugs, clothes, etc. This way you can technically just hand over your design to Canva themselves to print it for you. However, this feature is only available in select regions and the options can also vary on the region.
To have Canva print your design, follow these steps:
- After you’ve created a design, click on File near the top-left corner. Click on “File”
- When the drop-down appears, bring your cursor over to View settings . From the additional options that appear, choose whether you want to enable these settings. ⤷ Show print bleed: Shows the part of the design that will be printed on the edges ⤷ Show margins: Shows the part of the design that is sure to be displayed in the print. We suggest using these options to ensure that your print comes out as expected. These lines will not be displayed on the final print. Access additional options from “View settings”
- Next, click on Share on the top-right corner. Click on “Share”
- A drop-down menu should appear. Click on Print with Canva . Click on “Print with Canva”
- A variety of options will be made available for you. Choose what you want your design to be printed on by clicking on it. Choose your option by clicking on it If your design does not satisfy the required size for that object, this message will be displayed to you. Click on “Resize design” to adjust the size and fit the requirements
- Once you’ve chosen your design, several options will be available for you. Depending on your choice, the options can differ. Adjust them according to your requirements. You can also see a preview of how the print will look. Make the required changes
- The last option will be the amount of prints required. Click on How many? to adjust the amount. Click on “How many?”
- Then, click on Continue . Click on “Continue”
- If there are some problems present in your design, they will be pointed out to you. You can either fix them by yourself or click on the Automatically fix all issues switch to fix them automatically. Click on Continue to proceed. Click on “Automatically fix all issues” and then click on “Continue”
- Lastly, you’ll be taken to the checkout page. Enter your card details, home address, a coupon code (if you have one) and choose your delivery option. Finally, click on Place order . Click on “Place order” after you’re done entering your details
After placing your order, you will receive an email confirmation message. You can also modify or cancel your order for 2 hours after placing it.
Printing Yourself vs. Printing with Canva (or Other Services)
Printing by yourself is pretty common but when you want to get designs custom printed, things get a bit more complicated. You have to rely on third-party service s for this job and there’s no guarantee for whether the quality will be up to the mark or not. Canva is reliable and safe , with the best quality guaranteed. They also offer a refund or reprint, if contacted within 30 days after receiving the order.

PsPrint doesn’t allow much of a free-hand when creating a design
Other services like PsPrint are also great options, which also offer professional prints for a wide range of options, while being trusted. However, the main disadvantage would be the limited design options. Since Canva is primarily a graphic design tool , you can create almost anything on it. However, services like PsPrint do not offer much in the way of designs, and rely upon you already having ready-made ones.
A comparison of Canva’s and PsPrint’s printing services
This error message can occur when you add a new printer to your computer or send print operations to an existing printer in the network. There are several reasons why the Print Spooler service might stop or not start automatically at all. These reasons can range from your Windows Firewall to your printer drivers, among multiple other factors.
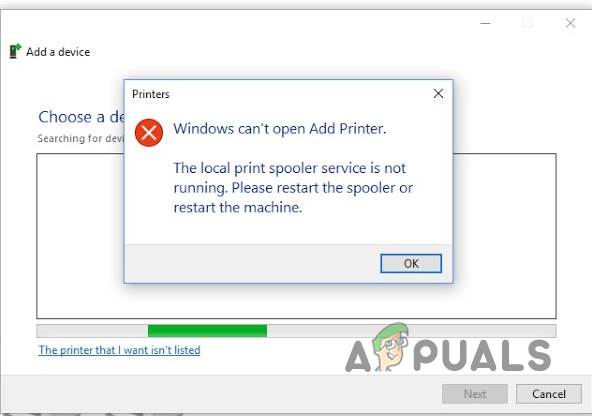
Local Print Spooler Service is not Running Error Message
When the Print Spooler service is down, you will not be able to interact with your printer. This is because the Print Spooler service acts as a communication bridge and facilitates the interactions you wish to have with your printer. Therefore, ensuring the service runs in the background without any issues is a high priority.
In this article, we will guide you through several methods you can use to rectify the problem. As it turns out, the cause of the error message can vary in each case, which is why it is essential that we examine the possible sources of the issue before diving into the solutions. With that in mind, let’s start right away.
- Windows Defender Firewall interfering with the connection – One of the reasons that can result in the error message in question is the Windows Defender Firewall. This happens when the Windows Firewall prevents your computer from sending the request due to a false positive. As a result, the Print Spooler service is affected Is kept at bay, unable to perform its tasks. The service may stop running in such situations, resulting in an error message. When this occurs, you will need to disable your Windows Firewall temporarily to fix the issue.
- Windows Update bug – Another cause for the Print Spooler failing to start, which can be a problem with a specific update. This has been reported by several users who experienced the same issue. In most cases, the issue was resolved by a new update. If this case is applicable, you must check for any pending updates and install them on your computer.
- Malfunctioning Printer Drivers – As it turns out, the printer drivers you are using on your system can also cause the issue at hand. This can happen when the drivers malfunction or become damaged due to a recent Windows update. In such a scenario, you will need to reinstall the proper drivers to resolve the issue.
- Windows file corruption – System file corruption can result in various issues. The Print Spooler service is no exception, as it is part of the operating system for facilitating printing jobs. You can get rid of corruption through a couple of built-in utilities, i.e., SFC (System File Checker) and DISM (Deployment Image Servicing and Management).
- Intervention of third-party programs – Interference from a third-party program on your computer is not new; rather, it occurs frequently. As it turns out, in some cases, third-party programs on your computer can interfere with the Print Spooler service, resulting in the service malfunctioning. These issues can often be traced back to security software or the printing programs responsible for your printer.
- Damage to existing print files – Any previous or pending printing tasks are stored on your computer within a specific directory. In some cases, corruption of these files in your Windows directory can cause the service to malfunction. The service spools these files to the printer to perform the printing task. In such a case, you will have to remove those files to fix the error message..
- Duplicate printers – Finally, if you have multiple printers on your network, the issue can also arise due to duplication. Duplication can occur when you have multiple printers connected to the same port or IP address. In such a scenario, you will need to remove the duplicate printers to get everything back to working properly.
Now that we have gone through various possible causes of the issue in question, let us start going through the possible solutions you can implement to resolve the error message.
1. Set the Print Spooler Service to automatic.
If the Print Spooler service cannot start automatically when required, you will not be able to perform any printing jobs. This can happen when the service’s startup type is set to manual. In that case, you will have to manually start the service before performing any print tasks.
When you begin troubleshooting the problem in question, you first need to ensure that the Print Spooler service can start automatically. If the service is not running in the background when you attempt to issue any printing commands, your system will be unable to communicate with the printer.
If this case is applicable, you will need to change the service’s startup type so it can start automatically whenever needed. To do this, follow the instructions below:
- First, open the Run dialogue box by pressing the Windows key + R on your keyboard.
- In the Run dialogue box, type “ services.msc ” and then press Enter. Opening up Services
- In the Services window, look for the Print Spooler service. You can press P on your keyboard to jump to services starting with the letter P. This should make the search easier.
- Once you find the Print Spooler service, double-click on it to open the Properties window. Print Spooler Service
- In the Properties window, change the Startup type to Automatic Print Spooler Service Properties
- Click “ Apply ,” and then hit “ OK.
- See if the error comes up again.
If you still face the error message, move on to the next fix below.
2. Edit the Print Spooler Service Configuration.
If changing the startup type of the Print Spooler to automatic does not fix the issue for you, you can try configuring the service even further as a possible solution. As it turns out, there have been reports of users resolving the problem in question by altering the computer’s response when the service fails.
You can do this from the properties window of the service. You have the ability to specify actions for the first, second, and subsequent failures of the service. To do this, follow the instructions below:
- Open the Run dialog box by pressing the Windows key + R shortcut.
- Type “ services.msc ” in the Run dialogue box and press Ente. Opening up Services
- Locate the Print Spooler service and double-click on it to open the Properties window. Print Spooler Service
- In the Properties window, switch to the Recovery tab.
- There, select the ‘ Restart Service ‘ option for ‘First Failure,’ ‘Second Failure,’ and ‘Subsequent Failures.’ This will restart the print spooler service upon any failures it encounters. Changing Print Spooler Recovery Actions
- Once you have done that, click “ Apply ” and “ OK .” Check if the error message disappears with this action.
3. Remove duplicate printers (if applicable).
One of the reasons the problem occurs is when multiple printers share the same port or IP address. This can be helpful when the error message occurs only on specific systems in your network. When this happens, you need to check if the systems use the same network printer.
If this case is applicable, you must remove the duplicate printers, which should do the trick for you. Removing devices from your computer is a straightforward process with the help of the Control Panel. Follow the instructions below to do this:
- First, open the Control Panel by searching for it in the Start Menu. Opening up Control Panel
- In the Control Panel window, navigate to Hardware and Sound . Control Panel
- There, click on the Devices and Printers option. Navigating to Devices and Printers
- Now, if you are using Windows 11, a Settings window should appear.
- On the Settings window, click on Devices. Navigating to Devices
- There, at the bottom, click on the ‘ More devices and printer settings ‘ option. Accessing Additional Devices and Printers Settings
- After that, in the Devices and Printers window, locate the duplicate printers and right-click on them.
- From the drop-down menu, choose the ‘ Remove device ‘ option. See if this resolves the issue. Removing Printer
If you are still experiencing the error message, proceed to the following method below.
4. Install pending Windows updates.
As it turns out, in some cases, Windows updates can cause issues with certain operating system components. While Windows updates bring new features and patches for known bugs, specific updates can be problematic. However, such issues are often resolved in subsequent updates.
Many users have reported that they began facing the issue after installing a specific Windows update. Additionally, there have been claims of the issue being resolved in subsequent updates. As such, if you are someone who has not installed any updates recently, doing so might be a good option, as it could potentially fix the problem for you. Follow the instructions below to install any pending updates:
- To begin, open the Settings window by pressing the Windows key + I on your keyboard. Windows Settings
- In the Settings window, navigate to Windows Updates .
- Once you are there, click on the “ Check for Updates ” button to download and install any pending updates. Checking for Windows Updates
- Wait for the updates to install. Your computer will restart automatically during the process. After that, check if the problem persists.
5. Disable the Windows Defender Firewall.
The Windows Defender Firewall is a vital part of the Windows operating system. As the name suggests, the Windows Defender Firewall monitors your computer’s incoming and outgoing connections. As a result, it helps keep your computer secure on the internet.
In some scenarios, the Windows Defender Firewall may be the culprit for the error message in question. This can occur when the Windows Firewall does not allow spooler requests to go through correctly. If this case is applicable, you will need to temporarily disable the Windows Defender Firewall to resolve the issue. To do this, follow the instructions provided below:
- First, open up the Control Panel by searching for it in the Start Menu. Opening up Control Panel
- On the Control Panel window, navigate to System and Security . Control Panel
- There, click on the Windows Defender Firewall option. Navigating to Windows Defender Firewall
- Now, on the Windows Defender Firewall screen, click the ‘ Turn Windows Defender Firewall on or off’ option on the left-hand side. Windows Defender Firewall Settings
- Then, click the “ Turn off Windows Defender Firewall ” option for both Public and Private networks. Turning off Windows Defender Firewall
- Finally, click OK to save the changes.
- See if the issue goes away with this.
If the problem no longer persists, you can try adding your printer software to the firewall’s whitelist. Once you do this, the firewall will allow any requests made by the software, and the issue should not resurface. In addition, you will be able to turn the firewall back on. Follow the instructions below:
- On the Windows Defender Firewall screen, click on the ‘ Allow an app or feature through Windows Defender Firewall ‘ option. Navigating to Allowed Apps Section
- There, click on the “ Allow another app ” button. Windows Defender Firewall Allowed Apps
- After that, click on the ‘ Browse ‘ button and navigate to the installation directory of your printing software. Open the executable file. Allowing a New App Through Windows Defender Firewall
- Once you do that, click on the Network Types button and check both the Public and Private checkboxes. Changing Network Types
- Finally, click ‘ Add ‘ and then hit ‘OK
6. Close third-party programs.
According to several user reports, the error message can also occur due to the interference of a third-party program with the Print Spooler service. Background processes interfering with another process are not new, and they happen all the time. This is especially true for any computer security programs you might use.
However, the problem may not be due solely to a third-party security program. Any process running in the background can be the culprit. Some users have reported HP Wolf Security as the culprit. Therefore, we recommend closing any unnecessary third-party programs running in the background.
Once you close the unnecessary programs, check if the error message goes away. If it does not, move on to the next fix below.
7. Delete the printer files.
As it turns out, the spooler sends files you wish to print to a folder inside the Windows directory. These files exist in the respective directory for the purpose of any pending print tasks. However, in some cases, corruption or damage to these files can result in the malfunction of the Print Spooler service.
When this occurs, you will need to clear out the contents of the respective folder to resolve the issue. To accomplish this, you will require administrative privileges, as the folder resides in the Windows installation directory. With that in mind, please follow the instructions below:
- First of all, open up a File Explorer window.
- Using the File Explorer window, navigate to the C:\Windows\System32\spool\PRINTERS directory. Navigating to Printers Folder
- Once there, delete all the files inside.
- After doing that, restart your system.
- Once your PC boots up, see if the problem still occurs.
8.Reinstall the printer drivers.
Drivers are essential in the Windows operating system, as they are used for communication with their respective hardware. There have been reports of error messages occurring due to faulty or malfunctioning drivers. It turns out that if the drivers on your system for your printer are not working correctly, you will not be able to use your printer.
If this case is applicable, you will need to uninstall your current printer drivers and then reinstall them. Doing so will also update the drivers, as you will be downloading them fresh from your printer’s manufacturer. To do this, follow the instructions below:
- To begin, open the Device Manager window by searching for it in the Start Menu. Opening up Device Manager
- In the Device Manager window, expand the Print Queues list. Device Manager
- From the drop-down list, locate your printer and right-click on it. Click on the ‘ Uninstall Device ‘ option. Uninstalling Printer
- After that, head to your printer manufacturer’s website and download the latest drivers available for your printer.
- Before you install the new drivers, restart your computer.
- Once your PC boots up, install the latest drivers and see if the issue goes away
If you still encounter the ‘Print Spooler service not running’ error message, proceed to the next method below.
9. Repair Corrupted System Files.
Finally, if none of the methods above have freed you from the problem in question, it is very likely that the issue is occurring due to the corruption of the system files. In such a scenario, you can use two built-in utilities to repair the corrupt files.
The utilities in question are System File Checker (SFC) and Deployment Image Servicing Management (DISM). Running these scans will locate corrupt files and replace them with functioning copies. To do this, follow the instructions below:
- First, open the Start Menu and search for the command prompt. Click the “ Run as administrator ” option to open it. Opening up Command Prompt as Admin
- Once the command prompt window is open, type in “ sfc /scannow ” and then press Enter. Performing SFC Scan
- Wait for the SFC scan to complete the system scan and search for any corrupt files.
- After the SFC scan, type in “ dism /Online /Cleanup-image /RestoreHealth ” and press Enter. Running DISM Utility
- Wait for the DISM utility to restore any corrupted files.
- Once you do that, see if the problem still persists.
