A lot of users have reported that the Exclusive Mode of InputMapper no longer works on Windows 10 after the Windows 10 Fall Creators Update or Anniversary Update is applied. As per various user reports, the Run DS4 exclusively feature no longer makes the switch to Exclusive Mode . On older InputMapper versions, the entry will appear as Use Exclusive Mode inside the Settings menu.
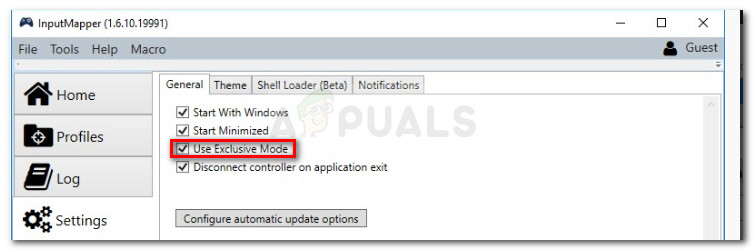
InputMapper’s Exclusive mode
What Causes the InputMapper Failed to Connect Exclusively error
After investigating the issue and looking at various user reports, it’s clear that the issue occurs due to a change in how Windows deals with HID devices once they are connected.
Both the Anniversary and the Creators updates introduced a process that opens every HID device available, thus getting in the way of InputMapper’s ability to open the device exclusively. This conflict is impossible to solve by the developer since it takes place within kernel32.dll.
How to Fix the InputMapper Failed to Connect Exclusively Error
If you’re struggling to configure a PS4 controller to your PC via InputMapper, this article will provide you with a few troubleshooting guides. Below you have a collection of methods that other Windows 10 users in a similar situation have used to get the issue resolved.
All of the methods featured below are confirmed to work by at least one user, so feel free to use whichever method is more convenient to your particular scenario. Let’s begin!
Method 1: Using InputMapper HidGuardian
The developer behind InputMapper released a new standalone tool that launches a service capable of filtering those involved drivers, making it easier to achieve Exclusive Mode on Windows 10.
This little tool is designed to be used with the parent application InputMapper. It essentially ensures that Windows doesn’t interfere with the DS4 exclusive feature. You can download InputMapper HidGuardian from this link ( here ).
To use it, run the service (by opening every .bat file as administrator) before starting InputMapper and make sure it remains open until you click the Run Ds4 exclusively button.
Method 2: Re-Enabling the Bluetooth HID Device
Some users have discovered that InputMapper is malfunctioning due to a change in the way that the Bluetooth HID device interacts with the associated Dual Shock 4 controller. As it turns out, re-enabling the Bluetooth HID Device while all the involved applications are turned off will fix resolve this error.
Here’s a quick guide on how to do this:
- Make sure that every application that you might be using to connect a PS controller to your PC is closed. This includes InputMapper, DS4Windows, SCP or the DS4Tool.
- Make sure that your PS controller is not connected to your PC.
- Press Windows key + R to open up a Run box. Next, type “ devmgmt.msc ” and press Enter to open up Device Manager .
- Inside Device Manager, look for Bluetooth HID Device (usually located inside Human Interface Devices drop-down menu). Note: The device might also be named HID-Compliant game controller if you’re using a wired controller.
- Once the device is located, right-click on it and choose Disable. With the service-disabled, use the Action menu from the ribbon at the top to click on Scan for Hardware changes . Scan for hardware Changes” width=”448″ height=”217″> Scan for Hardware Changes
- After the list is refreshed, right-click on the Bluetooth HID Device again and choose Enabled.
- Launch the required applications to connect the PS4 controller to your PC. InputMapper should function properly now.
Keep in mind that you might have to repeat this procedure every time you reconnect your Dual Shock 4 controller. You can also make the whole process a lot easier by using the Dualshock Exclusive Mode Tool . This free donationware program will do the steps enumerated above automatically saving you precious gaming time.
Method 3: Using and Configuring HidGuardian’s Exclusive Mode
Another method that we can use is to configure HidGuardian’s Exclusive mode. The methods are different for wired and Bluetooth controllers. Make sure that you are logged in as an administrator. You can always revert the changes later on.
For Bluetooth/Wireless Controllers:
Follow these steps for all types of Bluetooth and Wireless connections.
- Press Windows + R, type ‘ devmgmt.msc ‘ in the dialogue box, and press Enter. Type devmgmt.msc and Press Enter to Open Device Manager
- Now locate the Bluetooth driver from the Device Manager, right-click on it, and select Properties .
- Select Details section from the tabs and select Hardware IDs from the drop-down present. Accessing Hardware IDs
- Copy the first ID to a Notepad and replace “ BTHENUM ” in the ID with “ HID ” (For example, if the Hardware ID is “BTHENUM_148F&PID_5370” Change it to “HID_148F&PID_5370”)
- Press Windows + R again, type “regedit” in the dialogue box, and press Enter.
- Once in the Registry Editor, navigate to the following key: HKEY_LOCAL_MACHINE\SYSTEM\CurrentControlSet\Services\HidGuardian\Parameters
- Double-click on the Affected Devices option and paste the modified ID we just created there.
For Wired Controllers:
- Navigate to the device manager as we did in the earlier solution and go to the ID section of the Driver.
- Now instead of copying the first ID only, copy the first three IDs to Notepad. We will not change the IDs in this case.
- Navigate to the same registry entry as of previously and paste all the three IDs to the Affected Devices .
How to Fix “Printer is in an error state” Issue?
The error “ WinRAR Error: Next Volume Is Required ” usually appears when you’re extracting a multi-part RAR archive and WinRAR can’t find (or can’t correctly identify) the next file in the sequence . This often happens when a volume is missing , stored in a different folder , or renamed in a way that breaks the archive’s expected order .

In this guide, we’ll go over the most reliable fixes confirmed by affected users, along with what each method is doing behind the scenes so you can choose the right one for your situation.
Important: To extract multi-volume archives, you should always start extraction from the first file in the set. This is usually file.part1.rar , or (in older sets) the main .rar file that comes before .r01 , .r02 , and so on.
1. Download and Place the Missing RAR File
WinRAR needs all parts of a multi-volume archive to complete extraction. This error usually appears when one of the volumes in a set like .part2.rar , .r01 , .r02 , .001 , and similar naming formats is missing . Downloading the missing volume and placing it in the same folder as the other parts allows WinRAR to continue extracting normally .
- Look at the error message or review the list of archive parts in the folder.
- Identify which volume is missing (for example, part2.rar , .r02 , .001 , etc.).
- Go back to the website or source where you downloaded the archive.
- Locate and download the exact missing file using the same naming format as the others.
- Make sure the new file name matches the pattern of the rest. Example: If you have file.part1.rar and file.part3.rar , the missing one must be file.part2.rar .
- Move the downloaded missing volume into the same folder as the other archive parts.
- Confirm that all parts are in a single folder before extracting.
- Right-click the first file in the series (usually part1 or the main .rar file) and select Extract Here or Extract to Folder .
- WinRAR should now detect all volumes and continue extraction normally .
2. Manually Browse & Select the Next Volume
Use this method only if the next volume already exists , but WinRAR is failing to detect it automatically. This can happen due to incorrect naming , the file being in a different location , or a temporary file access issue. Manually browsing helps WinRAR locate the correct volume and resume extraction without interruption .
- Right-click the first file in the series (usually .rar or part1.rar ) and select Extract Here or Extract to Folder .
- When WinRAR cannot find the next volume, it will show the “ Next Volume Is Required ” message.
- A small window will appear, allowing you to manually select the next volume .
- Use the file explorer window to locate the folder where the other archive parts are saved.
- Select the next part based on the naming order (example: select file.part2.rar after file.part1.rar ).
- Make sure the selected file matches the naming format of the archive (no extra characters like (1) and no mismatched numbering).
- WinRAR will resume extraction using the selected volume .
- If additional volumes are missing or stored separately, WinRAR may prompt you again. Repeat the same process until extraction completes.
3. Rename the RAR files in Order
WinRAR relies on a proper naming sequence (such as file.part1.rar , file.part2.rar , file.part3.rar ) to extract multi-volume archives. If a file is named incorrectly, contains extra characters, or is out of order, WinRAR may fail to locate the next volume and show this error. Renaming the files correctly helps WinRAR follow the sequence and extract the archive without interruptions .
Note: Renaming only changes the file name , not the file contents. The goal is to restore the correct sequence so WinRAR can detect the next volume.
- Go to the folder where all the RAR files are saved.
- Make sure all parts of the archive are present and stored in the same folder .
- Check how the parts are currently named . Common patterns include:
file.part1.rar, file.part2.rar, file.part3.rar
file.rar, file.r01, file.r02, file.r03
- Look for files that don’t match the expected numbering pattern (for example, file.part01.rar , file.part1(1).rar , or unrelated names).
- Rename each file so it follows the same order without extra characters or mismatched numbering. Example:
Incorrect: file.part1.rar, file.part3.rar, file.part2(1).rar
Correct: file.part1.rar, file.part2.rar, file.part3.rar
- Make sure the text before the number is exactly the same for all files.
- Only the last part number should change.
- Right-click the first file in the series (usually part1.rar or the main .rar file) and select Extract Here .
- WinRAR should now recognize the sequence and continue extraction normally .
If you still get the same prompt: the archive set is likely incomplete (a part was never downloaded or was removed), or one of the volumes is corrupt and must be re-downloaded from the original source.
