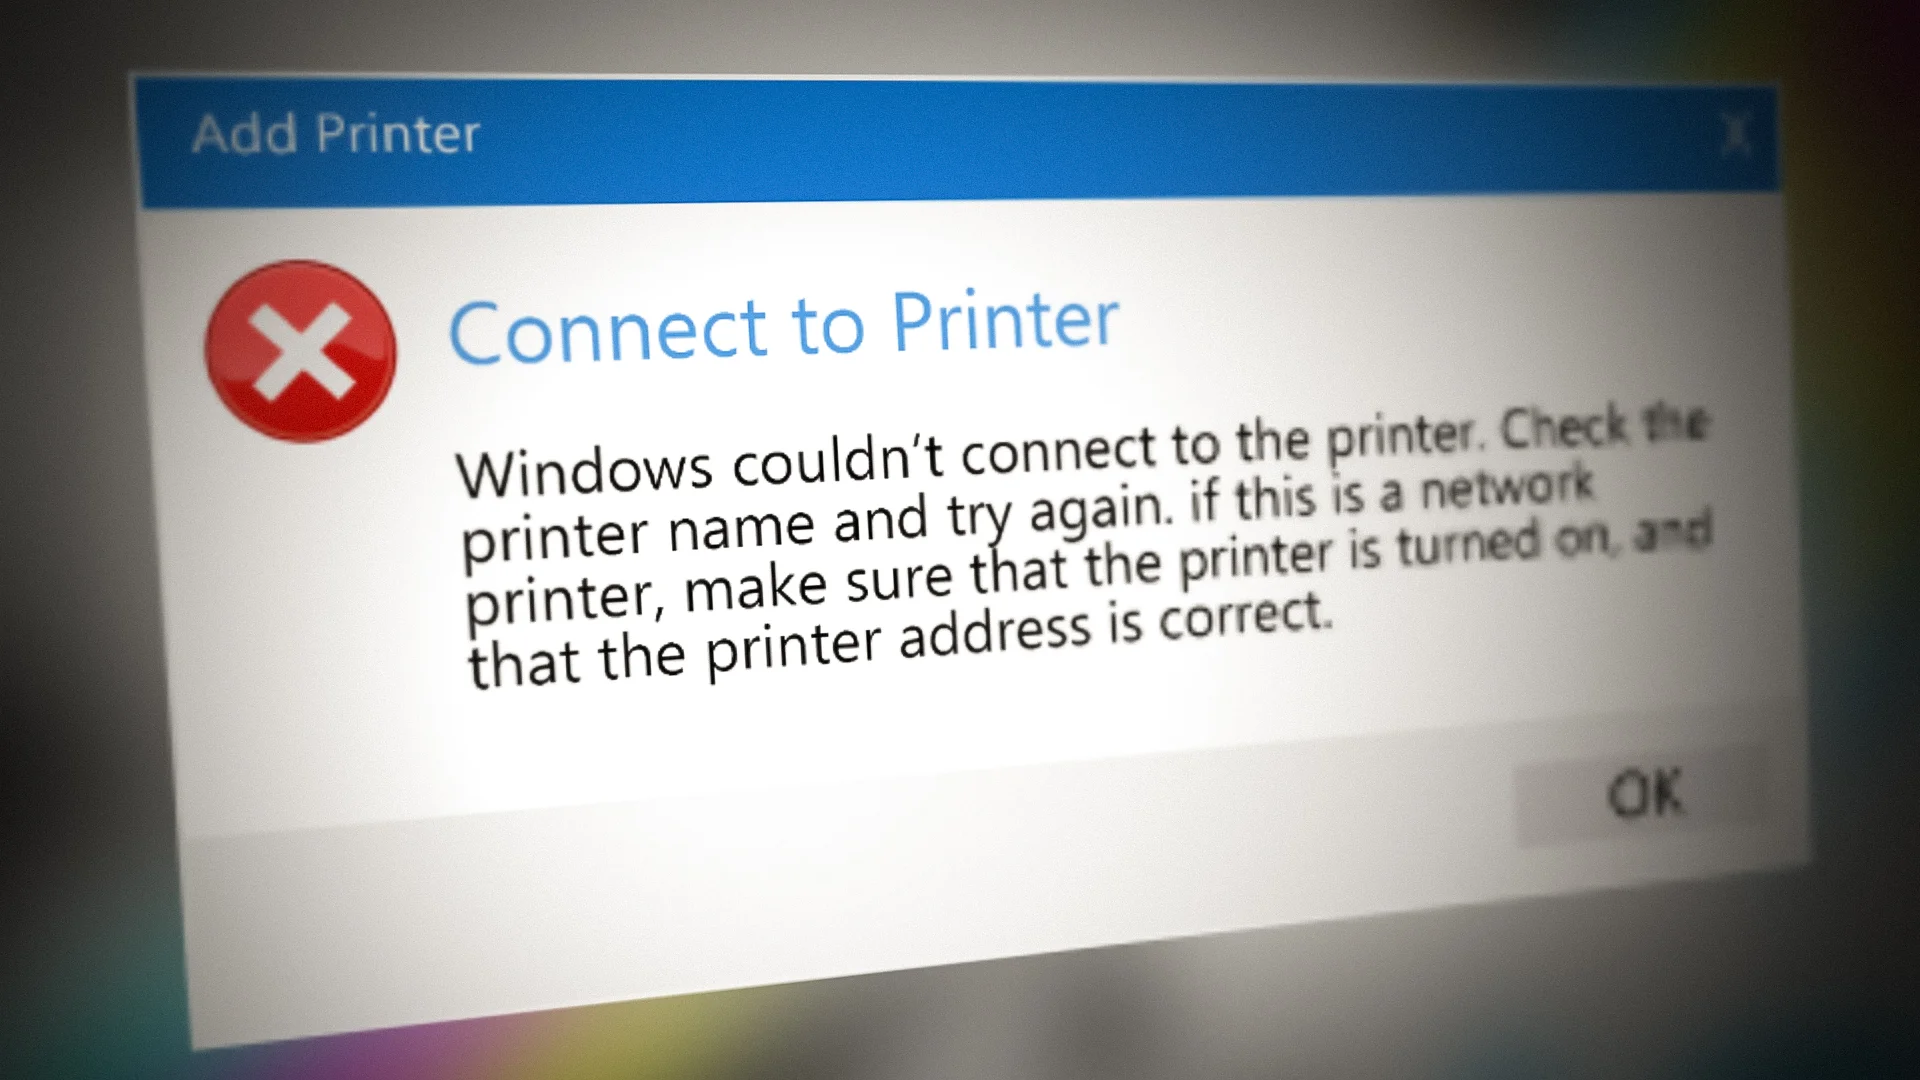
While trying to connect to network printers, or when attempting to use a network printer that is already connected to your system, you may encounter an error with the code 0x00000709 . The accompanying error message can appear in various forms, but the most common message is ‘ Element Not Found .’

Error 0x00000709 in Network Printing (Element Not Found) Fix
This error can be caused by a few different factors; however, its most frequent causes are erroneous Windows updates and installation restrictions on the printer driver.
To help you resolve this error, we’ve prepared this guide where we’ll be showing you multiple solutions that will help you resolve the error 0x00000709 and fix Network Printing on your system.
Uninstall the Erroneous Windows Update.
The biggest culprit of this error is usually an erroneous Windows update. Microsoft often releases updates that come with errors that cause certain functionalities of the system to completely stop working.
In this case, the specific update causing this error for most users is KB5006670 .
To uninstall the KB5006670 update from your system, follow the steps we’ve listed below:
- Press the Windows key on your keyboard to open the Start menu.
- Type cmd and click on the “Run as administrator” option. Opening Command Prompt as administrator
- Copy the following command and paste it into the Command Prompt window using Ctrl + V: wusa /uninstall /kb:5006670 Uninstalling erroneous Windows Update
- Press enter.
- Wait for the update to uninstall.
After the update has been successfully uninstalled, make sure to restart your computer. Once your computer is restarted, the Network Printing issue should be resolved.
However, if the issue persists, it may be caused by a different Windows update. You should try uninstalling the most recent update to your system by following the steps written below:
- Press Control + I to open Settings.
- Go to Updates and Security.
- Click on “View Update History.” Viewing Update History
- Click on “Uninstall updates.” Navigating to Uninstall Updates menu
- In the new menu, scroll down to the Microsoft Windows section.
- Right-click on the most recent update and press uninstall. Uninstalling the most recent Windows update
If the issue continues to persist even after you have done that, try the next solution we have listed below.
2. Add a Registry Key to Override Driver Installation Restrictions
The Windows Registry stores configuration settings for the operating system, applications, and hardware devices. Registry keys are used to store various types of data, such as system settings, user preferences, and program configurations.
In recent Windows updates, Microsoft has placed restrictions on installing drivers for printers. However, these restrictions can be bypassed by adding a simple Registry Key in your Windows Registry.
Follow the steps listed below to add a Registry Key that overrides driver installation restrictions :
- Open Command Prompt as an administrator.
- Copy and paste the following command into Command Prompt and press enter: reg add “HKEY_LOCAL_MACHINE\Software\Policies\Microsoft\Windows NT\Printers\PointAndPrint” /v RestrictDriverInstallationToAdministrators /t REG_DWORD /d 0 /f
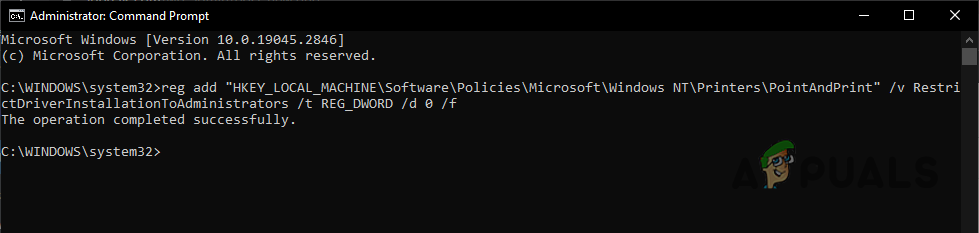
Adding Registry Key
By adding this registry key and setting its value to 0, you essentially disable the restriction on driver installations for printers, which allows non-administrator users to install printer drivers and hopefully resolves the network printing error 0x00000709 .
3. Reinstall the printer.
If the solutions listed above did not work for you, the final solution is to reinstall the printer on your system. During the installation process, some corruption may have occurred. Therefore, reinstalling the printer has a high chance of resolving the error.
Follow the steps listed below to reinstall your network printer:
- Press Windows Key, type Control Panel and press enter.
- Under Hardware and Sound, click on “View Devices and Printers.” Opening Devices and Printers menu
- Right-click on the printer and select “Remove Device.” Uninstalling Printer
- After it has been uninstalled, click on the ‘ Add a Printer ‘ button at the top, and Windows will automatically reinstall it for you. Reinstalling Printer
Once the printer has been reinstalled, the ‘Element Not Found’ error should finally be fixed.
How to Fix “Printer is in an error state” Issue?
The KB5005565 is a security update that was mainly released to patch the PrintNightmare vulnerability in the depreciated Point and Print technology. In the Point and Print technology, a client PC is connected to a remote printer that is managed by a print host or server system without requiring installation media at the client side.
The printer driver and configuration files are pulled from the host/server system and installed locally on the system. The print job created on the client PC is relayed to the host’s print queue for the print.
‘Inaccessible Shared Printer’ after the KB5005565 Update
With the PrintNightmare vulnerability in the Point and Print technology, a hacker may be able to bypass the security setup of an organization and may gain administrative privileges on the systems. Despite the update’s usefulness, this update caused a lot of trouble for some organizations/users, when the users could not access the shared or networked printer (sometimes with an error code).
The shared printer access issue after the KB5005565 update (despite the update’s itself incompatibility with the system) was mainly caused by the following:
- Incompatible or Outdated Printer Driver : As the KB5005565 update enabled the new printer technology (replacing the older Point and Print) and the client system is still using the older one, it may not be compatible with the KB5005565 update, resulting in the loss of the printer connectivity.
- Outdated OS of the Client System : If the client system is outdated whereas the print host/server is updated to the latest, both systems may become incompatible with each other, resulting in the printer issue at hand.
Update the PC’s Windows to the Latest Build
The KB5005565 mainly patches the old print technology (i.e., Point and Print) against the PrintNightmare exploit and if any of the PCs involved (print server or client) are not updated to the latest Windows build, then that may not be compatible with the newer update which may cause the printer access issue at hand. Here, updating the PCs’ (print server and client) Windows to the latest build may solve the problem.
- On the Print Server system , click Windows , search and open Check for Updates . Open Check for Updates
- Now click on the Check for Update button and if updates are available, download and install the updates . Make sure to install Optional Updates as well. Check for Windows Updates
- Once the updates are installed, restart your print server system.
- Then repeat the same on the client system (or systems) and once all the systems are updated, check if the shared printer can be accessed.
Re-add the Printer and Reinstall its Driver
The KB5005565 update has redefined the printer technology used between the client and print server which may cause incompatibility between the both, resulting in the shared printer issue. Here, re-adding or reinstalling the printer may solve the problem.
Re-add the Printer
- Click Windows , search for Services , right-click on it, and select Run as Administrator . Open Services as Administrator
- Now, double click on the Print Spooler service and set its Startup Type to Automatic . Double-click the Print Spooler Service
- Then click on the Stop button and afterward, click on the Start button. Set the Startup Type of the Print Spooler Service to Automatic and Stop/Start the Service
- Now, right-click on Windows and select Settings . Open Windows Settings
- Then open Devices and head to the Printers and Scanners tab. Open Devices in Windows Settings
- Now select the problematic printer and click on Remove Device . Remove Device in Printers and Scanners
- Then confirm to remove the device and wait till the device is removed.
- Now, remove all the other printers that use the same driver as the problematic printer.
- Then, click on Print Server Properties in the right pane of Devices» Printers and Scanners. Open Print Server Properties
- Now, head to the Drivers tab and remove the problematic printer driver from there as well. Remove Driver and Driver Package in the Print Server Properties
- Afterward, restart your system and upon restart, head to Settings» Devices» Printers and Scanners .
- Then, in the Printers and Scanners window, click on Add a Printer or Scanner and re-add the printer to check if the shared printer is accessible. Click on Add a Printer or Scanner
Keep in mind, in the case of Windows 7 client systems , firstly, disable password-protected sharing on the printer host. Then map a local port to the shared printer using the following command (make sure to replace the PC Name and Printer Name as per your environment).
net use lpt1 \\pc-name\printer-name /persistent:yes
Afterward, locally install the printer driver and check if that resolves the shared printer issue on Windows 7 systems.
Update the Driver Through the Device Manager
- Right-click Windows and select Device Manager .
- Now expand Printers (or Print Queues) and right-click on the problematic printer .
- Then select Update Driver and select Search Automatically for Drivers . Update the Network Printer Driver in the Device Manager
- Now select Search for Updated Drivers on Windows and afterward, check if the shared printer issue is resolved. Search Automatically for Drivers
- If not, then check if reinstalling the printer driver clears out the printer problem.
Add the Print Server Credentials to the Credential Manager of the Client System
As the printer cannot be accessed from the client system, adding the print server credentials to the credential manager of the client system may let the user access the printer.
- Firstly, remove the problematic printer from the client system .
- Now, in an administrator account on the client system, click Windows , search and open Credential Manager . Open Credential Manager
- Then head to the Windows Credential tab and click on Add a Windows Credential . Add a Windows Credential of an Administrator Account of the Print Server
- Now add the user like ServerPCNAME\UserName of the print server account and enter the password. Make sure you are using the credentials of the administrator account of the print server .
- Now restart the Print Spooler service on the client and print server system. Restart the Print Spooler Service
- Then, on the client PC , click Windows , search: Command Prompt , right-click on it, and select Run as Administrator . Open Command Prompt as Administrator
- Now execute the following (that will launch printer install UI in administrator mode): rundll32 printui.dll,PrintUIEntry /il
- Then follow the prompts to add the printer and afterward, check if the printer access issue is resolved.
Edit the System’s Registry
The main object of the KB5005565 update was to patch the print spooler vulnerabilities and for this purpose, the update enables the RpcAuthnLevelPrivacyEnabled registry value. But if any of your systems (print server or client) are not RPC_C_AUTHN_LEVEL_PKT_PRIVACY compliant, then the shared printer may not be accessible. In this scenario, disabling the RpcAuthnLevelPrivacyEnabled in the system’s registry may solve the problem.
Warning :
Proceed at your own risk as editing the system’s registry is a skillful task and if not done properly, you may expose your system to threats. Also, do not forget to create a backup of the system’s registry .
- Click Windows , type: Registry Editor , right-click on it, and select Run as Administrator on the host machine. Open Registry Editor as Administrator
- Then click Yes (if the UAC prompt is shown) and head to the following path: HKEY_LOCAL_MACHINE\System\CurrentControlSet\Control\Print Create a New DWORD (32-bit) Value Under the Print Key
- Now, in the left pane, right-click on the Print key and select New» DWORD (32-bit) Value .
- Then name the key as RpcAuthnLevelPrivacyEnabled and double-click on it.
- Now set its value as 0 and close the editor. Name the Value as RpcAuthnLevelPrivacyEnabled and Set its Value to 0
- Then click Windows , search for Services , right-click on it, and select Run as Administrator .
- Now, right-click on the Print Spooler service and select Restart .
- Then check if the shared printer is accessible to the client systems.
- If the issue persists, then restart the print server as well as client systems and check if the printer issue is resolved.
- If that did not work, check if making the above registry edit on the clients solves the problem.
- If the issue is still there, then check if executing the following command on the client systems in an elevated Command Prompt solves the issue: rundll32 printui.dll,PrintUIEntry /il
Uninstall the KB5005565 Update
If the update KB5005565 is not compatible with your particular print setup and other methods are not working, then uninstalling the KB5005565 update may solve the printer problem.
Remove the KB5005565 Update
- On the host system, click Windows , search, and open Check for Updates .
- Now open View Update History and near the top, click on Uninstall Updates . View Update History of Your System
- Then select the KB5005565 update and click on Uninstall . Open Uninstall Updates
- Now follow the prompts on your screen to complete the KB5005565 uninstallation. Uninstall the KB5005565 Update
- Once completed, restart your system, and upon restart, repeat the same on the client systems as well. Now check if the shared printer is accessible.
If the issue persists and you have KB5006670 , then check if uninstalling it clears out the issue. If you cannot uninstall the KB5005565 update, then performing a system restore to the point when the update in question was not installed, may solve the problem.
Perform a Network Reset After Uninstalling the Update
- If uninstalling the update did not work, then right-click Windows and select Settings on the host system.
- Now open Network and Internet and click on Network Reset . Open Network & Internet in the Windows Settings
- Then click on Reset Now and afterward, connect the system to a network (if required). Open Windows Network Reset
- Then repeat the same on the client computers and check if the printer access issue is resolved. Press Reset Network Button
Re-apply the Registry Edit and Reinstall the KB5005565 Update
If the registry edit discussed above did not work for you, then it may work after removing the update and may let you reinstall the update again. You may try this only on the host system.
- Remove the RpcAuthnLevelPrivacyEnabled registry key from the system (if present) and restart your system.
- Upon restart, re-add the RpcAuthnLevelPrivacyEnabled key to the registry and set its value to 0 .
- Now restart your system and upon restart, check if the shared printer is working fine.
- Then download and install the KB5005565 update.
- Now restart your system and upon restart, check if the shared printer issue is resolved.
Remove the Printers from the Spool Folder and Reinstall the KB5005565 Update
If the printer has become inaccessible after reinstalling the update, then deleting the printers from the Spool folder and reinstalling the update may let you keep the update.
- Firstly, remove the RpcAuthnLevelPrivacyEnabled registry key from the system (if present) and restart your system.
- Now remove any GPO applied printers from the system.
- Then click Windows , search for Services , right-click on it, and select Run as Administrator .
- Now, in the Services window, right-click on the Print Spooler service and select Stop . Stop the Print Spooler Service
- Then right-click on Windows and select Run . Open the Run Command Box from the Quick Access Menu
- Now navigate to the following path and if asked to, click Continue to allow access to the directory: \Windows\System32\spool\PRINTERS Open the Printers Folder in the Spool Directory
- Then delete all the printers present there and uninstall the KB5005565 update .
- Now, re-add the RpcAuthnLevelPrivacyEnabled key to the registry and set its value to 0 .
- Now restart your system and upon restart, repeat the above process on the client PC as well. Make sure to stop the print spooler service on the client system .
- Then restart the Print Spooler service on the printer server system and afterward, start the Print Spooler service on the client system .
- Now, re-configure and re-share the printer (if required) and then reinstall the KB5005565 update to check if the printer issue is resolved.
- If that did not work, then on a safe system (proceed at your own risk), where KB5005565 update is not installed, copy the Win32spl.dll file (in the Properties» Details tab, it should show a version less than 1320) from \Windows\System32 folder and place the same on the host PC. Afterward, check if that resolves the issue. Copy the Win32spl.dll File from a Safe System
If removing the update does the trick for you, but the update is installed again, then you may have to pause or hide the update .
If none of the above has worked for you and your printer has the ethernet or Wi-Fi capability , then you may set up your printer through that channel to access it.
PDF (Portable Document Format) is one of the most popular document format designed to present documents which includes images and text formatting. It is independent of the hardware, software, platform, and the operating system. Given the right tools, any device can open PDF files with ease.

Lately, there has been a lot of problems with PDF files where they are unable to get printed. This scenario is mostly seen in Adobe PDF software in Windows 10. This occurs mainly because there are misconfigurations in your software and some settings might be set incorrectly.
How to Fix PDF Printing Issues
Users have reported that they cannot print PDF files opened in Adobe PDF software but can print all other document formats from everywhere else. Apart from the software, there are also other modules from where the PDF fails to print for example Edge, Email, File viewers etc. This guide aims to target all these situations and get you printing in no time.
Check your printer
Before we take a look at problems in the software, you should make absolutely sure that your printer is working as expected from other platforms or applications. You should connect your printer properly, tailor some other document in Word etc, and print a test page. Once your printer is in an operational state, move on to the solutions.
In case you are having problems with your printer, you can check out our guides on printer troubleshooting.
Solution 1: Changing PDF preference and printing as Image
According to users, they fixed the issue of the PDF not printing by changing the default application using Settings in Windows 10 for .pdf extension files. There seem to be some conflicts with printing and the default application for PDF files. Once we change this, we will use the advanced options try printing the PDF file as an image.
- Press Windows + S, type “ settings ” in the dialogue box and open the application. Once in settings, navigate to Apps and then Default apps .
- Once in Default apps, click on Choose default apps by file type .

- Now make sure that for the file type ‘ .pdf ’, Adobe is selected. Save changes and exit.

- After restarting your computer, open the PDF file again in Adobe, click on File and then Print .
- Click on Advanced and check the box Print as image .

- After making sure that the correct printer is selected, click OK to continue printing.
Solution 2: Changing document settings
Another thing to try if printing as an image doesn’t work is changing the document’s settings. We will change the PDF/A mode to never and disable the protected mode. There are several reports that these options caused problems when printing the document and disabling them fixed the issue.
- Open the document in Adobe Acrobat and click on View > Preferences.

- Click on Documents using the left navigation pane and set the PDF/A View Mode to Never .

- Click on Security (Enhanced) using the left navigation pane and uncheck the option Enable Protected Mode at startup . If prompted with a warning, press Yes .

- Restart your computer and try printing the document again using Adobe.
Solution 3: Using a browser to print
If Adobe is causing issues and still not printing the PDF file, you can try printing the document using your browser. Browsers have inbuilt modules to view PDF files and even print them using your printer. Of course, you need to be sure that your printer is working perfectly.
- Navigate to the PDF file. Right-click it and select Open with and select your browser (Chrome etc.) .

- Open the settings and click on Print from the drop-down.

- Select the correct print options from the preceding window and print your document.
Solution 4: Reinstalling Adobe Acrobat
If the solutions above don’t work for you, you try reinstalling Adobe Acrobat software on your computer. It is possible that the installation is either corrupt or there are conflicts with the software. We will make sure that we remove all the leftover files before commencing with the fresh installation. Do note that you might lose your saved licenses in the software so make sure that you have them written down somewhere so you can enter again.
- Download and use the Adobe Reader and Acrobat Cleaner tool . This will remove the software from your computer and completely remove temporary settings and files which get left over.

- Now navigate to the official website of Acrobat and download the software again and install it. After installation, try printing and see if the problem is fixed.
Note: This issue has also been officially noticed by Adobe and download the patch to fix the issue.
There have been reports of users encountering an issue with their printers. As it turns out, upon attempting to change the default printer on their system, the “Operation could not be completed (error 0x00000709)” error message is triggered. On the other hand, some users are experiencing this error message in a shared network where a deleted printer keeps reappearing. The error message appears when they try to connect to the said printer when it reemerges. In this article, we will guide you through the process of fixing the aforementioned problem quite easily, so please follow along.
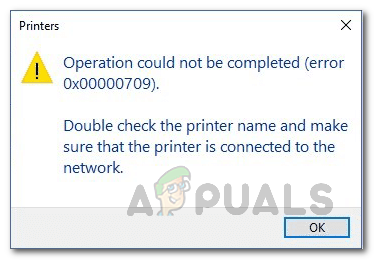
Operation Could not be Completed Error 0x00000709
As it turns out, printers remain one of the most widely used devices, especially in work environments. Not only that, but some of us also use printers in our homes for our convenience. When you set a default printer, all print jobs are sent to the selected printer automatically, instead of having to select a printer every time you wish to print something, which can be quite repetitive. In some cases, Windows may refuse to change the default printer on your computer. In such a scenario, you can get the job done quite easily by modifying some keys in your Windows Registry. With that said, let us get started and show you how to change your default printer on your operating system without any issues.
Change the Default Printer via the Windows Registry.
As it turns out, when encountering the 0x00000709 error code while trying to change the default printer on your computer, do not worry, as there are alternative ways to change the default printer.
In such a case, as we have mentioned previously, what you can do is use the Windows Registry to change the default printer on your computer. The Windows Registry is responsible for how the operating system on your computer behaves, and as such, it stores the default printer in a key. When facing the problem in question, you can edit this key to change the default printer on your computer. Normally, making changes to the Windows Registry is not recommended, especially when you do not know what you are doing. This is because any unwanted changes can cause serious damage to the operating system. Therefore, before proceeding with the instructions that we are going to provide, we would recommend creating a backup of the Windows Registry in case anything goes wrong.
The instructions below are quite straightforward, and if you follow them strictly, you won’t face any issues. With that said, let’s get started and show you how to change the default printer via the Windows Registry.
- First of all, open the Run dialog box on your computer by pressing the Windows key + R on your keyboard.
- In the Run dialog box, type “ regedit ” and then press the Enter key on your keyboard. Opening up Windows Registry
- In the follow-up User Access Control dialog box, click the Yes button.
- This will bring up the Windows Registry . In the address bar, copy and paste the following path, then hit Enter to navigate to the respective location automatically.
- Computer\HKEY_CURRENT_USER\Software\Microsoft\Windows NT\CurrentVersion\Windows Navigating to Appropriate Path
- Once you are there, on the right-hand side, double-click the device key. Opening up Device Key
- In the dialog box that appears, you will need to change the Value data . Changing Default Printer
- There are three parts to the value data, each separated by a comma, and you will be changing only the first part, which is the name of your printer.
- Thus, change the first part to the name of the printer you wish to make the default.
- Once you are done, click “ OK .” It should look something like this: PrinterNAME,winspool,Ne01: Changed Default Printer via Registry
- Make sure to replace ‘PrinterNAME’ with the actual name of your printer. In addition, the last two parts may differ depending on your case, and you should leave them as is.
- In case you do not know the name of the printer that you wish to make the default, open the Control Panel by searching for it in the Start Menu . Opening up Control Panel
- Then, in the Control Panel window, click on the Hardware and Sound option. Control Panel
- There, click on the “ Devices and Printers ” option provided. All Devices
- Here, you will see all of the devices connected to your computer, including your printer. Provide this name in the Value data box above.
- Once you have finished with that, go ahead and restart your computer for the changes to take effect. After your computer boots up, the problem should be resolved.
Clear the printer’s folder.
If you are facing an issue in a network where a deleted printer keeps reappearing , you can solve the problem by clearing the printer’s folder residing on your computer. These are called ghost printers, and there are a few ways to remove them. One method is to empty the printer’s folder, as mentioned earlier. To accomplish this, you will first need to stop the Print Spooler service. Follow the instructions below to do this:
- First of all, press Windows key + R on your keyboard to open up the Run dialog box.
- Then, in the Run dialog box, type “ services.msc ” and press the Enter key. Opening up Services
- The Services window will open up, listing all the services available on your system.
- From the list of services, search for the Print Spooler service. To make this task easier, press the “ P ” key on your keyboard, which will direct you to all the services starting with the specified letter. Locating Print Spooler Service
- Once you have located the service, right-click on it and, from the drop-down menu, click the Stop button. Stopping Print Spooler Service
- After doing that, open up Windows Explorer .
- In the address bar, copy and paste the following path: C:\Windows\System32\spool\PRINTERS Navigating to Printers Folder
- There, delete all the files and folders. Make sure that you have hidden files enabled so that you can clear them out as well.
- Once you have done that, open up the Services window again and start the Print Spooler service. The problem should now be resolved.
Use the Print Management.
As it turns out, another way to get rid of the ghost printer is by using the Print Management utility, which allows you to manage and handle all the printers connected to your computer, including any print servers and more. To use the Print Management utility, follow the instructions provided below:
- First of all, open the Start Menu and search for Print Management . Open it. Opening up Print Management
- On the left-hand side, expand the Custom Filters list. Expanding Custom Filters
- Then, click on ‘ All Printers. ‘ Opening up All Printers
- After doing that, locate the ghost printer on the right-hand side.
- Right-click on it, and from the drop-down menu, click the Delete option. Deleting Ghost Printer
- Once you have done that, the ghost printer will no longer appear.
