The “ERR! Could not determine executable to run” error message in NPM is encountered when the package manager fails to find the executable script required. This predicament typically arises while utilizing the NPX command to initiate a project or activate a certain library.
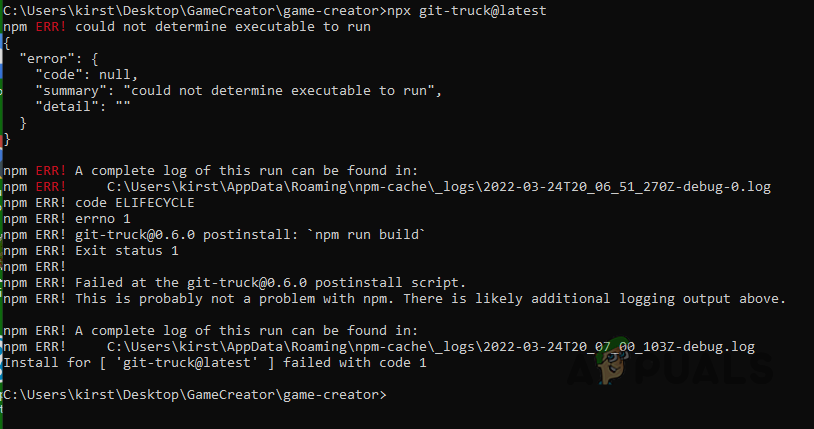
NPM ERR! Could Not Determine Executable to Run Error Message
This error can often be remedied by installing any absent dependencies or resolving conflicts within your project. This guide will walk you through various methods to tackle this issue.
1. Install Missing Dependencies
Upon encountering the NPM ERR message, your first action should be to install any missing dependencies in your project. This approach aims to rectify any absent executables essential for executing the troublesome command.
- Open File Explorer and navigate to the project directory .
- Proceed to delete the node_modules folder present in the project’s root directory. Deleting Node_Modules Folder
- Next, open a terminal window within the project’s root directory. Opening a Terminal Window
- Utilize the npm install command to reinstall the project’s dependencies. Running NPM Install
- Wait for the process to finish and check if the error message is resolved.
2. Remove Git Hooks
Git employs hooks that execute on specific events within a Git repository. These hooks can cause the NPM executable error due to conflicts or inconsistencies, especially when using packages like Husky that provide their own hooks.
To address this, consider removing the hooks folder from within the .git directory, opting to back it up in a different location rather than deleting it outright.
- Begin by opening a terminal window on your computer. Opening a Terminal Window
- Navigate to the project directory using the cd command.
- To address the issue, execute the following command within the project directory: rm -rf .git/hooks npm install Deleting Git Hooks
- Alternatively, consider moving the hooks folder to a separate location rather than deleting it, using the move (mv) command. mv .git/hooks TARGET_LOCATION
3. Double-check NPX Command
An error can also stem from an incorrect command input. This occurs when NPX fails to locate the script corresponding to the command entered, resulting in failure.
Therefore, it is advisable to meticulously verify your command input for typos. A common error involves mistaking dashes (-) for spaces in the command.
For instance, the command to create a Next.js project
npx create next-app@latest PROJECT_NAME
is incorrect, leading to the aforementioned error. The correct command should be:
npx create-next-app@latest PROJECT_NAME
Proceed to the next method if the command is verified to be correct.
4. Switch to Root Directory
Executing the command from an incorrect directory constitutes another common issue. It’s crucial to execute NPM commands from the project’s root directory to allow the package manager to accurately find the necessary executable files.
5. Check Project Dependencies
The NPM command may also fail if the package.json file includes incorrectly defined dependencies, possibly due to typos in manually declared project dependencies.
It’s necessary to scrutinize the dependency list in your package.json file to verify accuracy. Ensure the dependency names are correctly entered, paying attention to common errors such as typing babel-node instead of babel/node .
As dependency specifications vary, you will need to rely on your judgment. Once the dependencies list has been verified for accuracy, proceed to the next method.
6. Upgrade Problematic Package
Occasionally, the error may arise from using an outdated version of a dependency. In such instances, the error log will typically identify the problematic package, simplifying troubleshooting.
In these cases, upgrading to the latest version of the identified package can often resolve the issue.
- Open a terminal window and navigate to the project directory. Opening a Terminal Window
- Update the problematic package to the latest version with the command: npm install X@latest Upgrading Problematic Package
- Substitute X with the name of the package causing the issue.
These solutions should help you overcome the error message in most scenarios. Should your situation remain unchanged, consider seeking advice on Stackoverflow for further assistance.
How to Fix “Printer is in an error state” Issue?
The error “ WinRAR Error: Next Volume Is Required ” usually appears when you’re extracting a multi-part RAR archive and WinRAR can’t find (or can’t correctly identify) the next file in the sequence . This often happens when a volume is missing , stored in a different folder , or renamed in a way that breaks the archive’s expected order .

In this guide, we’ll go over the most reliable fixes confirmed by affected users, along with what each method is doing behind the scenes so you can choose the right one for your situation.
Important: To extract multi-volume archives, you should always start extraction from the first file in the set. This is usually file.part1.rar , or (in older sets) the main .rar file that comes before .r01 , .r02 , and so on.
1. Download and Place the Missing RAR File
WinRAR needs all parts of a multi-volume archive to complete extraction. This error usually appears when one of the volumes in a set like .part2.rar , .r01 , .r02 , .001 , and similar naming formats is missing . Downloading the missing volume and placing it in the same folder as the other parts allows WinRAR to continue extracting normally .
- Look at the error message or review the list of archive parts in the folder.
- Identify which volume is missing (for example, part2.rar , .r02 , .001 , etc.).
- Go back to the website or source where you downloaded the archive.
- Locate and download the exact missing file using the same naming format as the others.
- Make sure the new file name matches the pattern of the rest. Example: If you have file.part1.rar and file.part3.rar , the missing one must be file.part2.rar .
- Move the downloaded missing volume into the same folder as the other archive parts.
- Confirm that all parts are in a single folder before extracting.
- Right-click the first file in the series (usually part1 or the main .rar file) and select Extract Here or Extract to Folder .
- WinRAR should now detect all volumes and continue extraction normally .
2. Manually Browse & Select the Next Volume
Use this method only if the next volume already exists , but WinRAR is failing to detect it automatically. This can happen due to incorrect naming , the file being in a different location , or a temporary file access issue. Manually browsing helps WinRAR locate the correct volume and resume extraction without interruption .
- Right-click the first file in the series (usually .rar or part1.rar ) and select Extract Here or Extract to Folder .
- When WinRAR cannot find the next volume, it will show the “ Next Volume Is Required ” message.
- A small window will appear, allowing you to manually select the next volume .
- Use the file explorer window to locate the folder where the other archive parts are saved.
- Select the next part based on the naming order (example: select file.part2.rar after file.part1.rar ).
- Make sure the selected file matches the naming format of the archive (no extra characters like (1) and no mismatched numbering).
- WinRAR will resume extraction using the selected volume .
- If additional volumes are missing or stored separately, WinRAR may prompt you again. Repeat the same process until extraction completes.
3. Rename the RAR files in Order
WinRAR relies on a proper naming sequence (such as file.part1.rar , file.part2.rar , file.part3.rar ) to extract multi-volume archives. If a file is named incorrectly, contains extra characters, or is out of order, WinRAR may fail to locate the next volume and show this error. Renaming the files correctly helps WinRAR follow the sequence and extract the archive without interruptions .
Note: Renaming only changes the file name , not the file contents. The goal is to restore the correct sequence so WinRAR can detect the next volume.
- Go to the folder where all the RAR files are saved.
- Make sure all parts of the archive are present and stored in the same folder .
- Check how the parts are currently named . Common patterns include:
file.part1.rar, file.part2.rar, file.part3.rar
file.rar, file.r01, file.r02, file.r03
- Look for files that don’t match the expected numbering pattern (for example, file.part01.rar , file.part1(1).rar , or unrelated names).
- Rename each file so it follows the same order without extra characters or mismatched numbering. Example:
Incorrect: file.part1.rar, file.part3.rar, file.part2(1).rar
Correct: file.part1.rar, file.part2.rar, file.part3.rar
- Make sure the text before the number is exactly the same for all files.
- Only the last part number should change.
- Right-click the first file in the series (usually part1.rar or the main .rar file) and select Extract Here .
- WinRAR should now recognize the sequence and continue extraction normally .
If you still get the same prompt: the archive set is likely incomplete (a part was never downloaded or was removed), or one of the volumes is corrupt and must be re-downloaded from the original source.
