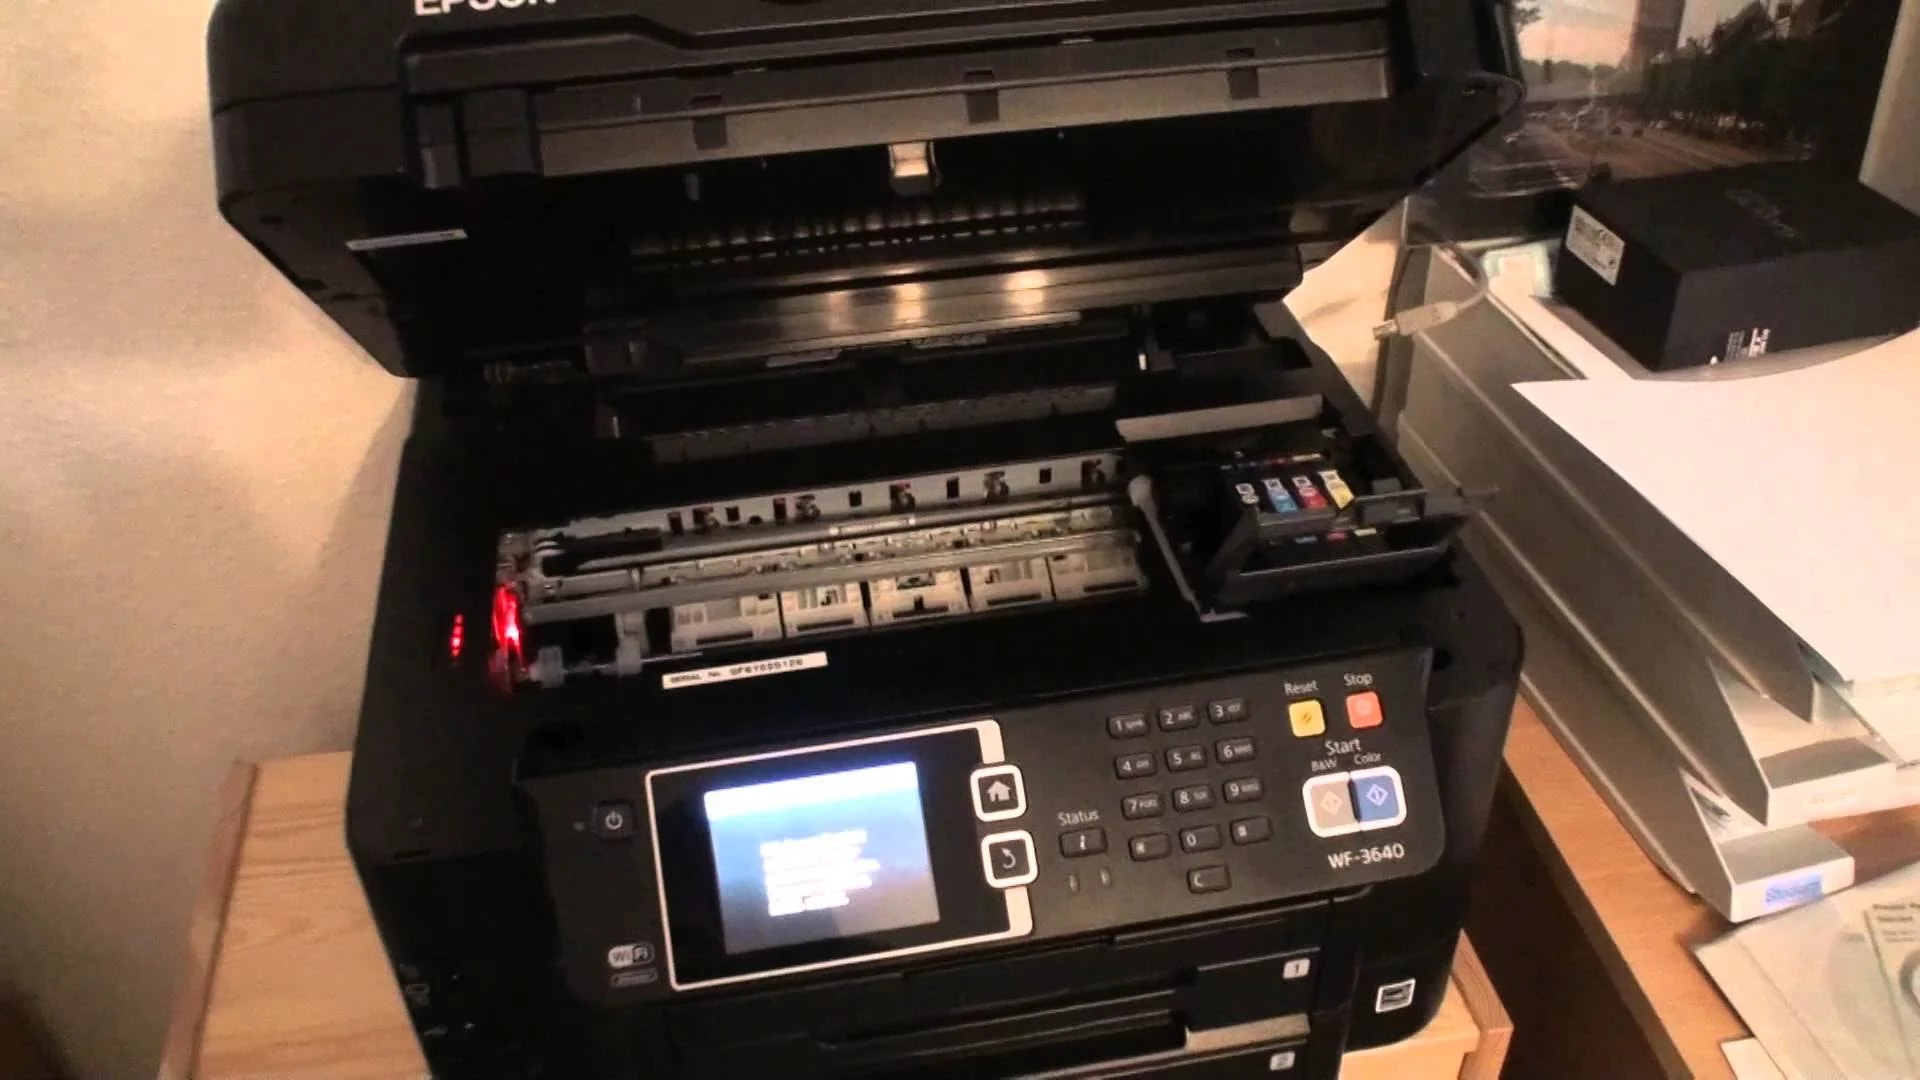
There’s no doubt that Epson printers are one of the best printers that you can find in the market these days. But best doesn’t mean perfect. There’s a high chance that you will be a victim of error code 0x97 if you are using the Epson printer, especially for a long time. The error code 0x97 can occur at any time without any warnings or signs. Usually, this error presents itself on the printer with an indicator to turn the printer off and on again. Usually, this error code will show up during the printing process and your printer will stop printing afterward. So for as long as this error keeps showing up, you won’t be able to use your printer.
The Epson error 0x97 happens because of an internal hardware issue. There are quite a few Epson models that are known to have this hardware issue where their motherboard will fail all of sudden. There aren’t many things that you can do once you’re facing a hardware issue and at most, you can try to clean the print head nozzles . There are some workarounds for the problem but as you might have already guessed, there isn’t a permanent solution except for repairing or getting a replacement.
Try the methods given below to troubleshoot and solve the problem but if nothing works then your last choice would be to try the last method.
1. Unplug and Plug-in
The steps given below require some technical knowledge of how to open and use your printer. If you aren’t sure then refer to the manual that came with your printer because the steps vary from model to model.
- Open the printer casing and check for any jammed papers or debris. If you find any, remove it.
- Remove all printing cartridges
- Unplug all the USBs and cables Unplugging power from the equipment
- Once the printer is disconnected, press the power button as if you were trying to turn on the printer. This will discharge any residual current in the printer
- Now reconnect all the USBs and power cable
- Turn on your printer and check for the error
2. Power-cycling the Printer
This method is a variation of the first method. So if that didn’t work then try this method to confirm if the error is caused by the internal hardware failure or not.
- Turn off your printer
- Unplug all cables Unplugging
- Wait for 5 minutes
- Press and hold the power button for 60+ seconds (DO NOT release it)
- When the 60+ seconds have gone, plug in the power cable while keeping the power button pressed
- Hold the power button pressed for another 60+ seconds (after plugging in the power cable)
- Release the power button after 60 seconds of plugging in.
Now check if the error code is still shown on the printer.
3. Wet Tissue
In some cases, the error code might be displayed because of waste ink around the head sprayer. Cleaning that waste ink with wet tissue sometimes solves the problem. Follow the steps given below to perform the cleanup procedure.
Note: This method requires a bit of technical knowledge and might not be suited for everyone. If you aren’t sure then ask an expert and take help from the manual that came with the printer.
- Turn off your printer
- Open the printer casing
- Take a tissue and wet it with warm water
- Now move the head to the center
- Put the tissue to the head cleaning mechanic pad
- Move the head to the parking spot
- Wait 10 minutes
Now remove the tissue and close everything. Turn on the printer and check if the problem is still there. Repeat this method 3 times if it doesn’t work the first time.
4. Customer Support
If none of these methods shown above helped you at all, then it’s highly likely that it’s a hardware failure. There is nothing that you can do to fix the printer now without taking the risk of permanently damaging your printer if you want to ignore that warning and still continue you can try some of the steps in this article ( here ). If you don’t want to continue with the steps you can contact customer support and they will guide you further. If you have your warranty then Epson should replace your printer with a new one within a few days.
How to Fix “Printer is in an error state” Issue?
There’s no doubt that Epson printers are one of the best printers that you can find in the market these days. But best doesn’t mean perfect. There’s a high chance that you will be a victim of error code 0x97 if you are using the Epson printer, especially for a long time. The error code 0x97 can occur at any time without any warnings or signs. Usually, this error presents itself on the printer with an indicator to turn the printer off and on again. Usually, this error code will show up during the printing process and your printer will stop printing afterward. So for as long as this error keeps showing up, you won’t be able to use your printer.
The Epson error 0x97 happens because of an internal hardware issue. There are quite a few Epson models that are known to have this hardware issue where their motherboard will fail all of sudden. There aren’t many things that you can do once you’re facing a hardware issue and at most, you can try to clean the print head nozzles . There are some workarounds for the problem but as you might have already guessed, there isn’t a permanent solution except for repairing or getting a replacement.
Try the methods given below to troubleshoot and solve the problem but if nothing works then your last choice would be to try the last method.
1. Unplug and Plug-in
The steps given below require some technical knowledge of how to open and use your printer. If you aren’t sure then refer to the manual that came with your printer because the steps vary from model to model.
- Open the printer casing and check for any jammed papers or debris. If you find any, remove it.
- Remove all printing cartridges
- Unplug all the USBs and cables Unplugging power from the equipment
- Once the printer is disconnected, press the power button as if you were trying to turn on the printer. This will discharge any residual current in the printer
- Now reconnect all the USBs and power cable
- Turn on your printer and check for the error
2. Power-cycling the Printer
This method is a variation of the first method. So if that didn’t work then try this method to confirm if the error is caused by the internal hardware failure or not.
- Turn off your printer
- Unplug all cables Unplugging
- Wait for 5 minutes
- Press and hold the power button for 60+ seconds (DO NOT release it)
- When the 60+ seconds have gone, plug in the power cable while keeping the power button pressed
- Hold the power button pressed for another 60+ seconds (after plugging in the power cable)
- Release the power button after 60 seconds of plugging in.
Now check if the error code is still shown on the printer.
3. Wet Tissue
In some cases, the error code might be displayed because of waste ink around the head sprayer. Cleaning that waste ink with wet tissue sometimes solves the problem. Follow the steps given below to perform the cleanup procedure.
Note: This method requires a bit of technical knowledge and might not be suited for everyone. If you aren’t sure then ask an expert and take help from the manual that came with the printer.
- Turn off your printer
- Open the printer casing
- Take a tissue and wet it with warm water
- Now move the head to the center
- Put the tissue to the head cleaning mechanic pad
- Move the head to the parking spot
- Wait 10 minutes
Now remove the tissue and close everything. Turn on the printer and check if the problem is still there. Repeat this method 3 times if it doesn’t work the first time.
4. Customer Support
If none of these methods shown above helped you at all, then it’s highly likely that it’s a hardware failure. There is nothing that you can do to fix the printer now without taking the risk of permanently damaging your printer if you want to ignore that warning and still continue you can try some of the steps in this article ( here ). If you don’t want to continue with the steps you can contact customer support and they will guide you further. If you have your warranty then Epson should replace your printer with a new one within a few days.
Epson is a Japanese company and is one of the world’s largest manufacturers of computer printers. It has numerous types of printers available and is known to be one of the ‘big’ players in the printing industry.
There have been numerous issues reported with Epson where the printer seems offline even if it is started up and is printing the test page just fine. This issue might occur on a number of different occasions and the cause of this issue might vary from system to system. We have listed down all the workarounds; start with the first one and work your way down accordingly.
Solution 1: Resetting Printer Spooler
The spooler service is a software program which is responsible for managing all print jobs being sent to the computer printer. The print spooler service is usually visible to users and they can also cancel a print job which is being processed. It also allows them to manage jobs which are currently on the waitlist. By resetting this service, we will make sure that all the configurations get reset.
We can try restarting this service and check if this solves the problem.
- Press Windows + R to launch the Run application. Type “ services. msc ” in the dialogue box and press Enter.
- Locate the service “ Print Spooler ” present in the list of services. Double-click it to open its properties. Click the “ Stop ” button present underneath system status and press “ Ok ” to save changes.
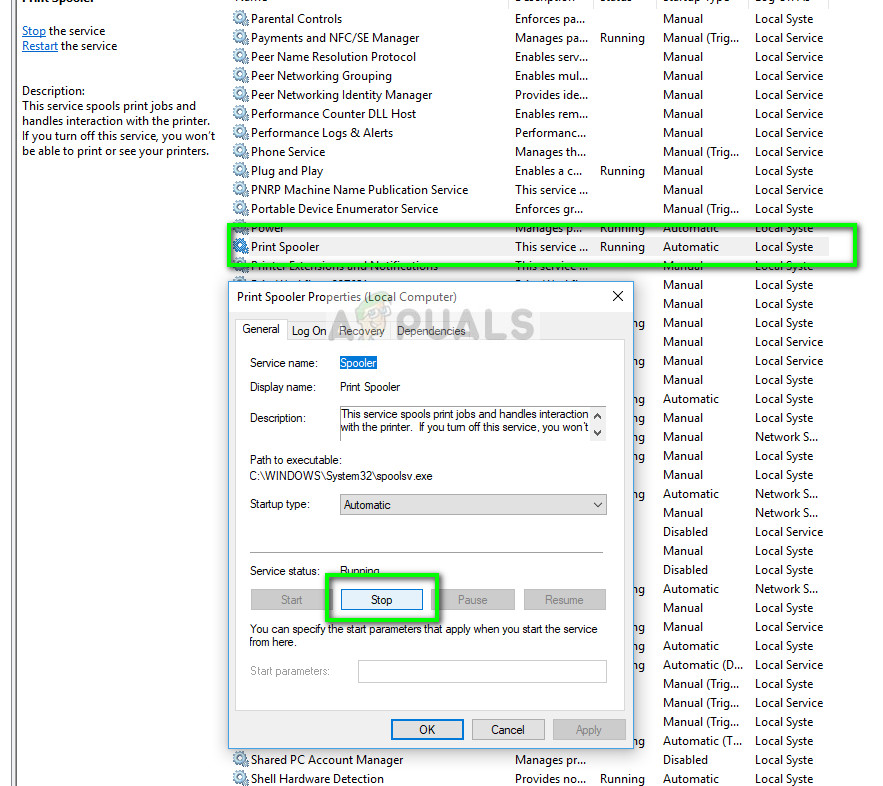
- Now open services again and start it once more and make sure that the startup type is set to automatic.
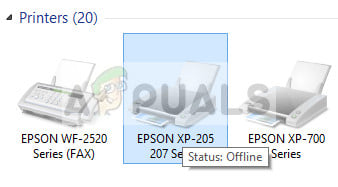
If this doesn’t fix the issue, access the printer using the login credentials and make sure that the printer is connected. If it isn’t connecting wirelessly, try plugging a wire and check again if this helps. Once this is done, navigate to printers, right-click on the device and select “ Connect ”.
Note: Also make sure that the printer is set as the default printer and make sure that the setting “Use printer offline” is not checked.
Solution 2: Disabling SNMP Settings
SNMP stands for Simple Network Management Protocol and is used for a variety of different purposes on your computer. Almost every printer which uses a wireless connection to connect with your computer uses this protocol for some functionalities and tightening the security of the connection. There were several reports which indicated that disabling the SNMP protocol solved the problem for them. Take a look at the steps below.
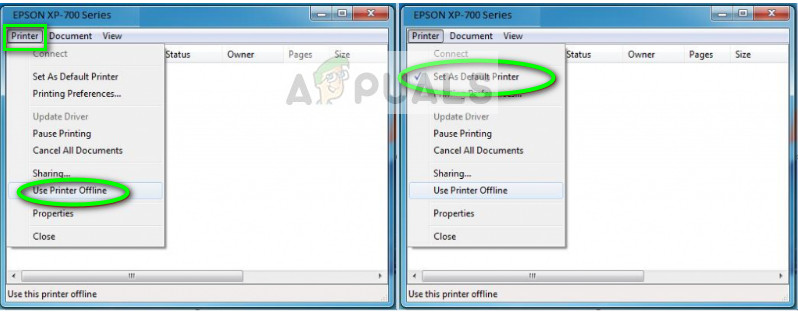
- Open your control panel and click on Devices and printers. Once in the printers window, locate your device, right-click it and select Properties .
- Once in the settings, click on Ports , now with your IP highlighted, click on Configure ports and uncheck the option SNMP Status Enabled .
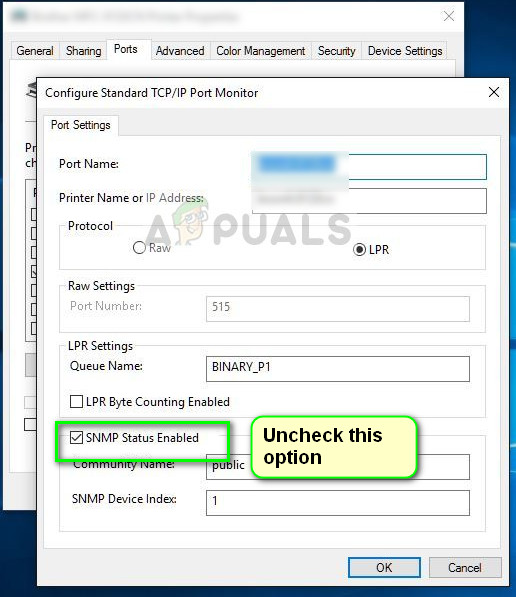
- Press OK to save changes and exit. Now right-click on the printer and try connecting. If possible, power cycle your printer properly before proceeding.
Solution 3: Adding the printer using IP address and port
Another thing you can try is adding the printer on your computer using its IP address and port number. There may be problems by the computer in adding the printer automatically. We will manually look up the addresses and try adding it to the computer.
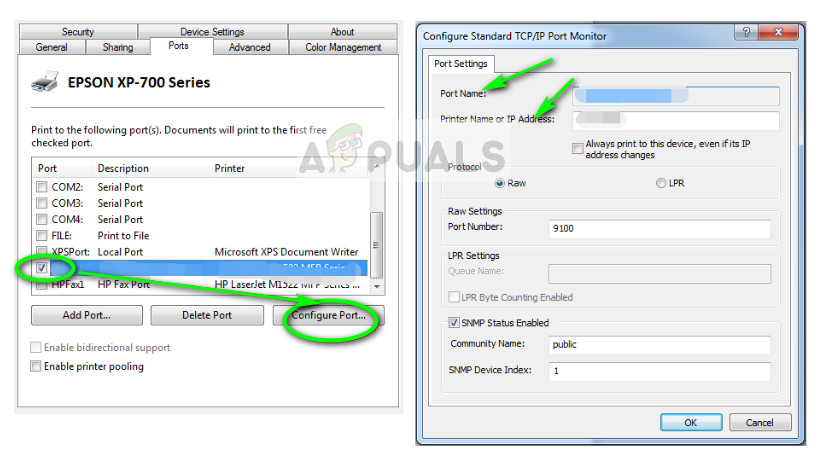
- Open the control panel and navigate to the printers section like we did earlier on. Select your device, right-click it and click Printer Properties .
- Now navigate to Ports , click on the checked entry and select Configure Port .
- A new window will pop up consisting of port name and IP address. Copy these so we can enter them later on.
- Now press Windows + R, type “control” in the dialogue box and press Enter. Once the control panel shows up, click on “Devices and printers” and select Add a printer .
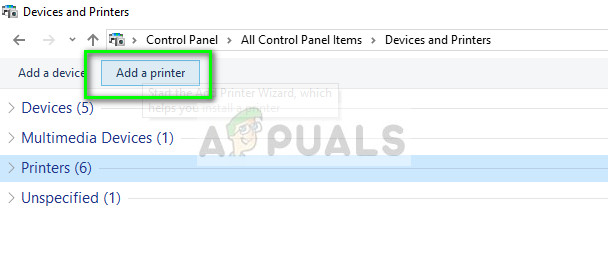
Note: You should delete the existing printer so we can add it again using the IP address.
- The printer will not be detected most probably. If it does, just click on it and the computer will connect. If it doesn’t show up, select “ The printer that I want isn’t listed ”.
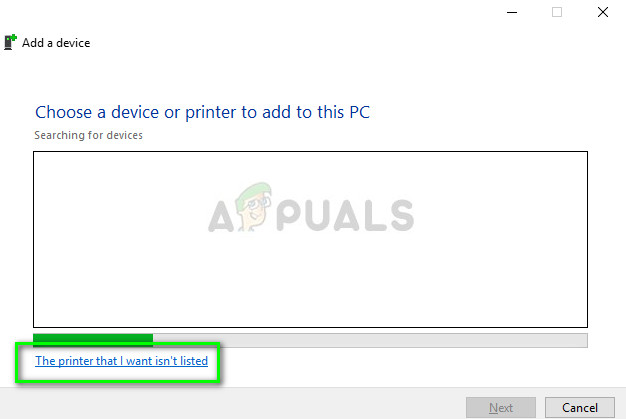
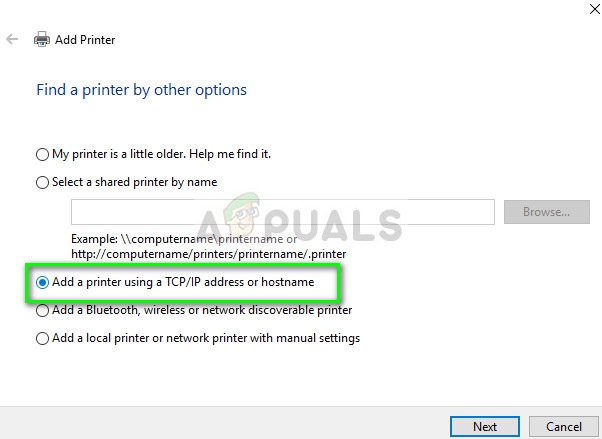
- Now select the option “ Add a printer using TCP/IP address or hostname ”.
- Enter the IP address and Port name of the printer and wait for it to connect.
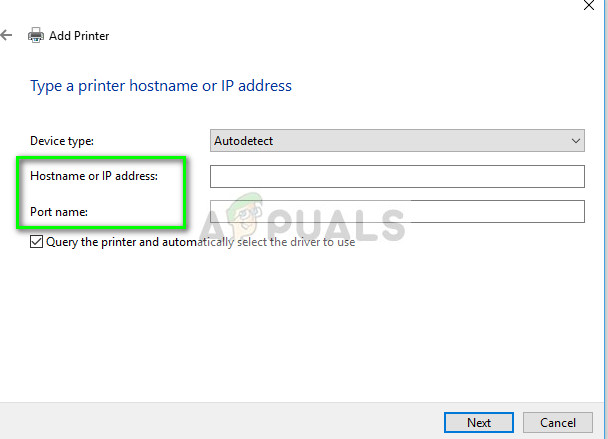
- Once the printer is connected, print out a test page and check if the problem is solved.
Note: This solution is meant to make sure that the IP address which your printer has obtained is the same which is inputted in the computer. If you are having trouble determining the IP address of the printer using the methods listed, you should check the printer manual and see if there is any way to confirm the IP and Port of the printer.
If this doesn’t work, you should allocate a static IP to the printer and try connecting to it again. Follow the steps mentioned in the article Fix: Canon Printer Offline .
Seiko Epson Corporation (Epson) is a Japanese based electronic company which is one of the largest distributors of Printing, and other imaging-related equipment. Print Head nozzles are located inside the printer below the cartridges and they are actually responsible for the spraying of the ink on the paper. These nozzles can, however, become clogged over time and it can degrade the quality of the printing process or in some cases, stop it altogether.
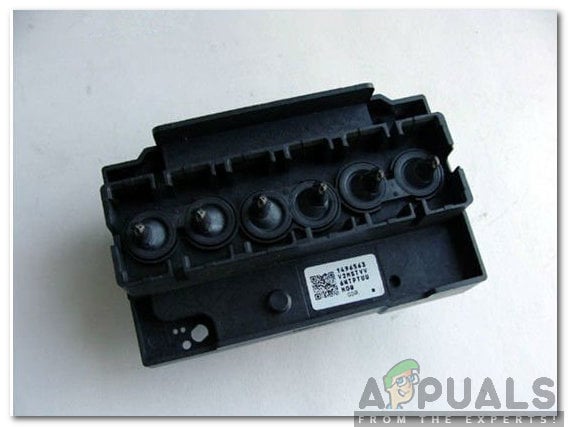
Clogged printer heads
Therefore, in this article, we will be describing the process to thoroughly clean your printer’s Head nozzles in the safest way possible. Make sure to follow the steps and the guidelines accurately to avoid any loss of equipment.
Required Equipment:
Before we start cleaning, you will need the following equipment to move ahead with the process:
- Syringe: To inject the solution.
- Bloating Paper: To absorb the spillage.
- Scissors: To Cut the bloating paper
- Cleaning Solution: To breakdown the clogged particles.
- Injecting Pipe: To inject the solution.
You can get all of this equipment from this site.
How to Clean Epson Printer Head Nozzles Which are Clogged?
After you have gathered the required equipment, we will move on towards the actual process. Be aware that if done incorrectly, you might end up permanently damaging your printer.
- Try to print something in the printer.
- Unplug the printer while it is printing, this will make it easier to remove the cartridges and access the print head. Unplugging the printer
- Remove the top of the printer, slide the carriage holding the ink cartridges and remove all the cartridges one by one.
- Wrap the cartridges in some paper, to avoid them from drying out.
- Remove the cap of the printing solution and put the bottle in warm water as shown below. Removing the cap and placing in warm water
- Cut 2 pieces of blotting paper that fit the rail under the print head.
- Slide the pieces of paper below the print head carriage and make sure that one head comes out of the other end of the carriage. Sliding the pieces of paper below the cartridge carriage
- Attach the injecting pipe with the syringe and make sure that it is tightly wound around the syringe.
- Inject about 2ml of the cleaning solution inside the syringe.
- Firmly put the pipe around the print head make sure that there isn’t any room for spillage .
- After waiting for about 5 minutes, inject the solution inside the print head slowly. Note: Make sure you don’t put too much force if there is too much resistance, stop the process and get the printer checked out for damages.
- Leave the pipe attached for about 5 minutes
- After removing the pipe, remove the bloated paper from under the print head carriage that we inserted previously.
- Put the cartridges back in and close the head. Putting the cartridges back in
- Run the printer’s self-clean function at least 2 or 3 times.
- The Printer head has now been cleaned and should be unclogged.
Epson is a Japanese Electronics company which is one of the largest manufacturer and distributor of Printers and imaging related equipment. The company although based in Suwa in Japan, has subsidiaries in the whole world and produces inkjet, dot matrix, and laser printers. Not only this, but it also produces and distributes Scanners, cash registers, laptops, robots, and a lot of other electronic equipment.
How to Fix “Error Code 0xf1” on Epson Printers
Although the company produces so much electronic equipment, they are mostly known for their printers which are flawless and quite popular among general consumers due to their sturdy quality and great customer support. However, quite recently, a lot of reports have been coming in of an “ Error Code 0xf1 ” on their printers. In this article, we will discuss some of the reasons due to which this error is triggered and provide viable solutions to rectify it completely.
What Causes the “Error Code 0xf1” on Epson Printers?
After receiving numerous reports from multiple users, we decided to investigate the issue and devised a set of solutions to fix it completely. Also, we looked into the reasons due to which this error is triggered and listed them below:
- Jammed Feed Gears: One user reported that a piece of plastic broken off from a part of the printer had gotten stuck in the feed gears and was jamming them due to which the error was being triggered.
- Paper Jam: In most cases, the error is caused due to a paper jam during the printing process. Some users reported that the paper was jammed inside the printer due to which the error was being triggered.
- Dirty Cartridge: It is possible that there might be a dirty cartridge that needs to be replaced and is preventing the printing process by jamming the papers while they are being printed.
- Improper Installation: In some cases, the printer might not be properly installed to the computer due to which this error might be triggered.
Now that you have a basic understanding of the nature of the problem, we will move on towards the solutions. Make sure to implement these in the specific order in which they are presented to avoid conflicts.
Solution 1: Unjamming Feed Gears
If a certain piece of plastic is stuck in the Feed Gears and is preventing them from turning properly, the error might be triggered. Therefore, it is recommended to try and unjam the Gears by providing manual force to the gears and getting the plastic out of them or physically removing the piece from the gears by opening the front panel of the printer. Check to see if the issue persists after doing so.
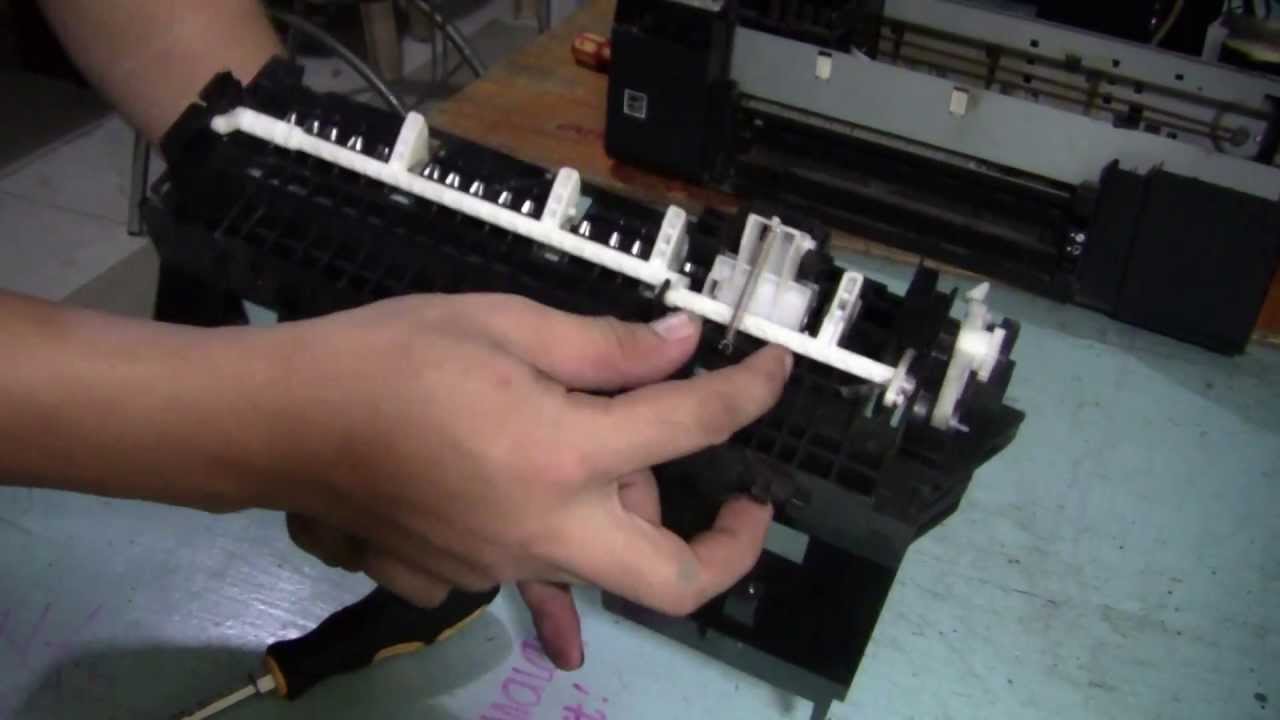
Checking for blockage in the Feed Gears
Solution 2: Moving Printer Head Assembly
In some cases, the error is fixed simply by moving the Printer Head Assembly in a particular fashion. Therefore, in this step, we will be powering down the printer and moving the Assembly. For that:
- Unplug the printer from the socket to turn it off.
- Raise the hood of the printer and Move the Printer Head Assembly all the way to the left . Raising the hood epson printer
- Move the Printer Head Assembly back all the way to the right. Moving the printer assembly head
- Turn the printer back on and check to see if the issue persists
- Repeat this process for 4 to 5 times before moving on.
Solution 3: Checking for Paper Jam
In some cases, there might be a paper jam inside the printer due to which this error is being triggered. Therefore, in this step, we will be taking the cartridge out and checking for any paper jams. For that:
- Power the printer off completely.
- Take the cartridge out of the printer’s back.
- Check to see if there is any paper jammed there.
- If there is remove it and put the cartridge back in. Removing Paper Jam
- Plug the printer back in and check to see if the issue persists.
- If the error disappears but the printer doesn’t print, take the cartridge out and clean it.
- Refill it with ink and put it back in.
- Check to see if the printer prints.
