Some Windows and macOS users that are trying to use ClipGrap to fetch videos from Youtube are reporting that the software regularly returns the error code 403 . This particular HTTP code means that access to the requested resource is forbidden.

ClipGrab Error 403 on Windows and MacOS
After investigating this particular issue, it turns out that there are several different underlying causes that might be triggering this error code. Here’s a list of scenarios that are most likely occurring:
- The web application is currently down – As it turns out, you can expect to encounter this type of issue if a supported streaming platform has made a change the breaks the streaming protocol for ClipGrab. In this case, there is no fix other than waiting for the developers to resolve the issue on their part.
- Outdated ClipGrab build – Another popular reason that might return this error code is an outdated ClipGrab build that is not equipped to use the latest streaming protocol enforced by the developers. Since there’s no auto-update function on ClipGrab, you’ll need to manually uninstall the current version before installing the latest available build.
- Security interference – According to a lot of affected users, you can also see this error code if the security suite that you’re actively using has flagged ClipGrab as a potential security threat due to a false positive and it’s actively blocking it. In this case, you can resolve the issue either by disabling the real-time protection or by establishing a whitelisting rule for ClipGrab.
Now that you are familiar with every potential culprit that might produce this error, here are a couple of methods that will most likely allow you to fix the issue:
Method 1: Checking the status of ClipGrab
Keep in mind that since Clipgrab is developed independently, it’s prone to break every time a supported platform like YouTube, Vimeo, Dailymotion, or Facebook makes a change that breaks the download protocol.
Given the small team behind it, you can expect the 403 error to occur until the developers react and adapt to the changes – This has happened a few times in the past, and typically the issue was resolved in a couple of days.
So before trying any of the other potential fixes below, start by visiting the official Twitter account of ClipGrab and checking for any official announcements regarding an ongoing issue.
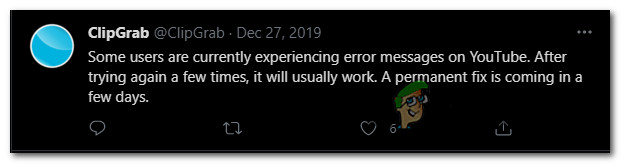
ClipGrab Issue announcement on Twitter
Another good place to check for an ongoing ClipGrab issue is the official support forum of ClipGrab – If you find that other users are currently reporting the same kind of issue you’re getting, you can safely conclude that the issue is beyond your control.
On the other hand, if you find no evidence that the 403 error in ClipGrab is currently experiencing server issues, move down to the first potential fix below.
Method 2: Updating ClipGrab to the latest version
If the previous investigation has found that the issue cannot be attributed to a server issue, the next potential culprit you should investigate is your current ClipGrab build.
As stated previously, ClipGrab is prone to break whenever YouTube, Vimeo, and the rest of the supported platforms make a change in their streaming protocol. But even if the developer fixes the issue promptly, you still need to get the changes to show up on your PC or Mac.
And given that ClipGrab has no AutoUpdate function, the only way to ensure that you’re running the latest version is to uninstall the current one and download the latest from the official channel.
To accommodate both user bases, we’ve put together 2 sub-guides that will show you how to do this on Windows and macOS:
A. Updating ClipGrab on Windows
- Press Windows key + R to open up a Run dialog box. Next, when prompted by the Run prompt, type ‘appwiz.cpl’ and hit Enter to open up the Programs and Features menu. When you’re prompted by the UAC (User Account Control) , click Yes to grant admin access. Opening the Programs and Features menu
- Inside the Programs and Features menu, scroll down through the list of installed programs and locate the entry associated with ClipGrab.
- When you manage to locate the correct entry, right-click on it and choose Uninstall from the context menu.
- Once you’re inside the uninstallation screen, follow the on-screen prompts to complete the uninstallation, then restart your computer. Uninstalling ClipGrab
- After your computer boots back up, open your favorite browser and navigate to the official download page of ClipGrab .
- Inside the download page, click on Free Download from the list of available options. Downloading the latest version of ClipGrab
- Once the installer is downloaded, double-click on it, click Yes at the UAC (User Account Control) , then follow the on-screen prompts to complete the installation of the latest version. Installing the latest version of ClipGrab Note: When asked to install the bloatware, you can skip the installation by clicking on Skip all .
- Wait until the installation is complete, then restart your computer and see if the problem is fixed once the next startup is complete.
B. Updating ClipGrab on macOS
- Open the Launchpad by clicking on the associated icon from the dock menu or by launching it from the Applications folder.
- Once you are inside the Applications folder, press and hold the option (⌥) key until you see the ClipGrab app jiggle. Uninstalling the ClipGrab application Note: In case you don’t see the application appearing inside the Launchpad, type its name inside the search field at the top of the screen.
- When you see the jiggling, press the X icon next to the app in order to uninstall it. At the confirmation prompt, click on Delete to confirm the operation.
- Once the application has been completely uninstalled, open Safari or your preferred browser and navigates to the download page of ClipGrab .
- Once the .dmg is downloaded, follow the on-screen to complete the installation.
- Once the latest version of ClipGrab is installed, open the application and see if the problem is now fixed.
If the same problem is still occurring, move down to the next potential fix below.
Method 3: Preventing the Security suite interference (Windows 10 Only)
If you’re experiencing the 403 error on a Windows computer, there’s a big chance you’re seeing this problem due to a problem fetching the youtube.dll which is a requirement when grabbing content from YouTube using ClipGrab.
But as it turns out, you can expect this download to fail due to the default security suite (Windows Security) flagging the main executable of ClipGrab as a potential security threat due to a false positive .
Fortunately, several affected users that were also dealing with this problem have reported that they managed to fix the apparition of this error either by whitelisting the main ClipGrab executable or by disabling the real-time protection when using ClipGrab.
To make matters easier for you, we’ve created 2 separate sub-guides to accommodate both scenarios:
A. Disabling the real-time protection
- Start by pressing Windows key + R to open up a Run box. Next, type ‘ ms-settings:windowsdefender’ inside the text box and hit Enter to open up the Windows Defender Security Center. Accessing the Windows Defender menu on Windows 10 Note: If you’re prompted by the UAC (User Account Control) , click Yes to grant admin access.
- Inside the Windows Security window, go ahead and use the left-hand pane to click on Virus & Threat Protection . Accessing the virus protection tab
- Inside the Virus & Threat protection screen, click the Manage hyperlink under Virus & threat protection settings ) Accessing the Virus & Threat protection settings
- Once you get to the next screen, go ahead and disable the toggle associated with Real-Time Protection. When prompted by the warning, confirm again to turn the feature off. Disabling the Real Time protection
- As soon as you manage to disable the real-time protection, make your way to the initial Windows Security menu, then move over to the right-hand section and click on Firewall & network protection. Accessing the Firewall and Network Protection
- After you get to the next menu, click on the network that you’re currently using. Next, scroll down through the list of items and disable the toggle associated with Windows Defender Firewall so that it’s set to OFF. Disabling the firewall component
- Now that the Windows Firewall component and real-time protection have both been disabled, open ClipGrab once again and see if the issue is now fixed.
B. Whitelisting ClipGrab’s executable
- Start by pressing Windows key + R to open up a Run dialog box. Then, type ‘ control firewall.cpl ‘ inside the text box and press Enter to open up up the classic interface of the Windows Firewall. Accessing the classic Firewall menu
- Inside the Windows Defender Firewall menu, move over to the left-hand menu and click on Allow an app or feature through Windows Defender Firewall. Allowing an app or feature through Windows Firewall
- Inside the Allowed apps menu, click on the Change settings button. Next, click Yes at the User Account Control (UAC) prompt to grant administrative privileges. Changing the settings of Windows Defender
- Once you are granted admin access, scroll down through the list of allowed applications and see ClipGrab is on that list. If it’s not, make sure that both boxes (for Private and Public) are checked before clicking on Ok to save the changes. Note: In case ClipGrab is not added to this list, click on Allow another app and add the two entries manually.
- Launch ClipGrab once again and see if you have managed to fix the 403 error code.
How to Fix “Printer is in an error state” Issue?
The error “ WinRAR Error: Next Volume Is Required ” usually appears when you’re extracting a multi-part RAR archive and WinRAR can’t find (or can’t correctly identify) the next file in the sequence . This often happens when a volume is missing , stored in a different folder , or renamed in a way that breaks the archive’s expected order .

In this guide, we’ll go over the most reliable fixes confirmed by affected users, along with what each method is doing behind the scenes so you can choose the right one for your situation.
Important: To extract multi-volume archives, you should always start extraction from the first file in the set. This is usually file.part1.rar , or (in older sets) the main .rar file that comes before .r01 , .r02 , and so on.
1. Download and Place the Missing RAR File
WinRAR needs all parts of a multi-volume archive to complete extraction. This error usually appears when one of the volumes in a set like .part2.rar , .r01 , .r02 , .001 , and similar naming formats is missing . Downloading the missing volume and placing it in the same folder as the other parts allows WinRAR to continue extracting normally .
- Look at the error message or review the list of archive parts in the folder.
- Identify which volume is missing (for example, part2.rar , .r02 , .001 , etc.).
- Go back to the website or source where you downloaded the archive.
- Locate and download the exact missing file using the same naming format as the others.
- Make sure the new file name matches the pattern of the rest. Example: If you have file.part1.rar and file.part3.rar , the missing one must be file.part2.rar .
- Move the downloaded missing volume into the same folder as the other archive parts.
- Confirm that all parts are in a single folder before extracting.
- Right-click the first file in the series (usually part1 or the main .rar file) and select Extract Here or Extract to Folder .
- WinRAR should now detect all volumes and continue extraction normally .
2. Manually Browse & Select the Next Volume
Use this method only if the next volume already exists , but WinRAR is failing to detect it automatically. This can happen due to incorrect naming , the file being in a different location , or a temporary file access issue. Manually browsing helps WinRAR locate the correct volume and resume extraction without interruption .
- Right-click the first file in the series (usually .rar or part1.rar ) and select Extract Here or Extract to Folder .
- When WinRAR cannot find the next volume, it will show the “ Next Volume Is Required ” message.
- A small window will appear, allowing you to manually select the next volume .
- Use the file explorer window to locate the folder where the other archive parts are saved.
- Select the next part based on the naming order (example: select file.part2.rar after file.part1.rar ).
- Make sure the selected file matches the naming format of the archive (no extra characters like (1) and no mismatched numbering).
- WinRAR will resume extraction using the selected volume .
- If additional volumes are missing or stored separately, WinRAR may prompt you again. Repeat the same process until extraction completes.
3. Rename the RAR files in Order
WinRAR relies on a proper naming sequence (such as file.part1.rar , file.part2.rar , file.part3.rar ) to extract multi-volume archives. If a file is named incorrectly, contains extra characters, or is out of order, WinRAR may fail to locate the next volume and show this error. Renaming the files correctly helps WinRAR follow the sequence and extract the archive without interruptions .
Note: Renaming only changes the file name , not the file contents. The goal is to restore the correct sequence so WinRAR can detect the next volume.
- Go to the folder where all the RAR files are saved.
- Make sure all parts of the archive are present and stored in the same folder .
- Check how the parts are currently named . Common patterns include:
file.part1.rar, file.part2.rar, file.part3.rar
file.rar, file.r01, file.r02, file.r03
- Look for files that don’t match the expected numbering pattern (for example, file.part01.rar , file.part1(1).rar , or unrelated names).
- Rename each file so it follows the same order without extra characters or mismatched numbering. Example:
Incorrect: file.part1.rar, file.part3.rar, file.part2(1).rar
Correct: file.part1.rar, file.part2.rar, file.part3.rar
- Make sure the text before the number is exactly the same for all files.
- Only the last part number should change.
- Right-click the first file in the series (usually part1.rar or the main .rar file) and select Extract Here .
- WinRAR should now recognize the sequence and continue extraction normally .
If you still get the same prompt: the archive set is likely incomplete (a part was never downloaded or was removed), or one of the volumes is corrupt and must be re-downloaded from the original source.
