The ‘fatal error occurred while creating an SSL client credential’ issue is typically discovered by users after they get recurring Office related error messages and they investigate the crashes using Event Viewer . In most cases, the investigation reveals that the error originates from a locally synced SharePoint document library.
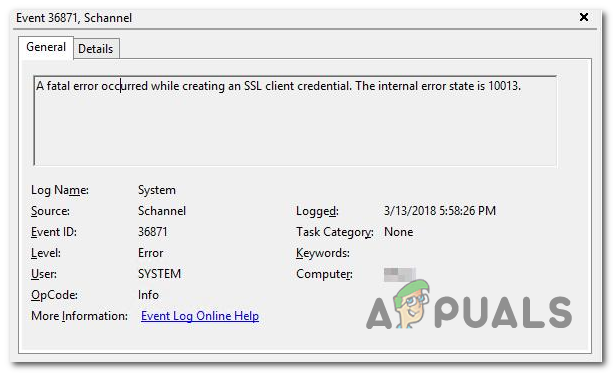
A fatal error occurred while creating an SSL client credential
What’s causing the ‘fatal error occurred while creating an SSL client credential’ error?
- System Cryptography policy is disabled – In most cases, this particular issue will occur due to an error related to Schannel. In this case, you should be able to fix the issue by using the Local Group Policy Editor to enable one FIPS compliant algorithm policy that is most likely responsible for this issue.
- Corrupted Office Installation – Another potential cause that might facilitate this problem is a corrupted Office installation. If this scenario is applicable, you can fix this issue by either repairing or reinstalling the entire Office installation.
- TLS 1.0 is not enabled – With severely outdated Office installations, this error might appear due to the fact TLS 1.0 is no longer enabled. Although this is not recommended, you can fix the issue in this case by doing some Registry adjustments so that TLS 1.0 is reinstated.
How to fix the ‘fatal error occurred while creating an SSL client credential’ error?
1. Enable the System Cryptography policy
As it turns out, the vast majority of ‘fatal error occurred while creating an SSL client credential’ errors are related to Schannel. Keep in mind that Schannel is Microsoft’s most secure popular package that facilitates the use of Security Socket Layer (SSL) or Transport Layer Security (TLS) encryptions on Windows platforms.
As it turns out, there’s one particular policy that is often responsible for the apparition of this issue ( FIPS compliant algorithms for encryption, hashing, and signing )
Several affected users have reported that the issue was resolved after they used the Gpedit (Local Group Policy Editor) utility to enable this policy.
Here’s a quick guide on enabling the FIPS compliant algorithms for encryption, hashing, and signing in order to resolve the ‘fatal error occurred while creating an SSL client credential’ issue:
- Press Windows key + R to open up a Run dialog box. Next, inside the text box, type ‘gpedit.msc’ and press Enter to open up the Local Group Policy Editor . Running the Local Policy Group Editor
- Once you’re inside the Local Group Policy Editor, use the left-hand section to navigate to the Computer Configuration > Windows Settings > Security Settings > Local Policies > Security Options .
- After you manage to arrive at the correct location, move over to the right-hand section and scroll down through the list of Policies until you locate System cryptography: Use FIPS compliant algorithms for encryption, hashing, and signing. Navigating to the policy responsible for the issue
- Double-click on the System cryptography: Use FIPS compliant algorithms for encryption, hashing, and signing . Inside the Properties window, expand the Local Security Setting tab and set the policy to Enable before clicking on Apply to save the changes. Enabling the policy responsible for the error
- Restart your computer and see if the problem is now resolved.
If you followed this method and you’re still encountering the same ‘fatal error occurred while creating an SSL client credential’ issue, move down to the next potential fix below.
2. Repair / Reinstall Microsoft Office
Another popular fix that a lot of affected users have used to fix the ‘fatal error occurred while creating an SSL client credential’ issue is to either repair or reinstall the Office installation.
Keep in mind that the repair function is not identical to a reinstallation procedure. For many users, uninstalling and installing the latest version of Microsoft Office finally did the trick after an attempt at fixing the issue by repairing failed.
Note : Here’s what to do in case your Office applications are no longer responding.
Here’s a quick guide on repairing or repairing Microsoft Office in order to eliminate the constant ‘fatal error occurred while creating an SSL client credential’ Event Viewer entries:
- Press Windows key + R to open up a Run dialog box. Inside the text box, type ‘appwiz.cpl’ and press Enter to open up Programs and Features window. Typing in “appwiz.cpl” in the Run prompt
- Once you get to the Programs and Features screen, scroll down through the list of installed applications and locate your Office installation. Once you manage to identify the listing, right-click on it and choose Change from the newly appeared context menu. Changing the Microsoft Office installation
- At first repair prompt, choose the option that is most suitable for your scenario. An online repair is a more effective process, but it’s more time-consuming and will require a stable internet connection in order to succeed. Once you made your decision, select the appropriate repair method and click the Repair button. Repairing Microsoft Office Installation
- Once the repair process is completed, restart your computer and see if the issue is resolved at the next system startup by checking the Event Viewer for new entries of the same ‘fatal error occurred while creating an SSL client credential’ error message. Note: If the same issue is still occurring, continue with the steps below.
- Follow step 1 once again to open up the Programs and Features menu. Once you return there, find your Office installation once again and right-click on it, but instead of clicking on Change, click Uninstall to get rid of the entire installation. Changing the installation of Microsoft Office
- At the confirmation prompt, click Uninstall to complete the uninstallation process, then restart your computer once again.
- After the next startup sequence is complete, use the installation media to reinstall your Office suite or visit this link ( here ) do download the installer compatible with your license key.
- Once the installation is complete, see if the issue was resolved by replicating the scenario in which the problem was occurring.
If the same problem is still occurring, move down to the next method below.
3. Enable TLS 1.0 (Not Recommended)
One potentially dangerous fix but one that has worked for several affected users is to enable TLS 1.0. This will most likely fix the issue if the ‘fatal error occurred while creating an SSL client credential’ error is encountered with older Office installations.
But the problem is, TLS 1.0 is a cryptographic protocol that is already abandoned in 2020. Leaving this key enabled might leave your system exposed to security risks in the long run.
If you understand the risks and you are prepared to go further with this fix, here’s what you need to do:
- Press Windows key + R to open up a Run dialog box. Inside the text box, type ‘regedit’ and press Enter to open up the Registry Editor . When you’re prompted by the User Account Control (UAC) , click Yes to grant admin access. Running the Registry Editor
- Once you’re inside the Regedit Editor, use the left-hand section to navigate to the following directory: HKEY_LOCAL_MACHINE\SYSTEM\CurrentControlSet\Control\SecurityProviders\SCHANNEL\Protocols\TLS 1.0
- After you arrive at the correct location, access the Client subfolder, then move over to the right-hand section and double-click on Enable Data . Once inside, set the Base to HexaDecimal and Value data to 1 .
- Next, double-click on DisabledByDefault and set the Base to HexaDecimal and Value data to 1 .
- Repeat step 3 with the Enabled Data and DisabledByDefault Data included in the Server sub-folder.
- Once the modifications have been made, restart your computer and see if the issue is now resolved.
How to Fix “Printer is in an error state” Issue?
The error “ WinRAR Error: Next Volume Is Required ” usually appears when you’re extracting a multi-part RAR archive and WinRAR can’t find (or can’t correctly identify) the next file in the sequence . This often happens when a volume is missing , stored in a different folder , or renamed in a way that breaks the archive’s expected order .

In this guide, we’ll go over the most reliable fixes confirmed by affected users, along with what each method is doing behind the scenes so you can choose the right one for your situation.
Important: To extract multi-volume archives, you should always start extraction from the first file in the set. This is usually file.part1.rar , or (in older sets) the main .rar file that comes before .r01 , .r02 , and so on.
1. Download and Place the Missing RAR File
WinRAR needs all parts of a multi-volume archive to complete extraction. This error usually appears when one of the volumes in a set like .part2.rar , .r01 , .r02 , .001 , and similar naming formats is missing . Downloading the missing volume and placing it in the same folder as the other parts allows WinRAR to continue extracting normally .
- Look at the error message or review the list of archive parts in the folder.
- Identify which volume is missing (for example, part2.rar , .r02 , .001 , etc.).
- Go back to the website or source where you downloaded the archive.
- Locate and download the exact missing file using the same naming format as the others.
- Make sure the new file name matches the pattern of the rest. Example: If you have file.part1.rar and file.part3.rar , the missing one must be file.part2.rar .
- Move the downloaded missing volume into the same folder as the other archive parts.
- Confirm that all parts are in a single folder before extracting.
- Right-click the first file in the series (usually part1 or the main .rar file) and select Extract Here or Extract to Folder .
- WinRAR should now detect all volumes and continue extraction normally .
2. Manually Browse & Select the Next Volume
Use this method only if the next volume already exists , but WinRAR is failing to detect it automatically. This can happen due to incorrect naming , the file being in a different location , or a temporary file access issue. Manually browsing helps WinRAR locate the correct volume and resume extraction without interruption .
- Right-click the first file in the series (usually .rar or part1.rar ) and select Extract Here or Extract to Folder .
- When WinRAR cannot find the next volume, it will show the “ Next Volume Is Required ” message.
- A small window will appear, allowing you to manually select the next volume .
- Use the file explorer window to locate the folder where the other archive parts are saved.
- Select the next part based on the naming order (example: select file.part2.rar after file.part1.rar ).
- Make sure the selected file matches the naming format of the archive (no extra characters like (1) and no mismatched numbering).
- WinRAR will resume extraction using the selected volume .
- If additional volumes are missing or stored separately, WinRAR may prompt you again. Repeat the same process until extraction completes.
3. Rename the RAR files in Order
WinRAR relies on a proper naming sequence (such as file.part1.rar , file.part2.rar , file.part3.rar ) to extract multi-volume archives. If a file is named incorrectly, contains extra characters, or is out of order, WinRAR may fail to locate the next volume and show this error. Renaming the files correctly helps WinRAR follow the sequence and extract the archive without interruptions .
Note: Renaming only changes the file name , not the file contents. The goal is to restore the correct sequence so WinRAR can detect the next volume.
- Go to the folder where all the RAR files are saved.
- Make sure all parts of the archive are present and stored in the same folder .
- Check how the parts are currently named . Common patterns include:
file.part1.rar, file.part2.rar, file.part3.rar
file.rar, file.r01, file.r02, file.r03
- Look for files that don’t match the expected numbering pattern (for example, file.part01.rar , file.part1(1).rar , or unrelated names).
- Rename each file so it follows the same order without extra characters or mismatched numbering. Example:
Incorrect: file.part1.rar, file.part3.rar, file.part2(1).rar
Correct: file.part1.rar, file.part2.rar, file.part3.rar
- Make sure the text before the number is exactly the same for all files.
- Only the last part number should change.
- Right-click the first file in the series (usually part1.rar or the main .rar file) and select Extract Here .
- WinRAR should now recognize the sequence and continue extraction normally .
If you still get the same prompt: the archive set is likely incomplete (a part was never downloaded or was removed), or one of the volumes is corrupt and must be re-downloaded from the original source.
