A Smart system that controls the lighting, entertainment systems, and other appliances can be designed at home easily and are also the fastest-growing concept of the modern world. Smart Home Systems is a concept in which all the electrical appliances or the devices are controlled using a single remote control. Nowadays, a single component like a relay module can be used to control various electronic parameters of a house, for example, switching of home appliances, monitoring of security alarms, garage door automation, etc. In this project, our Personal Computer will be controlled by an Android Application . In these systems, most of the time, the remote control is a mobile application. As an android mobile is the most common among the people, so an android application is the best option to control our PC.

Wireless Computer Switch
How To Make a Wireless Switch for Your PC on Mobile Phone?
Step 1: Gathering The Components
To make any project, one must know what the basic components that one is going to need to complete it are. So an excellent approach before starting the work is to make a complete list of all the components to save time and to avoid the chance of getting stuck in the middle of the project. A complete list of all the components that are easily available in the market is given below:
- ESP32
- No products found.
- 2N2222 NPN Transistor
- No products found.
- 5V Relay Module
- Connecting wires
Step 2: Softwares To Be Installed
As we are going to make a wireless switch, we will need a button to turn it on and off. We want to use a mobile phone to operate this button so we will need to develop an application for that. The most convenient application is an android application. We need to install two software to use this application. Both of them are listed below:
- Android Studio.
- JAVA JDK.
Step 3: Installing Android Studio
Before installing Android Studio, we will install JAVA JDK first. To install this, click on the exe file that you downloaded from the above link, and click next until it is successfully installed. Now Go through the following steps so that your command prompt recognizes java as an external or internal command.
- Open Control Panel and click on System and Security .
- Click on System . System
- Click on Advanced System Setting and then click on Environmental Variables . Advanced System Setting
- In the System Variable section, click on the path and then click on edit. A new Edit Environmental Variable box will appear. Edit Path
- Now go to C:\Program Files\Java in your PC. Open the JDK folder, click on the bin folder and then copy the path of that folder. Path of the bin folder
- Now go to the Edit Environmental Variable box and click on new to make a new variable. Paste the path that you copied in the above step in the new variable and save it.
- Now to confirm, if it is completely installed, open command prompt and type java –version . JAVA version
Now as you have successfully installed Java JDK on your computer. Let us now install Android Studio on your computer. Installing this software is very easy. You need to open the downloaded file and click next until your software is fully installed.
Step 4: Connection To Firebase
Now as we have installed Android Studio, let us launch it and make a new project to connect it to the firebase. To do this, follow the following steps.
- Launch Android Studio and make a new project by clicking on the Empty Activity .

New Project
- Now name your project as computerSwitc, select Kotlin as language, and select the minimum API level according to your mobile phone.

New Project
3.Since we are going to use the internet to control the pins of the raspberry pi. We will set permission in our app to access local wifi. To do this, go to app > manifests > AndroidManifest.xml and add the following command.
<uses-permission android:name="android.permission.INTERNET" />

Internet Permission
- Now, click n Tools. A drop-down menu will appear from which, select Firebase.

Firebase Connection
- A big menu will appear on the right side of the screen that will be providing the menu of almost every service that firebase is providing. But right now our main focus is on Real-Time Database. So click on Real-Time Database. A link to “ Save and Retrieve Data ” will appear. Click that link.

Firebase Assistant
Connect on Connect To Firebase button. It will take you to the default web browser. First, it will ask you to log-in to your Gmail account. Then click on Add the Realtime Database to your app and accept the changes.
Now go to Firebase Console . There you will see a project already made. The android logo on that projet’s icon means that it already belongs to an android application.
From the Develop menu that appears on the left side of the screen, select Database. A button of Create Database will appear on the right. Click on that button.
A menu will appear asking to set the mode of your database. Click on test mode and then click Enable .

Test Mode
- Now a really important step to remember is to change the Cloud Firestore to Real-Time Database. To do so click on the button shown in the below image and change the desired option.

Realtime Firebase
- Now click on the Rules tab and change the configurations to True . Once everything is done, click Publish .

Changing Configurations
- One thing that you need to do other than connecting the firebase, is to update the database version. For that, click on go to docs . Now click on guides and select Android Guides from the list that appears on the screen. Scroll down until a table appears. Look for Real-Time Database in that table and find its version. in my case, it is 19.1.0

Version
- Click on Gradle Scripts, a menu on the left side of the screen. Then select built. gradle (Module: app). Now in the code, search for the version of the Real-Time database and replace it by the new one.
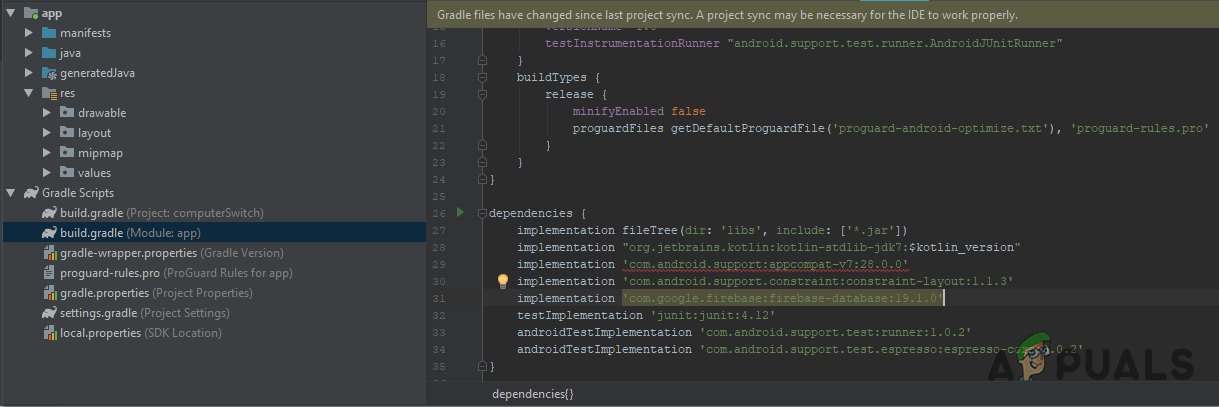
Firebase Version
- Now sync the project by clicking on the sync button appearing on the top of the screen.
Step 5: Making Layout
Now, as our android application is connected to the firebase, let us make a layout of our app that will be used by the user to switch the computer on or off. To make a layout, go to app > res > layout > activity_main.xml. where we will design a layout. Copy the code given below there to make a text view.
<?xml version="1.0" encoding="utf-8"?>
<android.support.constraint.ConstraintLayout
        xmlns:android="http://schemas.android.com/apk/res/android"
        xmlns:tools="http://schemas.android.com/tools"
        xmlns:app="http://schemas.android.com/apk/res-auto"
        android:layout_width="match_parent"
        android:layout_height="match_parent"
        tools:context=".MainActivity">
    <Switch
            android:text="Switch"
            android:layout_width="wrap_content"
            android:layout_height="wrap_content"
            android:id="@+id/switch2" app:layout_constraintEnd_toEndOf="parent"
            app:layout_constraintStart_toStartOf="parent" android:layout_marginTop="8dp"
            app:layout_constraintTop_toTopOf="parent" android:layout_marginBottom="8dp"
            app:layout_constraintBottom_toBottomOf="parent"/>
    <TextView
            android:text="Computer Switch"
            android:layout_width="0dp"
            android:layout_height="wrap_content"
app:layout_constraintStart_toStartOf="parent" app:layout_constraintEnd_toEndOf="parent"
android:id="@+id/textView" android:layout_marginTop="8dp"app:layout_constraintTop_toTopOf="parent"
android:layout_marginBottom="8dp" app:layout_constraintBottom_toBottomOf="parent"
app:layout_constraintVertical_bias="0.322" android:textSize="36sp" android:textAlignment="center"
android:textColor="#000" app:layout_constraintHorizontal_bias="0.0"/>
</android.support.constraint.ConstraintLayout>
The layout of our app will look like this:

App Layout
Step 6: Backend Coding in Kotlin
As we have made the frontend of the application, let us move one step ahead and write the backend code to connect it with the firebase. We have connected a toggle switch that will send a 0 to the firebase database when in off state, and it will send a 1 to the firebase database when it is in on state.
Now, on the left corner, click on app > java > com.example.computerswitch > main_activity, and add the following code there in your class. If any error of library occurs, Press ALT+ENTER to include that library automatically.
var database = FirebaseDatabase.getInstance()
var myRef = database.reference
internal lateinit var btnSwitch: Switch

override fun onCreate(savedInstanceState: Bundle?) {
    super.onCreate(savedInstanceState)
    setContentView(R.layout.activity_main)

    btnSwitch = findViewById<View>(R.id.switch2) as Switch

    btnSwitch.setOnClickListener{
        if(btnSwitch.isChecked)
        {
            myRef.child("switch").setValue("1")
        }
        else
        {
            myRef.child("switch").setValue("0")
        }
    }
}
In the below image, you can see that if the switch is turned on, “1” is uploaded to the firebase database. Similarly, a “0” will be replaced here when the switched is turned off.

Value
Step 7: Getting Started With Arduino
If you haven’t worked on Arduino IDE before, don’t worry because a step by step to set up Arduino IDE is shown below.
- Download the latest version of Arduino IDE from Arduino.
- Connect your Arduino board to the PC and open Control Panel. Click on Hardware and Sound. Now open Devices and Printer and find the port to which your board is connected. In my case it is COM14, but it is different in different computers. Finding Port
- Click on File and then click on Preferences. Copy the following link in the Additional Board Manager’s URL. “ https://dl.espressif.com/dl/package_esp32_index.json” Preferences
- Now, to use ESP32 with Arduino IDE, we need to import special libraries that will allow us to burn code on ESP32 and use it. these two libraries are attached in the link given below. To include the library, goto Sketch > Include Library > Add ZIP Library . A box will appear. Find the ZIP folder on your computer and click OK to include the folders. Include Library
- Now goto Sketch > Include Library > Manage Libraries. Manage Libraries
- A Menu will open. In the search bar, type Arduino JSON. A list will appear. Install Arduino JSON by Benoit Blanchon. Arduino JSON
- Now click on the Tools. A dropdown menu will appear. Set the board to ESP Dev Module. Setting Board
- Click on the Tool menu again and set the port that you observed in the control panel before. Setting Port
- Now Upload the code that is attached in the link below and click on the upload button to burn the code on the ESP32 microcontroller . Upload
So now when you will upload the code, an error may occur. This is the most common error that may occur if you are using a new version of the Arduino IDE and the Arduino JSON. The following are the errors that you may see on the screen.
In file included from C:\Users\Pro\Documents\Arduino\libraries\IOXhop_FirebaseESP32-master/IOXhop_FirebaseESP32.h:8:0,

from C:\Users\Pro\Desktop\smartHome\code\code.ino:2:

C:\Users\Pro\Documents\Arduino\libraries\IOXhop_FirebaseESP32-master/IOXhop_FirebaseStream.h:14:11: error: StaticJsonBuffer is a class from ArduinoJson 5. Please see arduinojson.org/upgrade to learn how to upgrade your program to ArduinoJson version 6

StaticJsonBuffer<STREAM_JSON_BUFFER_SIZE> jsonBuffer;

^

In file included from C:\Users\Pro\Documents\Arduino\libraries\IOXhop_FirebaseESP32-master/IOXhop_FirebaseESP32.h:8:0,

from C:\Users\Pro\Desktop\smartHome\code\code.ino:2:

C:\Users\Pro\Documents\Arduino\libraries\IOXhop_FirebaseESP32-master/IOXhop_FirebaseStream.h:65:11: error: StaticJsonBuffer is a class from ArduinoJson 5. Please see arduinojson.org/upgrade to learn how to upgrade your program to ArduinoJson version 6

return StaticJsonBuffer<STREAM_JSON_DATA_BUFFER_SIZE>().parseObject(_data);

^

Multiple libraries were found for "WiFi.h"
Used: C:\Users\Pro\AppData\Local\Arduino15\packages\esp32\hardware\esp32\1.0.2\libraries\WiFi
Not used: C:\Program Files (x86)\Arduino\libraries\WiFi
Using library WiFi at version 1.0 in folder: C:\Users\Pro\AppData\Local\Arduino15\packages\esp32\hardware\esp32\1.0.2\libraries\WiFi
Using library IOXhop_FirebaseESP32-master in folder: C:\Users\Pro\Documents\Arduino\libraries\IOXhop_FirebaseESP32-master (legacy)
Using library HTTPClient at version 1.2 in folder: C:\Users\Pro\AppData\Local\Arduino15\packages\esp32\hardware\esp32\1.0.2\libraries\HTTPClient
Using library WiFiClientSecure at version 1.0 in folder: C:\Users\Pro\AppData\Local\Arduino15\packages\esp32\hardware\esp32\1.0.2\libraries\WiFiClientSecure
Using library ArduinoJson at version 6.12.0 in folder: C:\Users\Pro\Documents\Arduino\libraries\ArduinoJson
exit status 1
Error compiling for board ESP32 Dev Module.
There is nothing to worry about because we can eliminate these errors by following some simple steps. These errors are arising because the new version of Arduino JSON has another class instead of StaticJsonBuffer. This is the class of JSON 5. So we can simply eliminate this error by downgrading the version of Arduino JSON of our Arduino IDE. Simply go to Sketch > Include Library > Manage Libraries. Search for Arduino JSON by Benoit Blanchon that you have installed before. Uninstall it first and then set its version to 5.13.5. Now as we have set an old version of Arduino JSON, install it again and recompile the code. This time, your code will compile successfully.
Step 8: Assembling The Circuit
Now as our app is ready and fully functional, let’s see how we will connect the circuit to the computer.
- First of all, take a switchboard and connect all the plugs of the Computer system in it i.e. Monitor, printer, CPU, PSU, etc.
- Now take the connecting switch of this board and make a cut in between of the wire so that two wires, black and red, are visible from inside.
- Take the red wire out and cut it from the middle. Connect one end of the wire in the NO point of the relay module and the other end in the COM point of the relay point. (don’t do anything with the black wire)
- Now fix the ESP32 in the breadboard and power it bu using a 5V battery. Connect the Vcc and ground of the Relay module in the breadboard, with the positive and negative terminals of the battery.
- Make the following configuration with the transistor on the breadboard.
Step 9: Code
The code is pretty simple, but still, it is briefly explained below.
- At the start, two libraries are included so that firebase can be used with ESP32.
#include<WiFi.h>
#include <IOXhop_FirebaseESP32.h>
- Then Information about your firebase database and the Wifi connection is given and pin of ESP is declared that will be used with the relay module.
#define FIREBASE_HOST "xxxxx" // replace it with your firebase host
#define FIREBASE_AUTH "xxxxx" // replace it with your firebase auth
#define WIFI_SSID "xxxxx"     // replace this with your WIFI SSID
#define WIFI_PASSWORD "xxxxx" // replace it with your wifi password

int swi = 34;  // connect pin34 of ESP with relay module
- void setup() is a function that runs only one time when the circuit is powered on or the Enable button is pressed. Here the code is written t connect the ESP board to the WIFI. The pin of the ESP that is used with the relay module is also declared as OUTPUT here.
void setup() {
Serial.begin(115200);
pinMode(swi,OUTPUT);

// connect to wifi.
WiFi.begin(WIFI_SSID, WIFI_PASSWORD);
Serial.println("connecting");
while (WiFi.status() != WL_CONNECTED) {
Serial.print(".");
delay(500);
}
Serial.println();
Serial.print("connected: ");
Serial.println(WiFi.localIP());
Firebase.begin(FIREBASE_HOST, FIREBASE_AUTH);
}
- void loop() is a function that runs repeatedly in a loop. Here, the value from the firebase is read. If this value is equal to “1”, then the HIGH signal will be sent to the relay module and the computer will switch on. When this value s “0”, the computer will be switched off.
void loop() {

// read value
if(Firebase.getFloat("switch") == 1)
{
digitalWrite(swi,HIGH);
}
else
{
digitalWrite(swi,LOW);
}

// handle error
if (Firebase.failed()) {
Serial.print("setting /number failed:");
Serial.println(Firebase.error());
return;
}
delay(1000);
}
How to Fix “Printer is in an error state” Issue?
Printing your own T-shirt at home is not only a fun and creative project but also a great way to express yourself and showcase your unique style. With the right materials and a bit of guidance, you can easily create a personalized T-shirt that perfectly fits your preferences. Imagine the satisfaction of seeing your own designs or slogans come to life on a shirt that you can wear and show off to the world.
Not to mention the countless possibilities of designing shirts for special events, gifts for loved ones, or even starting your own small business. With the help of a comprehensive guide and some practice, you’ll be on your way to creating a wardrobe that’s truly one-of-a-kind.
The Definitive Guide to T-Shirt Printing Step 1: Creating a Design Designing With a Software Designing by Hand Hiring a Graphic Designer Step 2: Transfer Your Design on Transfer Paper Types of Transfer Paper Step 3: Prepare Your Shirt Step 4: Transfer Your Design on Shirt Step 5: Final Touch Useful Tips and Tricks Conclusion
The Definitive Guide to T-Shirt Printing

T-shirt Printing |Startup.Info
Printing your own T-shirts at home is an excellent way to express your creativity and showcase your personal style. Whether you want to create a custom design for yourself or print shirts for your small business, it’s fun and affordable to do so using the following step-by-step guide.
Step 1: Creating a Design
Creating the right design is the first step in creating a great T-shirt. Your design should reflect your personality or brand, and it should be eye-catching and memorable. There are several ways to create your own design, including using graphic design software such as Photoshop , drawing your own design by hand, or hiring a professional designer.
Designing With a Software
If you’re new to graphic design, there are several online resources that can help you create a professional-looking design. Canva is a popular design platform that offers a range of design templates and graphics that you can use to create your own unique T-shirt design. It is the easiest tool one can use and is highly recommended for beginners.
Adobe Illustrator is another powerful design program that is commonly used in the industry. However, it is recommended for those that are far more professional and experts in photo editing.
Designing by Hand

A Woman Designing By Hand | Pexels
If you’re more comfortable drawing your own designs by hand, there are a few things to keep in mind. First, make sure your design is simple and easy to reproduce. Intricate designs may be difficult to transfer onto your shirt, and they may not be as visually appealing as simpler designs.
Second, choose colors that will stand out against the color of your shirt. For example, if you’re using a black shirt, consider using bright colors like white, red, or yellow for your design.
After creating your t-shirt design, you can use various scanning applications like CamScanner (yes, it can do more than just scan documents ) on your phone to capture it and transfer it to your computer. Unlike the regular camera, these apps offer more advanced features such as precise bordering and shape orientation, ensuring your design is properly aligned and in the correct format.
Hiring a Graphic Designer
If you’re not confident in your design skills, consider hiring a professional designer to create your T-shirt design.
Freelance graphic designers can be found on platforms like Fiverr and Upwork , and they can create a custom design that perfectly reflects your personality or brand. However, this option can cost you somewhere between $10 – $100 depending upon your requirements and complexity of the design.
Step 2: Transfer Your Design on Transfer Paper
Transfer Paper |Pinterest
Transferring your design onto transfer paper is the next step in the process of printing your own T-shirts at home. You will need a Transfer paper for this purpose. This is a type of paper that is specially designed to transfer your design onto fabric.
Types of Transfer Paper
There are different types of transfer paper available in the market, and it’s essential to choose the right one for your specific needs.
- Light-colored fabric transfer paper: This type of transfer paper is used on light-colored fabrics such as white or pastel shades. These transfer papers work by transferring the design onto the fabric through a heat transfer process.
- Dark-colored fabric transfer paper : This type of transfer paper is used on dark-colored fabrics such as black or dark blue. These transfer papers have a white background that allows the design to be visible on dark fabrics.
- Inkjet transfer paper : This type of transfer paper is designed to be used with an inkjet printer . It works by transferring the design onto the fabric through a heat transfer process.
- Laser transfer paper : This type of transfer paper is used with a laser printer and works similarly to the inkjet printer.
- Glitter transfer paper : This type of transfer paper is designed to add glitter to your design. It is available in both light-colored and dark-colored fabric options.
- Stretchable transfer paper : This type of transfer paper is used on stretchable fabrics such as spandex or lycra. It allows the design to stretch with the fabric without cracking or peeling.
Applying Design via Transfer Paper |Direct T-Shirt
Once you have your transfer paper, it’s time to transfer your design onto it. Start by resizing your design to fit the size of your T-shirt. Use a graphic design program like Adobe Illustrator or Canva to resize your design to the correct dimensions. Then, print your design onto the transfer paper, making sure to print it in a mirror image .
After printing, carefully cut out your design, leaving a small margin around the edges. This margin will help prevent any unwanted transfer of ink onto your shirt. Make sure to remove any excess paper around the design.
Step 3: Prepare Your Shirt
Preparing your shirt is an essential step to ensure that your T-shirt design looks professional and lasts for a long time. Before transferring your design onto your shirt, you must ensure that your shirt is clean and free of any wrinkles. Any dirt or debris on your shirt can affect the transfer process, so it’s crucial to clean your shirt thoroughly before printing your design.

A White T-Shirt | Pixabay
Wash your shirt in cold water and dry it in the dryer or air dry it to remove any dust or debris. Make sure to iron your shirt to remove any wrinkles or creases before transferring your design. A flat and smooth surface is essential for the transfer process to work correctly, so ironing your shirt is a crucial step.
Additionally, it’s important to consider the color of your shirt when preparing it for printing. If you’re using transfer paper for light-colored fabrics, make sure that your shirt is also a light color.
For dark-colored shirts, you’ll need to use transfer paper that is designed specifically for dark-colored fabrics.
Step 4: Transfer Your Design on Shirt
After preparing your shirt, it’s time to transfer your design onto it. This step involves carefully placing the transfer paper with your design onto the shirt and using heat to transfer the design onto the fabric.
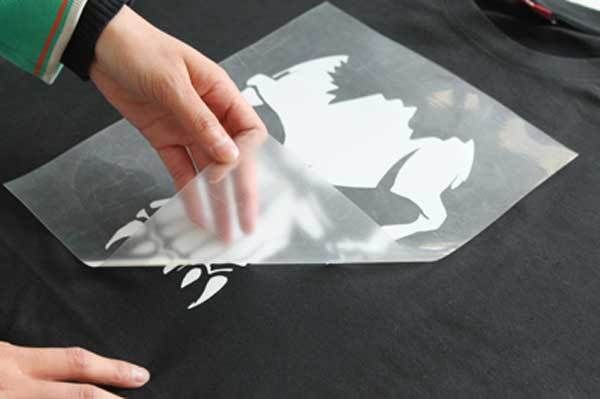
When transferring your design onto your T-shirt, ensure that your shirt is clean and dry. Place the transfer paper face down onto the shirt, with the design facing the fabric.
Use a hot iron to transfer the design onto your shirt. It’s crucial to follow the instructions on the transfer paper packaging for the correct temperature and duration. Be sure to apply even pressure with the iron to ensure that the design transfers evenly.

Transferring Design on T-Shirt |3D Insider
Start by placing your shirt on a flat and even surface. Then, carefully peel the backing paper off the transfer paper and position the design onto the shirt. Make sure that the design is centered and aligned correctly on the shirt. Once the design is in place, use a hot iron to transfer the design onto the fabric.
It’s important to follow the instructions on the transfer paper packaging for the correct temperature and duration to transfer the design onto the fabric correctly. Typically, the transfer process involves applying heat and pressure to the design for several seconds and then allowing it to cool before carefully peeling off the transfer paper.

Transferring Design on Shirt via Iron |Screen Printing Support
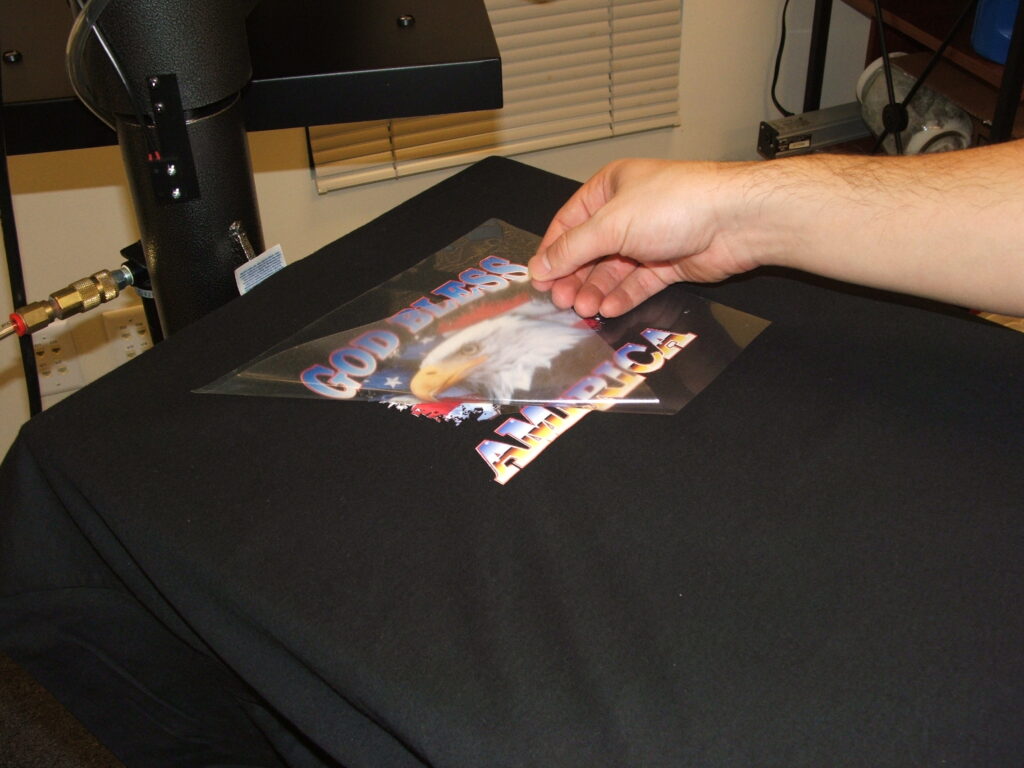
If you’re using a heat press machine, follow the manufacturer’s instructions for the correct temperature, pressure, and duration to transfer the design onto your shirt correctly. A heat press machine can help to ensure that the design is evenly transferred onto the fabric and can be a more efficient method if you’re printing a large number of T-shirts.
Once you’ve transferred your design onto your shirt, allow your shirt to cool for a few minutes, then carefully peel off the transfer paper. If any parts of your design didn’t transfer correctly, you can touch them up with a fabric marker.
Step 5: Final Touch
Finally, wash and dry your shirt according to the transfer paper instructions to set the design. You may want to turn your shirt inside out to protect the design during washing.
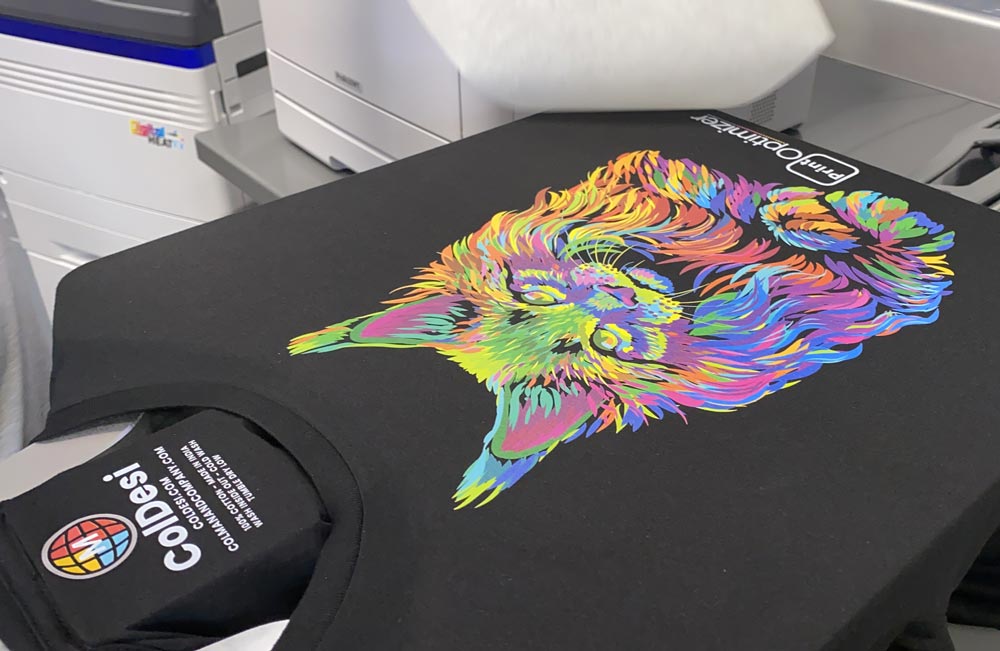
Shirt Ready After Design Transfer |Col Desi
Useful Tips and Tricks
Printing a T-shirt at home can be challenging, but it’s doable if you have the know-how. Here are a few tips and tricks to help you get the best results when printing your own T-shirts at home:
- Use high-quality transfer paper for best results.
- Test your design on a scrap piece of fabric before transferring it onto your shirt.
- Avoid using too much heat when transferring your design, as this can cause the design to crack or fade over time.
- Use a lint roller to remove any stray fibers or debris from your shirt before transferring your design.
- Use a hard surface, like an ironing board or countertop, when transferring your design to ensure even pressure.
Conclusion
Printing your own T-shirts at home is a fun and easy way to express your creativity and showcase your personal style. With just a few supplies and a little bit of know-how, you can create custom T-shirts for yourself or your small business. So why not give it a try? With a little practice, you’ll be printing professional-looking T-shirts in no time!
- Recognizing the importance of a printer’s duty cycle is crucial for choosing a device that matches your print volume needs. Staying within this limit ensures the printer operates efficiently and prolongs its lifespan, minimizing the risk of maintenance issues.
- Proper humidity, temperature, and cleanliness management can significantly enhance printer performance and maintain its duty cycle, preventing unnecessary wear.
- Enhancing a printer with upgrades like additional memory or better mechanical parts can improve its workload handling and extend its practical duty cycle, boosting overall durability and efficiency.
When choosing a new printer, you might come across the term “ duty cycle ” in the specifications. This guide will explain what a duty cycle is, why it matters, and how it can help you choose the right printer. We’ll keep things simple so you can easily understand how to use this information when shopping for a printer.
- Printer Duty Cycle: What It Means and Why It Matters?
- Why the Duty Cycle Is Key to Choosing the Right Printer?
- Duty Cycle vs. Recommended Monthly Print Volume: What’s the Difference?
- What Happens If You Ignore Printer Duty Cycle Recommendations? ↪ Real-World Scenarios: Why Exceeding the Duty Cycle Can Cost You
Printer Duty Cycle: What It Means and Why It Matters?

What is the meaning of Printer Duty Cycle?
The printer duty cycle represents the upper limit of a printer’s capacity—how many pages it can reliably process in a month before the risk of wear or malfunction increases. This figure is crucial for understanding printer performance limits and ensuring that your chosen printer can handle the expected work volume.
Manufacturers determine a printer’s duty cycle through stress testing, where the printer is pushed to its limit to identify how many pages it can produce each month before malfunctioning. These tests help set a reliable performance gateway for users.
A printer’s duty cycle is like a car’s speedometer—you wouldn’t drive a car at top speed all the time, and you shouldn’t push a printer to its maximum duty cycle. Doing so can lead to quicker wear and tear, more frequent maintenance, and a shorter lifespan.
If you’re unsure whether to choose an inkjet or laser printer, this detailed guide compares both options to help you make an informed decision.
Why the Duty Cycle Is Key to Choosing the Right Printer?

The Importance of Duty Cycle in printer selection
Knowing the duty cycle is essential when choosing a printer, as it determines how well the device can handle your monthly print volume without excessive wear or maintenance.
Here is why the duty cycle matters in printer selection:
- Fit for purpose: Selecting a printer with a suitable duty cycle ensures it can handle your monthly printing volume efficiently, reducing stress on its components.
- Longer lifespan and better performance: Staying within the duty cycle ensures optimal print quality and speed while prolonging the printer’s life, avoiding frequent breakdowns.
- Cost efficiency and reduced downtime: Operating within the duty cycle minimizes the need for repairs and reduces operational disruptions, managing long-term costs.
Duty Cycle vs. Recommended Monthly Print Volume: What’s the Difference?

Duty Cycle vs. recommended monthly print volume
The recommended monthly print volume is the optimal number of pages a printer should handle each month for the best performance and longevity. Unlike the maximum capacity indicated by the duty cycle, this number guides regular usage, ensuring the printer operates efficiently without excessive wear.
If your print volume regularly exceeds the recommended amount but stays within the duty cycle, the printer may operate safely in the short term, but it could still experience accelerated wear and reduced lifespan over time.
In such cases, consider upgrading to a higher-capacity printer or spreading print jobs across multiple devices to ensure long-term performance.
Here are the differences between the duty cycle and recommended monthly print volume:
- Duty cycle: Represents the maximum number of pages a printer can handle in a month without breaking down. It assesses the printer’s upper limit.
- Recommended monthly print volume: Suggests a practical, workable number of pages to print each month to keep the printer in good condition over its lifespan.
What Happens If You Ignore Printer Duty Cycle Recommendations?

Consequences of ignoring Duty Cycle recommendations |AndranikHakobyan via Canva
Ignoring the duty cycle limits poses more severe risks than exceeding the recommended monthly print volume, leading to serious long-term consequences.
While exceeding the recommended volume occasionally may result in additional wear and tear, consistently exceeding the duty cycle can lead to frequent breakdowns, reduced performance, and a shortened lifespan.
Ignoring duty cycle limits leads to frequent breakdowns, reduced performance, and increased maintenance, ultimately shortening the printer’s lifespan and causing more frequent operational downtime and higher repair costs. Long-term, pushing a printer beyond its limits leads to greater financial burdens due to premature replacements and inefficiencies.
↪ Real-World Scenarios: Why Exceeding the Duty Cycle Can Cost You
For example, in a busy law firm, overlooking duty cycle limits during a high-stakes period could cause a printer breakdown just before a critical deadline, delaying crucial legal filings and ultimately compromising client service.
For small businesses, consistently exceeding a printer’s duty cycle can lead to costly emergency repairs or premature equipment replacements, straining financial resources.
