- Common Chromebook printing issues include printer incompatibility, network connection problems, and outdated software or firmware.
- Solutions involve checking printer compatibility, ensuring both devices are on the same network, adding the printer manually, updating software, or using a USB connection.
- If issues persist, restart devices, troubleshoot the wireless connection, and update printer firmware; contacting support may be necessary for unresolved problems.
We’ve all been there—you need to print something important, and your Chromebook isn’t cooperating. Don’t worry; you’re not alone. Printing issues with Chromebooks are common but usually easy to fix.

Samsung Chromebook | Unsplash
- Check Printer Compatibility
- Connect Both Devices to the Same Network
- Select Your Printer
- Add Your Printer Manually
- Restart Devices
- Check Printer Settings
- Update Chrome OS
- Update Printer Firmware
- Use a USB Connection (if applicable)
- Troubleshoot Wireless Connection
- Check for Print Quality Issues
- Contact Support
In this guide, we’ll take you through straightforward steps to get your Chromebook working with your printer again. Let’s tackle this together, one step at a time.
But before we get into the solutions, let’s identify some common causes of printing issues on Chromebooks.
- Printer Incompatibility: Chromebooks have built-in drivers that may not be compatible with all printer models. Older printers or those requiring specific drivers may not work.
- Network Connection Problems: Both the Chromebook and printer must be connected to the same Wi-Fi network for wireless printing to work. Issues with the network configuration can prevent successful connections.
- USB Connection Issues: Problems with the USB cable or the USB ports on either device can cause printing failures when using a USB cable.
- Outdated Chrome OS: Running an outdated version of Chrome OS can lead to compatibility issues with printers.
- Outdated Printer Firmware: Older printer firmware may not work well with the latest Chrome OS versions, causing printing problems.

Chromebook Supported Printers by Epson
Now that you know the probable causes, check out the solutions below to fix the issue:
1. Check Printer Compatibility
Before attempting any fixes, ensure your printer is compatible with Chrome OS . Visit your printer manufacturer’s website to find information about your specific printer model and its compatibility with Chrome OS or Chromebook.
You can also check the list of ‘Certified “Works with Chromebook” printers’ on the Chromebook Help forum by Google . If your printer is listed, proceed to the next step. If not, you might need a compatible printer .

List of Printers Compatible with Chromebooks by Google | See Full List onChromebook Help
How This Helps: Ensuring printer compatibility with Chrome OS is crucial, as not all printers work seamlessly with Chromebooks. If incompatible, consider purchasing a different model verified to work with Chrome OS.
2. Connect Both Devices to the Same Network
- Turn on your printer and connect it to your Wi-Fi network. Refer to your printer’s manual for instructions. Connect Your Printer to Wi-Fi | WikiHow
- On your Chromebook, click the time in the bottom right corner to open the quick settings menu. Opening the quick settings menu on your Chromebook by clicking the time in the bottom right corner
- Ensure your Chromebook is connected to the same Wi-Fi network as your printer. If not, click the Wi-Fi icon and select your network. Ensure the Wi-Fi toggle is on and connected to the same network as your printer
How This Helps: Both devices need to be on the same network to communicate effectively. If they’re not, the Chromebook won’t find the printer, leading to printing failures.
3. Select Your Printer
- Press Ctrl + P on your Chromebook to open the print dialog. Press Ctrl + P to open the print dialog on your Chromebook
- In the print dialog, click the “Destination” dropdown and find your printer in the list. Select it and proceed to print. In the print dialog, select your printer from the ‘Destination’ dropdown
- If your printer is not listed, click “See more” at the bottom. If your printer isn’t listed, click ‘See more’ at the bottom
How This Helps: Selecting the correct printer is essential for printing. If the wrong printer is selected, or if the printer is not visible, the print job won’t proceed. This step ensures the Chromebook recognizes and is set to use the correct printer.
4. Add Your Printer Manually
- If your printer is not showing up, click on the time in the bottom right corner to open the quick settings menu. Opening the quick settings menu on your Chromebook by clicking the time in the bottom right corner
- Click the gear icon ⚙️ to open Settings . Open the Settings Menu
- Scroll down and click “Advanced” to expand advanced settings. Click on Advanced
- Under “Printing” , click “Printers” . Click on Printers
- Click on Add Printer icon Click Add Printer Icon
- Enter the following information about your printer: Name: Give your printer a recognizable name. Address: Enter your printer’s IP address. Print a network configuration page from your printer to find this. Protocol: Select “Internet Printing Protocol (IPP)” . Fill in Your Printer Details
- Click “Add” to save the printer settings. Click Add to Save the Printer
How This Helps: Manually adding your printer can resolve issues where automatic detection fails, allowing the Chromebook to communicate with the printer directly using its IP address.
5. Restart Devices
- Turn off your printer and wait for about 30 seconds.
- Turn your printer back on and wait for it to fully power up. Turn off your printer, wait 30 seconds, then turn it back on and wait for it to fully power up | WikiHow
- On your Chromebook, click the time in the bottom right corner and select “Sign out” . Click the time and select ‘Sign out’
- Sign back in to your Chromebook and check if the printer is now recognized.
How This Helps: Restarting both devices can clear temporary glitches or connectivity issues. This simple step often resolves many common problems.
6. Check Printer Settings
- Click the time in the bottom right corner and select the gear icon ⚙️ to open Settings . Open the Settings Menu
- Scroll down and click “Advanced” to expand advanced settings. Click on Advanced
- Under “Printing” , click “Printers” . Click on Printers
- Ensure that your printer is listed correctly with the right name and IP address.
- If necessary, remove the printer by clicking on the three-dot menu next to it and selecting “Remove” .
- Add the printer again manually using the steps in Section 4 .
How This Helps: Verifying and correcting printer settings ensures that the Chromebook is properly configured to communicate with the printer. Discrepancies in the printer name or IP address can lead to connection issues.
7. Update Chrome OS
- Click the time in the bottom right corner and select the gear icon ⚙️ to open Settings . Open the Settings Menu
- Scroll down and click “About Chrome OS” . Click ‘About Chrome OS’
- Click “Check for updates” . Click on ‘Check for Updates’
- If an update is available, it will start downloading automatically. Once downloaded, click “Restart” to install the update.
How This Helps: Keeping Chrome OS updated ensures you have the latest features, bug fixes, and compatibility improvements. Updates can resolve issues affecting printing functionality.
8. Update Printer Firmware
- Visit your printer manufacturer’s website and search for your specific printer model.
- Look for a “Support” or “Downloads” section and find the latest firmware update for your printer.
- Follow the instructions provided by the manufacturer to download and install the firmware update on your printer.

Canon G1330 Support Page
How This Helps: Printer firmware updates can fix bugs and improve compatibility with newer operating systems, including Chrome OS. This is essential for ensuring that your printer functions correctly with your Chromebook.
9. Use a USB Connection (if applicable)
- Ensure your printer is turned on and ready to print.
- Connect your printer to your Chromebook using a USB cable.
- A notification should appear on your Chromebook, asking if you want to set up the printer. Click “Set up” to proceed.
- Follow the on-screen instructions to complete the USB printer setup.

Connect your Chromebook to the printer via USB | WikiHow
How This Helps: Using a USB connection can bypass network issues entirely, allowing you to print directly from your Chromebook. This method is often more reliable when wireless connections fail .
10. Troubleshoot Wireless Connection
- On your printer, ensure Wi-Fi is enabled and connected to the correct Wi-Fi network.
- Power cycle your printer by turning it off, waiting for 30 seconds , and then turning it back on.
- Power cycle your Wi-Fi router by unplugging it from the power source, waiting for 30 seconds , and then plugging it back in.
- Wait for the router to fully power up and reconnect your Chromebook and printer to the Wi-Fi network.

Power Cycle Your Wi-Fi Router
How This Helps: Troubleshooting the wireless connection ensures that both devices are properly connected to the network. This can resolve issues caused by network interruptions or misconfigurations.
11. Check for Print Quality Issues
- Check the ink or toner levels in your printer. Replace any cartridges that are low or empty.
- Clean the printer heads by following the instructions in your printer’s manual. This can help resolve issues with blurry or faded prints.
- Run a test print from your printer to ensure that the print quality is satisfactory.

Check your printer’s ink or toner levels
How This Helps: Addressing print quality issues ensures that your documents print clearly and correctly. Low ink or clogged print heads can lead to poor print results, which may be mistaken for connectivity problems .
12. Contact Support
If the steps above didn’t fix the printing issue on your Chromebook, don’t stress. You can always reach out to your printer’s customer support—they might have more specific tips based on your printer model. If you’re still stuck, try posting your problem on the Chromebook Help Forum or contact Google support for extra help.

Chromebook Help
Follow these solutions, and you should fix most printing problems on your Chromebook. Ensure your printer and Chromebook are compatible, double-check that everything’s connected to the same network, keep your software updated , and if all else fails, try connecting in a different way. You’ve got this!
If your printer shows as “offline,” first check if it is powered on and connected to the same network as your Chromebook. Restart both the printer and Chromebook. If it’s still offline, try unplugging the printer for a minute, then plug it back in. Also, check the printer’s network settings to ensure it is connected to the correct Wi-Fi network.
If you can print some documents but not others, the issue may be related to the specific file type or format. For example, PDFs can sometimes have compatibility issues. Try opening the document in a different application or converting it to another format. Other than that, check the printer settings to ensure they are configured correctly for the document type.
To clear the print queue, open the Chrome browser and type chrome://devices in the address bar. Under the “Printers” section, find your printer and click “Manage.” From there, you can clear the print queue by selecting “Clear spooler.” This can help resolve issues with stuck print jobs.
If your printer is connected but won’t print, check for any error messages on the printer itself. Ensure that there are no paper jams, and that ink or toner levels are sufficient. Restart both the printer and Chromebook, and verify that the correct printer is selected in the print dialog. If the problem persists, consider updating your printer firmware.
Yes, you can print from a Chromebook without a Wi-Fi connection by using a USB cable to connect the printer directly to the Chromebook. This method allows you to bypass network issues and print directly from your device.
How to Fix “Printer is in an error state” Issue?
- Common Chromebook printing issues include printer incompatibility, network connection problems, and outdated software or firmware.
- Solutions involve checking printer compatibility, ensuring both devices are on the same network, adding the printer manually, updating software, or using a USB connection.
- If issues persist, restart devices, troubleshoot the wireless connection, and update printer firmware; contacting support may be necessary for unresolved problems.
We’ve all been there—you need to print something important, and your Chromebook isn’t cooperating. Don’t worry; you’re not alone. Printing issues with Chromebooks are common but usually easy to fix.
Samsung Chromebook | Unsplash
- Check Printer Compatibility
- Connect Both Devices to the Same Network
- Select Your Printer
- Add Your Printer Manually
- Restart Devices
- Check Printer Settings
- Update Chrome OS
- Update Printer Firmware
- Use a USB Connection (if applicable)
- Troubleshoot Wireless Connection
- Check for Print Quality Issues
- Contact Support
In this guide, we’ll take you through straightforward steps to get your Chromebook working with your printer again. Let’s tackle this together, one step at a time.
But before we get into the solutions, let’s identify some common causes of printing issues on Chromebooks.
- Printer Incompatibility: Chromebooks have built-in drivers that may not be compatible with all printer models. Older printers or those requiring specific drivers may not work.
- Network Connection Problems: Both the Chromebook and printer must be connected to the same Wi-Fi network for wireless printing to work. Issues with the network configuration can prevent successful connections.
- USB Connection Issues: Problems with the USB cable or the USB ports on either device can cause printing failures when using a USB cable.
- Outdated Chrome OS: Running an outdated version of Chrome OS can lead to compatibility issues with printers.
- Outdated Printer Firmware: Older printer firmware may not work well with the latest Chrome OS versions, causing printing problems.
Chromebook Supported Printers by Epson
Now that you know the probable causes, check out the solutions below to fix the issue:
1. Check Printer Compatibility
Before attempting any fixes, ensure your printer is compatible with Chrome OS . Visit your printer manufacturer’s website to find information about your specific printer model and its compatibility with Chrome OS or Chromebook.
You can also check the list of ‘Certified “Works with Chromebook” printers’ on the Chromebook Help forum by Google . If your printer is listed, proceed to the next step. If not, you might need a compatible printer .
List of Printers Compatible with Chromebooks by Google | See Full List onChromebook Help
How This Helps: Ensuring printer compatibility with Chrome OS is crucial, as not all printers work seamlessly with Chromebooks. If incompatible, consider purchasing a different model verified to work with Chrome OS.
2. Connect Both Devices to the Same Network
- Turn on your printer and connect it to your Wi-Fi network. Refer to your printer’s manual for instructions. Connect Your Printer to Wi-Fi | WikiHow
- On your Chromebook, click the time in the bottom right corner to open the quick settings menu. Opening the quick settings menu on your Chromebook by clicking the time in the bottom right corner
- Ensure your Chromebook is connected to the same Wi-Fi network as your printer. If not, click the Wi-Fi icon and select your network. Ensure the Wi-Fi toggle is on and connected to the same network as your printer
How This Helps: Both devices need to be on the same network to communicate effectively. If they’re not, the Chromebook won’t find the printer, leading to printing failures.
3. Select Your Printer
- Press Ctrl + P on your Chromebook to open the print dialog. Press Ctrl + P to open the print dialog on your Chromebook
- In the print dialog, click the “Destination” dropdown and find your printer in the list. Select it and proceed to print. In the print dialog, select your printer from the ‘Destination’ dropdown
- If your printer is not listed, click “See more” at the bottom. If your printer isn’t listed, click ‘See more’ at the bottom
How This Helps: Selecting the correct printer is essential for printing. If the wrong printer is selected, or if the printer is not visible, the print job won’t proceed. This step ensures the Chromebook recognizes and is set to use the correct printer.
4. Add Your Printer Manually
- If your printer is not showing up, click on the time in the bottom right corner to open the quick settings menu. Opening the quick settings menu on your Chromebook by clicking the time in the bottom right corner
- Click the gear icon ⚙️ to open Settings . Open the Settings Menu
- Scroll down and click “Advanced” to expand advanced settings. Click on Advanced
- Under “Printing” , click “Printers” . Click on Printers
- Click on Add Printer icon Click Add Printer Icon
- Enter the following information about your printer: Name: Give your printer a recognizable name. Address: Enter your printer’s IP address. Print a network configuration page from your printer to find this. Protocol: Select “Internet Printing Protocol (IPP)” . Fill in Your Printer Details
- Click “Add” to save the printer settings. Click Add to Save the Printer
How This Helps: Manually adding your printer can resolve issues where automatic detection fails, allowing the Chromebook to communicate with the printer directly using its IP address.
5. Restart Devices
- Turn off your printer and wait for about 30 seconds.
- Turn your printer back on and wait for it to fully power up. Turn off your printer, wait 30 seconds, then turn it back on and wait for it to fully power up | WikiHow
- On your Chromebook, click the time in the bottom right corner and select “Sign out” . Click the time and select ‘Sign out’
- Sign back in to your Chromebook and check if the printer is now recognized.
How This Helps: Restarting both devices can clear temporary glitches or connectivity issues. This simple step often resolves many common problems.
6. Check Printer Settings
- Click the time in the bottom right corner and select the gear icon ⚙️ to open Settings . Open the Settings Menu
- Scroll down and click “Advanced” to expand advanced settings. Click on Advanced
- Under “Printing” , click “Printers” . Click on Printers
- Ensure that your printer is listed correctly with the right name and IP address.
- If necessary, remove the printer by clicking on the three-dot menu next to it and selecting “Remove” .
- Add the printer again manually using the steps in Section 4 .
How This Helps: Verifying and correcting printer settings ensures that the Chromebook is properly configured to communicate with the printer. Discrepancies in the printer name or IP address can lead to connection issues.
7. Update Chrome OS
- Click the time in the bottom right corner and select the gear icon ⚙️ to open Settings . Open the Settings Menu
- Scroll down and click “About Chrome OS” . Click ‘About Chrome OS’
- Click “Check for updates” . Click on ‘Check for Updates’
- If an update is available, it will start downloading automatically. Once downloaded, click “Restart” to install the update.
How This Helps: Keeping Chrome OS updated ensures you have the latest features, bug fixes, and compatibility improvements. Updates can resolve issues affecting printing functionality.
8. Update Printer Firmware
- Visit your printer manufacturer’s website and search for your specific printer model.
- Look for a “Support” or “Downloads” section and find the latest firmware update for your printer.
- Follow the instructions provided by the manufacturer to download and install the firmware update on your printer.
Canon G1330 Support Page
How This Helps: Printer firmware updates can fix bugs and improve compatibility with newer operating systems, including Chrome OS. This is essential for ensuring that your printer functions correctly with your Chromebook.
9. Use a USB Connection (if applicable)
- Ensure your printer is turned on and ready to print.
- Connect your printer to your Chromebook using a USB cable.
- A notification should appear on your Chromebook, asking if you want to set up the printer. Click “Set up” to proceed.
- Follow the on-screen instructions to complete the USB printer setup.
Connect your Chromebook to the printer via USB | WikiHow
How This Helps: Using a USB connection can bypass network issues entirely, allowing you to print directly from your Chromebook. This method is often more reliable when wireless connections fail .
10. Troubleshoot Wireless Connection
- On your printer, ensure Wi-Fi is enabled and connected to the correct Wi-Fi network.
- Power cycle your printer by turning it off, waiting for 30 seconds , and then turning it back on.
- Power cycle your Wi-Fi router by unplugging it from the power source, waiting for 30 seconds , and then plugging it back in.
- Wait for the router to fully power up and reconnect your Chromebook and printer to the Wi-Fi network.
Power Cycle Your Wi-Fi Router
How This Helps: Troubleshooting the wireless connection ensures that both devices are properly connected to the network. This can resolve issues caused by network interruptions or misconfigurations.
11. Check for Print Quality Issues
- Check the ink or toner levels in your printer. Replace any cartridges that are low or empty.
- Clean the printer heads by following the instructions in your printer’s manual. This can help resolve issues with blurry or faded prints.
- Run a test print from your printer to ensure that the print quality is satisfactory.
Check your printer’s ink or toner levels
How This Helps: Addressing print quality issues ensures that your documents print clearly and correctly. Low ink or clogged print heads can lead to poor print results, which may be mistaken for connectivity problems .
12. Contact Support
If the steps above didn’t fix the printing issue on your Chromebook, don’t stress. You can always reach out to your printer’s customer support—they might have more specific tips based on your printer model. If you’re still stuck, try posting your problem on the Chromebook Help Forum or contact Google support for extra help.
Chromebook Help
Follow these solutions, and you should fix most printing problems on your Chromebook. Ensure your printer and Chromebook are compatible, double-check that everything’s connected to the same network, keep your software updated , and if all else fails, try connecting in a different way. You’ve got this!
If your printer shows as “offline,” first check if it is powered on and connected to the same network as your Chromebook. Restart both the printer and Chromebook. If it’s still offline, try unplugging the printer for a minute, then plug it back in. Also, check the printer’s network settings to ensure it is connected to the correct Wi-Fi network.
If you can print some documents but not others, the issue may be related to the specific file type or format. For example, PDFs can sometimes have compatibility issues. Try opening the document in a different application or converting it to another format. Other than that, check the printer settings to ensure they are configured correctly for the document type.
To clear the print queue, open the Chrome browser and type chrome://devices in the address bar. Under the “Printers” section, find your printer and click “Manage.” From there, you can clear the print queue by selecting “Clear spooler.” This can help resolve issues with stuck print jobs.
If your printer is connected but won’t print, check for any error messages on the printer itself. Ensure that there are no paper jams, and that ink or toner levels are sufficient. Restart both the printer and Chromebook, and verify that the correct printer is selected in the print dialog. If the problem persists, consider updating your printer firmware.
Yes, you can print from a Chromebook without a Wi-Fi connection by using a USB cable to connect the printer directly to the Chromebook. This method allows you to bypass network issues and print directly from your device.
Keeping your printer drivers up to date is crucial for smooth printing operations and to take advantage of new features and bug fixes. In this guide, we will explore the best places to obtain the latest printer drivers, considering different scenarios and providing you with detailed options. Let’s dive in and discover the ideal sources for obtaining the latest printer driver.
The Best Places to Find the Latest Printer Driver.
In the following sections, we will explore the best places to obtain the latest printer driver , catering to various scenarios and providing detailed options for obtaining the most up-to-date software.
1: Printer Manufacturer’s Official Website
The first and most reliable source for obtaining the latest printer driver is the official website of the printer manufacturer . Reputable printer manufacturers maintain dedicated support sections on their websites, providing access to the latest drivers and software for their printers. Here’s how you can obtain the latest driver from the manufacturer’s website:
- Visit the official website of your printer manufacturer.
- Look for the “Support” or “Drivers” section on the website. Look for the “Support” or “Drivers” section on the website.
- Locate your printer model by entering the model number or navigating through the product categories.
- Once you find your printer model, you will typically find a list of available driver s for different operating systems.
- Select the driver compatible with your operating system and click on the download link. Select the driver compatible with your operating system and click on the download link.
- Follow the provided instructions to install the driver on your computer.
Downloading drivers from the manufacturer’s official website ensures that you have the genuine software specifically designed for your printer model. It provides a reliable and trusted source for obtaining the latest printer driver.
2: Operating System Updates
Operating systems like Windows, macOS, and Linux often include a database of drivers for various hardware devices, including printers . These operating systems periodically release updates that may include the latest printer drivers. Here’s how you can check for printer driver updates through your operating system:
- Windows: On Windows, you can access printer driver updates through the Windows Update feature. Go to the “Settings” menu, select “Update & Security”. and click on “Windows Update”. Windows will automatically search for available updates, including printer driver updates. If any printer driver updates are found, they will be listed for installation . Go to Windows Update to update ur printer drivers on Windows.
- macOS: macOS provides updates for printer drivers through the “Software Update” feature. Click on the Apple menu, select “System Preferences”. and choose “Software Update”. If there are any printer driver updates available, they will be displayed for installation.
- Linux: Linux distributions often have dedicated package managers or software update utilities that handle driver updates. Depending on your Linux distribution, you can use the respective package manager or software update utility to check for printer driver updates. Refer to the documentation or support resources for your specific Linux distribution for more information.
By keeping your operating system updated, you can ensure that you have the latest printer driver provided by the operating system manufacturer.
3: Dedicated Driver Download Websites
If you are unable to find the necessary driver from the printer manufacturer’s website or through operating system updates, there are dedicated driver download websites that can serve as an alternative source . These websites collect and provide drivers for various devices, including printers. However, it is important to exercise caution when using third-party websites. Here are a few reputable driver download websites:
- Driver Guide : Driver Guide offers a vast collection of drivers, including printer drivers. They provide a user-friendly interface, detailed driver information, and instructions for installation .
- Driver Pack Solution : Driver Pack Solution is a comprehensive driver update tool that can automatically detect and install the latest printer drivers . It simplifies the driver update process and ensures you have the most up-to-date drivers for your devices.
- Softpedia : Softpedia is a trusted software and driver download website that hosts a wide range of printer drivers. They ensure the drivers available for download are free from malware and provide user reviews and ratings for additional guidance.
When using dedicated driver download websites, always verify the source, read user reviews, and ensure that the website is trustworthy. Exercise caution to avoid downloading drivers from unreliable sources that may contain malware or outdated drivers.
In conclusion, ensuring that you have the latest printer driver is essential for optimal performance and compatibility. Whether you choose to obtain the driver from the printer manufacturer’s official website, rely on operating system updates, explore dedicated driver download websites, or use automatic driver update software, it is important to prioritize reliability, compatibility, and ease of installation. By obtaining the latest printer driver, you can ensure smooth printing operations and take advantage of new features and bug fixes .
It is recommended to check for printer driver updates periodically, such as every few months or when you encounter compatibility or performance issues. Keeping your drivers up to date ensures optimal printing functionality.
While some third-party driver download websites are reputable, it is important to exercise caution. Verify the source, read user reviews, and ensure that the website is trustworthy before downloading drivers.
In most cases, the new driver installation will automatically replace the old one. However, if you encounter any issues, it is recommended to uninstall the old driver first before installing the latest version.
Generic printer drivers can provide basic functionality, but it is best to use the specific drivers designed for your printer model. Generic drivers may lack certain features or optimizations.
Updating printer drivers ensures compatibility with the latest operating systems and applications, improves performance, fixes bugs, and introduces new features.
Even though the digital age is upon us, we’re still at the frontier, so there are going to be times where we still need to produce paper-based copies of certain documents. Or, even better, you might need to make certain documents digitally. For both of these scenarios, an all-in-one wireless printer will get the job done – if you know how to configure it under Windows 11, that is.
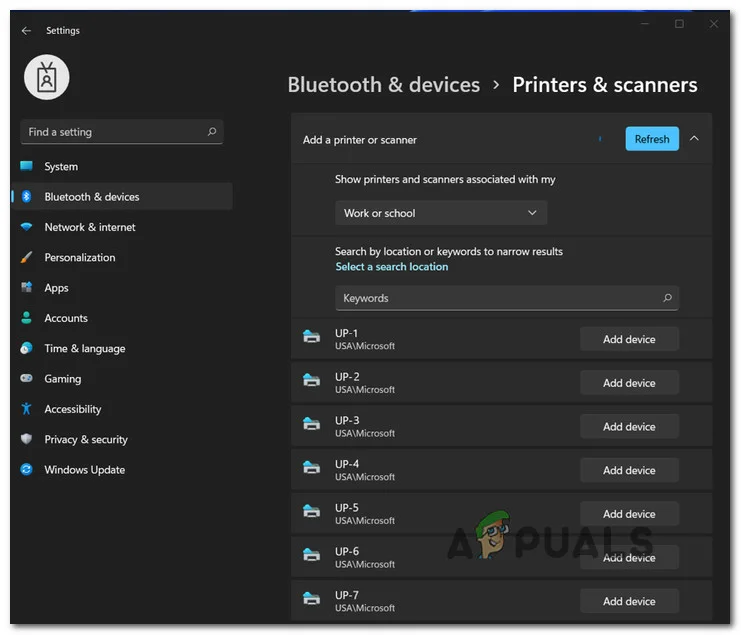
Setting up a wireless printer on Windows 11
If you’re on Windows 11 and currently scratching your head on how to connect and configure your wireless printer, this article will walk you through the whole thing. You shouldn’t feel bad either, as Microsoft has changed some things around, making the initial connection to a wireless printer a bit harder than it used to be.
As it turns out, there are actually two different ways of connecting a wireless printer to Windows 11:
- Utilizing the supporting software
- Connecting the printer directly via the Printers & Scanners tab
We’re going to follow both scenarios, so feel free to follow whichever guide you feel most comfortable with:
IMPORTANT: Both of these guides will assume that you’re just unpacking a new wireless printer and you need to connect it to your home or work environment. Also, the outlined steps are general, so depending on the printer manufacturer or model, the information provided below might not be applicable to your current setup. Don’t rely on these guides alone – consult the user manual provided by the manufacturer of your printer.
Initial Setup
- First things first, unbox your printer and make sure to put the important components on the side. These include power cables, ink cartridges, and the user manual. Configure the Wireless Printer on Windows 11
- Next, connect the power cable to a power outlet, then press the power button on your printer to switch it on. Power on your printer
- Once your printer is powered on, it’s time to take care of your cartridges. Of course, our recommendation is to install them according to the manufacturer’s instructions. But as for some general guidelines, make sure you remove the protective tape before sliding them in. Inserting the printer cartridges correctly Note: Make sure to install the color and the black in the cartridge in the correct bays. Almost all printers provide clear illustrations on which is which, so pay attention to the icons.
- Once the two cartridges are installed correctly, close the cartridge bay and move over to the Windows 11 computer and pick one from the following guides below.
Connect Wireless printer via supporting software
Most printers will have some kind of supporting software that you’ll need to install (especially for wireless printers). However, most of the major players in the printers sector will have the supporting software available inside the Microsoft Store.

Downloading the supporting software
Note: HP has HP Smart, Canon has Office Printer and Lexmark has Printer Home . But keep in mind that there are different variations of these supporting software for different printer models, so it’s best to consult your user manual before downloading the supporting software.
- Access the Microsoft Store or download the supporting software developed by your printer manufacturer from the official website.
- Once the download of the supporting application is complete, launch it and follow the on-screen instructions to install the printer and update its firmware to the latest . Connecting the printer Note: In case you get some sort of an error when installing the software, make sure your printer is turned on and connected to the same network as your Windows 11 PC.
- Once you get a message on the screen saying that the wireless printer has been detected, you should be taken to an installation wizard to carry over the remainder of the steps. Installing the printer
- After you successfully manage to configure the printer, all that’s left to be done at this point is to configure it as the default choice. This is done from the Printers & Scanners tab . Follow the instructions below to get there.
- Press Windows key + I to open up the Settings menu on Windows 11.
- Next, access the Bluetooth & devices tab from the menu on the left, then click on Printers & scanners from the menu on the right. Accessing the Printers and Scanners pane Note: If the vertical menu on the left is invisible by default, click on the action button in the top-left corner of the screen.
- Finally, identify your printer under Printers & Scanners and set it as the default choice.
Connect Wireless Printer via the Printers and Scanners tab
If you’re using a printer model that doesn’t come with supporting software or you’re just a fan of doing things the techy way under Windows, there are also some advanced steps of connecting a wireless printer under Windows 11.
This method involves connecting your wireless printer via the Printers & scanners tab inside the Settings menu. To do this, you’ll need to fetch the WPS pin from the back/bottom of your printer (full instructions below).
Note: The instructions below might not work for certain wireless printer models. A good indication of either this method will work or not is to check the bottom or back of your printer and see if you find the WPS pin or key.
Follow the instructions below to connect your Wireless printer via the Printers and Scanners tab on Windows 11:
- First things first, you need to put your wireless printer into pairing mode . This will be different from model to model, but in most cases, it’s a combination of button presses (like pressing the wireless and cancel button at the same time) Putting the printer in pairing mode Note: If you don’t know how to put your printer into pairing mode, check the user manual for specific instructions in doing so.
- Once you manage to make your wireless printer show up under Windows 11, press Windows key + I to open up the Settings menu.
- Inside the Settings menu, access the Bluetooth & other devices tab from the menu on the left, then click on Printers & Scanners from the menu on the left. Accessing the Printers and Scanners pane Note: If the vertical pane on the left is not visible by default, click on the action button (top-left corner).
- Once you’re inside the Printers & scanners tab, click on Add devices (under Add printers & scanners ).
- You’ll then be prompted to insert the WPS PIN – you can typically find it by looking on the back or bottom of your printer. Discovering the WPS pin
- After you find your WPS PIN key, insert it in the prompt and hit Next to establish the connection.

Inserting the WPS PIN
Embarking on the journey of 3D printing is both exciting and, at times, a bit daunting. Thankfully, this innovative technology has become considerably accessible, allowing users to convert digital designs into real-world objects. For 2024, a wide selection of 3D printers is designed specifically for beginners.

This guide offers genuine recommendations whether you are an educator, an entrepreneur working on prototypes, or a hobbyist pushing creative boundaries, to help establish a solid base for your 3D printing endeavors. But before we dive into these top picks, let’s explore what makes a 3D printer truly outstanding. Here’s a breakdown of the key considerations based on specific needs and applications.
Print Quality: Focus on obtaining high-quality prints first and foremost. Opt for a printer that generates detailed, clean, and precise prints, as these are crucial for any printing project. Elements such as resolution, measured in microns, play a role; a lower micron count results in a higher resolution. Furthermore, the layer height is pivotal, with thinner layers yielding finer details. While faster speeds can reduce print time, they might affect print quality, hence balancing speed and quality is key.
Build Volume: The build volume dictates the maximum size of objects you can print. Choose a printer with a build volume that aligns with your intended print sizes.
Reliability and Durability: A dependable 3D printer should consistently produce quality prints and remain durable over time. Prioritize printers with robust construction and reliable components.
Ease of Use: For beginners and those desiring easy printing, prioritize features that enhance usability. Look for elements like a user-friendly interface, perhaps via touchscreens or intuitive software. Automatic bed leveling diminishes the necessity for manual calibration, streamlining the process. Additionally, filament sensors are handy for notifying users about low filament levels or if issues arise during printing.
Material Compatibility: Projects may require diverse materials. Top 3D printers support multiple filaments like PLA, ABS, PETG, and specialized filaments such as flexible or composite variants.
Connectivity: Depending on your setup, connection options for your printer may include USB , SD card, Wi-Fi , or Ethernet. Some models even offer remote monitoring and control via apps.
Software: The software included with the printer, or compatible options, should smoothly translate designs into printable files. Look for slicer software balancing user-friendliness with advanced features.
Safety Features: Safety is paramount, particularly in educational settings or around children. Consider printers with enclosed areas for temperature regulation and burn prevention. Furthermore, HEPA filters reduce potentially harmful particle emissions, enhancing operational safety.
Support and Community: Having a strong user community and excellent customer support is invaluable, especially for troubleshooting and learning how to use your printer.
Price: Lastly, consider the cost. The best printer for you balances these factors with your budget.
Here, we have intricately curated a list of the best 3D printers for beginners. So, let’s get started.
1. Creality Ender 3 V2 Neo
Best Value
Pros
- Auto-Leveling
- Improved Extruder System
- Removable Build Plate
- Print Resume Feature
Cons
- No Touchscreen
- Print Speed Limitations
- No Double Z-Axis
- Bare-Bones Appearance
No products found.
No products found.
The Creality Ender 3 V2 Neo combines accessibility with precision, designed to make 3D printing approachable without sacrificing quality. This model exemplifies Creality ‘s dedication to innovation, incorporating a CR Touch auto-leveling system for perfect layering. The printer features a PC steel printing platform, delivering strong adhesion and a smooth foundation for creations.
Its all-metal Bowden extruder ensures durability and stable performance, suitable for both beginners and experienced users. This upgraded version of the well-known Ender 3 V2 model is crafted with user-friendliness and print quality in focus. It comes 95% pre-installed, facilitating an easy setup.

Creality Ender 3 V2 Neo
The addition of the CR Touch auto-leveling kit significantly improves leveling accuracy, while the PC steel platform and all-metal Bowden extruder support its dependability and longevity.
↪Pros
- Auto-Leveling: The CR Touch auto-leveling feature performs excellently, simplifying the process for beginners by negating manual leveling challenges.
- Improved Extruder System: Enhanced with metal construction, the extruder system boosts the printer’s performance and durability.
- Removable Build Plate: The removable build plate eases print removal, preventing damage caused by overly adhered prints.
- Print Resume Feature: The print resume feature saves progress during power outages, allowing for a smooth continuation once power is restored.
↪Cons
- No Touchscreen: Despite its improvements, the Ender 3 V2 Neo lacks a touchscreen interface, which could enhance user experience.
- Print Speed Limitations: Higher speeds (around 120mm/s) may result in reduced print quality, indicating an optimization for moderate speeds.
- No Double Z-Axis: Missing a double Z-axis, the printer might not offer the maximum stability and precision that some users seek.
- Bare-Bones Appearance: Some might find the Ender 3 V2 Neo’s design quite basic, lacking the aesthetic appeal found in other models.
This printer is part of Creality’s initiative to make 3D printing more accessible and user-friendly while incorporating features catering to advanced users. It strikes a balance between usability and performance, making it a suitable choice for many 3D printing enthusiasts.
2. Original Prusa i3 MK3S+
Best Overall
Pros
- High-Quality Prints
- User-Friendly Software
- Good Support Resources
- Included PLA Spool
Cons
Build Volume
No Built-In 3D Scanner
Dated Interface
Price
The Original Prusa i3 MK3S+ symbolizes continuous innovation, reflecting years of meticulous enhancement to provide superior print quality and reliability in 3D printing. A key feature is the SuperPINDA probe, which ensures meticulous first-layer calibration, paving the way for flawless prints. Its advanced extruder is engineered to handle filament smoothly and adapt seamlessly to various types, ensuring hassle-free printing.
More than a tool, this printer opens a world of precision and limitless possibilities, built upon Prusa’s lasting dedication to quality. As an evolution from the MK3S , the MK3S+ introduces enhancements while preserving the reputable Prusa i3 series’ legacy.
Original Prusa i3 MK3S+
Additionally, the integrated filament sensor detects any filament type or color, enhancing its functionality. Retaining its direct drive system, the MK3S+ remains notably advantageous for printing flexible materials, lending versatility to a broad spectrum of printing requirements.
↪Pros
- High-Quality Prints: The MK3S+ consistently delivers high-quality prints without errors, demonstrating its dependability.
- User-Friendly Software: The printer is accompanied by easy-to-use yet powerful software that supports multiple filament types.
- Good Support Resources: Prusa offers a professionally printed user guide and excellent support materials for the MK3S+.
- Included PLA Spool: A 1-kilogram PLA spool is included with the MK3S+, a beneficial bonus for beginners.
↪Cons
- Build Volume: The build volume might be slightly small for the price, which could limit larger projects.
- No Built-In 3D Scanner: The MK3S+ lacks a built-in 3D scanner, unlike some other models.
- Dated Interface: The LCD screen and interface are somewhat outdated compared to more current 3D printers.
- Price: Although the MK3S+ is a robust printer, some users may feel it doesn’t justify the cost considering market alternatives.
The Original Prusa i3 MK3S+ remains popular in the 3D printing community for its consistent performance and Prusa’s commitment to open-source development. It strikes a balance between ease of use and advanced capabilities for both enthusiasts and professionals.
3. Bambu Lab P1P
Best Speed
Pros
- Blazing Speed
- Simple Auto Bed Leveling
- DIY Custom Side Panels
- Optional Multicolor Capabilities
Cons
Appearance
Noise Level
Proprietary Parts
Filament Wastage
The Bambu Lab P1P excels in speed, characterized by a robust CoreXY framework engineered for rapid printing results. Ready for action from the start, this printer features a direct drive extruder and an all-metal hot end, accommodating various filament types.
Its automatic bed leveling sensor ensures a perfect first layer is effortlessly achieved, enabling prints that are both swift and visually appealing. Bambu Lab’s creation emphasizes not just speed but also reliability and versatility. The P1P offers a spacious build volume of 256 x 256 x 256 mm , coupled with impressive speeds reaching 500 mm/s and an acceleration of 20,000 mm/s .
Its direct drive extruder and high-temperature hot end facilitate printing with various filaments, including PLA, PETG , and TPU .
Additionally, the P1P is designed with future enhancements in mind, being compatible with Bambu Lab’s Automatic Material System (AMS) for multicolor printing, and can be further customized with printable mod plates, adding layers of flexibility to meet changing needs.
↪Pros
- Blazing Speed: A key highlight is the P1P’s speed, which facilitates rapid printing without compromising quality.
- Simple Auto Bed Leveling: The auto bed leveling streamlines the printing process, particularly advantageous for beginners.
- DIY Custom Side Panels: Customizable side panels add a degree of personalization.
- Optional Multicolor Capabilities: Utilizing the AMS unit, the P1P supports multicolor prints, enhancing creative opportunities.
↪Cons
- Appearance: The P1P’s “naked” design may not appeal to everyone as it lacks side panels.
- Noise Level: The printer can be loud in operation, which may be a concern for certain settings.
- Proprietary Parts: Using proprietary parts can increase maintenance and upgrade costs.
- Filament Wastage: The AMS unit can lead to filament wastage, affecting cost-efficiency.
The Bambu Lab P1P is appealing to those seeking speed, reliability, and customization with the flexibility to adapt to various needs.
4. Anycubic Kobra Max
Best for Large Prints
Pros
- Enormous Build Size
- Accurate Auto Bed Leveling
- Convenient Build Plate
- Comprehensive Kit
Cons
Large Footprint
Bed Slinger Design
No Larger Nozzle Included
Slow Printing
The Anycubic Kobra Max is a powerhouse in 3D printing, offering an impressive build volume that allows creators to manifest large-scale concepts. With its responsive touchscreen and remarkable printing speed, the Kobra Max distinguishes itself in FDM printing.
Its robust frame and automatic bed leveling offer stability and precision, making it a preferred choice for tackling substantial projects. Designed for hobbyists, enthusiasts, and professionals, the Anycubic Kobra Max boasts a large build volume of 400 x 400 x 450 mm , perfect for ambitious prints. The 4.3-inch LCD touchscreen simplifies navigation and operation.
Anycubic Kobra Max
With a maximum printing speed of 180mm/s , faster than many rivals, it ensures swift progress without sacrificing quality, supported by its solid aluminum frame for continuous stability and precision.
↪Pros
- Enormous Build Size: Ideal for large prints like props and costumes, accomplishing projects in a single run.
- Accurate Auto Bed Leveling: The auto leveling yields precise results, simplifying usage.
- Convenient Build Plate: The coated glass bed facilitates easy print releases as they cool.
- Comprehensive Kit: It comes with essential tools and a PLA sample to start off immediately.
↪Cons
- Large Footprint: The significant size requires ample space to operate effectively.
- Bed Slinger Design: The design might be a drawback for some users.
- No Larger Nozzle Included: Lacking a larger nozzle, which can expedite larger prints.
- Slow Printing: Despite a high maximum speed, actual printing can be slow.
The Anycubic Kobra Max offers a budget-friendly solution for those requiring significant build volume, prized for automatic bed leveling and touchscreen interface. However, consider the large size and slower operation pace.
5. Toybox 3D Printer
Best for Newbies/Children
Pros
- Ease of Use
- Creative Freedom
- Kid-Friendly Design
- Educational Value
Cons
Small Build Area
Internet Dependency
Unheated Bed
Proprietary Filament
The Toybox 3D Printer introduces a delightful touch of innovation, sparking creativity for both kids and adults. Its compact, intuitive design reshapes play by allowing users to easily design and print toys. With a simple, user-friendly interface, the Toybox invites everyone into the realm of 3D printing, serving as an ideal gateway for young enthusiasts.
Featuring a modest build volume of 7 x 8 x 9 cm , perfect for small hands and big imaginations, the Toybox operates at a pace of 60 mm/s with a resolution of 200 microns , ensuring precise toy reproduction. The 4mm Smooth-Flow Extruder Head and Easy-Peel bed simplify the printing experience, eliminating complexities.
Toybox 3D Printer
Compatible with STL, OBJ , and gCode formats, and offering easy connectivity via 2.4GHz Wi-Fi , sending designs from your smartphone or tablet is seamless. The Toybox puts the magic of creation at your fingertips.
↪Pros
- Ease of Use: Known for reliable, misprint-free performance and one-touch operation, ideal for kids and beginners.
- Creative Freedom: Access to more than 2,000 printable toys and crafting your own designs expands imaginative possibilities.
- Kid-Friendly Design: The robust all-metal frame features rounded edges, safe and easy enough for children to operate with minimal supervision.
- Educational Value: Introduces children to 3D printing and design basics, fostering creativity and problem-solving skills.
↪Cons
- Small Build Area: The build area may limit the size of toys that can be printed.
- Internet Dependency: Requires an internet connection to access its design library, which could be a constraint.
- Unheated Bed: An unheated bed may affect print adhesion compared to other printers.
- Proprietary Filament: Limited to its brand of filament, which may restrict material variety and increase long-term costs.
The Toybox 3D Printer is a doorway into 3D printing, offering a joyful and educational experience that encourages creative thinking and idea realization.
Look for printers with an easy setup, intuitive controls, good customer support, and a robust online community.
Entry-level 3D printers can range from $200 to $500, depending on features and quality.
You can print a wide variety of objects, but always check the printer’s material compatibility and build volume limits.
Yes, if you follow the manufacturer’s safety guidelines, such as proper ventilation and not touching hot surfaces.
Regular maintenance includes cleaning the build plate, lubricating moving parts, and updating firmware.
Check for common issues like bed leveling, filament quality, and slicer settings. Online communities can also offer support.
